
centOs编译安装php7.2支持微擎php扩展
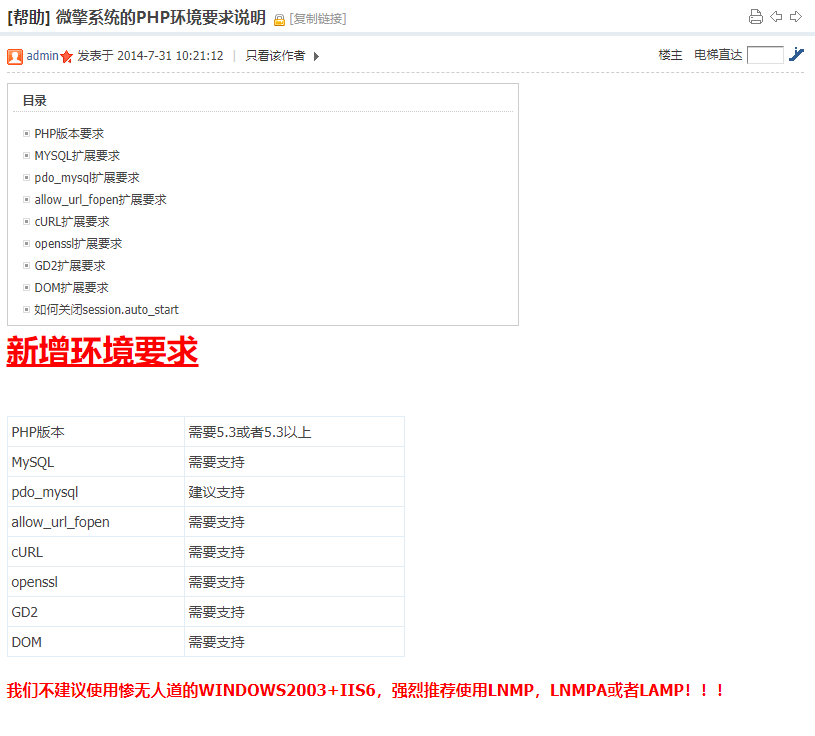
发现yum安装许多坑
于是只好编译安装
第一步得到镜像地址
在 https://www.php.net/downloads.php 有的地址比较慢,需要耐心等待
cd /usr/local/src

wget https://www.php.net/distributions/php-7.2.19.tar.gz

tar xzvf php-7.2.19.tar.gz

cd php-7.2.19
接下来是编译安装
配置命令
 ./configure --prefix=/usr/local/php --with-config-file-path=/usr/local/php --enable-mbstring --enable-ftp --with-gd --with-jpeg-dir=/usr --with-png-dir=/usr --with-mysql=mysqlnd --with-mysqli=mysqlnd --with-pdo-mysql=mysqlnd --with-pear --enable-sockets --with-freetype-dir=/usr --with-zlib --with-libxml-dir=/usr --with-xmlrpc --enable-zip --enable-fpm --enable-xml --enable-sockets --with-gd --with-zlib --with-iconv --enable-zip --with-freetype-dir=/usr/lib/ --enable-soap --enable-pcntl --enable-cli --with-curl

拆开看更清晰:

./configure
--prefix=/usr/local/php
--with-config-file-path=/usr/local/php
--enable-mbstring
--enable-ftp --with-gd
--with-jpeg-dir=/usr
--with-png-dir=/usr
--with-mysql=mysqlnd
--with-mysqli=mysqlnd
--with-pdo-mysql=mysqlnd
--with-pear --enable-sockets
--with-freetype-dir=/usr
--with-zlib --with-libxml-dir=/usr
--with-xmlrpc
--enable-zip
--enable-fpm
--enable-xml
--enable-sockets
--with-gd
--with-zlib
--with-iconv
--enable-zip
--with-freetype-dir=/usr/lib/
--enable-soap
--enable-pcntl
--enable-cli
--with-curl
这个先不管了

解决方法:
yum install libjpeg libpng freetype libjpeg-devel libpng-devel freetype-devel -y
若是64位系统
解决方法:
yum install libjpeg.x86_64 libpng.x86_64 freetype.x86_64 libjpeg-devel.x86_64 libpng-devel.x86_64 freetype-devel.x86_64 -y
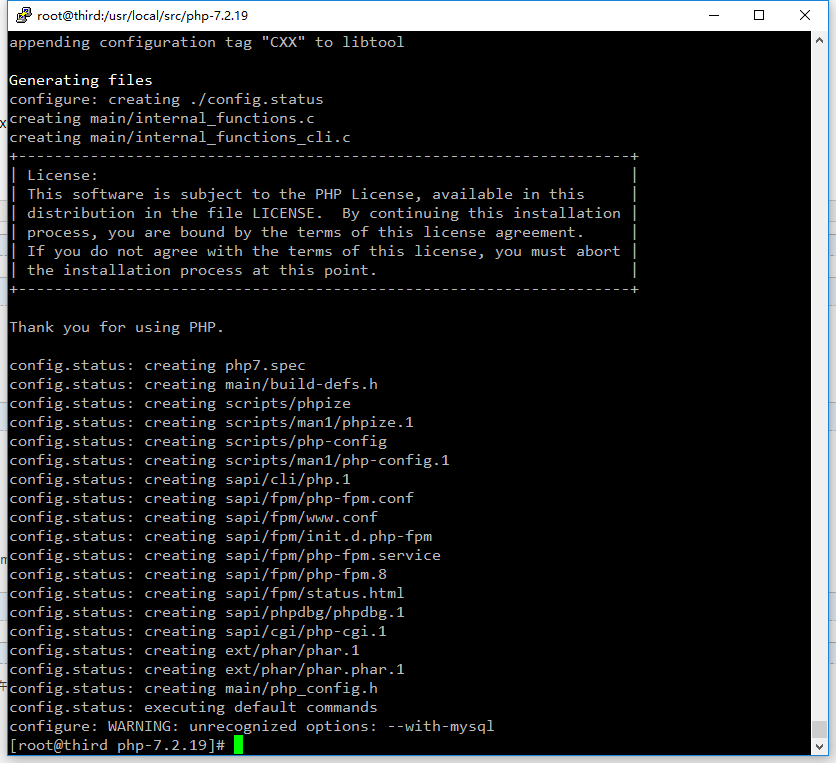
编译php后发生warning:configure:WARNING:unrecognizedoptions:--with-mysql 只是php7版本不支持mysql模块
./configure --help 查看configure的正确语法,重新编译php支持mysql,改用--with-pdo-mysql
php7版本编译语句是:
./configure --prefix=/usr/local/php \

--with-config-file-path=/usr/local/php/etc \

--enable-fpm \

--with-fpm-user=www \

--with-fpm-group=www \

--enable-mysqlnd \

--with-mysqli=mysqlnd \

--with-pdo-mysql=mysqlnd \

--enable-mysqlnd-compression-support \

--with-iconv-dir \

--with-freetype-dir \

--with-jpeg-dir \

--with-png-dir \

--with-zlib \

--with-libxml-dir\

--enable-xml \

--disable-rpath \

--enable-bcmath\

--enable-shmop \

--enable-sysvsem \

--enable-inline-optimization \

--with-curl --enable-mbregex \

--enable-mbstring \

--enable-intl \

--with-mcrypt \

--with-libmbfl \

--enable-ftp \

--with-gd \

--enable-gd-jis-conv \

--with-openssl \

--with-mhash \

--enable-pcntl \

--enable-sockets \

--with-xmlrpc \

--enable-zip \

--enable-soap \

--with-gettext \

--disable-fileinfo \

--enable-opcache \

--with-pear \

--enable-maintainer-zts \

--with-ldap=shared \

--without-gdbm
configure: WARNING: unrecognized options: --with-mcrypt, --enable-gd-native-ttf
php7.2不支持 --with-mcrypt, --enable-gd-native-ttf,把这两个选项删除掉。
修改后./configure通过的语句
其他错误解决: PHP编译安装时常见错误解决办法,php编译常见错误
ext/iconv/.libs/iconv.o: In function `php_iconv_stream_filter_ctor':
/home/king/php-5.2.13/ext/iconv/iconv.c:2491: undefined reference to `libiconv_open'
collect2: ld returned 1 exit status
make: *** [sapi/cli/php] Error 1
[root@test php-5.2.13]# vi Makefile
在安裝 PHP 到系统中时要是发生「undefined reference to libiconv_open'」之类的错误信息,那表示在「./configure 」沒抓好一些环境变数值。错误发生点在建立「-o sapi/cli/php」是出错,没給到要 link 的 iconv 函式库参数。 解决方法:编辑Makefile 大约77 行左右的地方: EXTRA_LIBS = ..... -lcrypt 在最后加上 -liconv,例如: EXTRA_LIBS = ..... -lcrypt -liconv 然后重新再次 make 即可。
或者用另一种办法
make ZEND_EXTRA_LIBS='-liconv'
ln -s /usr/local/lib/libiconv.so.2 /usr/lib64/
作者用的第一种办法解决的,编译好Makefile后,记得先make clean一下,再make,不然会报错
make && make install

See <http://bugzilla.redhat.com/bugzilla> for instructions.
make: *** [ext/fileinfo/libmagic/apprentice.lo] Error 1
查询得知是应为vps内存太小没到1G引起的,在./configure时加--disable-fileinfo也不能解决
内存不足,mysql 5.5以上版本编译需要1G以上内存,可以编译安装mysql5.5
centOs编译安装php7.2支持微擎php扩展的更多相关文章
- nginx php-fpm安装配置 CentOS编译安装php7.2
CentOS编译安装php7.2 介绍: 久闻php7的速度以及性能那可是比php5系列的任何一版本都要快,具体性能有多好,建议还是先尝试下再说.如果你是升级或新安装,那你首先需要考虑php7和程序是 ...
- CentOS编译安装php7.2
介绍: 久闻php7的速度以及性能那可是比php5系列的任何一版本都要快,具体性能有多好,建议还是先尝试下再说.如果你是升级或新安装,那你首先需要考虑php7和程序是否存在兼容性,如果程序是基于php ...
- centos编译安装php7
环境说明 VMware 12 中搭建的CentOS 7 x64 4核 2G内存 环境中已经安装了http://blog.csdn.net/u014595668/article/details/5016 ...
- linux centos编译安装php7.3
php7.2的编译安装参考:https://www.cnblogs.com/rxbook/p/9106513.html 已有的之前编译的旧版本php: mv /usr/local/php /usr/l ...
- centos编译安装vim并支持lua
系统环境:centos6.5 x86 (basic server) 1.安装编译环境. # yum groupinstall "Development Tools" 2.安装vim ...
- Centos 7源码编译安装 php7.1 之生产篇
Centos 7源码编译安装 php7.1 之生产篇 Published 2017年4月30日 by Node Cloud 介绍: 久闻php7的速度以及性能那可是比php5系列的任何一版本都要快,具 ...
- 编译安装PHP7并安装Redis扩展Swoole扩展
编译安装PHP7并安装Redis扩展Swoole扩展 在编译php7的机器上已经有编译安装过php5.3以上的版本,从而依赖库都有了 本php7是编译成fpm-php 使用的, 如果是apache那么 ...
- centos7.6编译安装php7.2.11及redis/memcached/rabbitmq/openssl/curl等常见扩展
centos7.6编译安装php7..11及redis/memcached/rabbitmq/openssl/curl等常见扩展 获取Php的编译参数方法: [root@eus-api-cms-bac ...
- centos7下编译安装php-7.0.15(PHP-FPM)
centos7下编译安装php-7.0.15(PHP-FPM) 一.下载php7源码包 http://php.net/downloads.php 如:php-7.0.15.tar.gz 二.安装所需依 ...
随机推荐
- find 命令常用解释
背景色是:orange #### find命令 find * path: 所有搜索的目录以及其所有子目录.默认为当前目录 * expression: 所有搜索的文件的特征 * cmd: 对搜索结果惊醒 ...
- SpringBoot文章合集
SpringBoot文章合集 SpringBoot合集为<尚硅谷雷神SpringBoot2零基础入门(spring boot2)>的学习以及项目中使用知识点进行整理. SpringBoot ...
- Swoole 中使用 HTTP 异步服务器、HTTP 协程服务器
HTTP 异步风格服务器 # http_server.php $http = new Swoole\Http\Server("0.0.0.0", 9501); // 设置服务器运行 ...
- CSS基础 元素整体透明效果(包含内容+背景及子元素)
属性名:opacity:数字+px; 数字值取值0-1之间数字 数字值:1表示完全不透明 0表示完全透明使用后效果 html结构代码 <div class="box"> ...
- Java时间格式化原来这么多玩法
时间过得真是快,现在已经是2022年了.作为开发来说,时间处理是非常繁琐的.从Java 8开始有了新的时间API.时间的处理更加优雅,不再需要借助三方类库,而且线程安全.今天来梳理一下新API的格式化 ...
- Python web框架开发 - WSGI协议
浏览器进行http请求的时候,不单单会请求静态资源,还可能需要请求动态页面. 那么什么是静态资源,什么是动态页面呢? 静态资源 : 例如html文件.图片文件.css.js文件等,都可以算是静态资源 ...
- 日志收集系统系列(四)之LogAgent优化
实现功能 logagent根据etcd的配置创建多个tailtask logagent实现watch新配置 logagent实现新增收集任务 logagent删除新配置中没有的那个任务 logagen ...
- Word2010初识
原文链接:https://www.toutiao.com/i6487370439910752782/ 认识Word Microsoft Office Word是微软公司的一个文字处理器应用软件. 启动 ...
- Java 在PDF中添加工具提示|ToolTip
本文,将介绍如何通过Java后端程序代码在PDF中创建工具提示.添加工具提示后,当鼠标悬停在页面上的元素时,将显示工具提示内容. 导入jar包 本次程序中使用的是 Free Spire.PDF for ...
- idea同时启动多个微服务模块进行管理
1,打开IDEA项目中的 .idea 下 的workspace.xml 找到文件中的 RunDashboard 配置块,增加如下圈起来的地方 代码: <option name="con ...