iTop安装 vm虚拟机、Linux、centos7安装itop 2.6.1
itop安装流程,是我基于下面两位博主发布的文章整理出来的,欢迎大家学习,如有错误之处请大家留言指出我看到之后及时更新。谢谢
itop 介绍
iTop,是IT运营门户(IT Operation Portal)的简称,它是一个开源web应用程序,适用于IT服务的日常运维管理。它基于ITIL最佳实践,适应符合ITIL最佳实践的流程,同时它又很灵活,可以适应一般的IT服务管理流程。
iTop的核心是CMDB,即配置管理数据库(Configuration Management Data Base)。CMDB是iTop最早开发的部分。以CMDB为中心的设计理念,需要保证CMDB的准确性和及时更新,服务人员和客户均使用iTop来解决运维管理中的各类问题将会对这一点有帮助。此外,CMDB与其它工具,如监控系统、报表工具、库存管理系统等整合得越多,CMDB的信息就会越丰富。CMDB快速实施,与其它系统相比iTop有丰富的CMDB接口,支持多种方式的数据导入。
iTop基于Apache/IIS、MySQL和PHP,它可以在任何支持这些程序的操作系统上运行,如Windows、Linux(Debian、Ubuntu和Redhat)、Solaris和MacOS X等。此外,由于iTop是基于B/S架构的应用程序,不需要在用户电脑上部署任何客户端,只需要一个简单的Web浏览器(IE 8+、Firefox 3.5+、Chrome或Safari 5+)即可使用。
需要安装的应用以及版本
本示例安装的 itop版本为:2.6.1
itop2.6.1版本要求的mysql版本必须要是5.7以上、PHP7.2以上
数据库为:mariadb,版本为:10.2.36-MariaDB
PHP环境,版本7.2
第一步安装数据库
由于我使用的是虚拟机安装方式,我的ISO镜像版本为:CentOS-7-x86_64-Minimal-1810.iso,centos系统默认的yum源下载的数据库版本要低于itop的要求,在安装数据库前,需要在yum源下新增一个mariadb源文件
增加yum源
vim /etc/yum.repos.d/Mariadb.repo
编辑内容:
[mariadb]

name = MariaDB

baseurl = https://mirrors.ustc.edu.cn/mariadb/yum/10.2/centos7-amd64

gpgkey=https://mirrors.ustc.edu.cn/mariadb/yum/RPM-GPG-KEY-MariaDB

gpgcheck=1
清除yum缓存并重建yum缓存
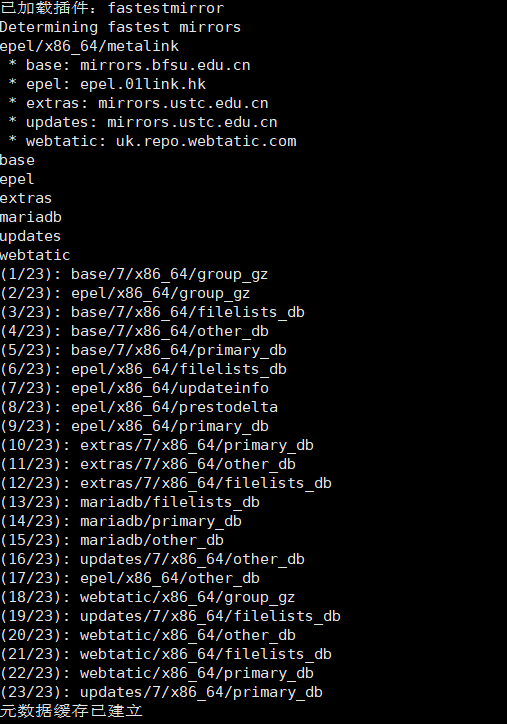
yum clean all

yum makecache all
执行安装数据库
yum install MariaDB-server MariaDB-client -y

至此数据库安装完成。
#启动数据库

systemctl start mariadb

#开机自启

systemctl enable mariadb
数据库配置
创建数据库、创建库用户、用户授权、修改数据配置
# 执行数据库安全向导,建议不论什么环境都进行这一步。

# 安装后第一次执行该文件,root密码,直接设定即可。以下为安全向导步骤:

  # a)为root用户设置密码

  # b)删除匿名账号

  # c)取消root用户远程登录

  # d)删除test库和对test库的访问权限

  # e)刷新授权表使修改生效

[root@localhost html]# /usr/bin/mysql_secure_installation

NOTE: RUNNING ALL PARTS OF THIS SCRIPT IS RECOMMENDED FOR ALL MariaDB

      SERVERS IN PRODUCTION USE!  PLEASE READ EACH STEP CAREFULLY!

In order to log into MariaDB to secure it, we'll need the current

password for the root user.  If you've just installed MariaDB, and

you haven't set the root password yet, the password will be blank,

so you should just press enter here.

Enter current password for root (enter for none):

OK, successfully used password, moving on...

Setting the root password ensures that nobody can log into the MariaDB

root user without the proper authorisation.

You already have a root password set, so you can safely answer 'n'.

Change the root password? [Y/n] n

 ... skipping.

By default, a MariaDB installation has an anonymous user, allowing anyone

to log into MariaDB without having to have a user account created for

them.  This is intended only for testing, and to make the installation

go a bit smoother.  You should remove them before moving into a

production environment.

Remove anonymous users? [Y/n] y

 ... Success!

Normally, root should only be allowed to connect from 'localhost'.  This

ensures that someone cannot guess at the root password from the network.

Disallow root login remotely? [Y/n] n

 ... skipping.

By default, MariaDB comes with a database named 'test' that anyone can

access.  This is also intended only for testing, and should be removed

before moving into a production environment.

Remove test database and access to it? [Y/n] y

 - Dropping test database...

 ... Success!

 - Removing privileges on test database...

 ... Success!

Reloading the privilege tables will ensure that all changes made so far

will take effect immediately.

Reload privilege tables now? [Y/n] y

 ... Success!

Cleaning up...

All done!  If you've completed all of the above steps, your MariaDB

installation should now be secure.

Thanks for using MariaDB!
[root@localhost html]# mysql -u root -p

Enter password:

Welcome to the MariaDB monitor.  Commands end with ; or \g.

Your MariaDB connection id is 14

Server version: 10.2.36-MariaDB MariaDB Server

Copyright (c) 2000, 2018, Oracle, MariaDB Corporation Ab and others.

Type 'help;' or '\h' for help. Type '\c' to clear the current input statement.

MariaDB [(none)]> use mysql

Reading table information for completion of table and column names

You can turn off this feature to get a quicker startup with -A

Database changed

MariaDB [mysql]> create database itop DEFAULT CHARACTER SET utf8;

MariaDB [mysql]> create user itop@localhost identified by 'itop';

MariaDB [mysql]> grant all privileges on *.* to itop@'localhost' identified by 'itop';

MariaDB [mysql]> flush privileges;

MariaDB [mysql]> exit;

[root@localhost html]# vim /etc/my.cnf

max_allowed_packet=2097652   --  允许上传包的最大值
至此数据库配置完成。
第二步:安装 itop其他依赖:PHP、Apache等
PHP需要7.2以上版本,在按照PHP之前,需要先配置一下yum源。
安装
php72w,是需要配置额外的yum源地址的,否则会报错不能找到相关软件包。
php高版本的yum源地址,有两部分,其中一部分是epel-release,另外一部分来自webtatic。如果跳过epel-release的话,安装webtatic的时候,会有错误爆出。所以,这里需要的命令是:
rpm -Uvh https://dl.fedoraproject.org/pub/epel/7/x86_64/Packages/e/epel-release-7-11.noarch.rpm

rpm -Uvh https://mirror.webtatic.com/yum/el7/webtatic-release.rpm
当然,您也可以选择下面的这个命令,也是一样的效果。
yum install epel-release -y

rpm -Uvh https://mirror.webtatic.com/yum/el7/webtatic-release.rpm
安装相关组件:
yum -y install httpd graphviz unzip mod_ssl php72w php72w-gd php72w-mysql php72w-imap php72w-soap php72w-ldap php72w-mbstring php72w-pecl-zendopcache php72w-xml php72w-cli
查看PHP版本:
[root@localhost ~]# php -v

PHP 7.2.34 (cli) (built: Oct  1 2020 13:37:37) ( NTS )

Copyright (c) 1997-2018 The PHP Group

Zend Engine v3.2.0, Copyright (c) 1998-2018 Zend Technologies

    with Zend OPcache v7.2.34, Copyright (c) 1999-2018, by Zend Technologies
配置PHP会话目录
mkdir -p /var/lib/php/session

chown apache:apache -R /var/lib/php/session/
配置
#启动 Apache

systemctl start httpd

#开机自启

systemctl enable httpd
第三步:开启防火墙、关闭SELinux
firewall-cmd --permanent --add-service=http

firewall-cmd --permanent --add-service=https

# 放开数据库   谨慎操作

firewall-cmd --zone=public --add-port=3306/tcp --permanent

#重启防火墙

firewall-cmd --reload
关闭SELinux
安全增强型 Linux(Security-Enhanced Linux)简称 SELinux,它是一个 Linux 内核模块,也是 Linux 的一个安全子系统。
SELinux 的结构及配置非常复杂,而且有大量概念性的东西,要学精难度较大。很多 Linux 系统管理员嫌麻烦都把 SELinux 关闭了。
#重启生效

sed -i 's#ELINUX=enforcing#ELINUX=disabled#g' /etc/selinux/config
第四步:下载itop、目录权限配置
itop官网:
mkdir -p /var/www/html/{conf,data,log,env-production}

cd /var/www/html

wget https://nchc.dl.sourceforge.net/project/itop/itop/2.6.1/iTop-2.6.1-4463.zip

unzip iTop-2.6.1-4463.zip

chown -R apache:apache /var/www/html

chmod 777 web/

chmod 777 web/log/

chmod 777 web/data/
第五步:安装配置itop
通过浏览器访问itop进行安装配置。安装步骤根据下面图片示意即可
http://{你的ip}/web/setup/


管理员账号密码,一定要记清楚:


iTop安装 vm虚拟机、Linux、centos7安装itop 2.6.1的更多相关文章
- CentOS7 LNMP+phpmyadmin环境搭建(一、虚拟机及centos7安装)
前一阵子配公司的服务器的时候,发现网上好多教程杂乱无章,然后便根据网上已有资料自己整理了一个lnmp环境的安装教程.因为懒,已经好久没写过博客了.趁着这次公司招新人,把之前整理的文档又整理了一次,顺便 ...
- Linux CentOS7 安装 Qt 5.9.2
Linux CentOS7 安装 Qt 5.9.2 参考链接 http://doc.qt.io/qt-5/linux.html sudo yum groupinstall "C Develo ...
- LINUX CentOS7安装字体库
LINUX CentOS7安装字体库 2017年12月26日 17:06:07 q260996583 阅读数:4866更多 个人分类: linux JAVA画图时常用到Font 类对象 这样的对象 ...
- Linux centos7安装Mongodb
Linux centos7安装Mongodb-4.0 1.下载 官方下载地址:https://www.mongodb.com/download-center/community 2.上传解压 1)rz ...
- linux(centos7) 安装nginx
linux(centos7) 安装nginx 1.14(stable) 版本 Nginx配置文件常见结构的从外到内依次是「http」「server」「location」等等,缺省的继承关系是从外到内, ...
- linux centos7 安装常用软件java,node,mysql,Seafile
linux centos7 安装常用软件java,node,mysql,Seafile 安装压缩解压缩软件 yum install -y unzip zip 安装git yum install -y ...
- VM虚拟机Linux和主机数据传输
虚拟机 Linux CentOS7 vm和主机通信是利用 vm tools 点击安装 点击后系统内有一个 打开 把 拖到桌面 打开终端 cd /home/whoami/桌面 ls 查看这个.tar. ...
- VM虚拟机Linux系统eth0下面没有inet和inet6
今天打开虚拟机发现ip有问题,VM虚拟机Linux系统eth0下面没有inet和inet6,明明都是配置好的 打开任务管理器-> 服务-> 打开VM的nat和DHCP和hostd 正常后:
- Linux学习(一)-安装vm虚拟机以及如何在虚拟机上安装Centos系统
(一)基本说明 学习Linux需要一个环境,我们需要创建一个虚拟机,然后在虚拟机上安装一个Centos系统来学习. 1)安装软件vm12; 2)通过vm12创建一个虚拟机空间; 3)在vm12创建好的 ...
- CentOS 7.5 安装KVM虚拟机(Linux)
1.认识理解KVM虚拟机 Kernel-based Virtual Machine的简称,是一个开源的系统虚拟化模块,自Linux 2.6.20之后集成在Linux的各个主要发行版本中.它使用Linu ...
随机推荐
- spring boot @Async异步注解上下文透传
上一篇文章说到,之前使用了@Async注解,子线程无法获取到上下文信息,导致流量无法打到灰度,然后改成 线程池的方式,每次调用异步调用的时候都手动透传 上下文(硬编码)解决了问题. 后面查阅了资料,找 ...
- Git&Gitlab开发流程与运维管理
Git&Gitlab开发流程与运维管理 作者 刘畅 时间 2020-10-31 实验系统版本centos7.5 主机名称 ip地址 配置 安装软件 controlnode 172.16.1.1 ...
- 「万字图文」史上最姨母级Java继承详解
摘要:继承是面向对象软件技术中的一个概念.它使得复用以前的代码非常容易,能够大大缩短开发周期,降低开发费用. 本文分享自华为云社区<「万字图文」史上最姨母级Java继承详解丨[奔跑吧!JAVA] ...
- Spring源码编译一次性通过&遇到的坑解决方法
前言 spring源码本地编译,按网上的博客参考资料的操作步骤,总是会出现各种莫名其妙的错误.根据错误信息找解决方案,但在自己的环境下又总是编译不过去.结合参加培训学习Jack老师提供的方法,自己多种 ...
- Python网页正文转换语音文件的操作方法
天气真的是越来越冷啦,有时候我们想翻看网页新闻,但是又冷的不想把手拿出来,移动鼠标翻看.这时候,是不是特别想电脑像讲故事一样,给我们念出来呢?人生苦短,我有python啊,试试用 Python 来朗读 ...
- 【重学Java】Stream流
Stream流 体验Stream流[理解] 案例需求 按照下面的要求完成集合的创建和遍历 创建一个集合,存储多个字符串元素 把集合中所有以"张"开头的元素存储到一个新的集合 把&q ...
- Linux基本操作 [转]
前言 只有光头才能变强 这个学期开了Linux的课程了,授课的老师也是比较负责任的一位.总的来说也算是比较系统地学习了一下Linux了~~~ 本文章主要是总结Linux的基础操作以及一些简单的概念~如 ...
- WIN10小技巧
WIN10激活: powershell管理员运行slmgr /skms kms.03k.orgslmgr /ato CMD:%TEMP% 全选垃圾,删除 手机投屏到WIN10:win+i---系统-- ...
- ES6新增语法(五)——Promise详解
Promise介绍 promise是一个对象,从它可以获取异步操作的消息.有all.race.reject.resolve这几个方法,原型上有then.catch等方法. Promise的两个特点: ...
- [刘阳Java]_Web前端入门级练习_迅雷官宣网设计
也有一段时间没有写一些技术专题文章,今天给大家来几篇Web前端入门级练习的文章.主讲<迅雷官宣网>的设计,相信大家平时也用过迅雷这个下载工具,所以分享的这篇技术大家在一定程序会感兴趣. 先 ...