Spring Boot自动配置原理与实践(二)
前言
在之前的博文(Spring Boot自动配置原理与实践(一))中,已经介绍了Spring boot的自动配置的相关原理与概念,本篇主要是对自动配置的实践,即自定义Starter,对原理与概念加深理解。
本篇是我在实际工作中配置的用于弱口令检查的Starter,能方便嵌入到用户模块中的相关密码接口或方法,对弱口令进行检查并反馈,当然由于是公司内部代码,部分代码省略。
一、Starter实践
1、配置Maven依赖
Spring Boot自动化配置主要依赖如下两个包:
- spring-boot-starter:打包starter主要依赖
- configuration-processor:自动化配置主要依赖
<dependency>

   <groupId>org.springframework.boot</groupId>

   <artifactId>spring-boot-starter</artifactId>

</dependency>

<dependency>

  <groupId>org.springframework.boot</groupId>

   <artifactId>spring-boot-configuration-processor</artifactId>

   <optional>true</optional>

</dependency>
2、创建实体类映射配置信息
众所周知,SpringBoot Starter最厉害的就是可以通过最简单的properties/yaml文件配置,达到最终目的。配置文件需要通过解析生成对应的实体类
@ConfigurationProperties(prefix = "weak.password")

public class CheckWeakPasswordProperties {

    private Boolean enabled = true;

    /**

     * 需要检查的URI数组

     */

    private String[] checkUri;

    /**

     * 拦截检查的方式 1-interceptor 2-filter 3-aop

     */

    private Integer checkType = 1;

    private String ip = "127.0.0.1";

    private String port = "8501";

    /**

     * 客户端名称

     */

    private String clientName = "cloud-user";

    /**

     * 校验失败信息提示

     */

    private String failureMessage = "密码等级不够";

   ...// 省略getter/setter方法
其中prefix = "weak.password",标明配置文件以“weak.password”开头的字段(对应实体类中的字段)都是需要解析的。在配置文件中输入前缀后,会进行提示说明

3、定义配置类
这一步非常关键,是自动装配的核心,通过配置文件配置灵活的参数产生相关的Bean,完成一系列初始化操作,关键的几个注解在这里就不解释了,具体可以看Spring Boot自动配置原理与实践(一)。
@Configuration

@EnableConfigurationProperties(CheckWeakPasswordProperties.class)

@ConditionalOnProperty(prefix = "weak.password", name = "enabled", havingValue = "true")

public class CheckWeakPasswordAutoConfiguration {

    public CheckWeakPasswordAutoConfiguration() {

    }

    @Bean

    @ConditionalOnProperty(prefix = "weak.password", name = "checkType", havingValue = "2")

    public CheckPasswordInterceptor checkPasswordInterceptor(){

        return new CheckPasswordInterceptor();

    }

    @Bean

    @ConditionalOnProperty(prefix = "weak.password", name = "checkType", havingValue = "2")

    public CheckPasswordFilter checkPasswordFilter(){

        return new CheckPasswordFilter();

    }

    @Bean

    @ConditionalOnProperty(name = "weak.password.check-type", havingValue = "2")

    public CheckPasswordFilterConfig checkPasswordFilterConfig() {

        return new CheckPasswordFilterConfig();

    }

    @Bean

    @ConditionalOnProperty(prefix = "weak.password", name = "checkType", havingValue = "1")

    public CheckPasswordInterceptorConfig checkPasswordInterceptorConfig(){

        return new CheckPasswordInterceptorConfig();

    }

}
4、创建spring.factories文件
之前三步所有的操作都已经完成,那么将Starter当引入工程中是如何发现并自动装配的,这就需要spring.factory文件中标明,在resource/META-INF在新建spring.factory文件
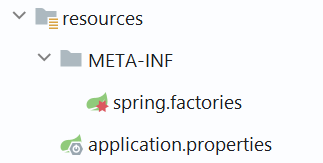
在该文件中指明AutoConfiguration的全Class路径

这样打包的时候就能将spring.factory文件打包,项目启动的时候就会扫描并装配
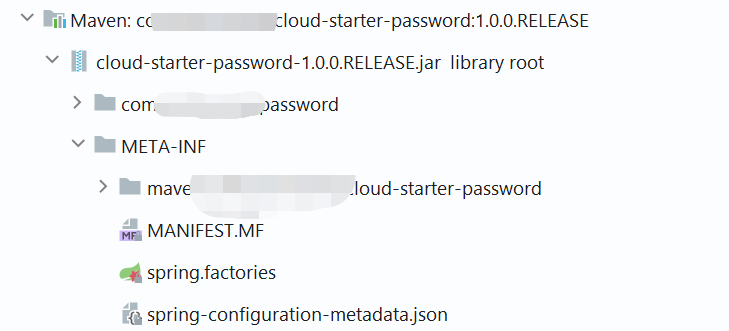
同时生成spring-configuration-metadata.json文件,其内容就是提供配置文件智能化提示的
{

  "groups": [

    {

      "name": "weak.password",

      "type": "com.yunchuang.password.properties.CheckWeakPasswordProperties",

      "sourceType": "com.yunchuang.password.properties.CheckWeakPasswordProperties"

    }

  ],

  "properties": [

    {

      "name": "weak.password.check-type",

      "type": "java.lang.Integer",

      "description": "拦截检查的方式 1-interceptor 2-filter 3-aop",

      "sourceType": "com.yunchuang.password.properties.CheckWeakPasswordProperties",

      "defaultValue": 1

    },

    {

      "name": "weak.password.check-uri",

      "type": "java.lang.String[]",

      "description": "需要检查的URI数组",

      "sourceType": "com.yunchuang.password.properties.CheckWeakPasswordProperties"

    },

    {

      "name": "weak.password.client-name",

      "type": "java.lang.String",

      "description": "客户端名称",

      "sourceType": "com.yunchuang.password.properties.CheckWeakPasswordProperties",

      "defaultValue": "cloud-user"

    },

    {

      "name": "weak.password.enabled",

      "type": "java.lang.Boolean",

      "sourceType": "com.yunchuang.password.properties.CheckWeakPasswordProperties",

      "defaultValue": true

    },

    {

      "name": "weak.password.failure-message",

      "type": "java.lang.String",

      "description": "校验失败信息提示",

      "sourceType": "com.yunchuang.password.properties.CheckWeakPasswordProperties",

      "defaultValue": "密码等级不够"

    },

    {

      "name": "weak.password.ip",

      "type": "java.lang.String",

      "sourceType": "com.yunchuang.password.properties.CheckWeakPasswordProperties",

      "defaultValue": "127.0.0.1"

    },

    {

      "name": "weak.password.port",

      "type": "java.lang.String",

      "sourceType": "com.yunchuang.password.properties.CheckWeakPasswordProperties",

      "defaultValue": "8501"

    }

  ],

  "hints": []

}
二、自定义Starter使用
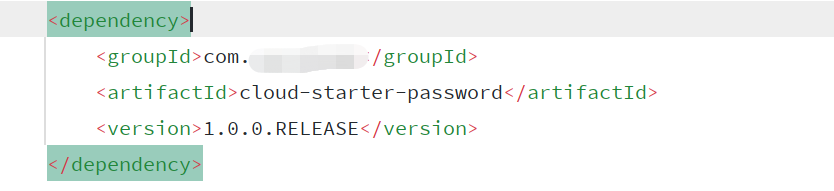
首先引入自定义的Starter包依赖到相关应用中
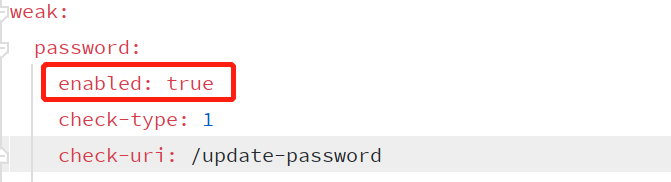
然后在配置文件中打开开关,或者某些条件才能开启自动配置,以我的代码示例举例的话,就是需要指定enabled为true
其次可以观察启动的时候相关的Bean是否被自动装配,可以打开debug模式查看日志,或者在idea中查看Endpoints-->Beans-->application,可以看到相关的自动配置启动时加载了,并且相应的Bean也注入了。

最后就是验证是否符合业务逻辑
Spring Boot自动配置原理与实践(二)的更多相关文章
- Spring Boot自动配置原理与实践(一)
前言 Spring Boot众所周知是为了简化Spring的配置,省去XML的复杂化配置(虽然Spring官方推荐也使用Java配置)采用Java+Annotation方式配置.如下几个问题是我刚开始 ...
- Spring Boot自动配置原理(转)
第3章 Spring Boot自动配置原理 3.1 SpringBoot的核心组件模块 首先,我们来简单统计一下SpringBoot核心工程的源码java文件数量: 我们cd到spring-boot- ...
- Spring Boot自动配置原理、实战
Spring Boot自动配置原理 Spring Boot的自动配置注解是@EnableAutoConfiguration, 从上面的@Import的类可以找到下面自动加载自动配置的映射. org.s ...
- Springboot 系列(三)Spring Boot 自动配置原理
注意:本 Spring Boot 系列文章基于 Spring Boot 版本 v2.1.1.RELEASE 进行学习分析,版本不同可能会有细微差别. 前言 关于配置文件可以配置的内容,在 Spring ...
- Spring Boot 自动配置原理(精髓)
一.自动配置原理(掌握) SpringBoot启动项目会加载主配置类@SpringBootApplication,开启@EnableAutoConfiguration自动配置功能 @EnableAut ...
- spring boot 自动配置原理
1).spring boot启动的时候加载主配置类,开启了自动配置功能@EnableAutoConfiguration,先看一下启动类的main方法 public ConfigurableApplic ...
- Spring Boot自动配置原理
使用Spring Boot之后,一个整合了SpringMVC的WEB工程开发,变的无比简单,那些繁杂的配置都消失不见了,这 是如何做到的? 一切魔力的开始,都是从我们的main函数来的,所以我们再次来 ...
- 【串线篇】spring boot自动配置原理
配置文件到底能写什么?怎么写?自动配置原理: 配置文件能配置的属性参照 一.自动配置原理: 1.1.SpringBoot启动的时候加载主配置类,开启了自动配置功能 @EnableAutoConfigur ...
- Spring Boot 自动配置原理是什么?
注解 @EnableAutoConfiguration, @Configuration, @ConditionalOnClass 就是自动配置的核心,首先它得是一个配置文件,其次根据类路径下是否有这个 ...
随机推荐
- SonarQube 启动无报错但是拒绝访问的解决过程及方案
启动sonarqube [sonar_user@Sonnarqube-dev linux-x86-64]$ ./sonar.sh start 查看网页: 排错步骤 第一步输入启动过程命令查看启动信息 ...
- 前端集合传参,springmvc后端如何接收
废话不多说,上代码 后端接收对象: class ObjectA{ private String a; private String b; private List<ObjectB> lis ...
- hadoop学习(三)HDFS常用命令以及java操作HDFS
一.HDFS的常用命令 1.查看根目录下的信息:./hadoop dfs -ls 2.查看根目录下的in目录中的内容:./hadoop dfs -ls in或者./hadoop dfs -ls ./i ...
- 容器化-Docker-1-速查手册-Docker常用命令
目录 备注 常用命令 Docker镜像管理(操作对象是镜像) Docker容器管理(操作对象是容器) 容器外挂目录(宿主目录映射到容器中) 这篇文章的目的就是把最常用的命令列出来,没时间看速查命令使用 ...
- Elasticsearch-04-master选举
3.2 master选举机制 3.2.1 选举算法 1)bully算法 核心思想 假定所有的节点都具有一个可以比较的ID,通过比较这个ID来选举master 流程说明 节点向所有比自己ID大的节点发送 ...
- Docker原理:Namespace
目录 Namespace UTS Namespae PID Namespace Mount Namespace User Namespace Network Namespace 参考 Namespac ...
- 机器学习Sklearn系列:(三)决策树
决策树 熵的定义 如果一个随机变量X的可能取值为X={x1,x2,..,xk},其概率分布为P(X=x)=pi(i=1,2,...,n),则随机变量X的熵定义为\(H(x) = -\sum{p(x)l ...
- 传统.NET 4.x应用容器化体验(2)
上一篇我们基于Windwos Server 2019 with Container初步跑了一个ASP.NET WebForm应用程序.本篇我们来自己编译部署一个ASP.NET MVC应用程序到Wind ...
- lucene 类介绍
lucene中重要的类: IndexWriter:lucene中最重要的类之一,主要用于索引的创建 Analyzer(抽象类):分析器,主要用于分析文本,常用的有StandardAnalyzer分析器 ...
- Pytest单元测试框架之FixTure内置临时文件tmpdir操作
1.前言:某些接口需要引用上个接口返回的值,作为下个接口的入参,但笔者又不想在本地维护及创建此文件,此时引出fixture内置函数中的临时文件存储tmpdir 2.首先下面的源码是使用flask框架写 ...