
SSM整合学习 三
三:整合Mybatis
完整的项目如下
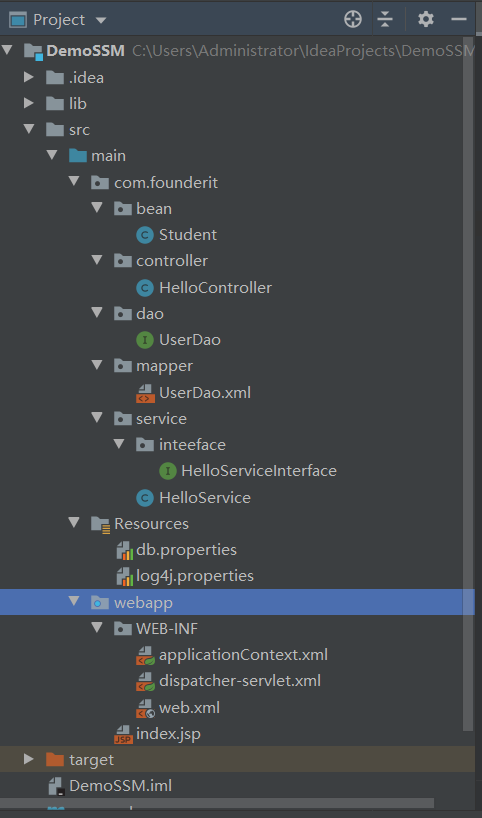
一:下载所需的jar包
<!--日志-->
<dependency>
  <groupId>log4j</groupId>
  <artifactId>log4j</artifactId>
  <version>1.2.17</version>
</dependency>

<!--数据源-->
<!-- https://mvnrepository.com/artifact/org.apache.commons/commons-dbcp2 -->
<dependency>
  <groupId>org.apache.commons</groupId>
  <artifactId>commons-dbcp2</artifactId>
  <version>2.1.1</version>
</dependency>

<!-- https://mvnrepository.com/artifact/org.mybatis/mybatis-spring -->
<dependency>
  <groupId>org.mybatis</groupId>
  <artifactId>mybatis-spring</artifactId>
  <version>1.3.2</version>
</dependency>

<!-- https://mvnrepository.com/artifact/org.mybatis/mybatis -->
<dependency>
  <groupId>org.mybatis</groupId>
  <artifactId>mybatis</artifactId>
  <version>3.4.6</version>
</dependency>
<dependency>
  <groupId>org.aspectj</groupId>
  <artifactId>aspectjweaver</artifactId>
  <version>1.8.4</version>
</dependency>
二:编写配置信息
在dispatcher-servlet.xml中填写MVC配置信息
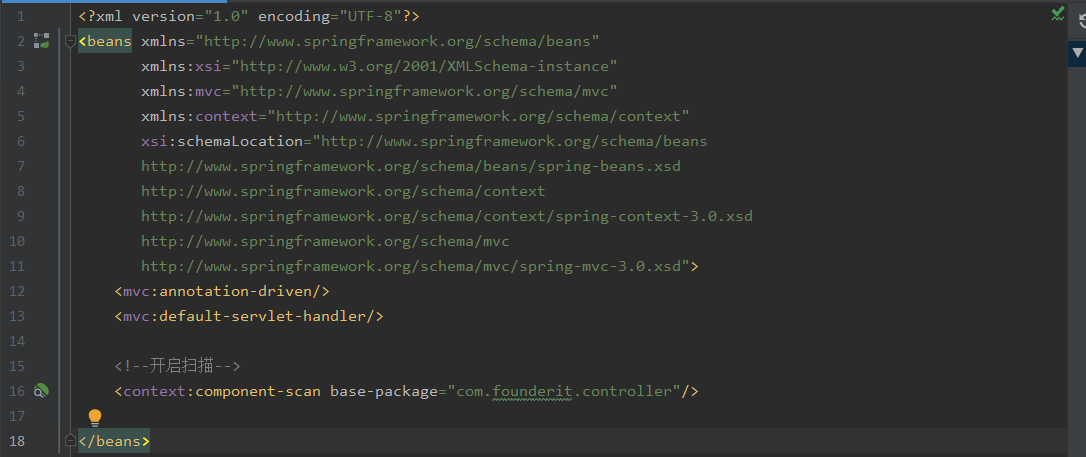
<?xml version="1.0" encoding="UTF-8"?>
<beans xmlns="http://www.springframework.org/schema/beans"
       xmlns:xsi="http://www.w3.org/2001/XMLSchema-instance"
       xmlns:mvc="http://www.springframework.org/schema/mvc"
       xmlns:context="http://www.springframework.org/schema/context"
       xsi:schemaLocation="http://www.springframework.org/schema/beans
       http://www.springframework.org/schema/beans/spring-beans.xsd
       http://www.springframework.org/schema/context
       http://www.springframework.org/schema/context/spring-context-3.0.xsd
       http://www.springframework.org/schema/mvc
       http://www.springframework.org/schema/mvc/spring-mvc-3.0.xsd">
    <mvc:annotation-driven/>
    <mvc:default-servlet-handler/>

    <!--开启扫描-->
    <context:component-scan base-package="com.founderit.controller"/>

</beans>
在applicationContext.xml中填写Spring配置信息
<?xml version="1.0" encoding="UTF-8"?>
<beans xmlns="http://www.springframework.org/schema/beans"
       xmlns:xsi="http://www.w3.org/2001/XMLSchema-instance"
       xmlns:context="http://www.springframework.org/schema/context"
       xmlns:tx="http://www.springframework.org/schema/tx"
       xmlns:aop="http://www.springframework.org/schema/aop"
       xsi:schemaLocation="http://www.springframework.org/schema/beans
       http://www.springframework.org/schema/beans/spring-beans.xsd
        http://www.springframework.org/schema/tx http://www.springframework.org/schema/tx/spring-tx.xsd
       http://www.springframework.org/schema/aop https://www.springframework.org/schema/aop/spring-aop.xsd
       http://www.springframework.org/schema/context
       http://www.springframework.org/schema/context/spring-context-3.0.xsd">

    <!--加载上下文注解配置-->
    <context:annotation-config/>
    <context:property-placeholder location="classpath:Resources/db.properties"/>
    <context:component-scan base-package="com.founderit">
        <context:exclude-filter type="annotation" expression="org.springframework.stereotype.Controller"/>
    </context:component-scan>
    <aop:aspectj-autoproxy/>

    <!--DBCP数据库连接池-->
    <bean id="dataSource"
          class="org.apache.commons.dbcp2.BasicDataSource"
          destroy-method="close" >
        <property name="driverClassName" value="${DRIVERCLASS}"/>
        <property name="url" value="${URL}"/>
        <property name="username" value="${USERNAME}"/>
        <property name="password" value="${PASSWORD}"/>
        <!--maxActive: 最大连接数量-->
        <property name="maxTotal" value="150"/>
        <!--minIdle: 最小空闲连接-->
        <property name="minIdle" value="5"/>
        <!--maxIdle: 最大空闲连接-->
        <property name="maxIdle" value="20"/>
        <!--initialSize: 初始化连接-->
        <property name="initialSize" value="30"/>
        <!--removeAbandonedTimeout: 超时时间(以秒数为单位)-->
        <property name="removeAbandonedTimeout" value="10"/>
    </bean>

    <!-- spring和MyBatis完美整合 -->
    <bean id="sqlSessionFactory" class="org.mybatis.spring.SqlSessionFactoryBean">
        <property name="dataSource" ref="dataSource"/>
        <!-- 自动扫描mapping.xml文件 -->
        <property name="mapperLocations" value="classpath:com/founderit/mapper/*.xml"></property>
    </bean>

    <!-- DAO接口所在包名,Spring会自动查找其下的类 -->
    <bean class="org.mybatis.spring.mapper.MapperScannerConfigurer">
        <property name="basePackage" value="com.founderit.dao"/>
        <property name="sqlSessionFactoryBeanName" value="sqlSessionFactory"></property>
    </bean>

   <!--事务管理部分-->
    <bean id="transactionManager"
          class="org.springframework.jdbc.datasource.DataSourceTransactionManager">
        <property name="dataSource" ref="dataSource" />
    </bean>
    <tx:annotation-driven transaction-manager="transactionManager" proxy-target-class="true" />

    <tx:advice id="txAdvice" transaction-manager="transactionManager">
        <tx:attributes>
            <tx:method name="save*" propagation="REQUIRED" />
            <tx:method name="insert*" propagation="REQUIRED" />
            <tx:method name="add*" propagation="REQUIRED" />
            <tx:method name="create*" propagation="REQUIRED" />
            <tx:method name="delete*" propagation="REQUIRED" />
            <tx:method name="update*" propagation="REQUIRED" />
            <tx:method name="find*" propagation="SUPPORTS" read-only="true" />
            <tx:method name="select*" propagation="SUPPORTS" read-only="true" />
            <tx:method name="get*" propagation="SUPPORTS" read-only="true" />
        </tx:attributes>
    </tx:advice>

    <aop:config>
        <aop:pointcut id="iccardTerm" expression="execution(* com.founderit.service.*.*(..))" />
        <aop:advisor pointcut-ref="iccardTerm" advice-ref="txAdvice" />
    </aop:config>

</beans>
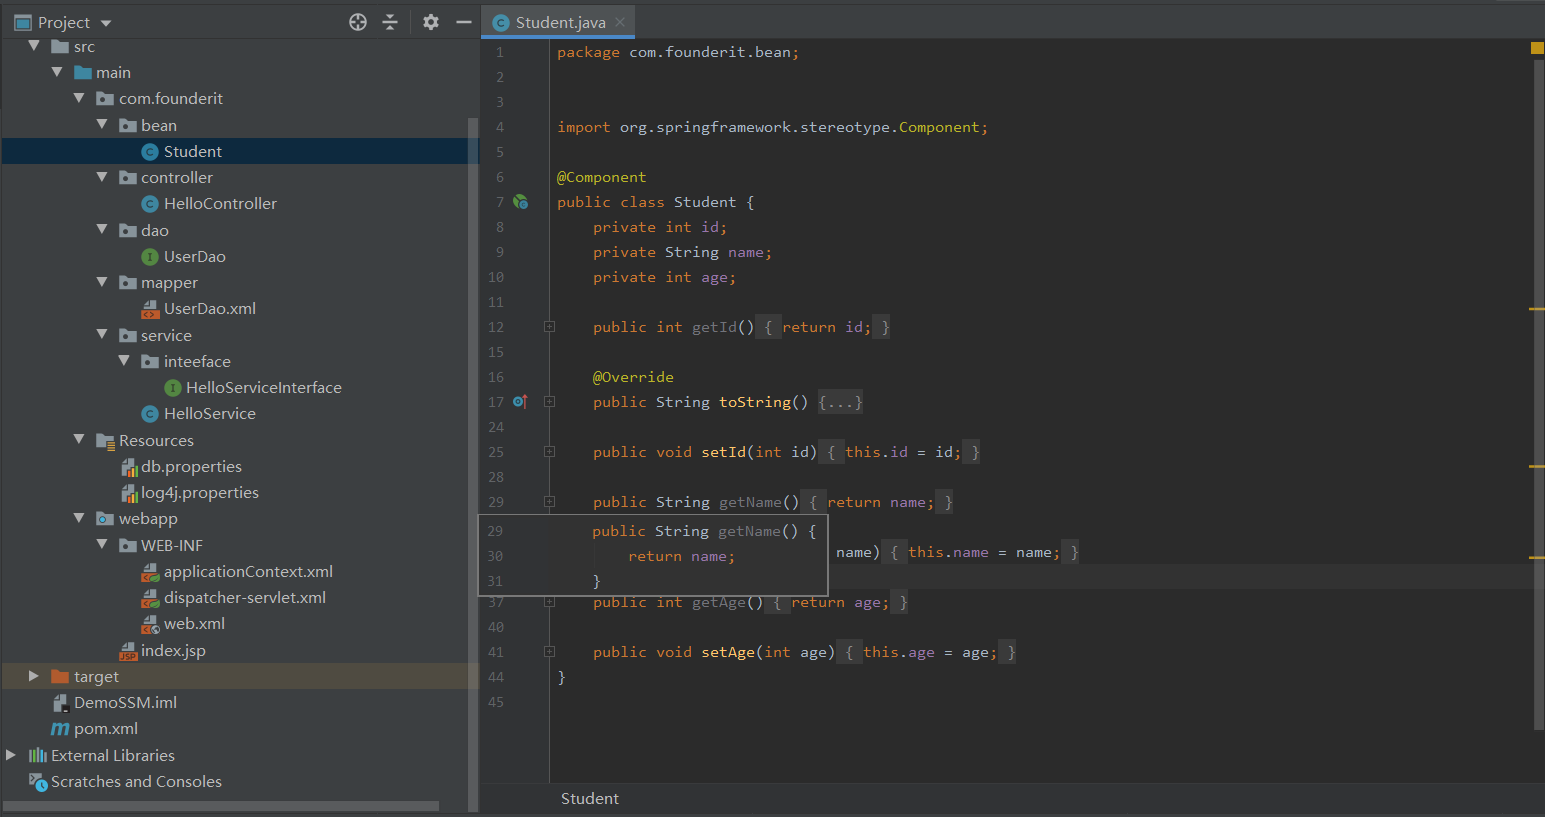
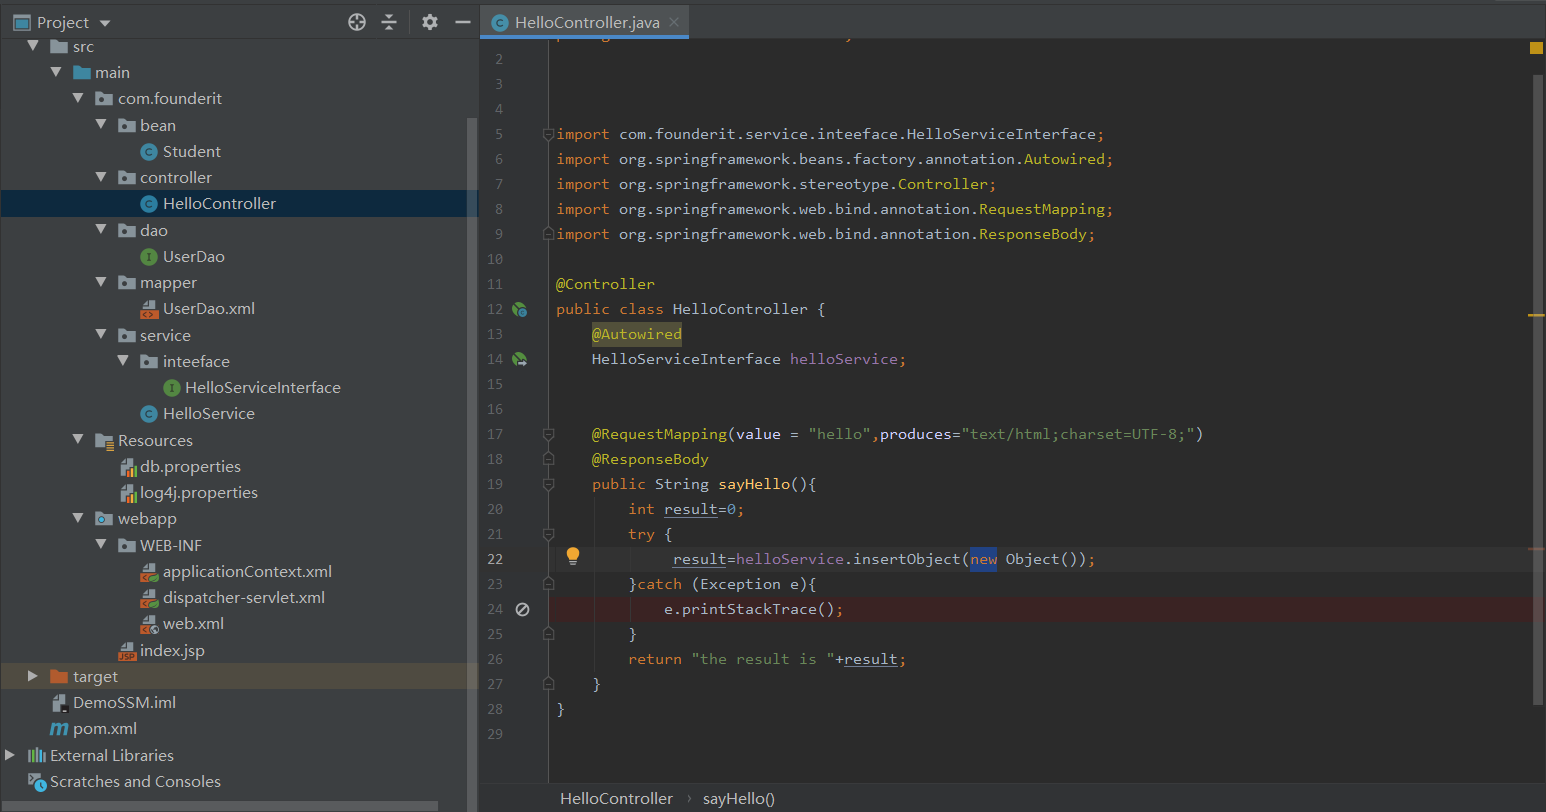
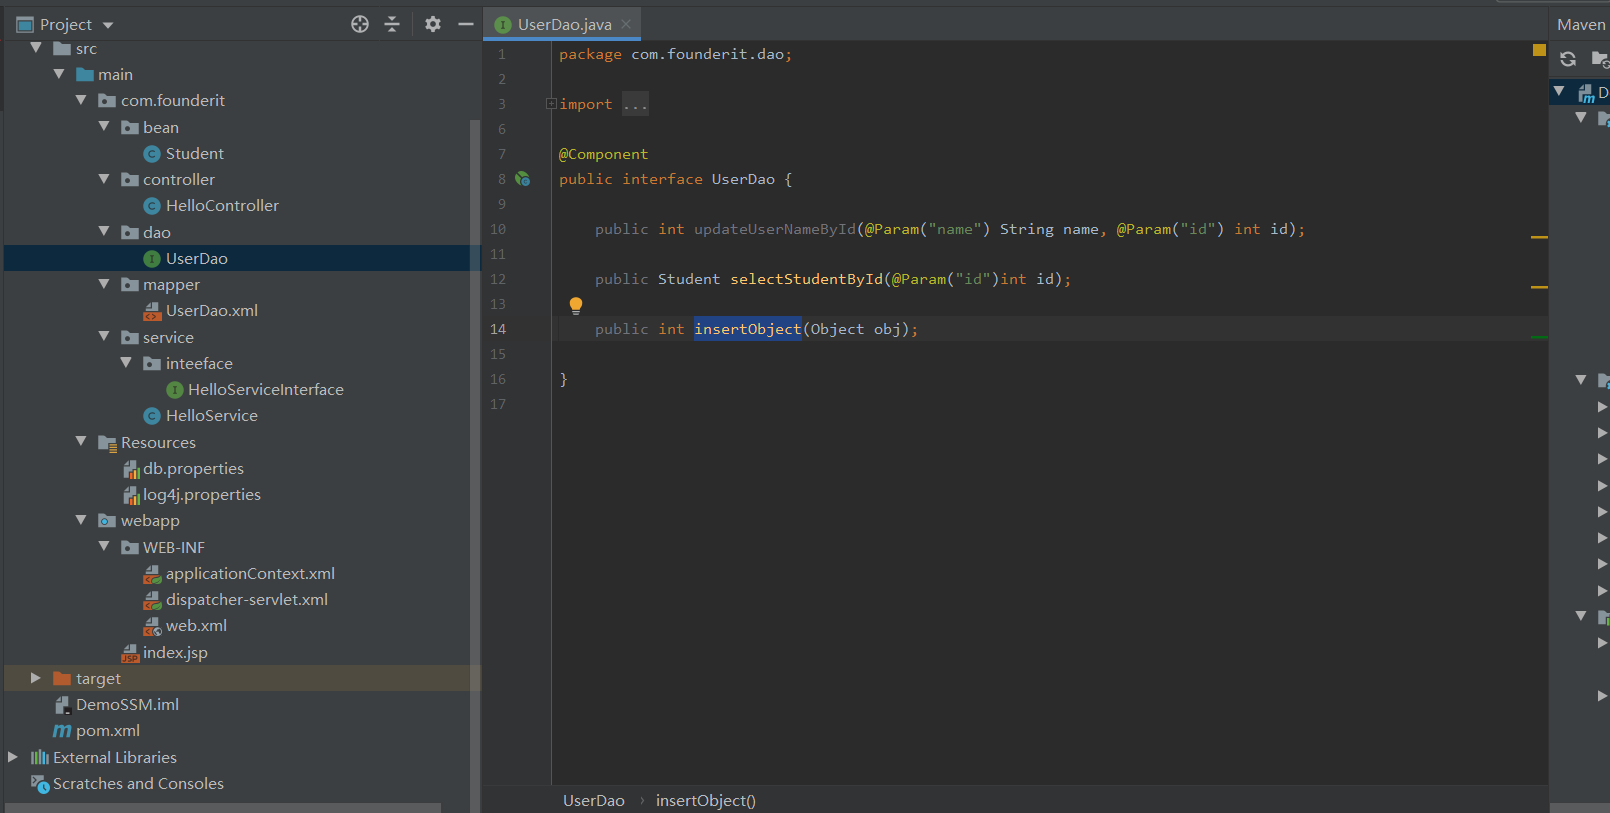
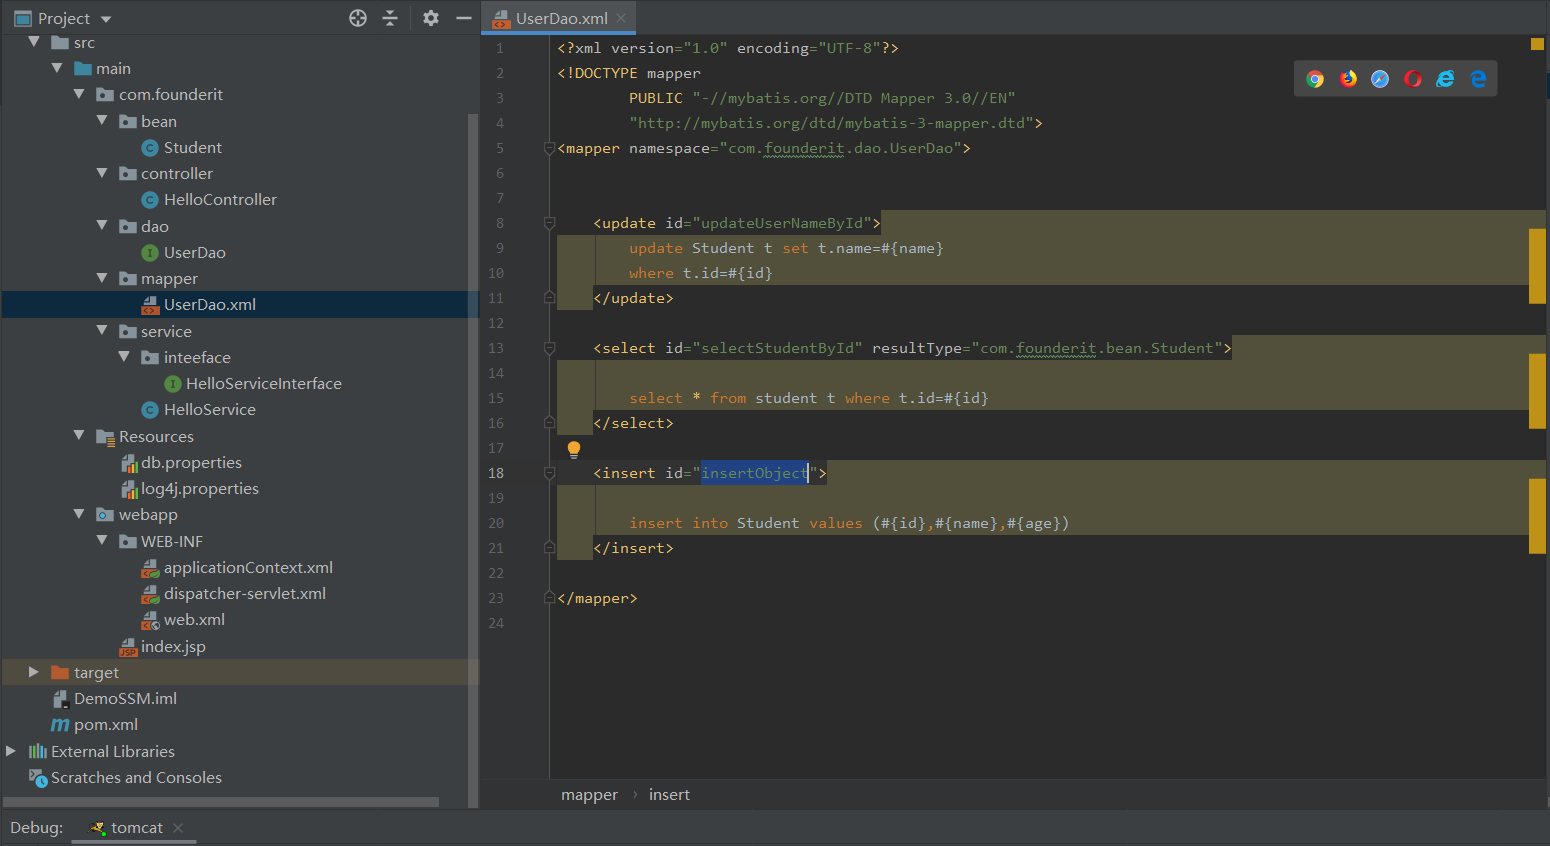
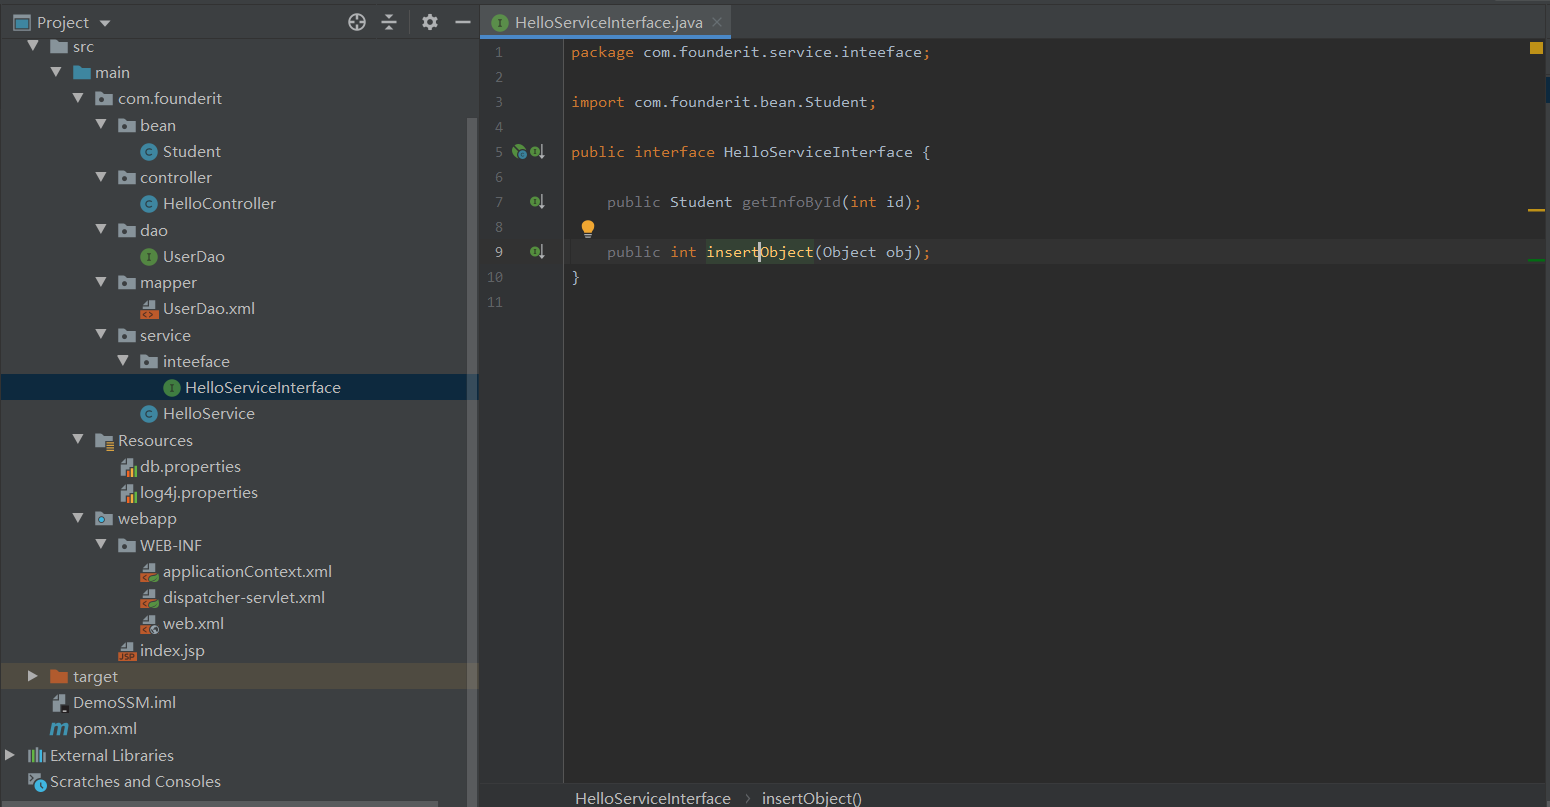
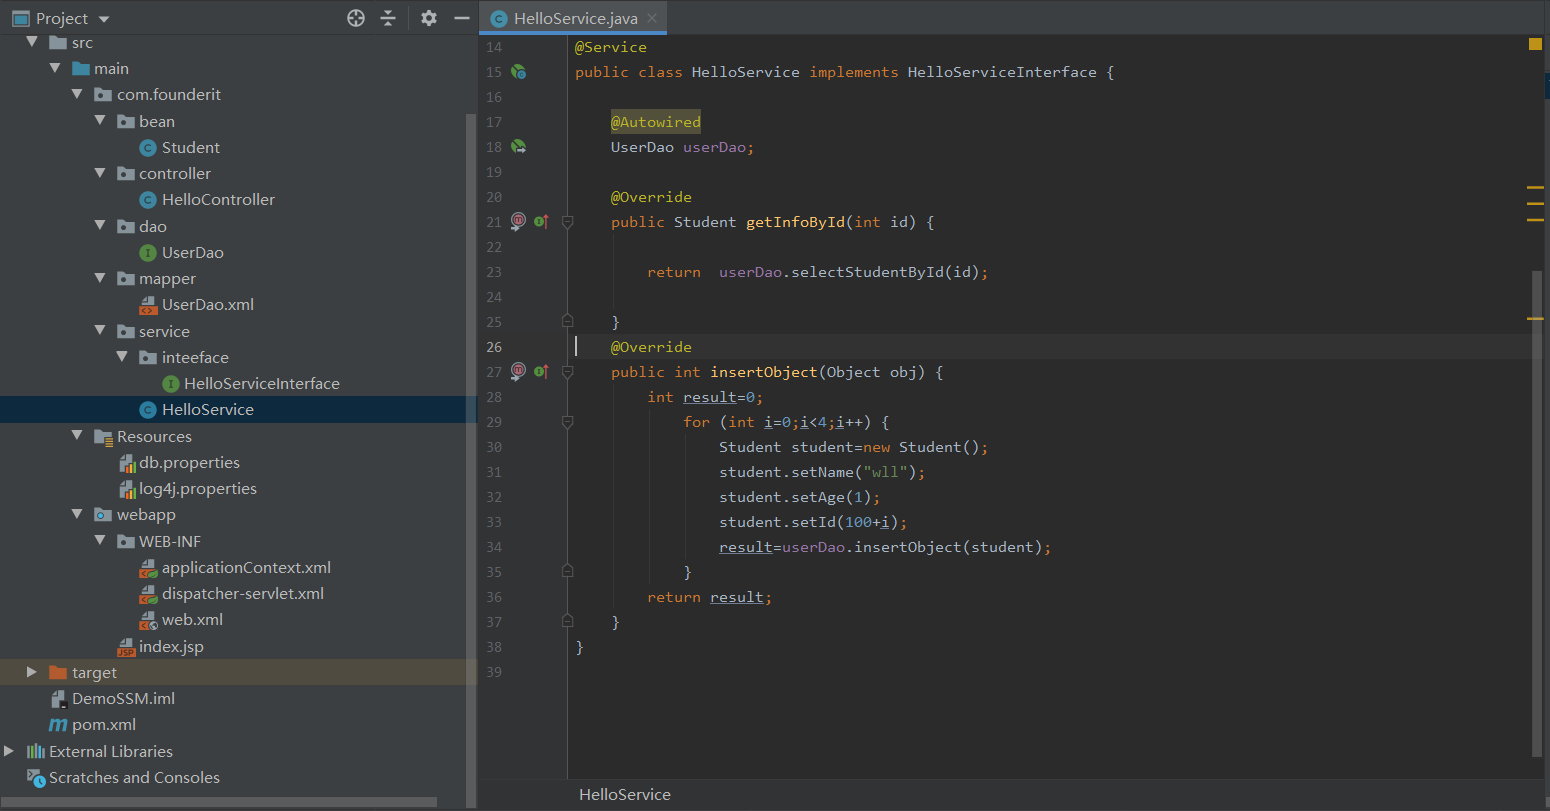
按项目图,编写对应的bean,controller,service,dao部分
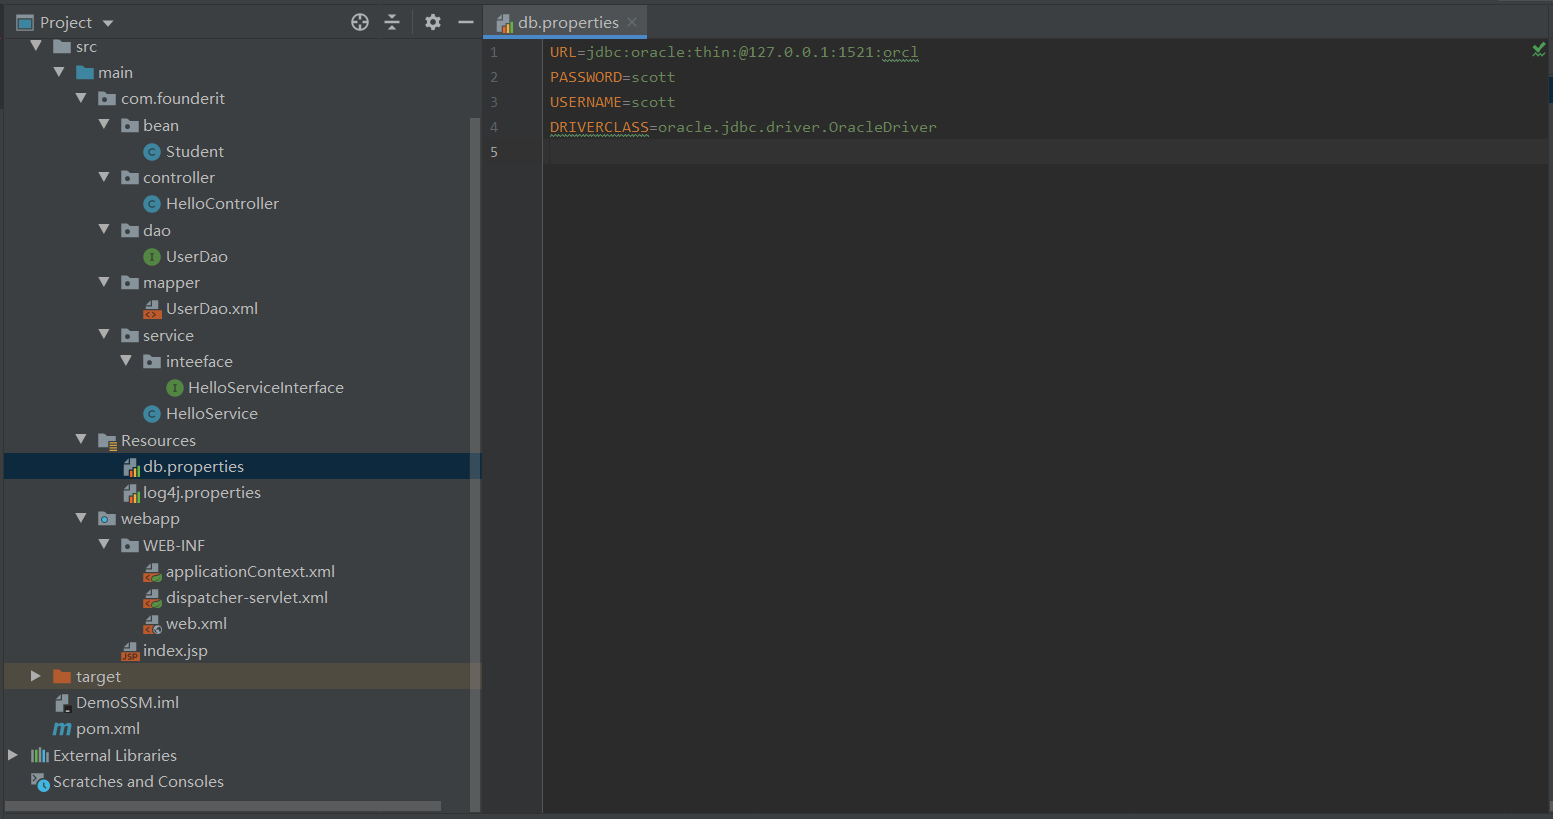
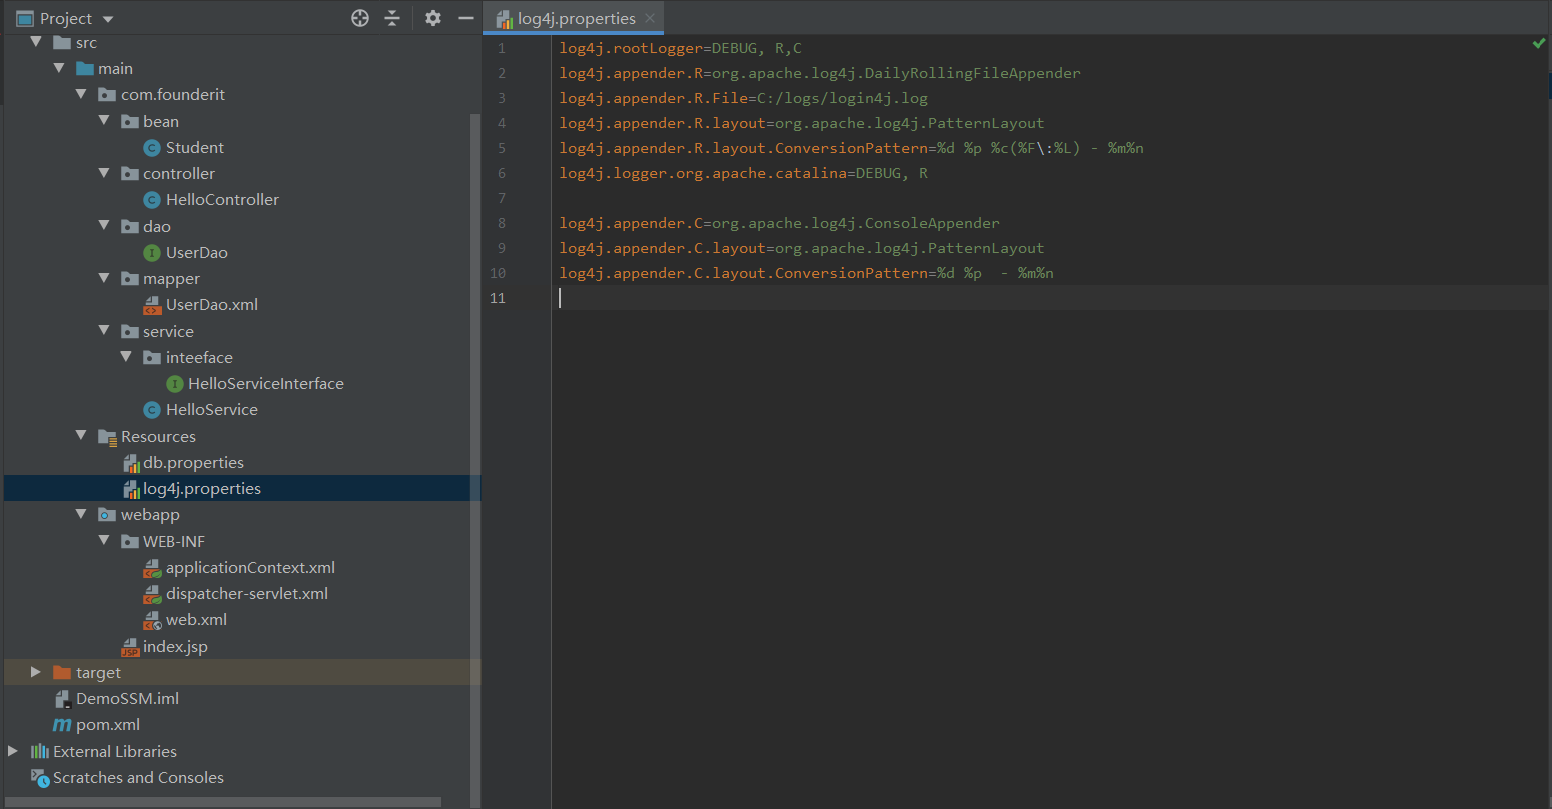
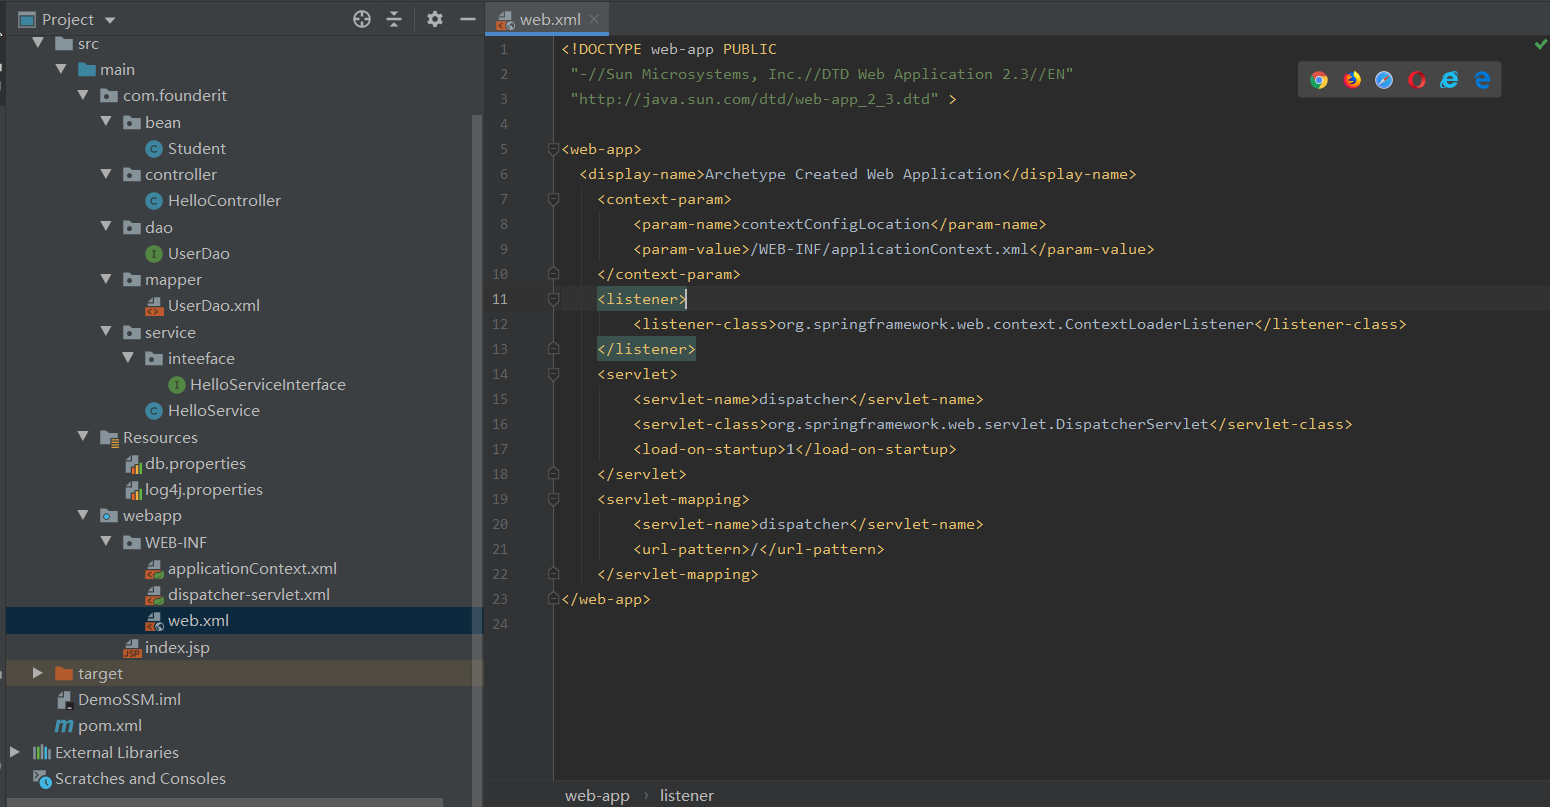
三:测试
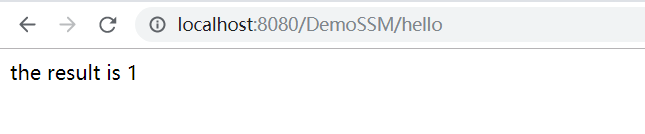
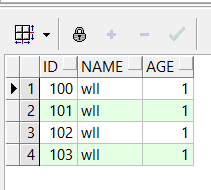
运行tomcat,发起hello请求,向数据库插入四条数据
SSM整合学习 三的更多相关文章
- SSM整合学习 四
事务管理 一:初步理解 理解事务之前,先讲一个你日常生活中最常干的事:取钱. 比如你去ATM机取1000块钱,大体有两个步骤:首先输入密码金额,银行卡扣掉1000元钱:然后ATM出1000元钱.这两个 ...
- SSM整合学习 二
二:与Spring MVC整合 一:添加Spring MVC Framework 右键项目名称,点击Add Framework Support 选择Spring-Spring MVC框架 选择Down ...
- SSM整合学习笔记
对学习Spring+Spring MVC+Mybatis过程中出现的问题解决办法汇总 出现的问题 1.pom.xml报错 右键项目->maven->update project 因此每次更 ...
- SSM整合学习 一
一:新建maven项目 File--New Project选择maven项目下的maven-archetype-webapp,输入GroupId.Artifactld,选择maven信息,新建mave ...
- Spring框架学习笔记(4)——SSM整合以及创建Maven自定义模版
Spring+Spring MVC+MyBatis+Maven SSM整合的核心还是Spring+MyBatis的整合,回顾一下MyBatis操作数据库流程,我们是使用一个SQLSessionFact ...
- 零基础学习java------39---------json格式交互,Restful(不懂),静态资源映射,SSM整合(ssm整合思想,application.xml文件详解(声明式事务管理),)
一. json格式交互(知道) 1 . 回顾ajax基本语法 $.ajax({ url:"", // 请求的后台路径 data:{"":"" ...
- 本人亲测-SSM整合后的基础包(供新手学习使用,可在本基础上进行二次开发)
本案例是在eclipse上进行开发的,解压后直接添加到eclipse即可.还需要自己配置maven环境.链接:https://pan.baidu.com/s/1siuvhCJASuZG_jqY5utP ...
- 04.redis集群+SSM整合使用
redis集群+SSM整合使用 首先是创建redis-cluster文件夹: 因为redis最少需要6个节点(三主三从),为了更好的理解,我这里创建了两台虚拟机(192.168.0.109 192.1 ...
- SpringMVC之简单的增删改查示例(SSM整合)
本篇文章主要介绍了SpringMVC之简单的增删改查示例(SSM整合),这个例子是基于SpringMVC+Spring+Mybatis实现的.有兴趣的可以了解一下. 虽然已经在做关于SpringMVC ...
随机推荐
- vector的使用注意事项
示例1: #include "iostream" #include "vector" using namespace std; int main(void) { ...
- CCF 201812-3 CIDR合并
CCF 201812-3 CIDR合并 //100分 93ms #include<stdio.h>//CCF上stdio.h比cstdio快!!! #include<string.h ...
- 大数定律(Law of Large Numbers)
大数定律:每次从总体中随机抽取1个样本,这样抽取很多次后,样本的均值会趋近于总体的期望.也可以理解为:从总体中抽取容量为n的样本,样本容量n越大,样本的均值越趋近于总体的期望.当样本容量极大时,样本均 ...
- 读RAM时的时序风险
读RAM时的时序有两个风险:1.数据已经存储好,读所需的时间.2.数据同时更新,读所需的时间节点.对于前者,只要延时足够节拍就行.对于后者,还必须要考虑数据建立的时间,同样延时的准备可能会因为数据尚未 ...
- [CMS] UsualToolCMS-8.0 sql注入漏洞【转载】
原文地址:http://lyscholar.cn/2019/07/30/代码审计-usualtoolcms存在sql注入漏洞/ 0x01 漏洞环境 版本信息:UsualToolCMS-8.0-Rele ...
- Redis Streams 介绍
Stream是Redis 5.0版本引入的一个新的数据类型,它以更抽象的方式模拟日志数据结构,但日志仍然是完整的:就像一个日志文件,通常实现为以只附加模式打开的文件,Redis流主要是一个仅附加数据结 ...
- ASP.NET Core 的 Dependency Injection
ASP.NET Core使用了大量的DI(Dependency Injection)设计,有用过Autofac或类似的DI Framework对此应该不陌生.本篇将介绍ASP.NET Core的依赖注 ...
- NIO网络访问模式实践
1.创建NioNest12类 一个线程监听5个端口的事件 public class NioTest12 { public static void main(String[] args) throws ...
- 【深入学习linux】Linux命令格式
一.命令基本格式 命令提示符 [root@localhost ~]# root 代表当前登录用户,Linux当中管理员账号是 root localhost 代表主机名 ~ 代表当前所在目录(家目录), ...
- epool与select有什么区别
select在一个进程中打开的最大fd是有限制的,由FD_SETSIZE设置,默认值是2048.不过 epoll则没有这个限制,它所支持的fd上限是最大可以打开文件的数目,这个数字一般远大于2048, ...