
OpenShift 4.1 基本问题探索
因为在OpenShift 4.1环境中不建议直接登录集群主机操作,因此很多操作可能需要在外部的Client VM上完成。当然用rhel的worker node的同事也可以和原来习惯保持一致。
这里记录一下经常遇到的一些问题:
如何查看密码
在4.1集群安装完后,系统会打印一句话出来,比如
INFO Creating infrastructure resources...         *********************************************************************************************

INFO Waiting up to 30m0s for the Kubernetes API at https://api.cluster-8447.sandbox.opentlc.com:6443...

INFO API v1.13.4+3a25c9b up

INFO Waiting up to 30m0s for bootstrapping to complete...

INFO Destroying the bootstrap resources...

INFO Waiting up to 30m0s for the cluster at https://api.cluster.sandbox.opentlc.com:6443 to initialize...

INFO Waiting up to 10m0s for the openshift-console route to be created...

INFO Install complete!

INFO To access the cluster as the system:admin user when using 'oc', run 'export KUBECONFIG=/root/cluster/auth/kubeconfig'

INFO Access the OpenShift web-console here: https://console-openshift-console.apps.cluster.sandbox.opentlc.com

INFO Login to the console with user: kubeadmin, password: TyCzM-ShJPQ-cgepT-dkDwq
一定要拷贝出来啊。。。如果万一没有拷贝,那在哪里还能找到呢?
可以在安装目录(cluster名)下,有个叫.openshift_install.log的文件,在那里可以找到
设置集群访问
export KUBECONFIG=$HOME/cluster-${GUID}/auth/kubeconfig

echo "export KUBECONFIG=$HOME/cluster-${GUID}/auth/kubeconfig" >>$HOME/.bashrc
上传镜像到内部镜像仓库
暴露image-registry路由,缺省不暴露route,只暴露image-registry.openshift-image-registry.svc服务
[root@clientvm  ~]# oc get svc -n openshift-image-registry

NAME             TYPE        CLUSTER-IP       EXTERNAL-IP   PORT(S)    AGE

image-registry   ClusterIP   172.30.134.180   <none>        /TCP   5h2m
oc patch configs.imageregistry.operator.openshift.io/cluster --patch '{"spec":{"defaultRoute":true}}' --type=merge
Podman登录
oc login -u kubeadm

HOST=$(oc get route default-route -n openshift-image-registry --template='{{ .spec.host }}')

podman login -u kubeadm -p $(oc whoami -t) --tls-verify=false $HOST
胡乱搞了一个Dockerfile,然后build
podman build -t default-route-openshift-image-registry.apps.cluster-.sandbox452.opentlc.com/myproject/mytomcat:slim .
[root@clientvm  ~/cluster-]# podman images

REPOSITORY                                                                                           TAG      IMAGE ID       CREATED              SIZE

default-route-openshift-image-registry.apps.cluster-.sandbox452.opentlc.com/myproject/mytomcat   slim     ec32b2cdbea2   About a minute ago    MB

<none>                                                                                               <none>   0426c1689356    minutes ago         MB

docker.io/library/openjdk                                                                            -jdk    08ded5f856cc    days ago            MB
然后push镜像,切记使用--tls-verify=false
[root@clientvm  ~]# podman push default-route-openshift-image-registry.apps.cluster-d60b.sandbox509.opentlc.com/myproject/mytomcat:slim --tls-verify=false

Getting image source signatures

Copying blob ea23cfa0bea9 done

Copying blob 2bf534399aca done

Copying blob eb25e0278d41 done

Copying blob 46ff59048438 done

Copying blob f613cd1e50cc done

Copying blob 1c95c77433e8 done

Copying blob 6d520b2e1077 done

Copying config  done

Writing manifest to image destination

Copying config  done

Writing manifest to image destination

Storing signatures
push完可以看到imagestream

生成应用
[root@clientvm  ~/cluster-]# oc new-app mytomcat:slim

--> Found image ec32b2c ( minutes old) in image stream "myproject/mytomcat" under tag "slim" for "mytomcat:slim"

    * This image will be deployed in deployment config "mytomcat"

    * Port /tcp will be load balanced by service "mytomcat"

      * Other containers can access this service through the hostname "mytomcat"

    * WARNING: Image "myproject/mytomcat:slim" runs as the 'root' user which may not be permitted by your cluster administrator

--> Creating resources ...

    deploymentconfig.apps.openshift.io "mytomcat" created

    service "mytomcat" created

--> Success

    Application is not exposed. You can expose services to the outside world by executing one or more of the commands below:

     'oc expose svc/mytomcat'

    Run 'oc status' to view your app.
通过命令可以直接部署,但如果在deployment.yaml中间的image直接写myproject/mytomcat会出错的。
如果是自己建立模板和通过yaml文件部署,image字段的正确写法是全路径。
image-registry.openshift-image-registry.svc:/openshift/mytomcat:-slim
添加用户
OpenShift 4.1 的用户认证这块也基于Operator实现,和3.11很大的区别在于3.11是配置在master-config.yaml下面,缺省是HTPasswd,
而4是缺省identity provider是没有的,需要基于authentication的cr配置出来。
在Cluster Setting的Global Configuration里面可以看到OAuth这项内容。
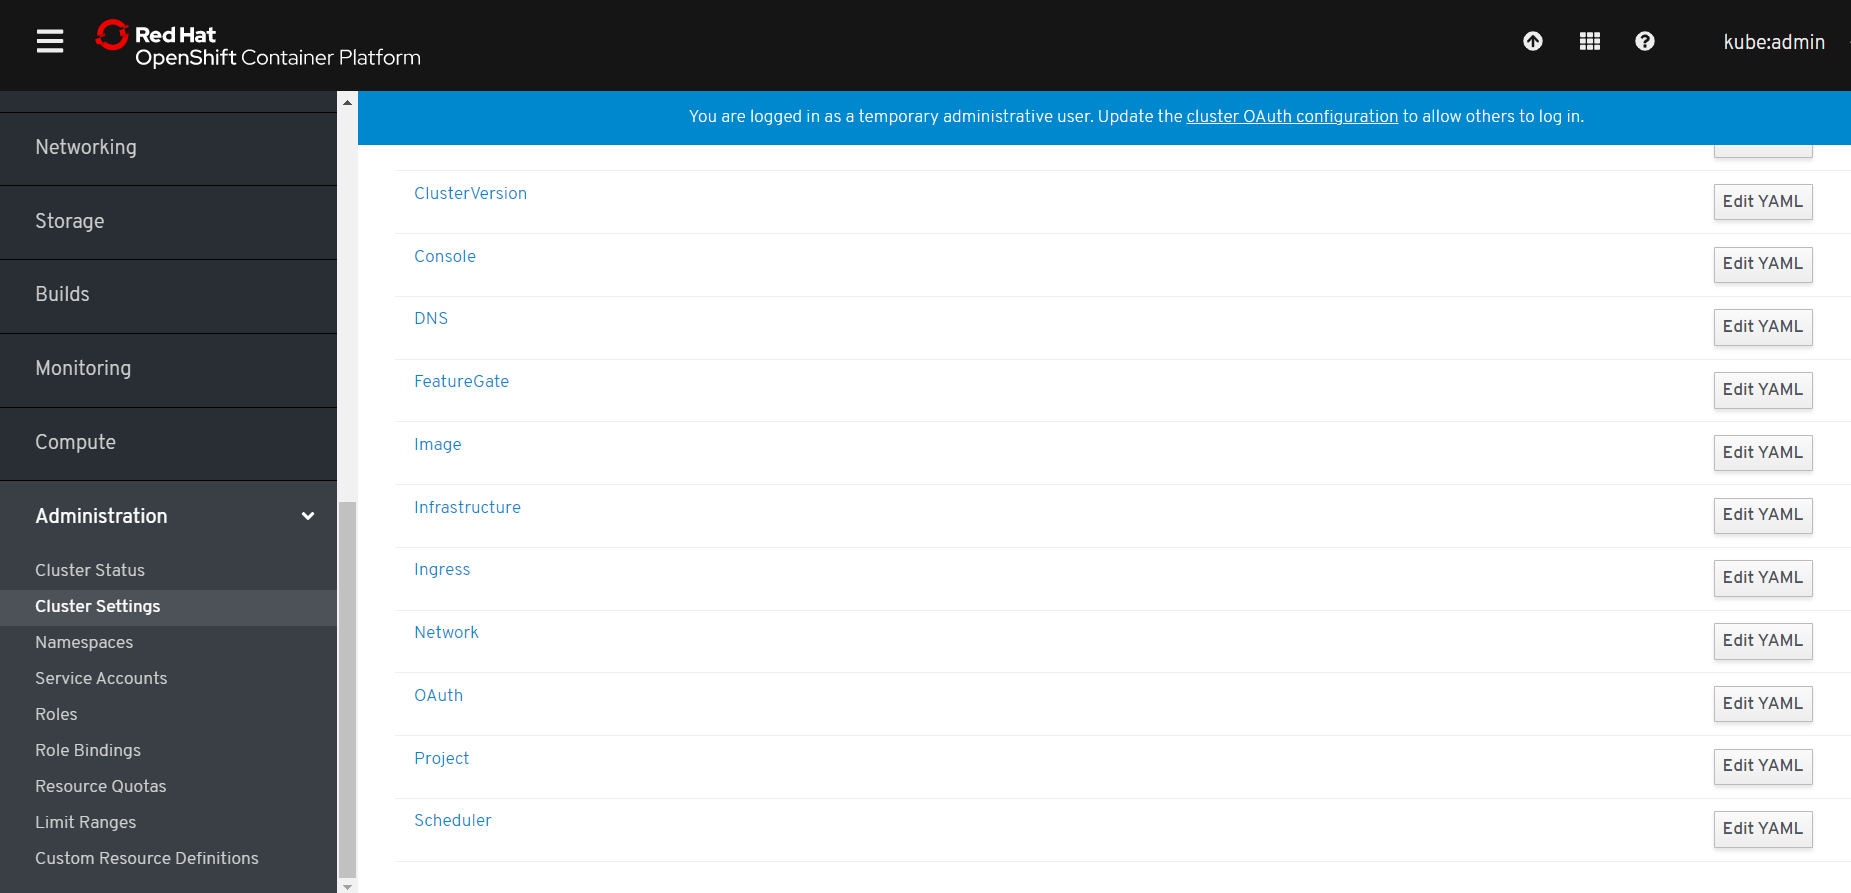
点击进去可以看到identity Provider为空
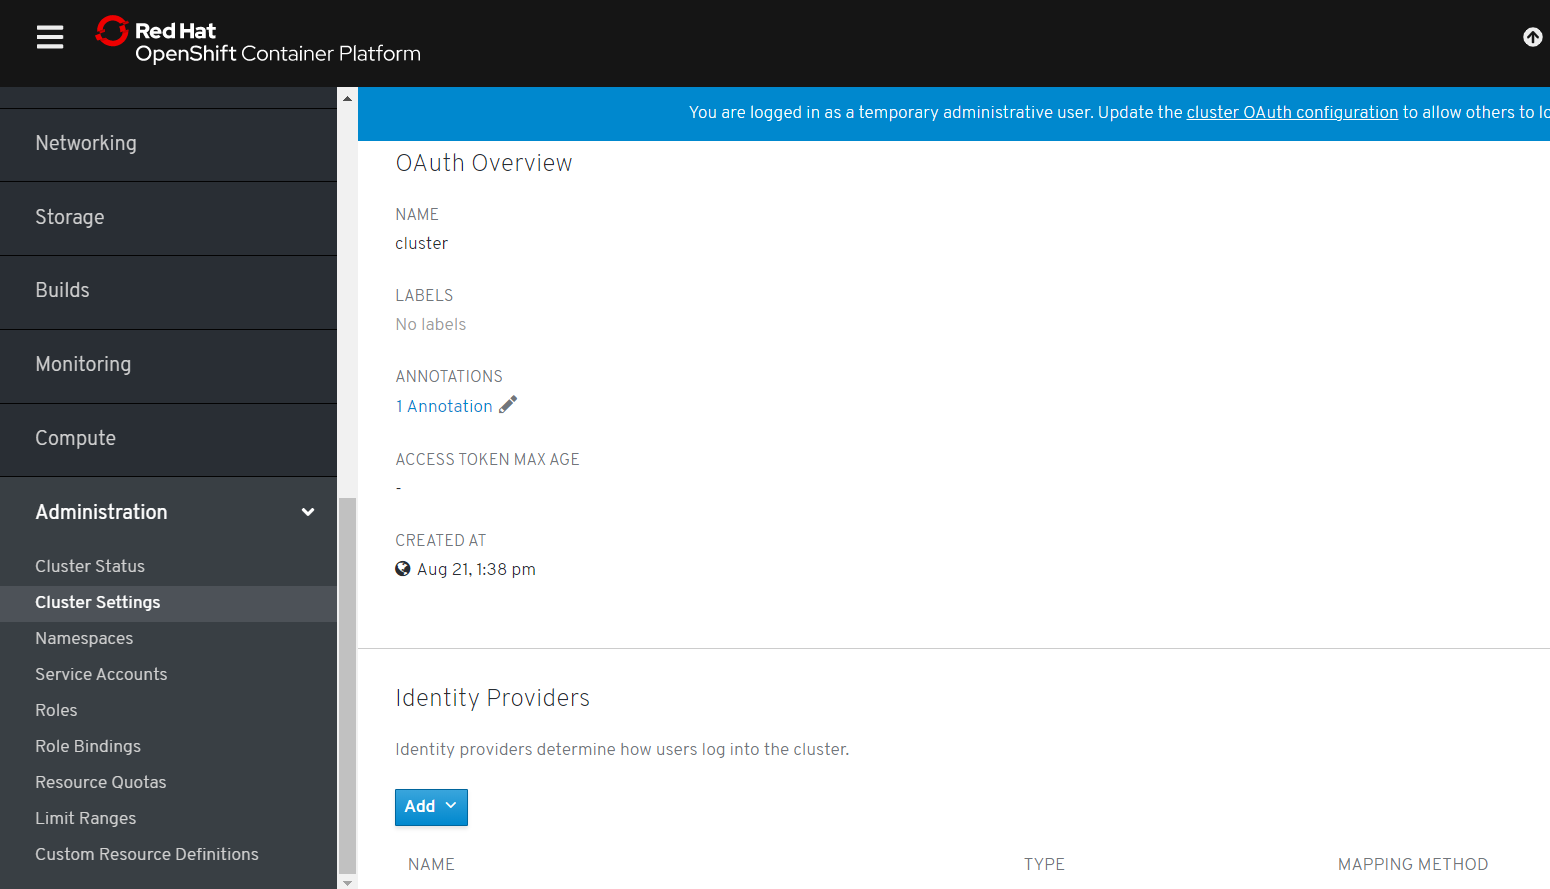
缺省只能用kubeadmin登录,如果需要添加用户,首先需要创建CR(Custom Resource)
如果我们还是以原来的HTPasswd方式,步骤如下:
1.在客户端创建users.htpasswd文件,并写入用户
htpasswd -c -B -b users.htpasswd admin welcome1
如果要添加多个用户,用下面命令
htpasswd -b users.htpasswd eric welcome1

htpasswd -b users.htpasswd alice welcome1
2. 在openshift-config下创建secret
oc create secret generic htpass-secret --from-file=htpasswd=/root/users.htpasswd -n openshift-config
如果是以后在文件中又添加了用户,可以用下面命令更新
oc create secret generic htpass-secret --from-file=htpasswd=/root/users.htpasswd -n openshift-config --dry-run -o yaml | oc apply -f -
完成后可以在openshift-config下看到这个secret, 选择edit secret,看到里面包含得用户名
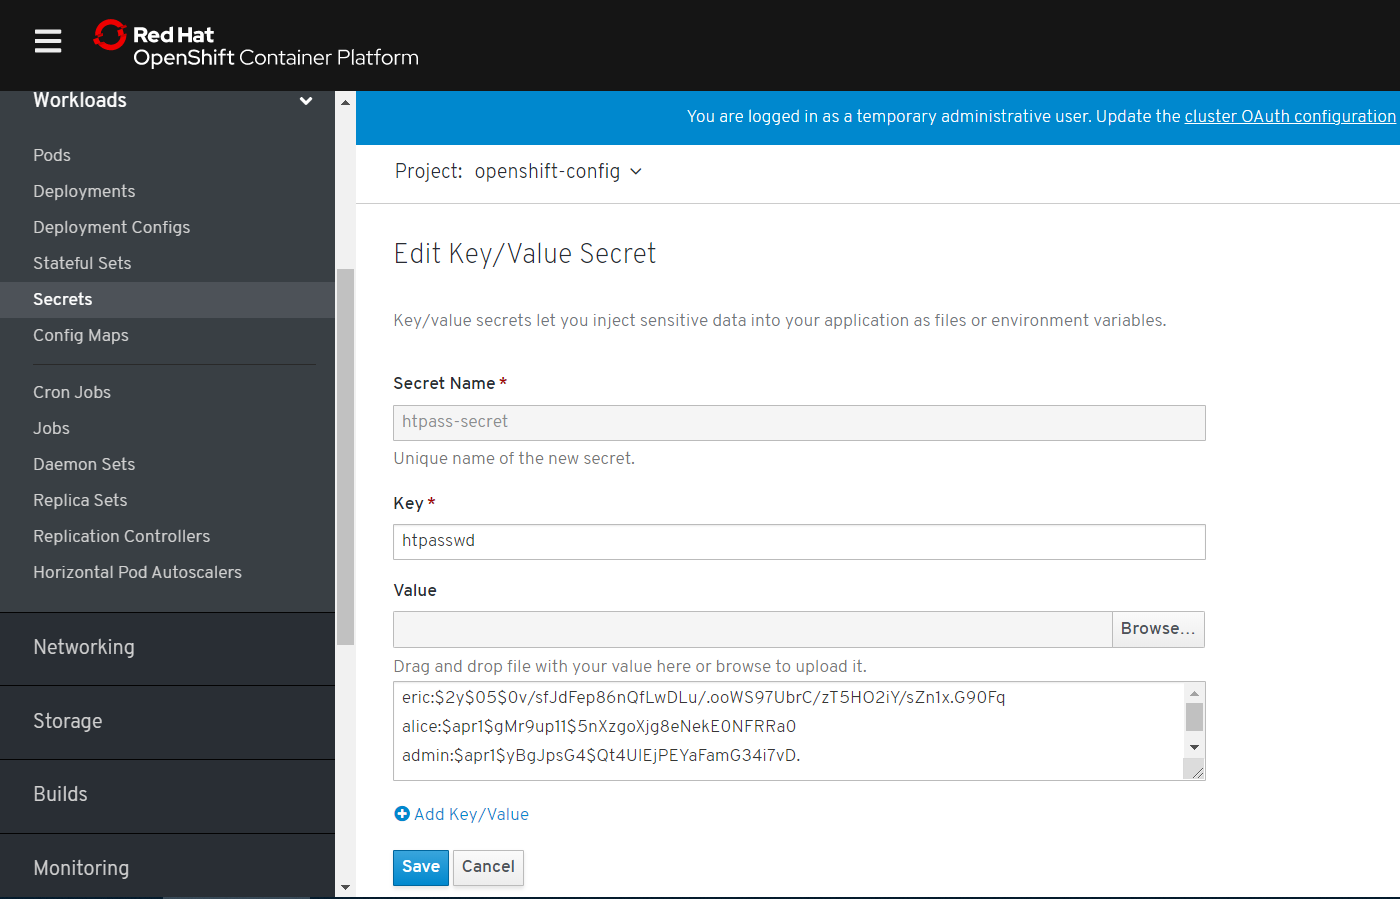
3. 更新CR, 写一个yaml文件, 这一步也可以直接在界面上添加。
[root@clientvm  ~]# cat htpass.yaml

apiVersion: config.openshift.io/v1

kind: OAuth

metadata:

  name: cluster

spec:

  identityProviders:

  - name: my_htpasswd_provider

    mappingMethod: claim

    type: HTPasswd

    htpasswd:

      fileData:

        name: htpass-secret
cluster的CR已经存在,所有通过apply去更新
[root@clientvm  ~]# oc apply -f htpass.yaml

Warning: oc apply should be used on resource created by either oc create --save-config or oc apply

oauth.config.openshift.io/cluster configured
完成后可以看到在Oauth里面包含了一个my_htpasswd_provider
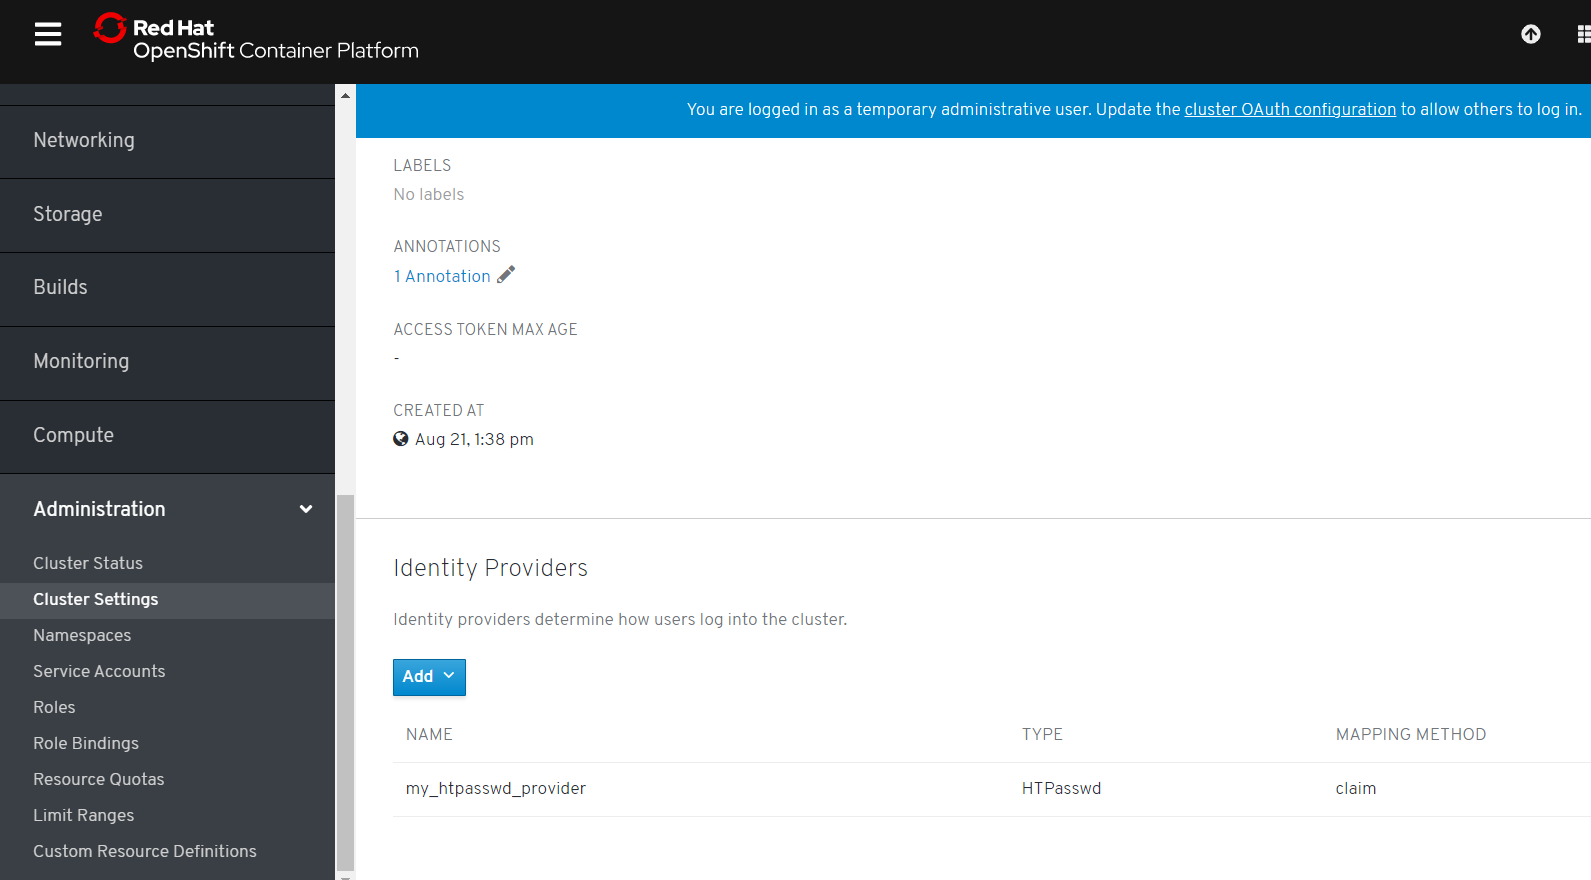
检查Pod的状态(在openshift-authentication project下),如果没有重新更新,就手工delete Pod让他重新装载一遍.
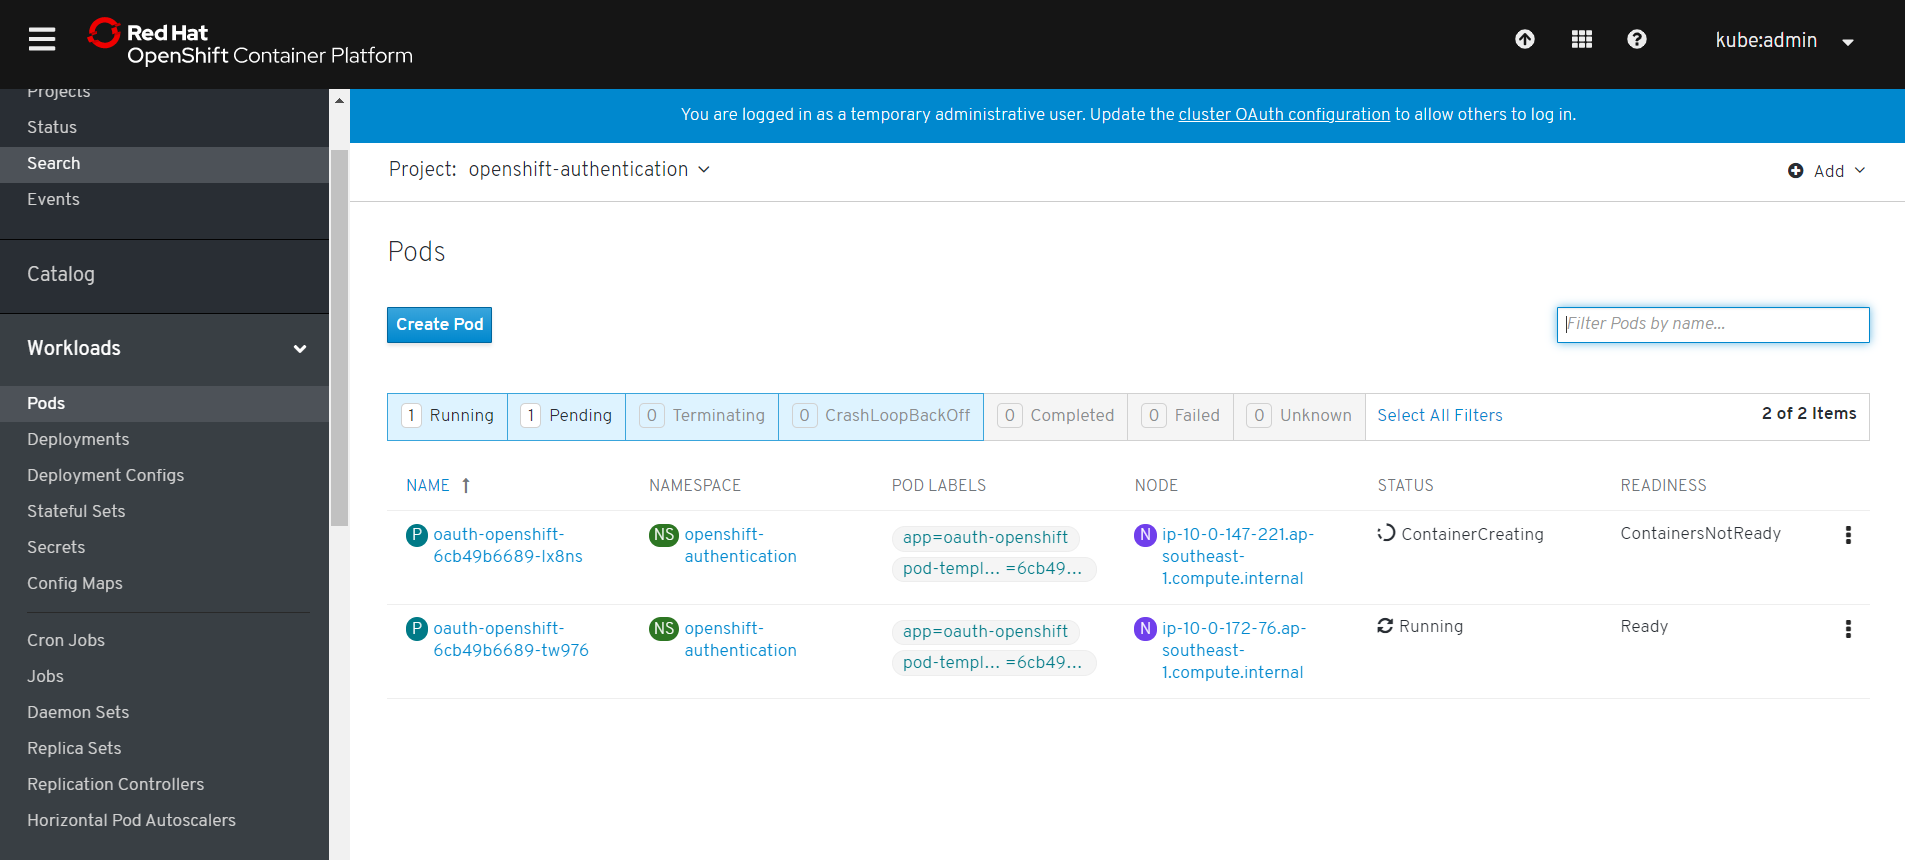
用oc get users看一看,怎么什么都没有。。。这里有个坑,只有登录过后的用户才能看到,所以直接登录吧
[root@clientvm  ~]# oc login -u eric

Authentication required for https://api.cluster-8447.sandbox452.opentlc.com:6443 (openshift)

Username: eric

Password:

Login successful.

You don't have any projects. You can try to create a new project, by running

    oc new-project <projectname>
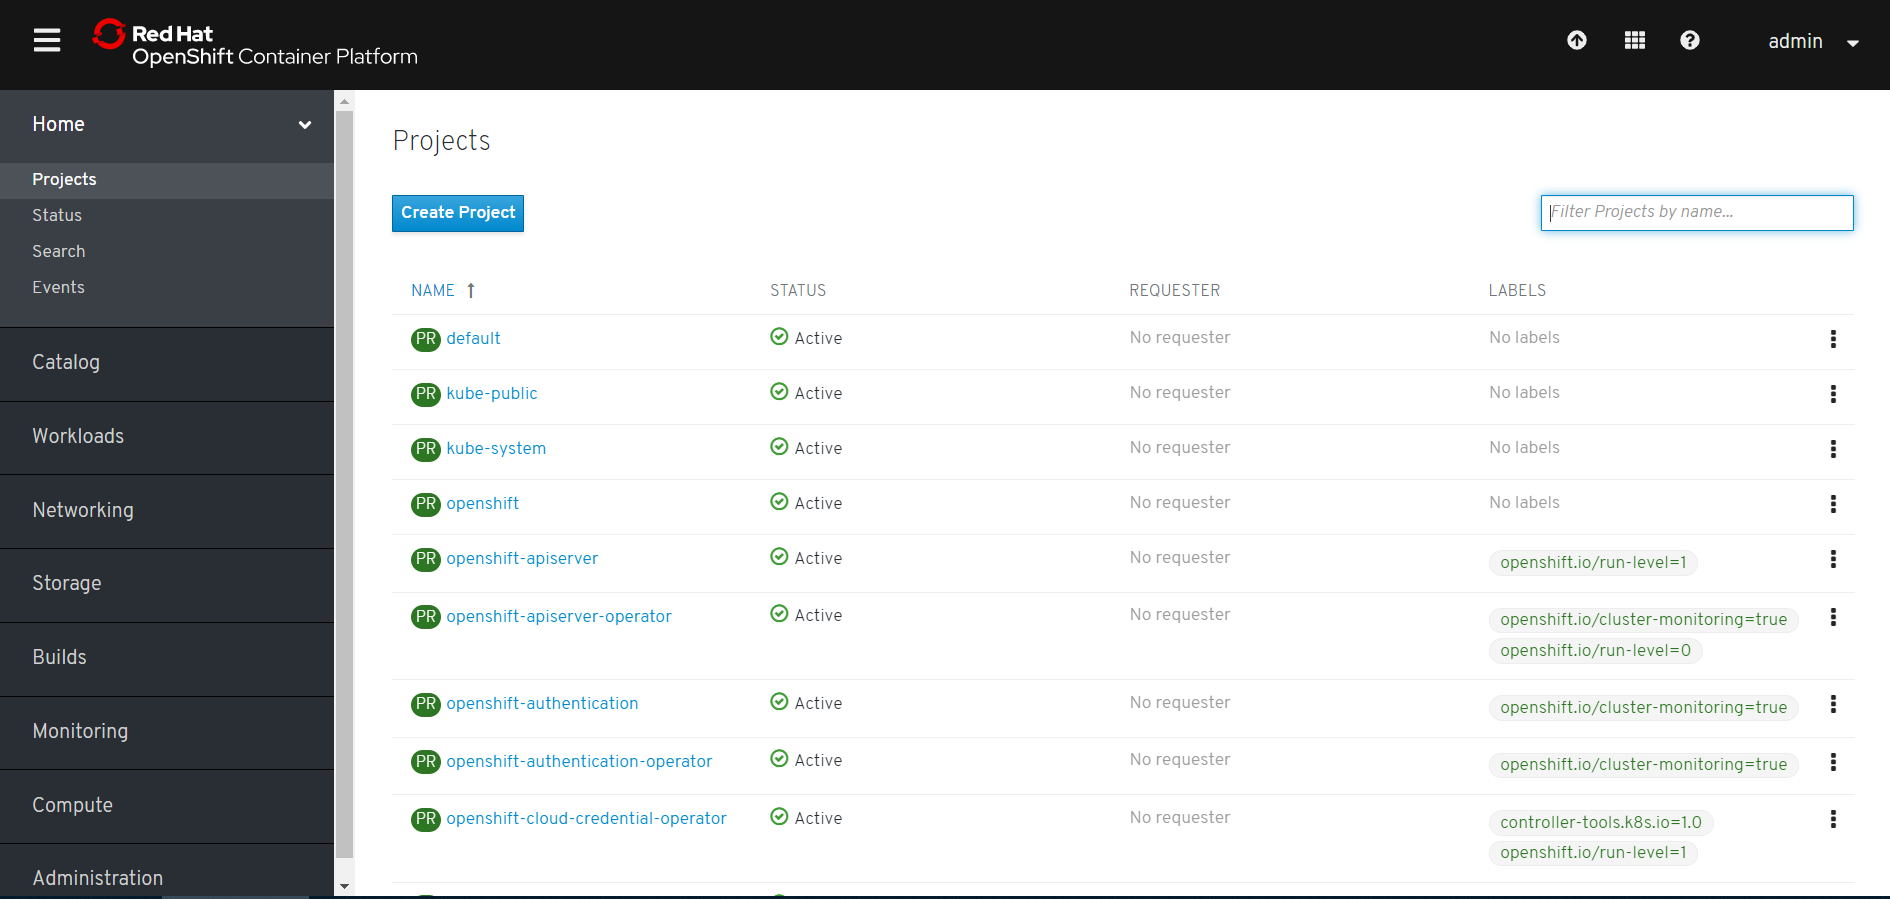
再切换回 kubeadmin用户,就可以看到了
[root@clientvm  ~]# oc get users

NAME    UID                                    FULL NAME   IDENTITIES

admin   463b2706-c3d9-11e9-b6ad-0a580a81001f               my_htpasswd_provider:admin

alice   d73b3e6f-c3db-11e9-ba6d-0a580a80001a               my_htpasswd_provider:alice

eric    4c8b7952-c3de-11e9-ab5a-0a580a82001b               my_htpasswd_provider:eric
设置为集群管理员
oc adm policy add-cluster-role-to-user cluster-admin admin
Console上LogOut
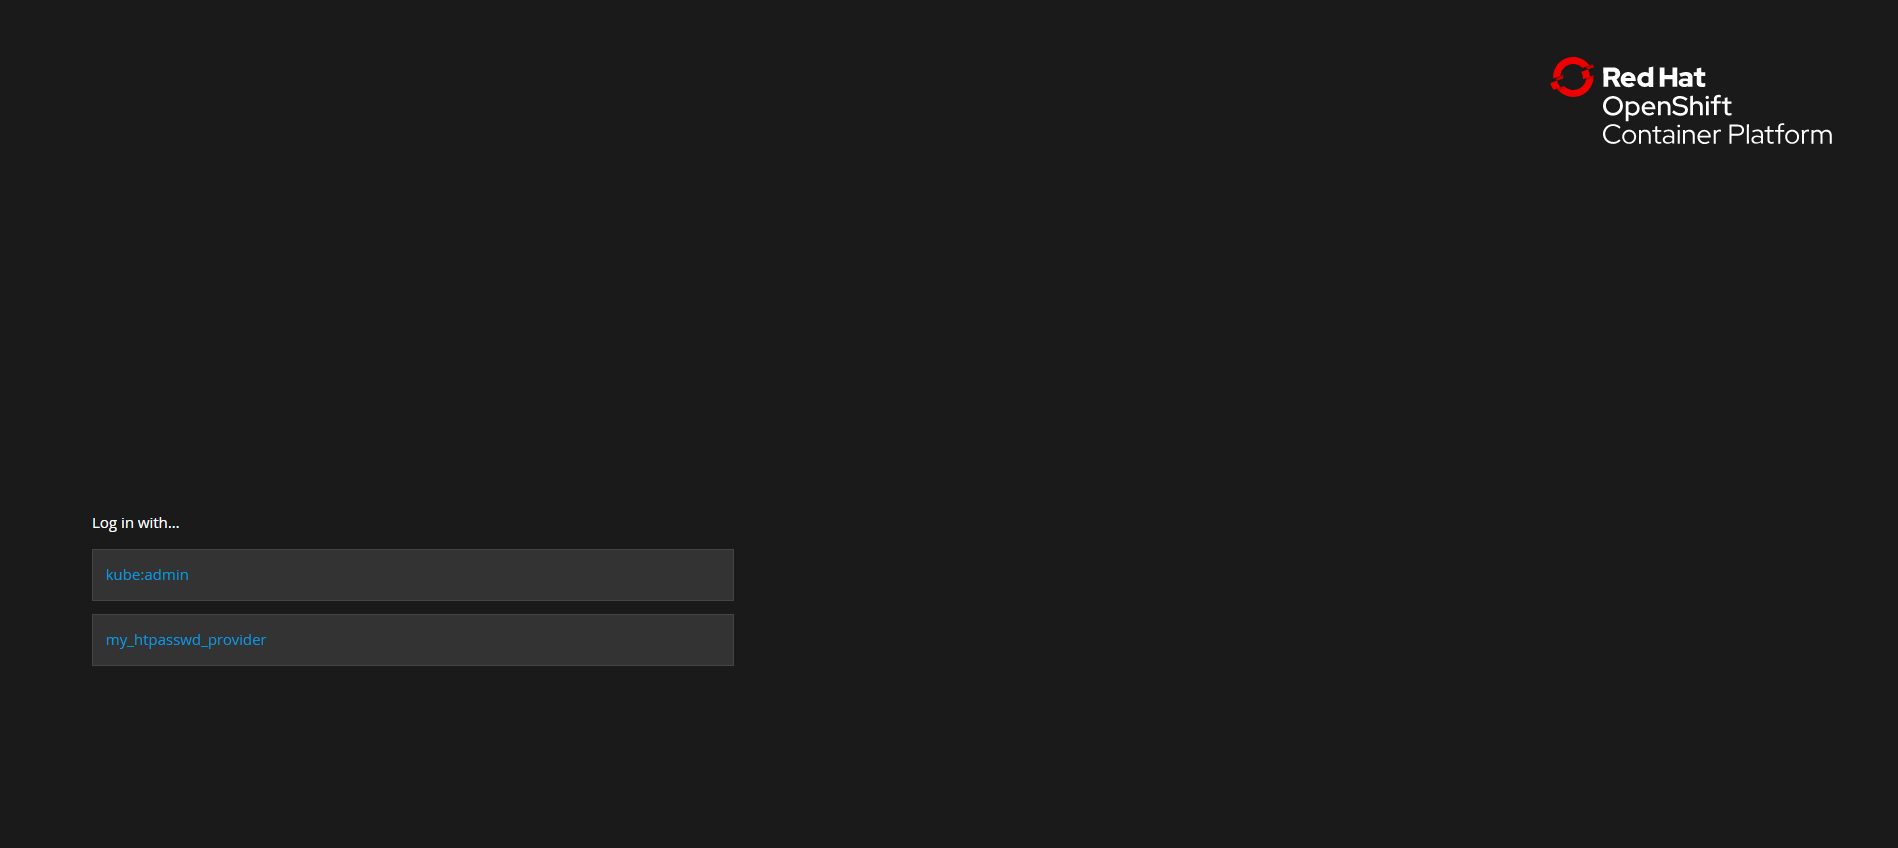
鼠标点击选择my_htpasswd_provider,一定要选这个,如果选上面的是不会让你登录的,然后用用户名登录就可以了。
OpenShift 4.1 基本问题探索的更多相关文章
- RedHat OpenShift QuickStart 1.1 OpenShift基础
openshift 提供了命令行工具和web可视化页面,这些工具通过REST API去和openshift交互 一.开始为开发人员使用OpenShift 1. 探索命令行 2. 探索web conso ...
- [转]OpenShift 集群搭建指南
转自:http://www.cnblogs.com/zhangning/p/7251810.html OpenShift 集群搭建指南 v1.0 搭建Hyper-v虚拟机或物理机 配置物理机静态IP, ...
- 在OpenShift平台上验证NVIDIA DGX系统的分布式多节点自动驾驶AI训练
在OpenShift平台上验证NVIDIA DGX系统的分布式多节点自动驾驶AI训练 自动驾驶汽车的深度神经网络(DNN)开发是一项艰巨的工作.本文验证了DGX多节点,多GPU,分布式训练在DXC机器 ...
- 【探索】机器指令翻译成 JavaScript
前言 前些时候研究脚本混淆时,打算先学一些「程序流程」相关的概念.为了不因太枯燥而放弃,决定想一个有趣的案例,可以边探索边学. 于是想了一个话题:尝试将机器指令 1:1 翻译 成 JavaScript ...
- 【探索】利用 canvas 实现数据压缩
前言 HTTP 支持 GZip 压缩,可节省不少传输资源.但遗憾的是,只有下载才有,上传并不支持.如果上传也能压缩,那就完美了.特别适合大量文本提交的场合,比如博客园,就是很好的例子. 虽然标准不支持 ...
- 探索C#之6.0语法糖剖析
阅读目录: 自动属性默认初始化 自动只读属性默认初始化 表达式为主体的函数 表达式为主体的属性(赋值) 静态类导入 Null条件运算符 字符串格式化 索引初始化 异常过滤器when catch和fin ...
- Mysql事务探索及其在Django中的实践(二)
继上一篇<Mysql事务探索及其在Django中的实践(一)>交代完问题的背景和Mysql事务基础后,这一篇主要想介绍一下事务在Django中的使用以及实际应用给我们带来的效率提升. 首先 ...
- Linux学习之探索文件系统
Linux,一起学习进步- ls With it, we can see directory contents and determine a variety of important file ...
- 马里奥AI实现方式探索 ——神经网络+增强学习
[TOC] 马里奥AI实现方式探索 --神经网络+增强学习 儿时我们都曾有过一个经典游戏的体验,就是马里奥(顶蘑菇^v^),这次里约奥运会闭幕式,日本作为2020年东京奥运会的东道主,安倍最后也已经典 ...
随机推荐
- Pthon魔术方法(Magic Methods)-bool
Pthon魔术方法(Magic Methods)-bool 作者:尹正杰 版权声明:原创作品,谢绝转载!否则将追究法律责任. 一.bool方法 __bool__: 内建函数bool(),或者对象放在逻 ...
- 【转】点评cat高可用实时监控系统
CAT总体介绍CAT(Central Application Tracking)是由吴其敏(前大众点评首席架构师,现携程架构负责人)主导设计基于Java开发打造的实时应用监控平台,为大众点评网提供了全 ...
- 项目Alpha冲刺 7
作业描述 课程: 软件工程1916|W(福州大学) 作业要求: 项目Alpha冲刺(团队) 团队名称: 火鸡堂 作业目标: 介绍第7天冲刺的项目进展.问题困难和心得体会 1.团队信息 队名:火鸡堂 队 ...
- Mybatis分页方法
使用方法https://github.com/pagehelper/Mybatis-PageHelper/blob/master/wikis/zh/HowToUse.md 使用 Maven 在 pom ...
- 关于input标签checkbox属性 和checked
我们设置了type的属性为checkbox时,记住以下3个关键点 1.点勾选时或者说点击时,checked为选中,在input标签中是checked=“checked”,注意这里面无论checked= ...
- [Javascript] Use requestIdleCallback to schedule JavaScript tasks at an optimal time
JavaScript is single-threaded, which can present some problems when creating an interactive user exp ...
- 事件类型(onfocus和onblur)
<!DOCTYPE html> <html lang="en"> <head> <meta charset="UTF-8&quo ...
- [RN] React Native 常用命令行
[RN] React Native 常用命令行 1.查看当前版本 react-native --version 或 react-native -v 2.创建指定版本的React Native项目 1) ...
- 前端base64加密
一.Base64编码表 码值 字符 码值 字符 码值 字符 码值 字符 0 A 16 Q 32 g 48 w 1 B 17 R 33 h 49 x 2 C 18 S 34 i 50 y 3 D 19 ...
- Nessus简单使用
1.更新插件 上次搭建完后总觉得不踏实,因为老是提示插件多久没更新了,然后果断花了1.25美刀买了台vps,终于把最新的插件下载下来了,总共190M,需要的QQ私信我.