在iOS项目中嵌入RN代码
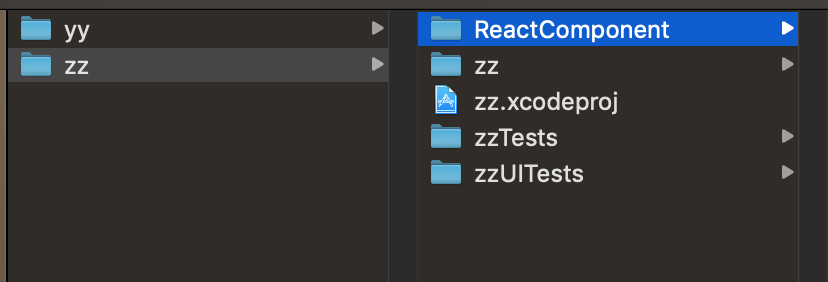
1:在项目跟目录下创建一个ReactComponent文件夹。目录结构如下:
2: 在ReactComponent文件夹下新建一个 package.json 文件
{

  "name": "yy", // 项目名称

  "version": "0.0.1",

  "private": true,

  "scripts": {

    "start": "node node_modules/react-native/local-cli/cli.js start",

    "test": "jest"

  },

  "dependencies": {

    "react": "16.8.3",

    "react-native": "0.59.9"

  },

  "devDependencies": {

    "@babel/core": "7.4.5",

    "@babel/runtime": "7.4.5",

    "babel-jest": "24.8.0",

    "jest": "24.8.0",

    "metro-react-native-babel-preset": "0.54.1",

    "react-test-renderer": "16.8.3"

  },

  "jest": {

    "preset": "react-native"

  }

}
3:到ReactComponent目录下,初始化package.json文件,会生成需要的 node_modules 目录结构如下
// 到对应的目录中

cd xxx/ReactComponent

// 初始化 package.json

npm install

4:在ReactComponent文件夹下生成 index.ios.js 文件
/*

*

* Sample React Native App

* jff

*

*/

import React, {Component} from 'react';

import {

    AppRegistry,

    StyleSheet,

    Text,

    View,

} from 'react-native';

class NativeRnApp extends Component {

    render(){

        return (

            <View style={styles.container}>

                <Text style={styles.welcome}> Welcome react-native </Text>

                <Text style={styles.instructions}> To get started, edit index.ios.js </Text>

                <Text style={styles.instructions}> Press Cmd+R to reload,{'\n'} Cmd+D or shake for dev menu </Text>

            </View>

        );

    }

}

const styles = StyleSheet.create({

    container:{

        flex:1,

        justifyContent:'center',

        alignItems:'center',

        backgroundColor:'#F5FCFF',

    },

    welcome:{

        fontSize:20,

        textAlign:'center',

        margin:10,

    },

    instructions:{

        textAlign:'center',

        marginBottom:10,

        color:'#333333'

    }

})

// 注册组件

AppRegistry.registerComponent('rn', ()=>NativeRnApp);
5:常见Podfile 文件导入yoga,react框架,Podfile文件内容
# 如果导入react-navigation 和 react-native-gesture-handler 需要在Podfile中导入RNGestureHandler 否则会报 null is not an object (evaluating '_rngeasturhandlemodule.default.direction'
# RCTLinkingIOS 用于链接原生module 否则会报 Native Moudle is NULL
# RCTAnimation 导入动画,否则会有警告
# DevSupport 用于调试支持
platform :ios, '9.0'

target 'iOSRN' do
    pod 'yoga', :path => './ReactComponent/node_modules/react-native/ReactCommon/yoga'
    pod 'React', :path => './ReactComponent/node_modules/react-native', :subspecs => [
        'Core',
        'DevSupport',
        'CxxBridge',
        'RCTActionSheet',
        'RCTGeolocation',
        'RCTImage',
        'RCTNetwork',
        'RCTPushNotification',
        'RCTSettings',
        'RCTText',
        'RCTVibration',
        'RCTWebSocket',
        'RCTLinkingIOS',
        'RCTAnimation'
    ]
    pod 'RNGestureHandler', :path => './ReactComponent/node_modules/react-native-gesture-handler'
    pod 'DoubleConversion', :podspec => './ReactComponent/node_modules/react-native/third-party-podspecs/DoubleConversion.podspec'
    pod 'glog', :podspec => './ReactComponent/node_modules/react-native/third-party-podspecs/glog.podspec'
    pod 'Folly', :podspec => './ReactComponent/node_modules/react-native/third-party-podspecs/Folly.podspec'
end
在第一次 pod install 的时候,要打开VPN不然下载不下来 ‘boost-for-react-native’会报错:RPC failed; curl 56 LibreSSL SSL_read: SSL_ERROR_SYSCALL, errno 60 fatal:
如果报‘ios folly/portability.h' file not found’ 需要导入上面的‘:podspec’对应的依赖库,同时为了正常的链接好需要有 'CxxBridge'
6: 在pod install 成功之后,打开 xx.xcworkspace, 之后 file -> Workspace Settings -> 更改“new Build System(Default)”为“legacy Build System”,如下

在info.plist文件中添加"App Transport Security Settings"
<key>NSAppTransportSecurity</key>

<dict>

    <key>NSAllowsArbitraryLoads</key>

    <true/>

</dict>
7:生成需要使用的RN文件。让ReactViewController继承自UIVIewController
//

//  ReactViewController.h

//  yy

//

//  Created by jisa on 2019/6/24.

//  Copyright © 2019 jff. All rights reserved.

//

#import <UIKit/UIKit.h>

NS_ASSUME_NONNULL_BEGIN

@interface ReactViewController : UIViewController

@end

NS_ASSUME_NONNULL_END
//

//  ReactViewController.m

//  yy

//

//  Created by jisa on 2019/6/24.

//  Copyright © 2019 jff. All rights reserved.

//

#import "ReactViewController.h"

// 导入需要的组件

#import <React/RCTRootView.h>

@interface ReactViewController ()

@end

@implementation ReactViewController

- (void)viewDidLoad {

    [super viewDidLoad];

    // Do any additional setup after loading the view. local

    NSString * strUrl = @"http://localhost:8081/index.ios.bundle?platform=ios&dev=true";

    NSURL * jsCodeLocation = [NSURL URLWithString:strUrl];

    RCTRootView * rootView = [[RCTRootView alloc] initWithBundleURL:jsCodeLocation

                                                         moduleName:@"rn"

                                                  initialProperties:nil

                                                      launchOptions:nil];

    self.view = rootView;

}

@end
在进行真机调试是要把localhost换成电脑上的IP地址,同事要保证电脑和手机处于同一网段下。
在iOS项目中嵌入RN代码的更多相关文章
- 在Flex (Flash)中嵌入HTML 代码或页面—Flex IFrame
在flex组件中嵌入html代码,可以利用flex iframe.这个在很多时候会用到的,有时候flex必须得这样做,如果你不这样做还真不行-- flex而且可以和html进行JavaScript交互 ...
- iOS-C文件添加到iOS项目中,运行报错
iOS-C文件添加到iOS项目中,运行报错 问题: 往项目中添加一个空的c文件, 编译运行; 出现2,30个编译错误. 原因: 由于在项目中添加了Pch文件,在文件中所有代码还没有开始运行之前, pc ...
- iOS项目中常见的文件
html,body,div,span,applet,object,iframe,h1,h2,h3,h4,h5,h6,p,blockquote,pre,a,abbr,acronym,address,bi ...
- 在Xamarin.iOS项目中使用预设数据库
在Xamarin.iOS项目中使用预设数据库 当开发者准备好一个预设数据库文件后,就可以将这个数据库文件添加到创建的项目中了.本节将分别在Xamarin.iOS和Xamarin.Android项目中使 ...
- 在Flex (Flash)中嵌入HTML 代码或页面—Flex IFrame
在flex组件中嵌入html代码,可以利用flex iframe.这个在很多时候会用到的,有时候flex必须得这样做,如果你不这样做还真不行…… flex而且可以和html进行JavaScript交互 ...
- 给iOS项目中添加图片,并通过UIImageView引用和显示该UIImage图片
[问题] 关于iOS/iPhone中的文件选择对话框,用于用户去选择图片等文件 过程中,问题转换为,需要给当前iOS项目中,添加一个图片. 类似于Windows开发中的资源文件,其中图片文件属于资源的 ...
- linux内核分析作业4:使用库函数API和C代码中嵌入汇编代码两种方式使用同一个系统调用
系统调用:库函数封装了系统调用,通过库函数和系统调用打交道 用户态:低级别执行状态,代码的掌控范围会受到限制. 内核态:高执行级别,代码可移植性特权指令,访问任意物理地址 为什么划分级别:如果全部特权 ...
- ios项目中引用其他项目复习
ios项目中引用其他开源项目,今天再次复习了,记个备注. 1. 将开源项目的.xcodeproj拖入项目frameworks 2. Build Phases下 Links Binary With Li ...
- JSP中嵌入java代码方式以及指令
JSP中嵌入java代码的三种方式: (1)声明变量或方法 : <%! 声明; %> :慎重使用,因为此方法定义的是全局变量 (2)java片段(scriptlet): <% j ...
随机推荐
- 利用FFmpge进行视频压缩(从图像到H264视频流)
对于FFmpeg相信做视频或图像处理这一块的都不会陌生,在网上也能找到非常多相关的代码.但因为版本号不同等原因.往往找到的代码都是须要自行改动才干够用,为此本人希望能尽绵薄之力,将开发包和自行编写的代 ...
- scikit-learn:matplotlib.pyplot经常使用绘图功能总结(1)
參考:http://matplotlib.org/api/pyplot_api.html 绘图功能总结(2):http://blog.csdn.net/mmc2015/article/details/ ...
- 【MVC框架】——View和Controller之间的传值
在MVC中,Controller运行一个能够说是路由功能.它通过View传过来的数据,来决定应该调用哪一个Model,相同会把Model处理完的数据传给View,所以就总是涉及到Controller和 ...
- Redis 持久化,写入磁盘的方式
如果帮到了您,可以支持一下,谢谢您的支持! Redis是一个支持持久化的内存数据库=>也就是说redis需要经常将内存中的数据同步到磁盘来保证持久化. redis支持四种持久化方式, 一是 Sn ...
- MBEEWALK - Bee Walk
A bee larva living in a hexagonal cell of a large honey comb decides to creep for a walk. In each “s ...
- ASP.NET Overview
https://msdn.microsoft.com/en-us/library/4w3ex9c2.aspx ASP.NET is a unified统一的 Web development model ...
- [模板] BSGS
BSGS是一种解决一类专门的问题的解法,主要是解决已知A, B, C,求X使得A^x = B (mod p)这一类问题. 解法很简单,先设x = i*m-j(m=ceil(sqrt(p))),然后进行 ...
- openStack aio nova service-list neutron ext-list
- openstack instance resize Resize error: Unable to resize disk down
- 必会!Linux文件的管理
1.1 创建一个目录 /data [root@liuhao ~]# mkdir /data 1.2 查看目录是否创建成功 <可以找到data即为创建成功> [root@liuhao ~]# ...