Linux安装PHP环境
简介:
PHP(外文名:PHP: Hypertext Preprocessor,中文名:“超文本预处理器”)是一种通用开源脚本语言。语法吸收了C语言、Java和Perl的特点,利于学习,使用广泛,主要适用于Web开发领域。
标注:
配置nginx请参考此教程:
http://www.cnblogs.com/zoulongbin/p/6253568.html
配置mysql请参考此教程:
http://www.cnblogs.com/zoulongbin/p/6287167.html
配置网络yum源参考此教程:
http://www.cnblogs.com/zoulongbin/p/5773330.html
需要安装以下安装包:(使用网络yum源在线安装以下四个依赖包,本教程大部分使用下载的源码安装进行编译安装)
[root@ssticentos65 src]# yum -y install libcurl-devel (必须安装)
[root@ssticentos65 src]# yum -y install libXpm-devel (必须安装)
[root@ssticentos65 src]# yum -y install libxml2-devel (必须安装)
[root@ssticentos65 src]# yum -y install php-mbstring (自行选择安装)
提示:Linux软件编译安装都需要依赖两个安装包 gcc gcc-c++ make 可使用 yum -y install gcc gcc-c++ make 在线安装。
标注:下载的软件安装包统一存放路径在 /usr/local/src 目录下进行解压编译安装
1、 安装yasm
下载地址:http://www.tortall.net/projects/yasm/releases/
[root@ssticentos65 src]# cd yasm-1.3.0
[root@ssticentos65 yasm-1.3.0]# ./configure
[root@ssticentos65 yasm-1.3.0]# make
[root@ssticentos65 yasm-1.3.0]# make install
2、 安装libmcrypt
下载地址:https://sourceforge.net/projects/mcrypt/files/Libmcrypt/2.5.8/
[root@ssticentos65 src]# cd libmcrypt-2.5.8
[root@ssticentos65 libmcrypt-2.5.8]# ./configure
[root@ssticentos65 libmcrypt-2.5.8]# make
[root@ssticentos65 libmcrypt-2.5.8]# make install
3、 安装libvpx
下载地址: http://www.linuxfromscratch.org/blfs/view/svn/multimedia/libvpx.html
[root@ssticentos65 src]# cd libvpx-1.6.0
[root@ssticentos65 libvpx-1.6.0]#./configure --prefix=/usr/local/libvpx --enable-shared --enable-vp9
[root@ssticentos65 libvpx-1.6.0]# make
[root@ssticentos65 libvpx-1.6.0]# make install
4、 安装tiff
下载地址: http://download.osgeo.org/libtiff/
[root@ssticentos65 src]# cd tiff-4.0.6
[root@ssticentos65 tiff-4.0.6]#./configure --prefix=/usr/local/tiff --enable-shared
[root@ssticentos65 tiff-4.0.6]# make
[root@ssticentos65 tiff-4.0.6]# make install
5、 安装libpng
下载地址:http://www.libpng.org/pub/png/libpng.html
[root@ssticentos65 src]# cd libpng-1.6.28
[root@ssticentos65 libpng-1.6.28]#./configure --prefix=/usr/local/libpng --enable-shared
[root@ssticentos65 libpng-1.6.28]# make
[root@ssticentos65 libpng-1.6.28]# make install
6、 安装freetype
下载地址:http://ring.u-toyama.ac.jp/archives/graphics/freetype/freetype2/
[root@ssticentos65 src]# cd freetype-2.7.1
[root@ssticentos65 freetype-2.7.1]#./configure --prefix=/usr/local/freetype --enable-shared
[root@ssticentos65 freetype-2.7.1]# make
[root@ssticentos65 freetype-2.7.1]# make install
7、 安装jpeg
下载地址:http://www.ijg.org/files/
[root@ssticentos65 src]# cd jpeg-9a
[root@ssticentos65 jpeg-9a]#./configure --prefix=/usr/local/jpeg --enable-shared
[root@ssticentos65 jpeg-9a]# make
[root@ssticentos65 jpeg-9a]# make install
8、 安装libgd
下载地址:https://github.com/libgd/libgd/releases
[root@ssticentos65 src]# cd libgd-2.2.0
[root@ssticentos65 libgd-2.2.0]#./configure --prefix=/usr/local/libgd --enable-shared --with-jpeg=/usr/local/jpeg --with-png=/usr/local/libpng --with-freetype=/usr/local/freetype --with-fontconfig=/usr/local/freetype --with-xpm=/usr/ --with-tiff=/usr/local/tiff --with-webp=/usr/local/libwebp/
[root@ssticentos65 libgd-2.2.0]# make
[root@ssticentos65 libgd-2.2.0]# make install
9、 安装t1lib
下载地址:http://download.csdn.net/download/sunkaivg/9696064
[root@ssticentos65 src]# cd t1lib-5.1.2
[root@ssticentos65 t1lib-5.1.2]#./configure --prefix=/usr/local/t1lib --enable-shared
[root@ssticentos65 t1lib-5.1.2]# make without_doc
[root@ssticentos65 t1lib-5.1.2]# make install
10、 安装php
下载地址 :http://www.php.net/downloads.php
[root@ssticentos65 src]# ls
php-5.6.28 php-5.6.28.tar.gz
[root@ssticentos65 src]# pwd
/usr/local/src
[root@ssticentos65 src]# cd php-5.6.28
[root@ssticentos65 php-5.6.28]#./configure --prefix=/usr/local/php --with-config-file-path=/usr/local/php/etc --with-pdo-mysql=/usr/local/mysql --with-mysqli=/usr/local/mysql/bin/mysql_config --with-mysql-sock=/tmp/mysql.sock --with-pdo-mysql=/usr/local/mysql --with-gd --with-png-dir=/usr/local/libpng --with-jpeg-dir=/usr/local/jpeg --with-freetype-dir=/usr/local/freetype --with-xpm-dir=/usr/ --with-zlib-dir=/usr/local/zlib --with-iconv --enable-libxml --enable-xml --enable-bcmath --enable-shmop --enable-sysvsem --enable-inline-optimization --enable-opcache --enable-mbregex --enable-fpm --enable-mbstring --enable-ftp --enable-gd-native-ttf --with-openssl --enable-pcntl --enable-sockets --with-xmlrpc --enable-zip --enable-soap --without-pear --with-gettext --enable-session --with-mcrypt --with-curl --enable-ctype
[root@ssticentos65 php-5.6.28]# make
[root@ssticentos65 php-5.6.28]# make install
11、配置PHP
#显示php安装包存放路径
[root@ssticentos65 src]# pwd
/usr/local/src
[root@ssticentos65 src]# ls
php-5.6.28 php-5.6.28.tar.gz
[root@ssticentos65 src]# cd php-5.6.28
#复制php配置文件到安装目录
[root@ssticentos65 php-5.6.28]# cp php.ini-production /usr/local/php/etc/php.ini
#删除系统自带配置文件
[root@ssticentos65 php-5.6.28]# rm -rf /etc/php.ini
#添加软链接到 /etc目录
[root@ssticentos65 php-5.6.28]# ln -s /usr/local/php/etc/php.ini /etc/php.ini
[root@ssticentos65 php-5.6.28]# ls -l /etc/php.ini
lrwxrwxrwx 1 root root 26 Jan 6 02:22 /etc/php.ini -> /usr/local/php/etc/php.ini
#复制模板文件为php-fpm配置
[root@ssticentos65 php-5.6.28]# cp /usr/local/php/etc/php-fpm.conf.default /usr/local/php/etc/php-fpm.conf
#添加软件链接到 /etc目录
[root@ssticentos65 php-5.6.28]#ln -s /usr/local/php/etc/php-fpm.conf /etc/php-fpm.conf
#编辑php配置文件php-fpm.conf
[root@ssticentos65 php-5.6.28]# vim /usr/local/php/etc/php-fpm.conf
pid = run/php-fpm.pid //如果这个选项在配置文件存在就取消掉注释使用,如果不存在可以忽略,请勿手动添加,否则PHP启动会报错。
user = www
group = www
:wq! #保存并退出
12、设置php-fpm开机自启动
#复制php-fpm到启动目录
[root@ssticentos65 ~]# cp /usr/local/src/php-5.6.28/sapi/fpm/init.d.php-fpm /etc/init.d/php-fpm
[root@ssticentos65 ~]# ls -l /etc/init.d/php-fpm
-rw-r--r--. 1 root root 2354 Jan 6 02:37 /etc/init.d/php-fpm
#赋予php-fpm执行权限
[root@ssticentos65 ~]# chmod 755 /etc/init.d/php-fpm
[root@ssticentos65 ~]# ls -l /etc/init.d/php-fpm
-rwxr-xr-x. 1 root root 2354 Jan 6 02:37 /etc/init.d/php-fpm
#设置php-fpm开机启动
[root@ssticentos65 ~]# chkconfig php-fpm on
[root@ssticentos65 ~]# chkconfig --list php-fpm
php-fpm 0:off 1:off 2:on 3:on 4:on 5:on 6:off
#编辑php配置文件php.ini
[root@ssticentos65 ~]# vim /usr/local/php/etc/php.ini
找到:disable_functions =
修改成disable_functions= passthru,exec,system,chroot,scandir,chgrp,chown,shell_exec,proc_open,proc_get_status,ini_alter,ini_alter,ini_restore,dl,openlog,syslog,readlink,symlink,popepassthru,stream_socket_server,escapeshellcmd,dll,popen,disk_free_space,checkdnsrr,checkdnsrr,getservbyname,getservbyport,disk_total_space,posix_ctermid,posix_get_last_error,posix_getcwd,posix_getegid,posix_geteuid,posix_getgid,posix_getgrgid,posix_getgrnam,posix_getgroups,posix_getlogin,posix_getpgid,posix_getpgrp,posix_getpid,posix_getppid,posix_getpwnam,posix_getpwuid, posix_getrlimit,posix_getsid,posix_getuid,posix_isatty, posix_kill,posix_mkfifo,posix_setegid,posix_seteuid,posix_setgid, posix_setpgid,posix_setsid,posix_setuid,posix_strerror,posix_times,posix_ttyname,posix_uname
找到:date.timezone =
修改为:date.timezone = PRC #设置时区
找到:expose_php = On
修改为:expose_php = Off #禁止显示php版本的信息
找到:short_open_tag = Off
修改为:short_open_tag = On #支持php短标签
找到opcache.enable=0
修改为opcache.enable=1 #php支持opcode缓存
找到:opcache.enable_cli=1 #php支持opcode缓存
修改为:opcache.enable_cli=0
在最后一行添加:zend_extension=opcache.so #开启opcode缓存功能 (在文本按Shift+G就能跳到最后一行)
:wq! #保存并退出
13、配置nginx支持php
检查www用户和www用户组是否存在,不存在请手动创建
[root@ssticentos65 ~]# cat /etc/passwd | grep www
apache:x:48:48:Apache:/var/www:/sbin/nologin
www:x:501:3005::/home/www:/bin/bash
[root@ssticentos65 ~]# cat /etc/group | grep www
www:x:3005:
[root@ssticentos65 ~]# vim /usr/local/nginx/conf/nginx.conf
user www www;
#首行user去掉注释,修改Nginx运行组为www www;必须与/usr/local/php/etc/php-fpm.d/www.conf中的user,group配置相同,否则php运行出错
location / {
root html;
index index.html index.htm index.php; #添加index.php
}
location ~ \.php$ {
root html;
fastcgi_pass 127.0.0.1:9000;
fastcgi_index index.php;
fastcgi_param SCRIPT_FILENAME $document_root$fastcgi_script_name;
include fastcgi_params;
}
#取消FastCGI server部分location的注释,注意fastcgi_param行的参数,改为$document_root$fastcgi_script_name,或者使用绝对路径
:wq! #保存并退出
#启动nginx服务
[root@ssticentos65 ~]# /etc/init.d/nginx restart
#启动php服务
[root@ssticentos65 ~]# /etc/init.d/php-fpm start
14、测试php配置
#进入nginx默认网站根目录
[root@ssticentos65 ~]# cd /usr/local/nginx/html/
[root@ssticentos65 html]# ls
50x.html index.html
#删除默认测试页
[root@ssticentos65 html]# rm -rf /usr/local/nginx/html/*
[root@ssticentos65 html]# pwd
/usr/local/nginx/html
#新建index.php文件进行测试
[root@ssticentos65 html]# vim index.php
<?php
phpinfo();
?>
:wq! #保存并退出
#设置目录所有者为 www
[root@ssticentos65 html]# chown www.www /usr/local/nginx/html/ -R
#设置目录权限
[root@ssticentos65 html]# chmod 755 /usr/local/nginx/html/ -R
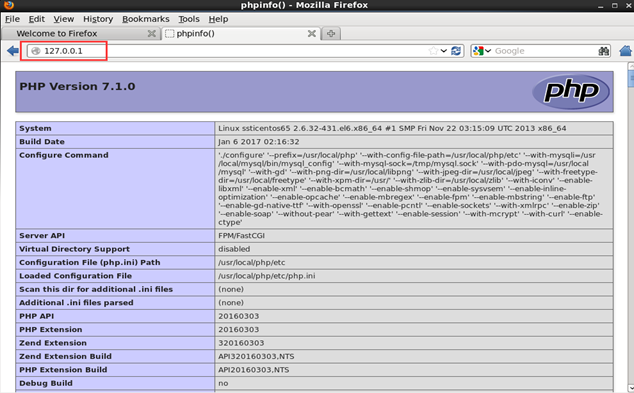
打开浏览器输入服务器IP地址,会看到下面的界面就是php安装成功
在外部访问CentOS中部署应用时,需要关闭防火墙。
关闭防火墙命令:systemctl stop firewalld.service
开启防火墙:systemctl start firewalld.service
关闭开机自启动:systemctl disable firewalld.service
开启开机启动:systemctl enable firewalld.service
Linux安装PHP环境的更多相关文章
- linux 安装 node 环境
本篇学习的分享主要说在linux 安装 node 环境,个人也是在腾讯云的实验室课程学习的,这里只是个人的一个学习记录, 大家也可以去腾讯的实验室来体验一下,教程十分详细易学. 1 .安装 Node. ...
- linux安装maven环境
linux安装maven环境 一. 下载压缩包: 官网地址: http://maven.apache.org/download.cgi 或者百度网盘链接:https://pan.baidu.com/s ...
- Linux 安装nodejs环境以及路径配置
linux安装nodejs有2种方式一种简单的,解压即可用:另一种,通过下载source code ,通过编译,make,make install命令来安装. 这里只讲第一种,简单方便.不需要执行ma ...
- Linux安装python环境脚本
自动安装python环境的脚本 1.首先判断是不是root用户 2.判断是否安装 3.是否下载成功(网络可能有问题) 4.是否解压成功(文件下载可能缺少) 5.安装配置python环境 # codin ...
- Linux 安装Mono环境 运行ASP.NET(一)
1.先看一下Linux环境下面请求的过程,(画的不是很好,简单的了解一下原理.) .NET跨平台其实需要这三个关键:编译器.CLR和基础类库.在.NET下我们编写一个最简单的"Hello W ...
- Linux 安装Mono环境 运行ASP.NET(二)
一.安装libgdiplus 前面我们已经安装了apr.apr_util.pcre和httpd apache .现在我们来安装libgdiplus Libgdiplus是一个Mono库,用于对 ...
- linux安装java环境
在linux下安装JDK如下: 第一步:查看Linux自带的JDK是否已安装 (1)查看已经安装的jdk: [root@web-server ~]# rpm -qa|grep jdk ← 查看jdk的 ...
- Linux安装开发环境,必须配置的环节(Fedora15版本)
前提:U盘安装fedora:<[原]U盘安装Fedora15 DVD镜像>.<Grub引导安装Fedora15> 1.设置代理上网:<fedora 配置网络代理> ...
- 转 linux安装jdk环境(多种方式)
linux系统通用安装通过tar.gz压缩包安装此方法适用于绝大部分的linux系统 1.先下载tar.gz的压缩包,这里使用官网下载. 进入: http://www.oracle.com/techn ...
- linux 安装java环境
1.检查是否安装或者linux系统自带jdK 命令:java -version 查找JDK相关包是否被安装: rpm -qa |grep jdk rpm -qa |grep gcj 删除JDK相关包: ...
随机推荐
- 3.2 符号表之二叉查找树BST
一.插入和查找 1.二叉查找树(Binary Search Tree)是一棵二叉树,并且每个结点都含有一个Comparable的键,保证每个结点的键都大于其左子树中任意结点的键而小于其右子树的任意结点 ...
- springmvc json 数据
这里是controllor层 @RequestMapping("/traceupdatestatus") @ResponseBody public boolean traceupd ...
- MongoDB小结14 - find【查询条件$lt $lte $gt $gte】
$lt $lte $gt $gte 以上四个分别表示为:< . <= . > . >= . 通常的做法是将他们组合起来,以便查找一个范围. 比如,查询年龄在18到25岁(含)的 ...
- 【CV论文阅读】Deep Linear Discriminative Analysis, ICLR, 2016
DeepLDA 并不是把LDA模型整合到了Deep Network,而是利用LDA来指导模型的训练.从实验结果来看,使用DeepLDA模型最后投影的特征也是很discriminative 的,但是很遗 ...
- Android 实现形态各异的双向側滑菜单 自己定义控件来袭
转载请标明出处:http://blog.csdn.net/lmj623565791/article/details/39670935.本文出自:[张鸿洋的博客] 1.概述 关于自己定义控件側滑已经写了 ...
- JSP自己定义标签入门实例具体解释
JSP自己定义标签主要能用到的两个包 javax.servlet.jsp.*;javax.servlet.jsp.tagext.*; 自己定义标签<userInfo:showUserInfo/& ...
- 使用11g DNFS建立基于DNFS的tablespace
使用11g DNFS建立基于DNFS的tablespace 參考自: Step by Step - Configure Direct NFS Client (DNFS) on Linux (11g) ...
- 改动Centosserver主机名称
1.暂时改动server主机名称: hostname myhost. myhost为你指定的主机名称. 2.永久性的改动主机名称 Centosserver安装好之后.默认的主机名为:localhost ...
- SSLStrip 终极版 —— location 瞒天过海
之前介绍了 HTTPS 前端劫持 的方案,尽管非常有趣.然而现实却并不理想. 其唯一.也是最大的缺陷.就是无法阻止脚本跳转.若是没有这个缺陷,那就非常完美了 -- 当然也就没有必要写这篇文章了. 说究 ...
- react jsx 常见问题
问题一: Expected to return a value in arrow function 解决方案: 修改后: // 使用 store return ( <div> <h1 ...