CentOS 6.9 --Squid代理服务器
| 主机名 | IP地址 | 网关 | DNS | 服务类型 |
| Master |
eth0:192.168.17.130(VMnet4) eth1:192.168.30.130(NAT) |
192.168.30.2 | 119.29.29.29 | Squid |
| client | eth0:192.168.17.131(VMnet4) | 192.168.17.131 | 无 |
服务端安装Squid服务
[root@Master ~]# yum install -y squid
配置正向代理,修改配置文件
[root@Master ~]# vim /etc/squid/squid.conf   //添加

acl localdomain src 192.168.30.0/

http_access allow localdomain
这里修改配置文件的第二种方式是
搜索http_access deny all将deny修改为allow,同时注释掉上面添加的两行内容
启动squid服务测试
在客户端测试
只是有点慢,还有不知道为什么打不开百度。
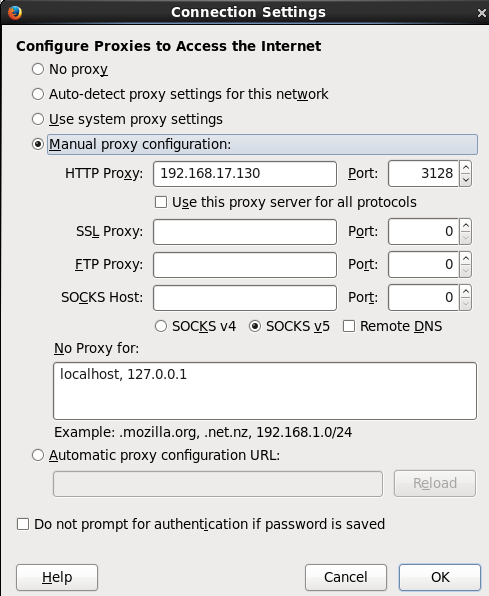
配置透明代理,在正向代理的基础上。
[root@Master ~]# vim /etc/squid/squid.conf

http_port  transparent   #直接搜索http_port 3128然后在行尾加上一个单词即可
开启IPv4地址转发
[root@Master ~]# vim /etc/sysctl.conf

net.ipv4.ip_forward =
使之生效,并配置iptables:
[root@Master ~]# sysctl -p

net.ipv4.ip_forward =

net.ipv4.conf.default.rp_filter =

net.ipv4.conf.default.accept_source_route =

kernel.sysrq =

kernel.core_uses_pid =

net.ipv4.tcp_syncookies =

kernel.msgmnb =

kernel.msgmax =

kernel.shmmax =

kernel.shmall =

[root@Master ~]# service iptables start

iptables: Applying firewall rules:                         [  OK  ]

[root@Master ~]# iptables -t nat -A POSTROUTING -s 192.168.17.0/ -j SNAT --to 1922.168.30.130  //SNAT代理内部上网,将内部的地址全部转化为可以上网的地址 192.168.1.63

[root@Master ~]# iptables -t nat -A PREROUTING -s 192.168.17.0/ -i eth0 -p tcp --dport  -j REDIRECT --to-port 3128 //端口转化,来自192.168.2.0,从eth1且端口为80的数据进行数据重定向到3128,代理服务器为你工作

[root@Master ~]# iptables -L -t nat

Chain PREROUTING (policy ACCEPT)

target     prot opt source               destination

REDIRECT   tcp  --  192.168.17.0/      anywhere            tcp dpt:http redir ports

Chain POSTROUTING (policy ACCEPT)

target     prot opt source               destination

SNAT       all  --  192.168.17.0/      anywhere            to:192.168.30.130

Chain OUTPUT (policy ACCEPT)

target     prot opt source               destination
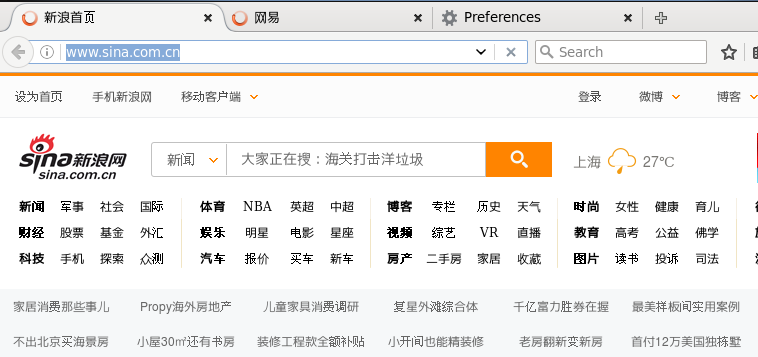
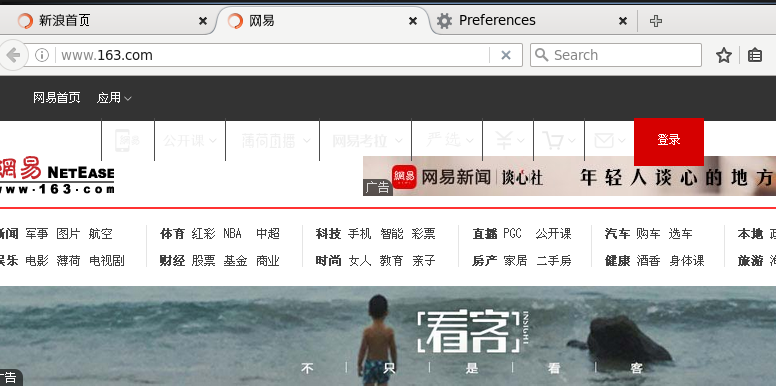
重启squid去客户端测试
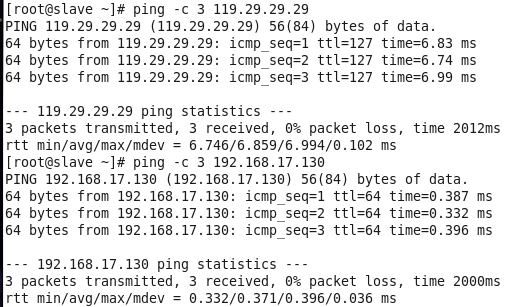
客户端确认DNS和网关都可以ping通
然后测试
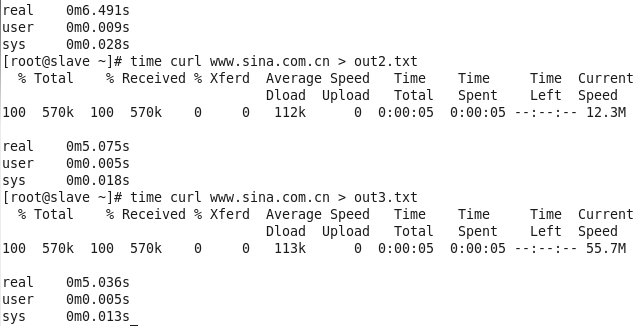
使用curl -I www.sina.com或者time curl www.sina.com
配置反向代理加速
[root@master ~]# vim /etc/squid/squid.conf

http_access  allow all

http_port  vhost #启用虚拟主机

cache_peer 192.168.17.131 parent   no-query originserver weight= name=a

cache_peer 192.168.17.131 parent   no-query originserver weight= name=b

#no-query和originserver指明了服务器,不查询直接到源服务器

#name对前面的定义做了一个别名

cache_peer_domain a www.servera.com #访问www.servera.com将直接访问到上面定义的17.131的80端口

cache_peer_domain b www.serverb.com

cache_peer_access a allow all

cache_peer_access b allow all
重启squid
[root@master ~]# service squid restart

Stopping squid: ................                           [  OK  ]

Starting squid: .                                          [  OK  ]
配置虚拟主机,slave作为httpd的服务端
[root@slave ~]# mkdir /var/www/html/sishen
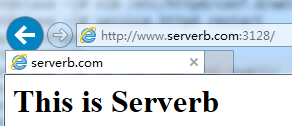
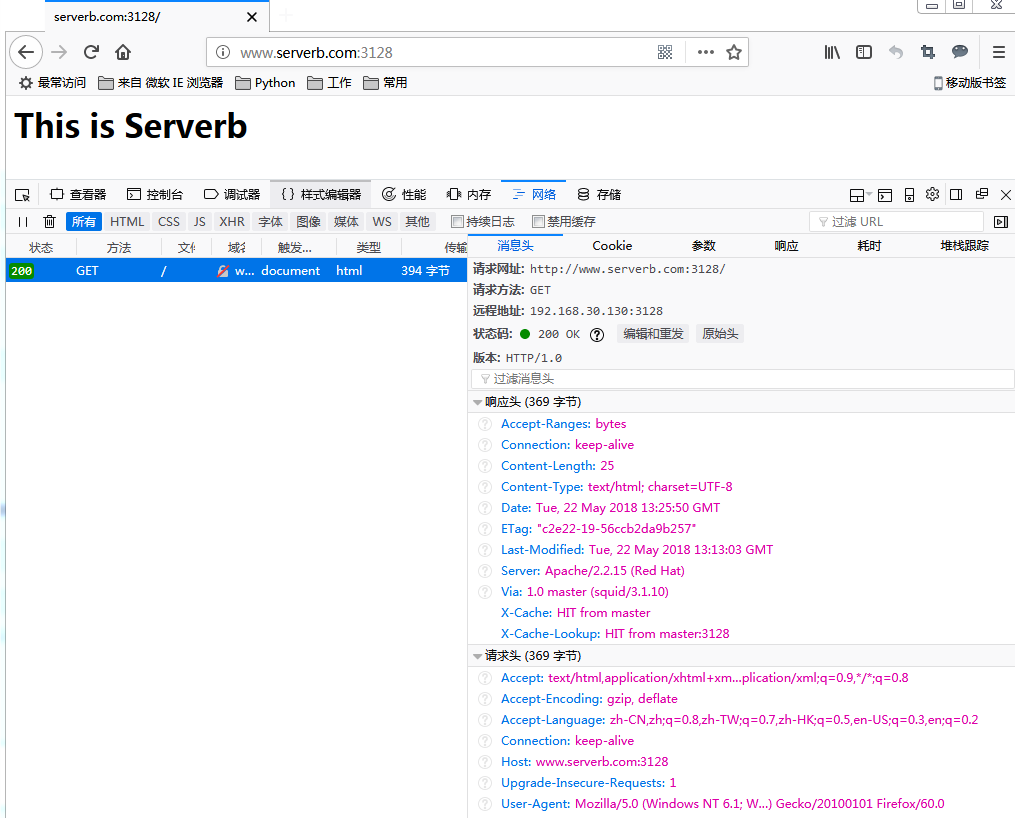
[root@slave ~]# echo "<h1>This is serverb</h1>" > /var/www/html/index.html
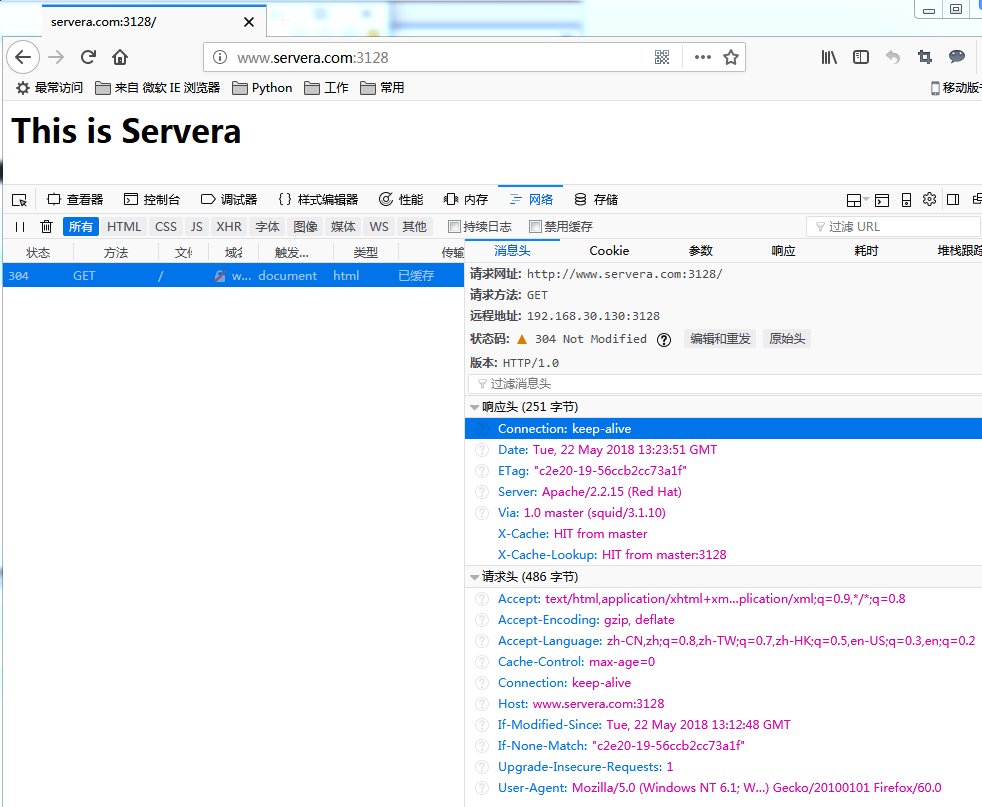
[root@slave ~]# echo "<h1>This is servera</h1>" > /var/www/html/sishen/index.html
[root@slave ~]# vim /etc/httpd/conf/httpd.conf
.......
Listen
Listen
............
<VirtualHost *:>
ServerAdmin webmaster@dummy-host.servera.com
DocumentRoot /var/www/html/sishen
ServerName www.servera.com
ErrorLog logs/dummy-host.servera.com-error_log
CustomLog logs/dummy-host.servera.com-access_log common
</VirtualHost>
<VirtualHost *:>
ServerAdmin webmaster@dummy-host.serverb.com
DocumentRoot /var/www/html
ServerName www.serverb.com
ErrorLog logs/dummy-host.serverb.com-error_log
CustomLog logs/dummy-host.serverb.com-access_log common
</VirtualHost>
修改完成后,重启httpd服务
[root@slave ~]# service httpd restart
Stopping httpd: [ OK ]
Starting httpd: [ OK ]
修改C:\Windows\System32\drivers\etc\hosts文件
末尾添加如下内容:
192.168.30.130 www.servera.com

192.168.30.130 www.serverb.com
使用物理机的IE浏览器访问测试

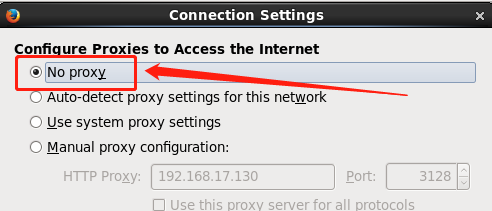
这里我用的Firefox查看的缓存信息,IE出了点问题,通过刷新当前页面可以查看命中缓存信息。
疑问:服务端配置两张网卡,第一次 我的eth0为VMnet4,eth1为NAT;这种情况不能连外网,不知道为什么。第二种情况是将两个顺序颠倒下就可以了。(网关写错了)
CentOS 6.9 --Squid代理服务器的更多相关文章
- CentOS 7安装squid代理服务器
Squid,一个高性能的代理缓存服务器,支持FTP.gopher.HTTP协议. Squid,一个缓存Internet 数据的软件,其接收用户的下载申请(作为代理服务器),并自动处理所下载的数据,并返 ...
- CentOS 7 搭建Squid代理服务器
Squid安装 官方地址:http://www.squid-cache.org/ [root@DaMoWang ~]# -r6d8f397.tar.gz [root@DaMoWang ~]# -r6d ...
- Linux 搭建 squid 代理服务器 三种模式
CentOS 6.7 squid 代理服务器 一般有两张或以上网卡,一张链接公网,访问外网资源,一张位于局域网. 代理服务器可以提供文件缓存.复制和地址过滤等服务,充分利用有限的出口带宽,加快内部主机 ...
- 【转载】CentOS 6.4下Squid代理服务器的安装与配置
一.简介 代理服务器英文全称是Proxy Server,其功能就是代理网络用户去取得网络信息. Squid是一个缓存Internet 数据的软件,其接收用户的下载申请,并自动处理所下载的数据.当一个用 ...
- CentOS 6.4下Squid代理服务器的安装与配置
一.简介 代理服务器英文全称是Proxy Server,其功能就是代理网络用户去取得网络信息. Squid是一个缓存Internet 数据的软件,其接收用户的下载申请,并自动处理所下载的数据.当一个用 ...
- CentOS 6.4下Squid代理服务器的安装与配置,反向代理
CentOS 6.4下Squid代理服务器的安装与配置 一.简介 代理服务器英文全称是Proxy Server,其功能就是代理网络用户去取得网络信息. Squid是一个缓存Internet 数据的软件 ...
- [转]CentOS 6.4下Squid代理服务器的安装与配置
一.简介 代理服务器英文全称是Proxy Server,其功能就是代理网络用户去取得网络信息. Squid是一个缓存Internet 数据的软件,其接收用户的下载申请,并自动处理所下载的数据.当一个用 ...
- CentOS 6.4下Squid代理服务器的安装与配置(转)
add by zhj: 其实我们主要还是关注它在服务器端使用时,充当反向代理和静态数据缓存.至于普通代理和透明代理,其实相当于客户端做的事,和服务端没有什么关系.另外,Squid的缓存主要是缓存在硬盘 ...
- CentOS上使用Squid+Stunnel搭建代理服务器教程
这篇文章主要介绍了CentOS上使用Squid+Stunnel搭建代理服务器教程,同时文中也介绍了用户认证的方法,适合于多用户共同使用代理,这种功能在国内用还是比较exciting的~需要的朋友可以参 ...
随机推荐
- 小程序 swiper banner 图片 居中
var imgUrlApp = getApp().globalData.imgUrlApp; Page({ /** * 页面的初始数据 */ data: { indicatorDots: true, ...
- sdut oj 1510 Contest02-4 Spiral
Contest02-4 Spiral Time Limit: 1000ms Memory limit: 65536K 有疑问?点这里^_^ 题目描述 Given an odd number n, ...
- MYSQL学习拓展一:MySQL 存储过程之游标的使用!
一.MySQL游标的概念 游标介绍: MySQL的游标(cursor)是一个重要的概念,通过查找资料与自己的理解,主要得出以下几点关于自己的理解. 有数据缓冲的思想:游标的设计是一种数据缓冲区的思想, ...
- 西交校赛 F. GZP and Poker
F. GZP and Poker GZP often plays games with his friends.Today they went to a board game.There are n ...
- Vue之组件之间的数据传递
Vue的组件作用域都是孤立的,不允许在子组件的模板内直接引用父组件的数据,必须使用特定的方法才能实现组件之间的数据传递. 下列为在vue-cli创建项目中的操作 一·父组件向子组件传递数据 在Vue中 ...
- 【前端】CentOS 7 系列教程之三: 搭建 git 服务器
转载请注明出处:http://www.cnblogs.com/shamoyuu/p/linux_3.html 上一篇我们安装好了git,这一篇我们搭建git服务器 创建一个用户组 groupadd g ...
- redhat 关机注销命令详解
一.注销,关机,重启 注销系统的logout命令 1,Logout 注销是登陆的相对操作,登陆系统后,若要离开系统,用户只要直接下达logout命令即可: [root@localhost root]# ...
- node安装升级npm
安装npm npm上有很多优秀的nodejs包,来解决常见的一些问题,比如用node-mysql,就可以方便通过nodejs链接到mysql,进行数据库的操作 在开发过程往往会需要用到其他的包,使用n ...
- C#:template
ylbtech-C#: 1.返回顶部 2.返回顶部 3.返回顶部 4.返回顶部 5.返回顶部 6.返回顶部 作者:ylbtech出处:http://ylbtech.cnbl ...
- input type=password 浏览器会自动填充密码的问题
解决办法是在form上或input上添加autoComplete="off"这个属性. form表单的属性如下所示: 但是这个解决方案在谷歌和火狐上均有bug,下面来一个一个解决. ...