Unity3D学习笔记(二十):Rect、Canvas、Toggle、Slider、ScrollBar
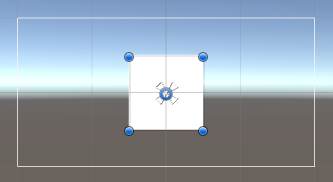


框的显示:快捷键T

代码操作,继承Transform
using System.Collections;
using System.Collections.Generic;
using UnityEngine;
public class UGUI_RectTransform : MonoBehaviour {
public Canvas canvas;
//1、手动拖拽
private RectTransform rt;
// Use this for initialization
void Start () {
//2、获取方式
rt = GetComponent<RectTransform>();
//3、里氏转换原则
rt = transform as RectTransform;
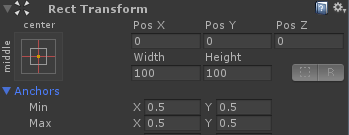
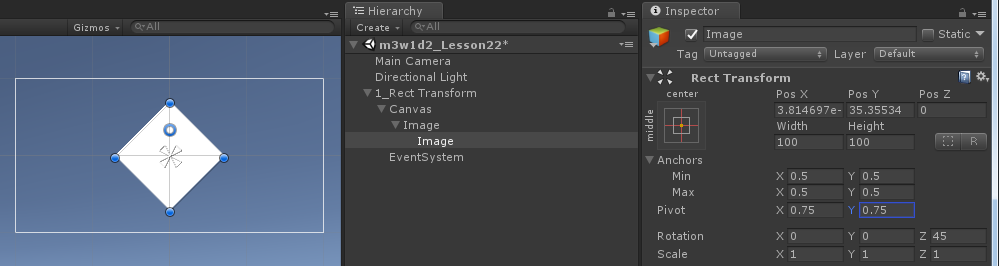
//锚点坐标(物体中心点相对于锚点的坐标)
//rt.anchoredPosition = new Vector2(50, 100);
//世界坐标
//rt.position = Vector3.zero;
//相对于父物体坐标系的坐标, 跟锚点坐标不一样。
//rt.localPosition = new Vector2(50, 100);
//设置物体的宽高。只有四个点在一起组成锚点时使用
//rt.sizeDelta = new Vector2(500, 400);
//设置锚点
//rt.anchorMax = Vector2.one * 0.5f;
//rt.anchorMin = Vector2.one * 0.5f;
//当四个点不在一起组成锚框时
//设置的是Left和Bottom,界面的值就是100, 50
//rt.offsetMin = new Vector2(100, 50);
//设置的是Right和Top,界面的值是设置值的负值 -100 50
//rt.offsetMax = new Vector2(100, 50);
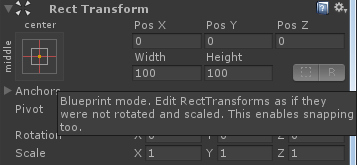
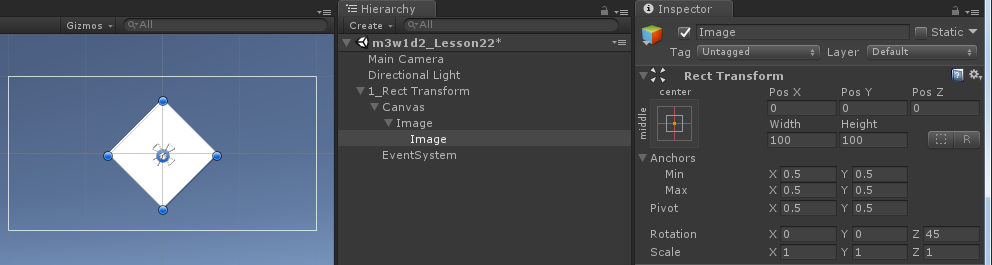
//设置中心点
rt.pivot = Vector2.one;
InstanceImage();
} // Update is called once per frame
void Update () {
//if (Input.GetMouseButton(0))
//{
// rt.anchoredPosition = new Vector2(500, 400);
//}
//if (Input.GetMouseButton(1))
//{
// rt.position = Vector3.zero;
//}
//if (Input.GetMouseButton(2))
//{
// rt.localPosition = new Vector2(50,100);
//}
}
void InstanceImage()//加载图片,默认生成在层级面板的根目录下
{
GameObject prefab = Resources.Load<GameObject>("prefab");
GameObject obj = Instantiate(prefab, canvas.transform);
}
}
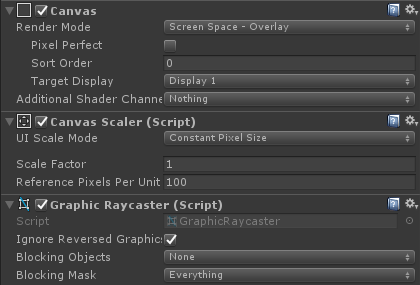
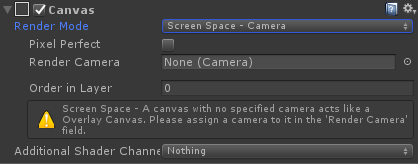
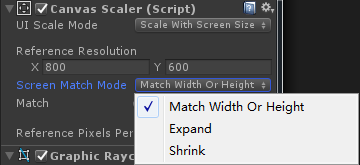
----World Space(世界空间):只有该模式下Canvas的Rect Transorm才能编辑,并且纵深Z值有效了。


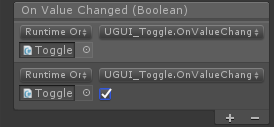

UnityEvent:Invoke方法也需要有一个bool类型的参数
UnityAction:无返回值的泛型委托,参数未指定

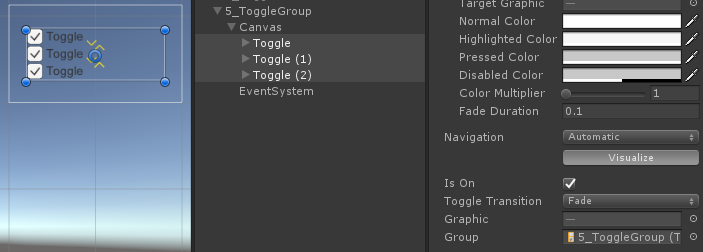
Toggle Group(单选框组):实现一组Toggle的单选效果,只有一个Group内的Toggle才是一个组。


using System.Collections;
using System.Collections.Generic;
using UnityEngine;
using UnityEngine.UI;
public class UGUI_Slider : MonoBehaviour {
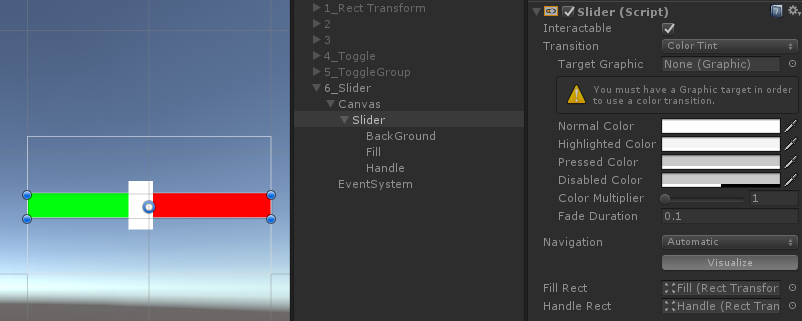
private Slider slider;
private float value = 0f;
// Use this for initialization
void Start () {
slider = GetComponent<Slider>();
//slider.value为实际的值
Debug.Log("Value: " + slider.value);
//slider.normalizedValue为值的百分比
Debug.Log("Value: " + slider.normalizedValue);
slider.value = 0f;
slider.onValueChanged.AddListener(AddValueChanged);
}
// Update is called once per frame
void Update () {
value += Time.deltaTime;
slider.value = value;
}
public void OnValueChanged(float value)
{
Debug.Log("手动添加的value:" + value);
}
private void AddValueChanged(float value)
{
Debug.Log("代码添加的value:" + value);
}
}
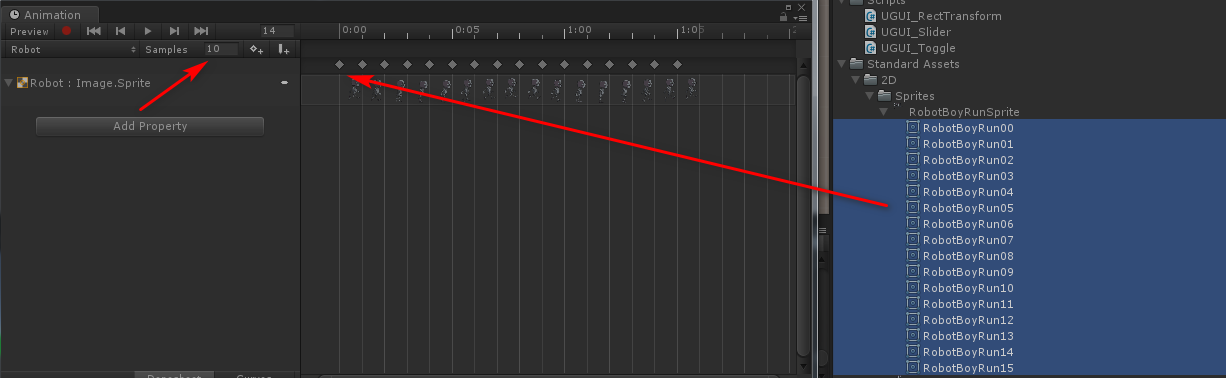
精灵图片批量添加动画:1、全选拖入,2、修改帧数
滑动值改为整数
代码操作
using System.Collections;

using System.Collections.Generic;

using UnityEngine;

using UnityEngine.UI;

public class UGUI_SliderMusic : MonoBehaviour {

    private Slider slider;

    private AudioSource source;

    private void Awake()

    {

        source = gameObject.AddComponent<AudioSource>();

        AudioClip clip = Resources.Load<AudioClip>("OnOff/SingleDog");

        source.clip = clip;

        source.Play();

        slider = GetComponent<Slider>();

        slider.onValueChanged.AddListener(OnValueChanged);

    }

    // Use this for initialization

    void Start () {

        slider.value = ;

    }

       // Update is called once per frame

       void Update () {

        slider.value = ;

    }

    private void OnValueChanged(float value)

    {

        if (value > 0.5f)//打开音乐

        {

            source.volume = ;

        }

        else//关闭音乐

        {

            source.volume = ;

        }

    }

}
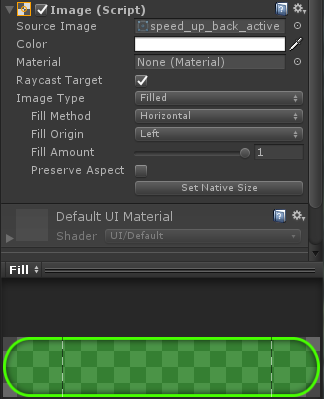
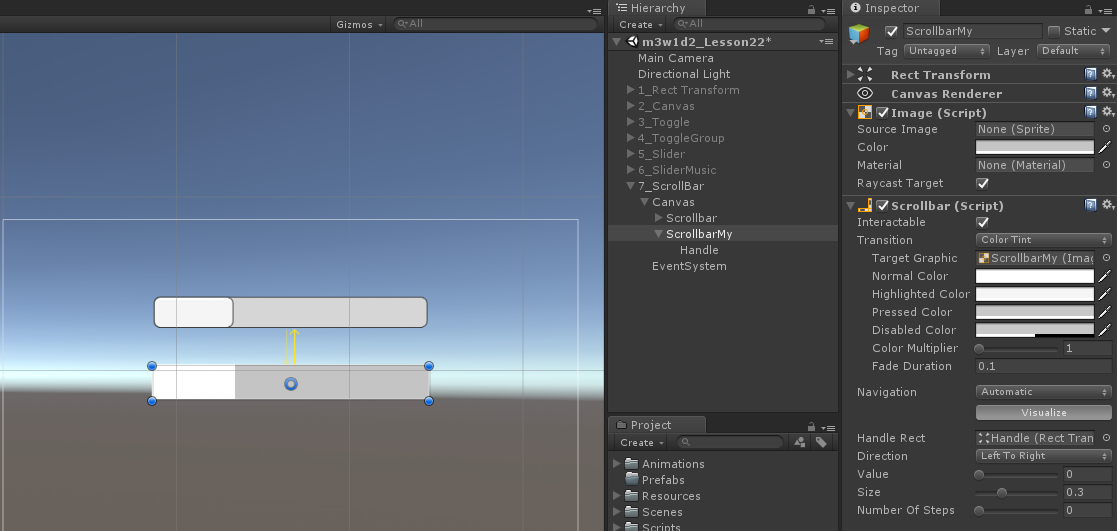
自制滚动条
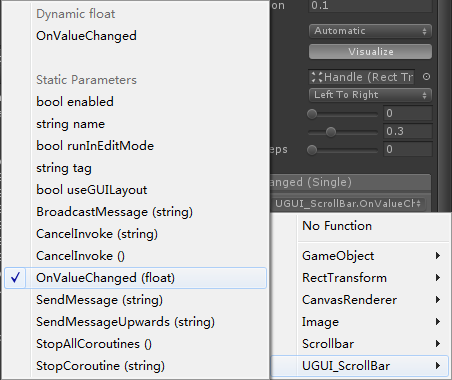
OnValueChanged:可变参数


OnValueChanged(float):固定参数

using System.Collections;

using System.Collections.Generic;

using UnityEngine;

using UnityEngine.UI;

public class UGUI_ScrollBar : MonoBehaviour {

    private Scrollbar bar;

       // Use this for initialization

       void Start () {

        bar = GetComponent<Scrollbar>();

        bar.value = 0.5f;//改变Scrollbar的值

        bar.size = 0.4f;//改变句柄大小

        bar.onValueChanged.AddListener(OnValueChanged);

    }

       // Update is called once per frame

       void Update () {

       }

    public void OnValueChanged(float value)

    {

        Debug.Log("值变了:" + value);

    }

}
using System.Collections;

using System.Collections.Generic;

using UnityEngine;

using UnityEngine.UI;

public class UGUI_ScrollBar_Image : MonoBehaviour {

    private Scrollbar bar;//滚动条

    private RectTransform imageX;//图片

    private float canvasX = 1920f;//画布

    private float offset;//偏移量

    private void Awake()

    {

        //

        //GameObeject.Find();

        //从子物体里寻找物体,参数是路径,并且支持层级结构

        bar = transform.Find("Canvas/Scrollbar").GetComponent<Scrollbar>();

        //通过方法找到物体的transform直接转换成Rect Transform

        imageX = transform.Find("Canvas/Image") as RectTransform;

        bar.onValueChanged.AddListener(OnValueChanged);

    }

    // Use this for initialization

    void Start () {

        // - (图片的宽度 - 画布的宽度)

        offset = canvasX - imageX.sizeDelta.x;

        //当图片宽度小于画布宽度时,滚动条没有意义,不需要显示

        //offset 大于 0 的时候证明图片的宽度小于画布的宽度

        if (offset >= )

        {

            bar.gameObject.SetActive(false);

        }

        else

        {

            bar.gameObject.SetActive(true);

        }

        bar.value = ;

       }

       // Update is called once per frame

       void Update () {

       }

    //当Scroll bar的值改变时,执行的方法

    private void OnValueChanged(float value)

    {

        //根据value的值去改变图片的位置

        float posX = value * offset;

        imageX.anchoredPosition = new Vector2(posX, imageX.anchoredPosition.y);

    }

}


using System.Collections;

using System.Collections.Generic;

using UnityEngine;

using UnityEngine.UI;

public class RectTransformTest : MonoBehaviour

{

    public RectTransform leftImg;   // 设置的是锚点

    public RectTransform rightImg;  // 设置的是锚框

    public RectTransform upImg;     // 设置的是水平锚线

    public RectTransform downImg;   // 设置的是垂直锚线

    void Start()

    {

        // 设置图片的尺寸为 400,300

        // 设置图片的位置为 父物体的中心位置

        // ========================== leftImg 设置的是锚点

        if (leftImg.anchorMin.x == leftImg.anchorMax.x && leftImg.anchorMin.y == leftImg.anchorMax.y)

        {

            // 设置位置

            leftImg.anchoredPosition = Vector2.zero;

            // 设置图片尺寸

            leftImg.sizeDelta = new Vector2(, );

        }

        // ========================== rightImg 设置的是锚框

        if (rightImg.anchorMin.x != rightImg.anchorMax.x && rightImg.anchorMin.y != rightImg.anchorMax.y)

        {

            // 设置位置

            float anchorReferensePointX = ( - rightImg.pivot.x) * rightImg.anchorMin.x + rightImg.pivot.x * rightImg.anchorMax.x;

            float anchorReferensePointY = ( - rightImg.pivot.y) * rightImg.anchorMin.y + rightImg.pivot.y * rightImg.anchorMax.y;

            rightImg.anchoredPosition = rightImg.pivot - new Vector2(anchorReferensePointX, anchorReferensePointY);

            // 设置图片尺寸

            //rightImg.offsetMin = new Vector2(100, 100);

            //rightImg.offsetMax = new Vector2(-100, -100);

            rightImg.sizeDelta = new Vector2(-, -);

            //Debug.Log("RightImg sizeDelta : " + rightImg.sizeDelta);   // sizeDelta = offsetMax - offsetMin; 结果: (-200, -200)

        }

        // ========================== upImg 设置的是水平锚线 (上方)

        if(upImg.anchorMin.y == upImg.anchorMax.y && upImg.anchorMin.x != upImg.anchorMax.x)

        {

            // 设置位置

            float anchorReferensePointX = ( - upImg.pivot.x) * upImg.anchorMin.x + upImg.pivot.x * upImg.anchorMax.x;

            float anchorReferensePointY = ( - upImg.pivot.y) * upImg.anchorMin.y + upImg.pivot.y * upImg.anchorMax.y;

            Vector2 anchorPos = upImg.pivot - new Vector2(anchorReferensePointX, anchorReferensePointY);

            RectTransform parentTrans = upImg.parent as RectTransform;

            anchorPos.y -= parentTrans.rect.height / ;

            upImg.anchoredPosition = anchorPos;

            // 设置图片尺寸

            upImg.offsetMin = new Vector2(, -);

            upImg.offsetMax = new Vector2(-, -);

            //upImg.sizeDelta = new Vector2(-200, 300);

        }

        // ========================== downImg 设置的是垂直锚线 (左方)

        if (downImg.anchorMin.x == downImg.anchorMax.x && downImg.anchorMin.y != downImg.anchorMax.y)

        {

            // 设置位置

            float anchorReferensePointX = ( - downImg.pivot.x) * downImg.anchorMin.x + downImg.pivot.x * downImg.anchorMax.x;

            float anchorReferensePointY = ( - downImg.pivot.y) * downImg.anchorMin.y + downImg.pivot.y * downImg.anchorMax.y;

            Vector2 anchorPos = downImg.pivot - new Vector2(anchorReferensePointX, anchorReferensePointY);

            RectTransform parentTrans = downImg.parent as RectTransform;

            anchorPos.x += parentTrans.rect.width / ;

            downImg.anchoredPosition = anchorPos;

            // 设置图片尺寸

            downImg.offsetMin = new Vector2(, );

            downImg.offsetMax = new Vector2(, -);

            //downImg.sizeDelta = new Vector2(400, -200);

        }

    }

    void Update()

    {

    }

}
补充内容-Unity的委托和事件
using System.Collections;
using System.Collections.Generic;
using UnityEngine;
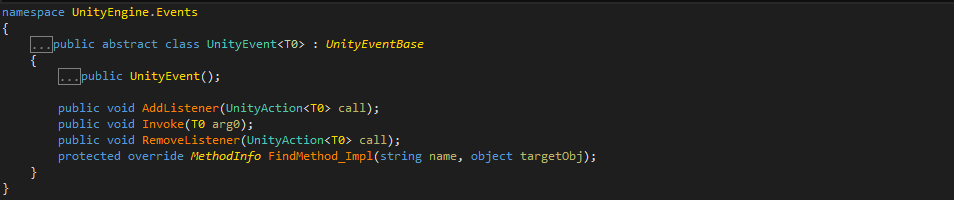
using UnityEngine.Events; // Unity中使用的委托和事件的命名空间
// C#中使用的委托
// using System; // Action、Action<T>、Action<T, A> .....Action<A, B, C, .....> 没有返回值的
// Func<TResult>、Func<T, TResult>、Func<A, B, .... TResult> 有返回值的
// Predicate<T> 有一个参数,返回值是bool类型
// Comparison<T>(T x, T y) 返回值是int型
public class UnityEventTest : MonoBehaviour
{
public UnityAction myAction;
public UnityEvent myEvent1; // 可以在检视面板中显示 用法同UI
public MyEvent2 myEvent2;
void Start()
{
#region Unity中提供的委托
// 没有返回值 没有参数 相当于C#中的 Action
UnityAction del1 = delegate ()
{
Debug.Log("delegate");
};
del1 += () => { Debug.Log("Lambda"); };
del1 += Fun1;
del1();
UnityAction<int> del2 = delegate (int num) { Debug.Log(num); };
// 有参的匿名委托,Unity委托中参数的个数最多4个
UnityAction<int, int, int, int> del3 = (a, b, c, d) => { Debug.Log(a + b + c + d); };
#endregion
#region Unity中的事件
UnityEvent myEvent = new UnityEvent();
// 注册方法
myEvent.AddListener(
() =>
{
Debug.Log("这是Unity中的事件");
}
);
myEvent.AddListener(Fun1);
// 取消注册
myEvent.RemoveListener(Fun1);
myEvent.RemoveAllListeners();//无返回值无参数的事件,匿名委托只能用RemoveAllListeners();
// 调用
myEvent.Invoke();
// Unity中有参数的事件 需要自己写一个类去继承 UnityEvent<T> 参数个数:最多4个
// 通过自己的类去创建对象
MyEvent2 myEvent2 = new MyEvent2();
// 注册和取消注册同上
// 调用
myEvent2.Invoke();
#endregion
}
void Update()
{
}
public void Fun1()
{
}
}
public class MyEvent2 : UnityEvent<int> { }
public class MyEvent3 : UnityEvent<int, float, bool, string> { }
Unity3D学习笔记(二十):Rect、Canvas、Toggle、Slider、ScrollBar的更多相关文章
- python3.4学习笔记(二十六) Python 输出json到文件,让json.dumps输出中文 实例代码
python3.4学习笔记(二十六) Python 输出json到文件,让json.dumps输出中文 实例代码 python的json.dumps方法默认会输出成这种格式"\u535a\u ...
- python3.4学习笔记(二十五) Python 调用mysql redis实例代码
python3.4学习笔记(二十五) Python 调用mysql redis实例代码 #coding: utf-8 __author__ = 'zdz8207' #python2.7 import ...
- python3.4学习笔记(二十四) Python pycharm window安装redis MySQL-python相关方法
python3.4学习笔记(二十四) Python pycharm window安装redis MySQL-python相关方法window安装redis,下载Redis的压缩包https://git ...
- python3.4学习笔记(二十二) python 在字符串里面插入指定分割符,将list中的字符转为数字
python3.4学习笔记(二十二) python 在字符串里面插入指定分割符,将list中的字符转为数字在字符串里面插入指定分割符的方法,先把字符串变成list然后用join方法变成字符串str=' ...
- python3.4学习笔记(二十) python strip()函数 去空格\n\r\t函数的用法
python3.4学习笔记(二十) python strip()函数 去空格\n\r\t函数的用法 在Python中字符串处理函数里有三个去空格(包括'\n', '\r', '\t', ' ')的函数 ...
- (C/C++学习笔记) 二十四. 知识补充
二十四. 知识补充 ● 子类调用父类构造函数 ※ 为什么子类要调用父类的构造函数? 因为子类继承父类,会继承到父类中的数据,所以子类在进行对象初始化时,先调用父类的构造函数,这就是子类的实例化过程. ...
- (C/C++学习笔记) 二十二. 标准模板库
二十二. 标准模板库 ● STL基本介绍 标准模板库(STL, standard template library): C++提供的大量的函数模板(通用算法)和类模板. ※ 为什么我们一般不需要自己写 ...
- (C/C++学习笔记) 二十. 文件和流
二十. 文件和流 ● 文件的概念 文件(file) 一. C/C++语言将文件作为字节序列(sequence of characters)来对待,但从编码角度,或说从对字节信息的解释来看,文件分为:文 ...
- Unity3D学习笔记(十二):2D模式和异步资源加载
2D模式和3D模式区别:背景纯色,摄像机2D,没有深度轴 精灵图片设置 Normal map,法线贴图,更有立体感 Sprite (2D and UI),2D精灵贴图,有两种用途 1.当做UI贴图 2 ...
- Java基础学习笔记二十五 MySQL
MySQL 在dos中操作mysql 连接mysql命令: mysql -uroot -p密码 ,连接OK,会出现mysql> 对数据库的操作 创建一个库 create database 库名 ...
随机推荐
- kettle中源和目标表结构不一致的情况处理
创建数据仓库的过程中,往往会遇到这样的问题,例如:源表由于业务原因新增了字段,而ETL程序中是按照之前的源表结构进行抽取的,那么如果不重新构建ETL程序,新的指标就不会流入DW,问题如下图所示 创建了 ...
- 14 jmeter性能测试实战--数据库MySQL
需求 测试用户表(对用户表select操作) 测试步骤 1.MySQL驱动下载并安装. 2.测试计划面板点击“浏览”按钮,将JDBC驱动(mysql-connector-java.jar)添加进来. ...
- vue.js常用的
<input v-model.number="age" type="number"> //自动将用户的输入值转为数值类型 <input v-m ...
- 智能指针 - 现代C++新特性总结
C++98中的智能指针通过一个模板类auto_ptr来实现,new操作符返回的指针可以交由它来管理,程序员不用再显式的调用delete,这在一定程度上避免了堆内存忘记释放的问题:不过auto_ptr有 ...
- vue使用resource传参数
<!DOCTYPE html> <html lang="en"> <head> <meta charset="UTF-8&quo ...
- Docker 后台进程参数-------更改Docker运行根目录的方法
参数 介绍 --api-enable-cors=false 远程API调用. -b, --bridge="" 桥接一个系统上的网桥设备到 Docker 容器里,当使用 none 可 ...
- Saving Princess claire_(hdu 4308 bfs模板题)
http://acm.hdu.edu.cn/showproblem.php?pid=4308 Saving Princess claire_ Time Limit: 2000/1000 MS (Jav ...
- Andrew Ng-ML-第十三章-支持向量机
1.从代价函数谈起SVM 图一 根据将y=0||y=1,得到逻辑回归的代价函数,那么SVM和其代价函数是相似的,只不过是引入了cost0与cost1,并且自变量使用了theta_T*x(i),并且由于 ...
- VS中出现“链接器工具错误,XXX工具模块对于SAFESEH映像是不安全的”的解决方法
1.“调试”菜单->“属性”->“配置属性”->“链接器”->“命令行” 2.在“其它选项”的输入框里输入 /SAFESEH:NO ,点击“应用”
- sql server数字转字符串出现科学计数法
在从excel往sql server导入数据,电话.编号等数字呈现float类型,然后向b表中insert后(phone为nvarchar)出现科学计数法,解决方法:需将float等数据类型转为标准的 ...