springboot整合mybatis的多数据源解决办法
最近项目有一个非解决不可的问题,我们的项目中的用户表是用的自己库的数据,但是这些数据都是从一个已有库中迁过来的,所以用户信息都是在那个项目里面维护,自然而然我们项目不提供用户注册功能,这就有个问题,如何解决数据迁移的问题,总不能我每次都手动导数据吧,所以我决心写一个接口把那个库中的用户信息同步我们的库中去。
这又涉及到一个问题,如何在一个服务中连接两个库,在网上搜索了一番,算是把问题解决了,现将多数据源demo代码贴出来,先看一下我的目录结构
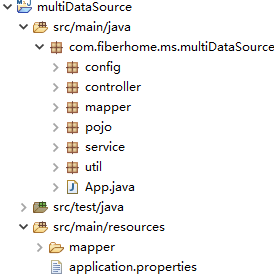
controller、mapper、pojo、service这几个常见的业务逻辑包我们放到最后看,先看一下util包里面的类
DatabaseType
/**

 * 采用枚举的方法列出所有的数据源key(常用数据库名称来命名)

 * 数据源个数和数据库个数保持一致

 */

public enum DatabaseType {

    mytestdb,mytestdb2

}
这里就是列出所有的数据源,相当于定义了两个常量,便于统一维护
DynamicDataSource
import org.springframework.jdbc.datasource.lookup.AbstractRoutingDataSource;

/**

 * 动态数据源(需要继承AbstractRoutingDataSource)

 */

public class DynamicDataSource extends AbstractRoutingDataSource {

    //定义一个线程安全的DatabaseType容器

    private static final ThreadLocal<DatabaseType> contextHolder = new ThreadLocal<DatabaseType>();

    public static DatabaseType getDatabaseType(){

        return contextHolder.get();

    }

    public static void setDatabaseType(DatabaseType type) {

        contextHolder.set(type);

    }

    //获取当前线程的DatabaseType

    protected Object determineCurrentLookupKey() {

      return getDatabaseType();

  }

}
在这里创建一个动态数据源的类,定义了DatabaseType的get和set方法,用getDatabaseType()获得一个当前线程的DatabaseType来重写determineCurrentLookupKey()方法。
最后来看一下config包下面的类
MybatisConfig
import java.util.HashMap;

import java.util.Map;

import java.util.Properties;

import javax.sql.DataSource;

import org.apache.ibatis.session.SqlSessionFactory;

import org.mybatis.spring.SqlSessionFactoryBean;

import org.springframework.beans.factory.annotation.Qualifier;

import org.springframework.context.EnvironmentAware;

import org.springframework.context.annotation.Bean;

import org.springframework.context.annotation.Configuration;

import org.springframework.context.annotation.Primary;

import org.springframework.core.env.Environment;

import org.springframework.core.io.support.PathMatchingResourcePatternResolver;

import org.springframework.jdbc.datasource.DataSourceTransactionManager;

import com.alibaba.druid.pool.DruidDataSourceFactory;

import com.fiberhome.ms.multiDataSource.util.DatabaseType;

import com.fiberhome.ms.multiDataSource.util.DynamicDataSource;

/**

 * springboot集成mybatis的基本入口

 * 1) 获取数据源

 * 2)创建数据源

 * 3)创建SqlSessionFactory

 * 4)配置事务管理器,除非需要使用事务,否则不用配置

 */

@Configuration

public class MybatisConfig implements EnvironmentAware {

    private Environment environment;

    public void setEnvironment(final Environment environment) {

        this.environment = environment;

    }

    /**

     * 创建数据源,从配置文件中获取数据源信息

     */

    @Bean

    public DataSource testDataSource() throws Exception {

        Properties props = new Properties();

        props.put("driverClassName", environment.getProperty("jdbc.driverClassName"));

        props.put("url", environment.getProperty("jdbc.url"));

        props.put("username", environment.getProperty("jdbc.username"));

        props.put("password", environment.getProperty("jdbc.password"));

        return DruidDataSourceFactory.createDataSource(props);

    }

    @Bean

    public DataSource test1DataSource() throws Exception {

        Properties props = new Properties();

        props.put("driverClassName", environment.getProperty("jdbc2.driverClassName"));

        props.put("url", environment.getProperty("jdbc2.url"));

        props.put("username", environment.getProperty("jdbc2.username"));

        props.put("password", environment.getProperty("jdbc2.password"));

        return DruidDataSourceFactory.createDataSource(props);

    }

    /**注入数据源

     */

    @Bean

    public DynamicDataSource dataSource(@Qualifier("testDataSource")DataSource testDataSource, @Qualifier("test1DataSource")DataSource test1DataSource) {

        Map<Object, Object> targetDataSources = new HashMap<Object, Object>();

        targetDataSources.put(DatabaseType.mytestdb, testDataSource);

        targetDataSources.put(DatabaseType.mytestdb2, test1DataSource);

        DynamicDataSource dataSource = new DynamicDataSource();

        dataSource.setTargetDataSources(targetDataSources);// 该方法是AbstractRoutingDataSource的方法

        dataSource.setDefaultTargetDataSource(testDataSource);// 默认的datasource设置为myTestDbDataSource

        return dataSource;

    }

    /**

     * 根据数据源创建SqlSessionFactory

     */

    @Bean

    public SqlSessionFactory sqlSessionFactory(@Qualifier("testDataSource") DataSource testDataSource,

                                               @Qualifier("test1DataSource") DataSource test1DataSource) throws Exception{

      PathMatchingResourcePatternResolver resolver = new PathMatchingResourcePatternResolver();

      SqlSessionFactoryBean fb = new SqlSessionFactoryBean();

        fb.setDataSource(this.dataSource(testDataSource, test1DataSource));

        fb.setTypeAliasesPackage("com.fiberhome.ms.multiDataSource");// 指定基包

        fb.setMapperLocations(resolver.getResources("classpath:mapper/*.xml"));//

        return fb.getObject();

    }

    /**

     * 配置事务管理器

     */

    @Bean

    public DataSourceTransactionManager testTransactionManager(DynamicDataSource dataSource) throws Exception {

        return new DataSourceTransactionManager(dataSource);

    }

}
上面这段代码在创建数据源DataSource实例时采用的是@bean注解注入的方式,使其成为受spring管理的bean。在后面的方法把两个DataSource作为参数传入,可以看到用了@Qualifier注解,加这个注解是为了解决多个实例无法直接装配的问题,在这里有两个DataSource类型的实例,需要指定名称装配。
还有数据源配置文件
application.properties
#the first datasource

jdbc.driverClassName = com.mysql.jdbc.Driver

jdbc.url = jdbc:mysql://localhost:3306/test?useUnicode=true&characterEncoding=UTF-8

jdbc.username = root

jdbc.password = 123456

#the second datasource

jdbc2.driverClassName = com.mysql.jdbc.Driver

jdbc2.url = jdbc:mysql://localhost:3306/test1?useUnicode=true&characterEncoding=UTF-8

jdbc2.username = root

jdbc2.password = 123456
说完了关键的通用代码,再来看看如何在业务代码中使用
UserServiceImpl
import com.fiberhome.ms.multiDataSource.mapper.UserMapper;

import com.fiberhome.ms.multiDataSource.pojo.User;

import com.fiberhome.ms.multiDataSource.service.UserService;

import com.fiberhome.ms.multiDataSource.util.DatabaseType;

import com.fiberhome.ms.multiDataSource.util.DynamicDataSource;

@Service

public class UserServiceImpl implements UserService {

  @Autowired

  private UserMapper userMapper;

  @Override

  public List<User> getTestUser() {

    //设置数据源

    DynamicDataSource.setDatabaseType(DatabaseType.mytestdb);

    return userMapper.findUser();

  }

  @Override

  public List<User> getTest1User() {

    //设置数据源

    DynamicDataSource.setDatabaseType(DatabaseType.mytestdb2);

    return userMapper.findUser();

  }

}
在service层的实现类中设置数据源即可指定哪个mapper接口使用哪个数据源,这样就OK了。剩下的业务代码很简单就不贴了。。。
springboot整合mybatis的多数据源解决办法的更多相关文章
- SpringBoot整合Mybatis之项目结构、数据源
已经有好些日子没有总结了,不是变懒了,而是我一直在奋力学习springboot的路上,现在也算是完成了第一阶段的学习,今天给各位总结总结. 之前在网上找过不少关于springboot的教程,都是一些比 ...
- SpringBoot系列七:SpringBoot 整合 MyBatis(配置 druid 数据源、配置 MyBatis、事务控制、druid 监控)
1.概念:SpringBoot 整合 MyBatis 2.背景 SpringBoot 得到最终效果是一个简化到极致的 WEB 开发,但是只要牵扯到 WEB 开发,就绝对不可能缺少数据层操作,所有的开发 ...
- SpringBoot整合Mybatis多数据源 (AOP+注解)
SpringBoot整合Mybatis多数据源 (AOP+注解) 1.pom.xml文件(开发用的JDK 10) <?xml version="1.0" encoding=& ...
- SpringBoot进阶教程 | 第四篇:整合Mybatis实现多数据源
这篇文章主要介绍,通过Spring Boot整合Mybatis后如何实现在一个工程中实现多数据源.同时可实现读写分离. 准备工作 环境: windows jdk 8 maven 3.0 IDEA 创建 ...
- springboot整合mybatis时无法读取xml文件解决方法(必读)
转 http://baijiahao.baidu.com/s?id=1588136004120071836&wfr=spider&for=pc 在springboot整合myba ...
- 三、SpringBoot 整合mybatis 多数据源以及分库分表
前言 说实话,这章本来不打算讲的,因为配置多数据源的网上有很多类似的教程.但是最近因为项目要用到分库分表,所以让我研究一下看怎么实现.我想着上一篇博客讲了多环境的配置,不同的环境调用不同的数据库,那接 ...
- 【springboot spring mybatis】看我怎么将springboot与spring整合mybatis与druid数据源
目录 概述 1.mybatis 2.druid 壹:spring整合 2.jdbc.properties 3.mybatis-config.xml 二:java代码 1.mapper 2.servic ...
- SpringBoot整合mybatis、shiro、redis实现基于数据库的细粒度动态权限管理系统实例
1.前言 本文主要介绍使用SpringBoot与shiro实现基于数据库的细粒度动态权限管理系统实例. 使用技术:SpringBoot.mybatis.shiro.thymeleaf.pagehelp ...
- SpringBoot整合MyBatisPlus配置动态数据源
目录 SpringBoot整合MyBatisPlus配置动态数据源 SpringBoot整合MyBatisPlus配置动态数据源 推文:2018开源中国最受欢迎的中国软件MyBatis-Plus My ...
随机推荐
- LeetCode专题-Python实现之第1题:Two Sum
导航页-LeetCode专题-Python实现 相关代码已经上传到github:https://github.com/exploitht/leetcode-python 文中代码为了不动官网提供的初始 ...
- 超详细“零”基础kafka入门篇
1.认识kafka 1.1 kafka简介 Kafka 是一个分布式流媒体平台 kafka官网:http://kafka.apache.org/ (1)流媒体平台有三个关键功能: 发布和订阅记录流,类 ...
- 痞子衡嵌入式:常用的数据差错控制技术(1)- 重复校验(Repetition Code)
大家好,我是痞子衡,是正经搞技术的痞子.今天痞子衡给大家讲的是嵌入式里数据差错控制技术-重复校验. 在嵌入式应用里,除了最核心的数据处理外,我们还会经常和数据传输打交道.数据传输需要硬件传输接口的支持 ...
- 第36章 扩展授权 - Identity Server 4 中文文档(v1.0.0)
OAuth 2.0为令牌端点定义了标准授权类型,例如password,authorization_code和refresh_token.扩展授权是一种添加对非标准令牌颁发方案(如令牌转换,委派或自定义 ...
- Camera测试之Color & Lens shading Test
测试目的:测试摄像头成像的均匀性 测试主要设备:均匀光源(DNP灯箱),色温照度计 测试环境:将灯箱光源调至600±100lux 测试注意事项:保证均匀的光源 测试原理: 造成摄像头成像不均匀的原因有 ...
- Sqlserver UrlEncode
Sqlserver UrlEncode if exists (select * from dbo.sysobjects where id = object_id(N'[dbo].[UrlEncode ...
- Java开发笔记(三十三)字符包装类型
正如整型int有对应的包装整型Integer那样,字符型char也有对应的包装字符型Character.初始化字符包装变量也有三种方式,分别是:直接用等号赋值.调用包装类型的valueOf方法.使用关 ...
- 利用jQuery动态设置单选框的选中
一.需要实现的效果 这里使用jQuery来实现.需要实现的效果如下:当下拉条改变时,单选框选中的值随之变化. <!DOCTYPE html> <html> <head&g ...
- 为什么要学习Java虚拟机
为什么要学习Java虚拟机? 为什么要学习JVM? 学习Java虚拟机有什么好处? 这些问题就好像在问Java程序猿:你为什么要变强大! C++程序编译后可直接运行于物理机CPU上.而Java程序则不 ...
- vue HTTP 请求(vue-resource)
来自:https://www.cnblogs.com/lhl66/p/8022423.html 侵删 //初始化页面需要做什么事情 //点击后需要做什么事情 //鼠标.键盘.冒泡.默认行为等事件 // ...