
android-基础编程-ListView
ListView主要包括view和数据源。其数据适配器列表分为三种,ArrayAdapter,SimpleAdapter和SimpleCursorAdapter。
ListView的没有oom原因。经典图:
1.democoderjoy中使用,这里我们新建一个ListViewActi的activity。布局文件listview比较简单
<LinearLayout xmlns:android="http://schemas.android.com/apk/res/android"

    android:orientation="vertical" android:layout_width="match_parent"

    android:layout_height="match_parent">

    <ListView android:layout_width="wrap_content"

        android:layout_height="wrap_content"

        android:id="@+id/ListView01"

        android:layout_weight="1"

        />

    <ListView android:layout_width="wrap_content"

        android:layout_height="wrap_content"

        android:id="@+id/list_view"

        android:layout_weight="1"

        android:stackFromBottom="true"

        android:background="@drawable/icon"

        android:scrollbars="none"

        />

</LinearLayout>
2.此外还需要一个item项
<?xml version="1.0" encoding="utf-8"?>

<RelativeLayout xmlns:android="http://schemas.android.com/apk/res/android"

    android:layout_width="match_parent"

    android:layout_height="match_parent">

d

        <ImageView

            android:layout_width="wrap_content"

            android:layout_height="wrap_content"

            android:id="@+id/imageView"

            android:layout_alignParentRight="true"

            />

        <TextView

            android:layout_width="match_parent"

            android:layout_height="40dp"

            android:textSize="20dp"

            android:text="New Text"

            android:id="@+id/textView01"

             />

        <TextView

            android:layout_width="match_parent"

            android:layout_height="wrap_content"

            android:text="New Text"

            android:id="@+id/textView02"

            android:layout_below="@+id/textView01"

            />

</RelativeLayout>
3.arrayAdapter的使用采用布局的第二个listview id
核心代码:
ArrayAdapter<String> adapter=new ArrayAdapter<String>(

                this,R.layout.simple_list_item_1,

                mData);

        ListView listView=(ListView) findViewById(R.id.list_view);

        listView.setAdapter(adapter);
4.simpleAdater使用
ListView list = (ListView) findViewById(R.id.ListView01);

        ArrayList<HashMap<String, Object>> listItem = new ArrayList<HashMap<String, Object>>();

        for(int i=0;i<10;i++)

        {

            HashMap<String, Object> map = new HashMap<String, Object>();

            map.put("ItemImage", R.drawable.icon);//图像资源的ID

            map.put("ItemTitle", "Level "+i);

            map.put("ItemText", "Finished in 1 Min 54 Secs, 70 Moves! ");

            listItem.add(map);

        }

        SimpleAdapter listItemAdapter = new SimpleAdapter(this,listItem,//数据源

                R.layout.listview_item,//ListItem的XML实现

                //动态数组与ImageItem对应的子项

                new String[] {"ItemImage","ItemTitle", "ItemText"},

                //ImageItem的XML文件里面的一个ImageView,两个TextView ID

                new int[] {R.id.imageView,R.id.textView01,R.id.textView02}

        );

        View view = LayoutInflater.from(this).inflate(R.layout.head_view_layout, null);

        list.addHeaderView(view, null, true);

        list.setOverscrollHeader(getResources().getDrawable(R.drawable.icon));

        list.addFooterView(view);

        list.setHeaderDividersEnabled(true);

        list.setFooterDividersEnabled(true);

        list.setDescendantFocusability(ViewGroup.FOCUS_BLOCK_DESCENDANTS);

        list.setAdapter(listItemAdapter);

        //list.setOverScrollMode(View.OVER_SCROLL_NEVER);

        //view.setVisibility(View.GONE);

        //添加点击

        list.setOnItemClickListener(new AdapterView.OnItemClickListener() {

            @Override

            public void onItemClick(AdapterView<?> arg0, View arg1, int arg2,

                                    long arg3) {

                setTitle("点击第"+arg2+"个项目");

                Toast.makeText(getApplicationContext(),"点击第"+arg2+"个项目",Toast.LENGTH_SHORT).show();

            }

        });

        SimpleCursorAdapter d;

        //添加长按点击 响应餐单

        list.setOnCreateContextMenuListener(new View.OnCreateContextMenuListener() {

            @Override

            public void onCreateContextMenu(ContextMenu menu, View v, ContextMenu.ContextMenuInfo menuInfo) {

                menu.setHeaderTitle("长按菜单-ContextMenu");

                menu.add(0, 0, 0, "弹出长按菜单0");

                menu.add(0, 1, 0, "弹出长按菜单1");

            }

        });
5.效果如下:
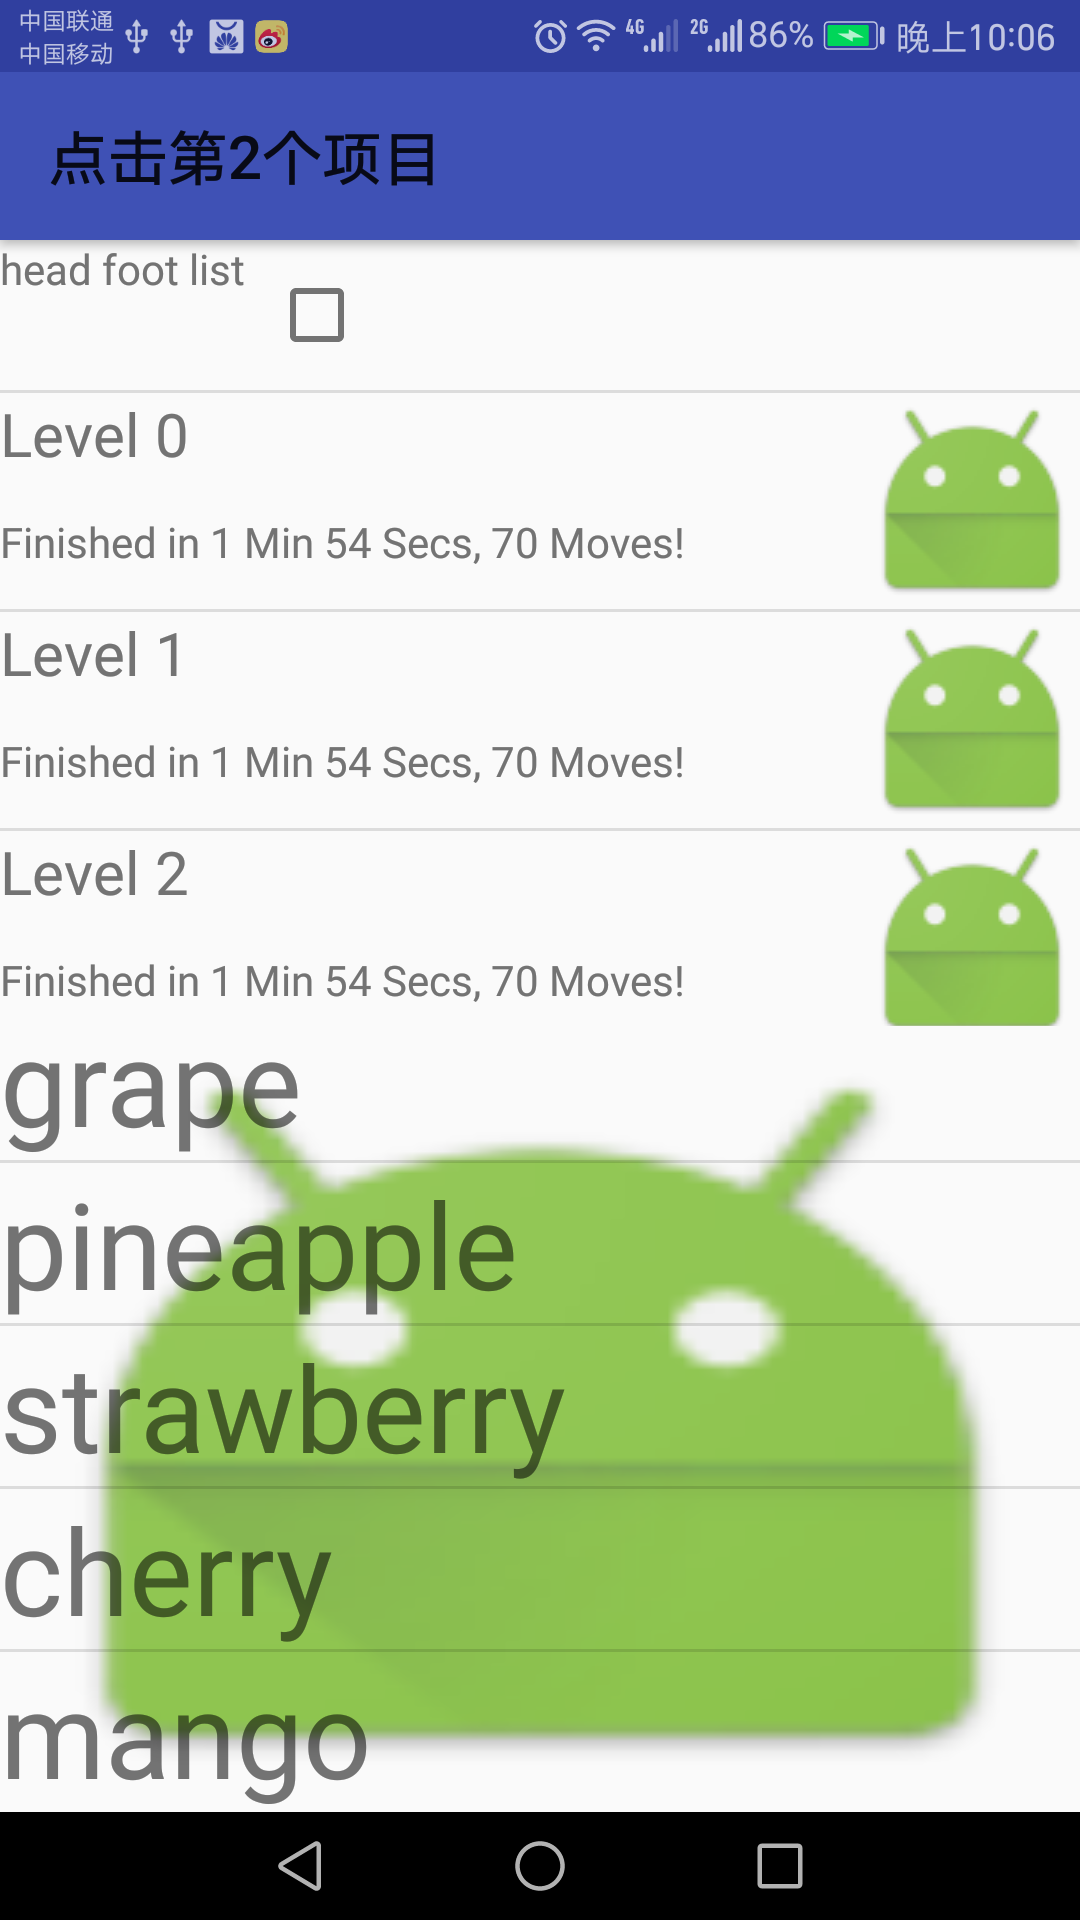
Tips:
a. footerDividersEnabled:是否在footerView(表尾)前绘制一个分隔条,默认为true
headerDividersEnabled:是否在headerView(表头)前绘制一个分隔条,默认为true
b. listview可以在布局中设置背景
c. listview具有headview 和footview 如程序中所使用的,
list.addHeaderView(view, null, true);

        list.setOverscrollHeader(getResources().getDrawable(R.drawable.icon));

list.addFooterView(view);
使用的子view的布局如下:
<?xml version="1.0" encoding="utf-8"?>

<LinearLayout xmlns:android="http://schemas.android.com/apk/res/android"

    android:layout_width="match_parent"

    android:layout_height="match_parent"

    android:orientation="horizontal" >

    <TextView

        android:layout_width="match_parent"

        android:layout_height="50dp"

        android:text="head foot list"/>

<CheckBox

    android:id="@+id/group_selection_all"

    android:layout_width="40dip"

    android:layout_height="40dip"

    android:layout_gravity="center_vertical"

    android:layout_marginLeft="8dip"

    android:layout_marginRight="0dip"

    android:focusable="false"

    android:clickable="true"

    android:gravity="center"

    android:scaleType="centerInside"/>

</LinearLayout>
d.设置从底向上排列参数 布局中定义stackFromBottom
android-基础编程-ListView的更多相关文章
- 【Android基础】listview控件的使用(4)-----自定义布局的listview的使用
前面我介绍了listview控件的不同用法,但是这些用法在实际的开发项目中是不足以满足需求的,因为前面的几种用法只能简单的显示文本信息,而且布局都比较单一,很难做出复杂的结果,在实际的开发项目中,90 ...
- 【Android基础】listview控件的使用(2)-------继承自ListActivity的普通listview
由于listview在android控件中的重要性,所以android为我们直接封装了一个类ListviewActivity,直接将listview封装在了activity之中,在本篇中,我将介绍在L ...
- 【Android基础】listview控件的使用(1)------最简单的listview的使用
listview控件是项目开发中最常用的空间之一,我将慢慢推出关于listview的一系列的文章,先从最简单的,系统自带的listview开始吧! 先上效果图: activity_one.xml &l ...
- Android基础TOP7_1:ListView制作列表
结构: Activity: activity_main: <RelativeLayout xmlns:android="http://schemas.android.com/apk/r ...
- 【Android基础】listview控件的使用(3)------Map与SimpleAdapter组成的多显示条目的Listview
前面介绍的两种listview的使用都是最基础的,所以有很大的局限性,比如只能在一个item(即每一行的条目)中显示一个文本信息,这一篇我将介绍Map与SimpleAdapter组成的多显示条目的Li ...
- Android基础控件ListView基础操作
1.简介 基于Android基础控件ListView和自定义BaseAdapter适配器情况下,对ListView的数据删除和添加操作: public boolean add(E e) {//添加数据 ...
- android: 多线程编程基础
9.1 服务是什么 服务(Service)是 Android 中实现程序后台运行的解决方案,它非常适合用于去执行那 些不需要和用户交互而且还要求长期运行的任务.服务的运行不依赖于任何用户界面,即使 ...
- Android网络编程基础
Android网络编程只TCP通信 TCP 服务器端工作的主要步骤如下.步骤1 调用ServerSocket(int port)创建一个ServerSocket,并绑定到指定端口上.步骤2 调用acc ...
- <Android基础>(三) UI开发 Part 2 ListView
ListView 1)ListView的简单用法 2)定制ListView界面 3)提升ListView的运行效率 4)ListView的点击事件 3.5 ListView 3.5.1 ListVie ...
- 安卓Android基础第三天——数据库,ListView
数据库介绍sqlite问:什么情况下使用数据库?答:有大量相似结构的数据需要存储的时候 数据库的创建定义一个类继承SqliteOpenHelpercontext:上下文name:数据库名字,如&quo ...
随机推荐
- git diff 分支1 分支2 --stat命令没有将所有的不同显示出来
昨天遇到使用git diff 分支1 分支2 --stat命令时打印的文件修改列表,并不全,导致找了一下午的问题没有找到...特此记录,显示不全的原因我还没有找到,特此记录.
- Oracle_PL/SQL(8) 动态sql
动态sql0.pl/sql块的限制 不能执行ddl操作(create.drop.alter): 不能执行部分dcl操作(grant.revoke). 1.语法动态sql:在执行时才能确定要执行的sql ...
- Eclipse中logcat过滤器的使用
logcat里信息繁多,用过滤器可以方便快捷的找到我们要查找的信息. 我们可以在打开Eclipse之后,选择Window –> Show View ->Other菜单,然后在Android ...
- 1F - A+B for Input-Output Practice (III)
Your task is to Calculate a + b. Input Input contains multiple test cases. Each test case contains a ...
- ES6 Symbol的应用场景
一.简介 具体使用请参考:API ES6 引入了一种新的原始数据类型Symbol,表示独一无二的值.它是 JavaScript 语言的第七种数据类型,前六种是:undefined.null.布尔值(B ...
- linux使用笔记4
运行已经安装好的软件: cd到这个软件的安装目录 输入命令/:./软件名称 就可以了 运行geoserver 1.首先需要添加JAVA_HOME的环境变量: 在服务器没有设置JAVA_HOME的情况下 ...
- 英国BBC出的这套中国风海报,设计美哭了!
“中国风”在国际上已经不是“小众”了 之前分享过好莱坞电影的中国风海报 没想到国外的电视剧也看上了中国市场 没错就是英国BBC的最长寿科幻剧—— <神秘博士Doctor Who> 前段时间 ...
- insert执行错误,怎么样获取具体的错误原因
1.开启debug 2.去runtime里面去找最后执行的SQL
- b2c项目访问
http://xmpw.testbase.smi170.com:8091/member/movie_coupon_new.php
- Spring Boot学习笔记:传统maven项目与采用spring boot项目区别
项目结构区别 传统的maven构建的项目结构如下: 用maven构建的采用springboot项目结构如下: 二者结构一致,区别如下:传统项目如果需要打成war包,需要在WEB-INF目录结构配置we ...