
SpringMvc配置详解
在此做一个对Mvc的复习,便于以后快速复习mvc配置。
开发环境 :
IDe :iDEA
JDK:1.8
使用的框架技术:Mybtais ,Spring,Spring MVC 数据源选用Dbcp
首先贴上我们的项目结构,很简单的一个Demo层次分明
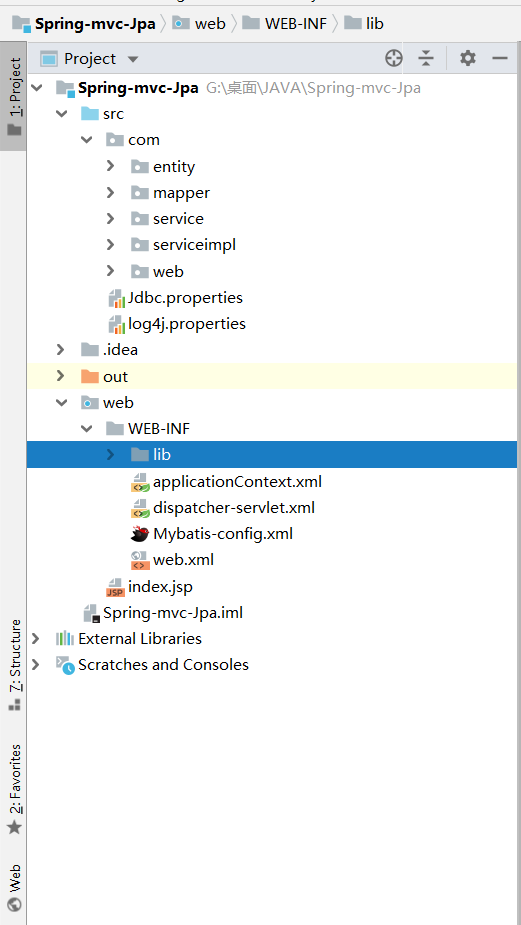
当我们使用IDea创建Spring MVC项目时Idea会自动为我们加入Web组件 我们可以看到我们的配置文件并没有像myeclipse一样在Src下 ,IDea默认给我们的配置文件放到了Web/web-inf文件夹下
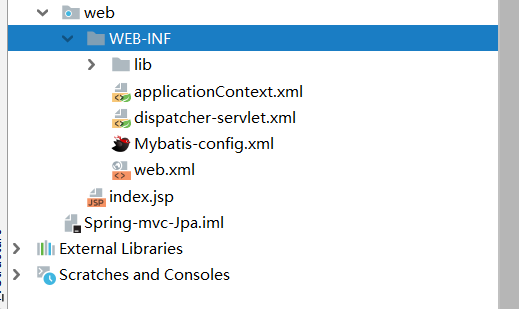
上面这些JAr是我们自己导入的,让我们来看一下

以下的Jar包为Idea自动为我们下载并且添加到项目中的,在这里不多做阐述
按照Mvc的流程来说项目对应实体结构如下
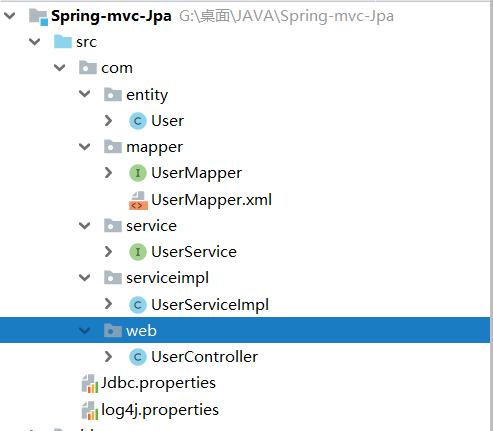
我们在entity包中创建我们与数据库相连接,并且指定对应表内字段的一一对应。
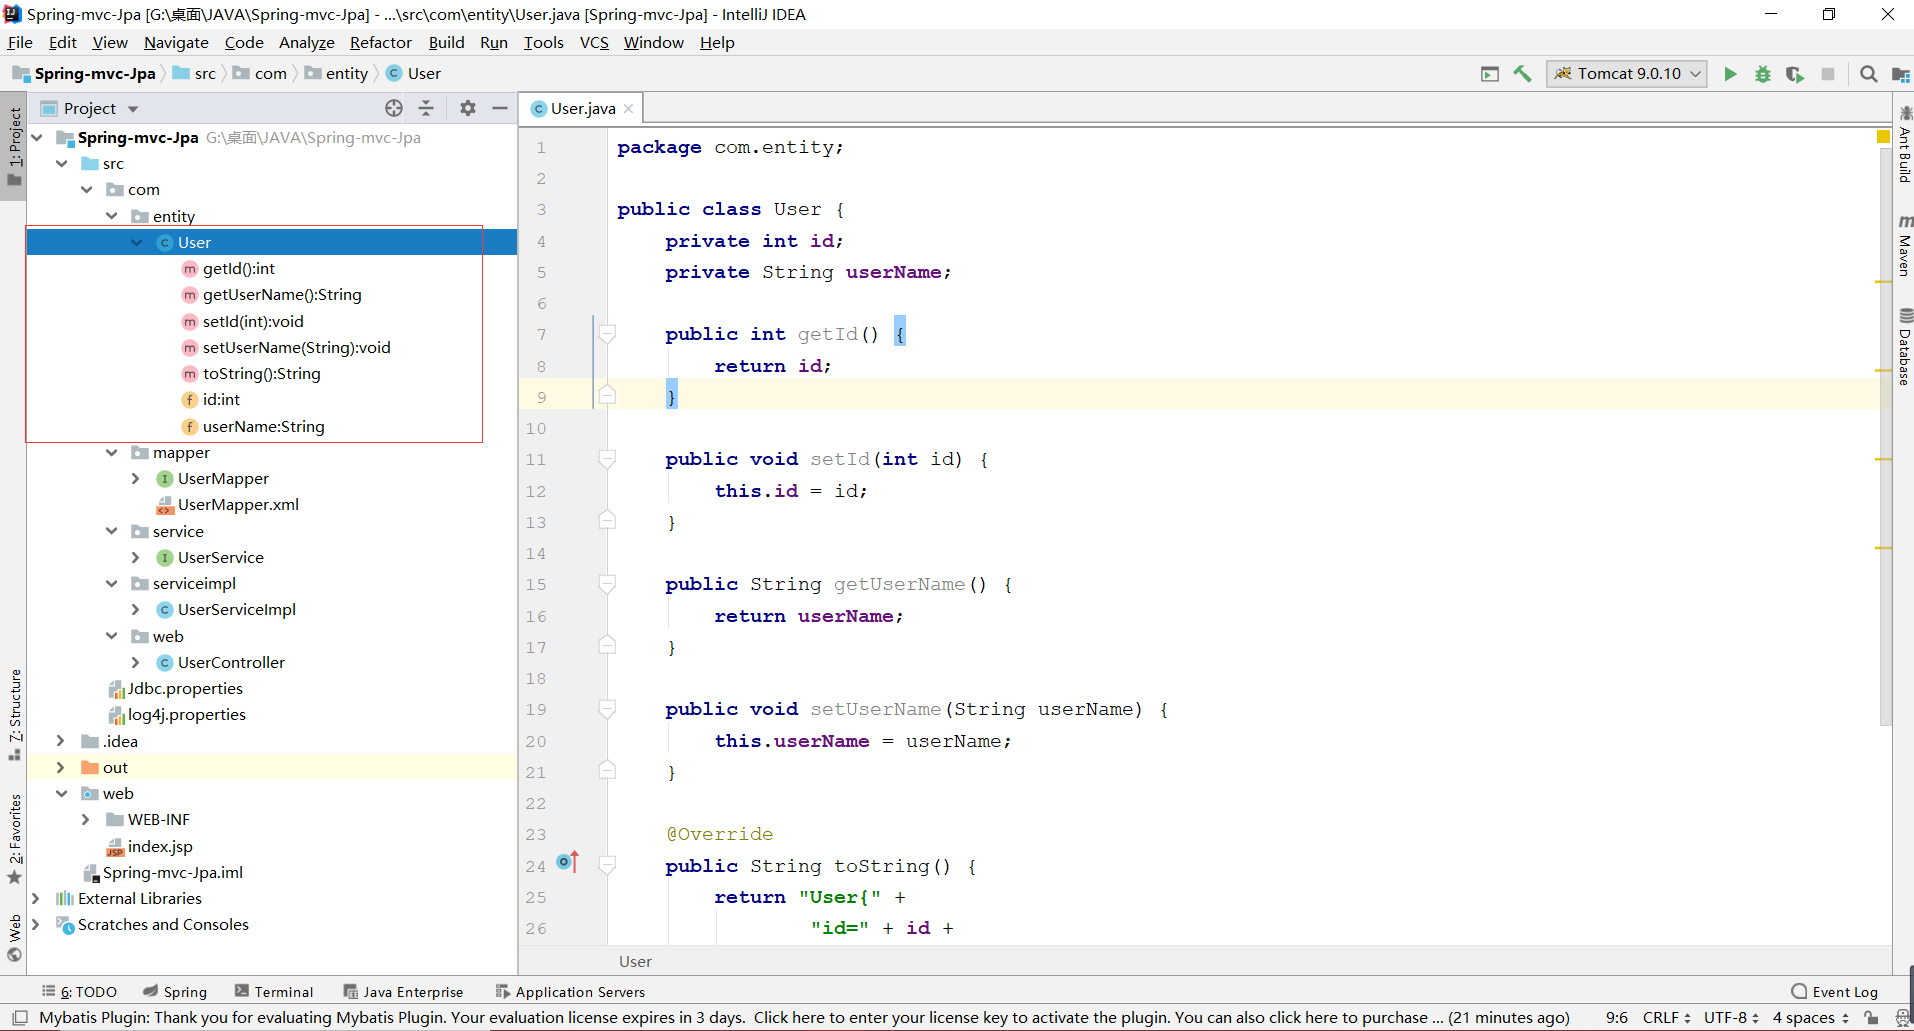
数据库字段如下
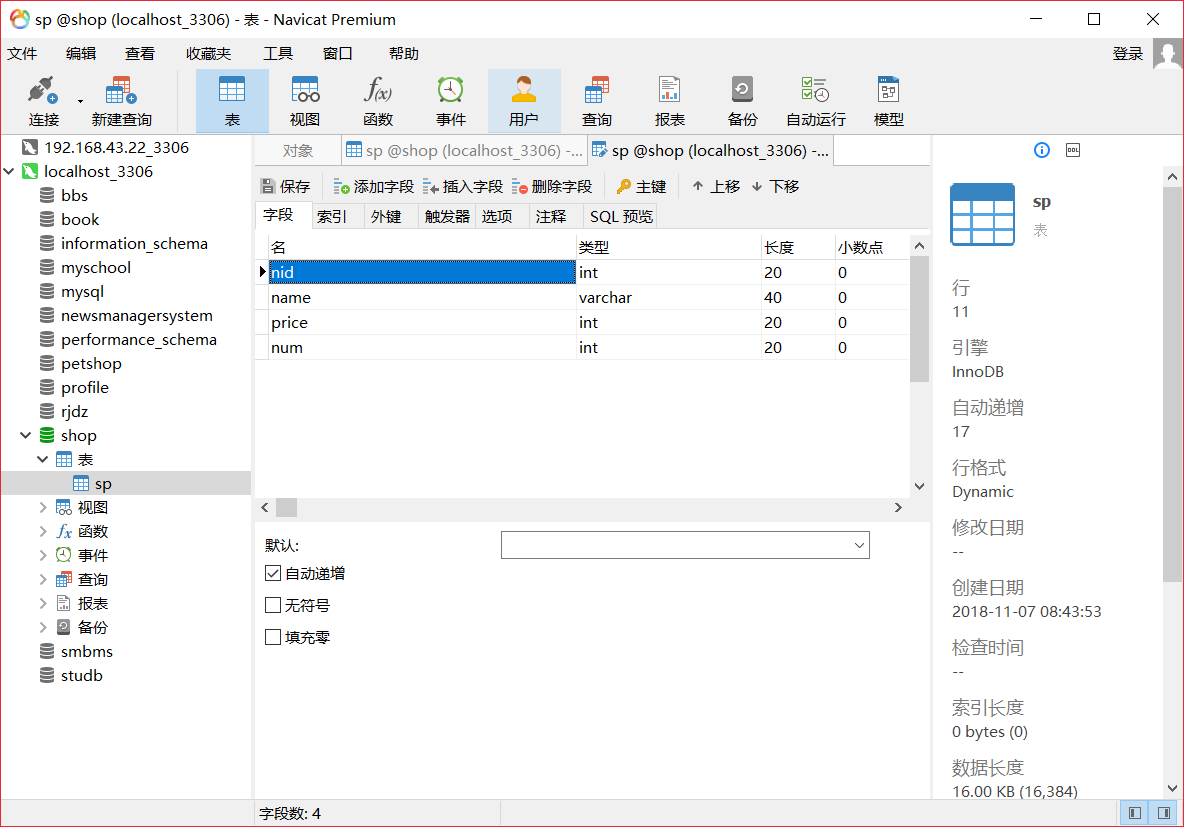
通常的执行流程为:Serviceimpl调用和对应Mapper 来实现对数据库的增删改查等一系列功能
这里演示了一个简单的查询全部,并且使用 El 和JStl将查询的数据显示到JSp页面上,
Mapper
 package com.mapper;

 import com.entity.User;

 import org.springframework.stereotype.Repository;

 import java.util.List;

 @Repository

 public interface UserMapper {

  与下面对应Mapper中的Id向对应

     List<User> cxall();

 }
于是便引入今天的第一个配置,对对应Mapper的操作映射
<?xml version="1.0" encoding="UTF-8"?>

<!DOCTYPE mapper PUBLIC "http://mybatis.org/dtd/mybatis-3-mapper.dtd" "mybatis-3-mapper.dtd" >

引入对对应Mapper操作的命名空间,来告诉Mybatis 我们要对哪一个Mapper执行什么样的操作

<mapper namespace="com.mapper.UserMapper">
简单查询,id对应Mapper中的查询方法名, 返回结果集也是一个User类型的

    <select id="cxall" resultType="User">

        select * from smbms_user

    </select>

</mapper>
Service:
 package com.service;

 import com.entity.User;

 import org.springframework.stereotype.Repository;

 import java.util.List;

 public interface UserService {

     List<User> cxall();

 }
以及Service的实现:
package com.serviceimpl;

import com.entity.User;

import com.mapper.UserMapper;

import com.service.UserService;

import org.springframework.beans.factory.annotation.Autowired;

import org.springframework.stereotype.Service;

import java.util.List;

@Service

public class UserServiceImpl implements UserService {
  使用自动注入将UserMapper注入到当前Service的实现中,调用其方法

    @Autowired

    private UserMapper userMapper;

    @Override

    public List<User> cxall() {

        return userMapper.cxall();

    }

}
controller:
 package com.web;

 import com.alibaba.fastjson.JSON;

 import com.entity.User;

 import com.service.UserService;

 import org.springframework.beans.factory.annotation.Autowired;

 import org.springframework.stereotype.Controller;

 import org.springframework.web.bind.annotation.RequestMapping;

 import org.springframework.web.bind.annotation.ResponseBody;

 import java.util.List;

 @RequestMapping("/user")

 @Controller

 public class UserController {
  注入Service 调用其子类的实现     @Autowired

     private UserService userService;


  结果返回页面的Json格式乱码的问题

     @RequestMapping(value = "/cx.do",produces = {"text/javascript;charset=UTF-8"})

     @ResponseBody

     public String cx(){

         List<User> cxall = userService.cxall();

         String JSon= JSON.toJSONString(cxall);

         return JSon;

     }

 }
如上便是这个小Demo的经典三层实现,下面我们来说说为什么通过这么简单的操作就可以达到我们所要的效果呢?
首先我们来看一下我们的Jdbc配置文件
jdbc.properties
 jdbc.driver=com.mysql.jdbc.Driver

 jdbc.uri=jdbc:mysql://localhost\:3306/smbms?useUnicode\=true&characterEncoding\=utf8

 jdbc.name=root

 jdbc.pwd=1234
Log4J.properties
log4j.rootLogger=debug, stdout,logfile

log4j.appender.stdout=org.apache.log4j.ConsoleAppender

log4j.appender.stdout.Target=System.err

log4j.appender.stdout.layout=org.apache.log4j.SimpleLayout

log4j.appender.logfile=org.apache.log4j.FileAppender

log4j.appender.logfile.File=jbit.log

log4j.appender.logfile.layout=org.apache.log4j.PatternLayout

log4j.appender.logfile.layout.ConversionPattern=%d{yyyy-MM-dd HH:mm:ss}%l %F %p %m%n

org.apache.jasper.servlet.TldScanner.level = FINE
重点在下面,我们看一下Idea自动在为我们配置了什么,我们想当这个项目启动的时候,就自动为启动我们SpringMvc的组件,那么我们这个Demo是一个Web工程,并不需要对应的Main方法之类,那我们究竟改怎么做呢?
我们来看一下Web.xml文件
<?xml version="1.0" encoding="UTF-8"?>

<web-app xmlns="http://xmlns.jcp.org/xml/ns/javaee"

         xmlns:xsi="http://www.w3.org/2001/XMLSchema-instance"

         xsi:schemaLocation="http://xmlns.jcp.org/xml/ns/javaee http://xmlns.jcp.org/xml/ns/javaee/web-app_4_0.xsd"

         version="4.0">

    配置上下文参数,在项目启动的时候自动加载Spring的配置文件

    <context-param>

        <param-name>contextConfigLocation</param-name>

        <param-value>/WEB-INF/applicationContext.xml</param-value>

    </context-param>

    同理,自动加载Mvc配置文件,加载位置是在Web/web-inf/文件夹下,通常我们在Myeclipse中的配置文件是在Src下 ,这里不要搞混淆

    <context-param>

        <param-name>spring</param-name>

        <param-value>/WEB-INF/dispatcher-servlet.xml</param-value>

    </context-param>
    配置过滤器

    <filter>

        <filter-name>filter</filter-name>

        <filter-class>org.springframework.web.filter.CharacterEncodingFilter</filter-class>

        <init-param>

            <param-name>encoding</param-name>

            <param-value>UTF-8</param-value>

        </init-param>

    </filter>

    <filter-mapping>

        <filter-name>filter</filter-name>

        <url-pattern>/*</url-pattern>

    </filter-mapping>
   配置了监听器

    <listener>

        <listener-class>org.springframework.web.context.ContextLoaderListener</listener-class>

    </listener>

    配置了前端控制器

    <servlet>

        <servlet-name>dispatcher</servlet-name>

        <servlet-class>org.springframework.web.servlet.DispatcherServlet</servlet-class>

        <load-on-startup>1</load-on-startup>

    </servlet>

     对所有访问为.do的访问进行拦截处理

    <servlet-mapping>

        <servlet-name>dispatcher</servlet-name>

        <url-pattern>*.do</url-pattern>

    </servlet-mapping>

</web-app>
Spring配置文件
 <?xml version="1.0" encoding="UTF-8"?>

 <beans xmlns="http://www.springframework.org/schema/beans"

        xmlns:xsi="http://www.w3.org/2001/XMLSchema-instance"

        xmlns:context="http://www.springframework.org/schema/context"

        xsi:schemaLocation="http://www.springframework.org/schema/beans

         http://www.springframework.org/schema/beans/spring-beans.xsd

          http://www.springframework.org/schema/context

           http://www.springframework.org/schema/context/spring-context.xsd">

        加载类路径下的Jdbc配置文件

     <context:property-placeholder location="classpath:Jdbc.properties"></context:property-placeholder>


      配置Dbcp数据源

     <bean id="dataSource" class="org.apache.commons.dbcp2.BasicDataSource">

         <property name="driverClassName" value="${jdbc.driver}"></property>

         <property name="url" value="${jdbc.uri}"></property>

         <property name="username" value="${jdbc.name}"></property>

         <property name="password" value="${jdbc.pwd}"></property>

     </bean>

       配置SqlsessionFactory用来创建Sqlsession

     <bean id="SqlSessionFactory" class="org.mybatis.spring.SqlSessionFactoryBean">

     <property name="dataSource" ref="dataSource"></property>
    对该包下的实体类起别名  不需要用全类名的方法要标记

     <property name="typeAliasesPackage" value="com.entity"></property>
      扫描对应的Mapper.xml  需要引入的Mapper.Xml

         <property name="mapperLocations">

             <list>

                 <value>classpath*:com/mapper/UserMapper.xml</value>

             </list>

         </property>

     </bean>

       配置Mapper扫描,对指定mAooer包下的的Mapper生成对应的实现,并且注入Spring容器

     <bean class="org.mybatis.spring.mapper.MapperScannerConfigurer">

         <property name="basePackage" value="com.mapper"></property>

     </bean>

 </beans>
mvc配置:
 <?xml version="1.0" encoding="UTF-8"?>

 <beans xmlns="http://www.springframework.org/schema/beans"

        xmlns:xsi="http://www.w3.org/2001/XMLSchema-instance"

        xmlns:context="http://www.springframework.org/schema/context"

        xmlns:mvc="http://www.springframework.org/schema/mvc"

        xsi:schemaLocation="http://www.springframework.org/schema/beans
 http://www.springframework.org/schema/beans/spring-beans.xsd
 http://www.springframework.org/schema/cache
 http://www.springframework.org/schema/cache/spring-cache.xsd
 http://www.springframework.org/schema/context
 http://www.springframework.org/schema/context/spring-context.xsd
 http://www.springframework.org/schema/mvc http://www.springframework.org/schema/mvc/spring-mvc.xsd">

     <!--mvc自动配置-->

     <mvc:annotation-driven/>
     扫描对应文件夹下的所有类 开启注解

     <context:component-scan base-package="com"></context:component-scan>

     <!-- 视图解析器 -->

     <bean class="org.springframework.web.servlet.view.InternalResourceViewResolver">

         <property name="viewClass" value="org.springframework.web.servlet.view.JstlView"/>

         <property name="prefix" value="/"/>

         <property name="suffix" value=".jsp"/>

     </bean>

 </beans>
上述有一点需要注意的是:在我们开启Mvc配置的时候一定要导入Mvc的命名空间,
实例:
项目运行测试:
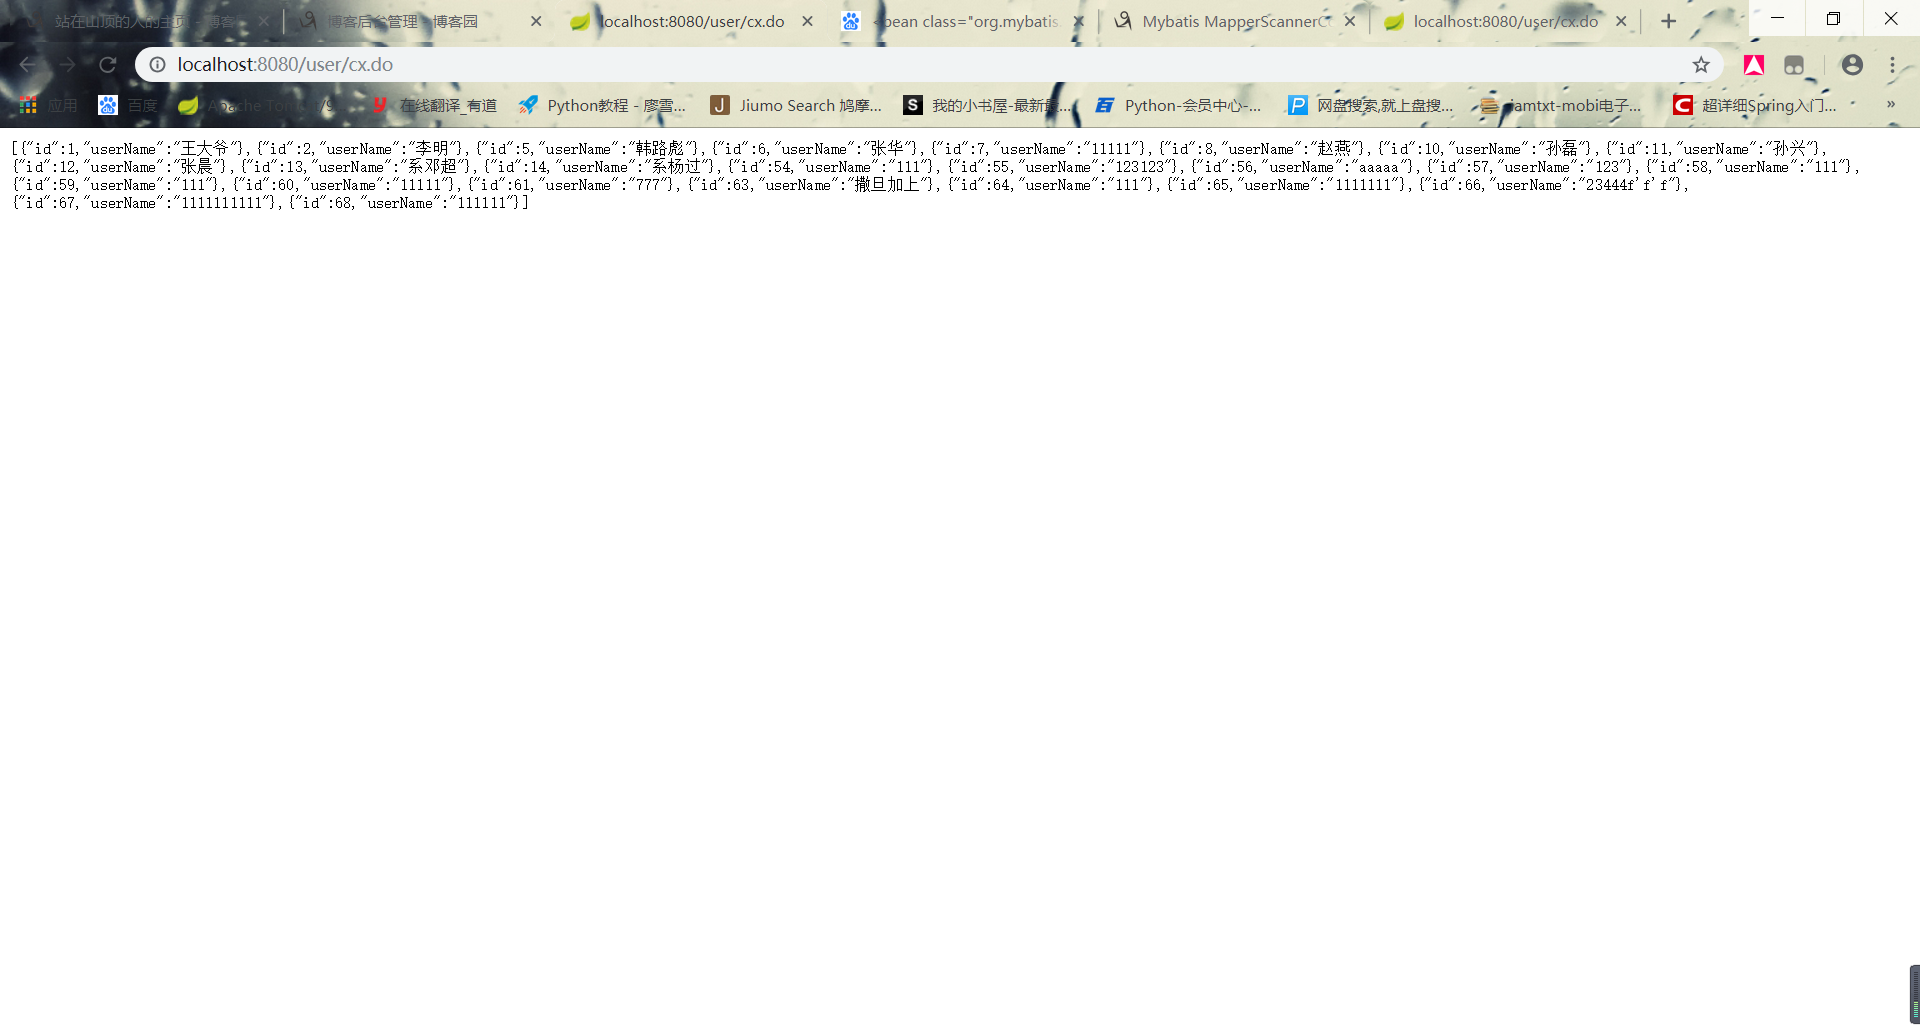
前台以Json格式返回。没有进行多余的操作。若有问题敬请大佬指正,想要一起学习交流的欢迎加入Java交流群:682677231
SpringMvc配置详解的更多相关文章
- SpringMVC配置详解(转)
要想灵活运用Spring MVC来应对大多数的Web开发,就必须要掌握它的配置及原理. 一.Spring MVC环境搭建:(Spring 2.5.6 + Hibernate 3.2.0) 1. jar ...
- springmvc配置详解 教程
https://www.cnblogs.com/sunniest/p/4555801.html
- SpringMVC 框架系列之组件概述与配置详解
在上一篇文章 SpringMVC 框架系列之初识与入门实例 的实例中,我们已经知道,SpringMVC 框架是一个 web 层的框架,本篇文章就详细解释一下 SpringMVC 框架具体文件的配置以及 ...
- SpringMVC RequestMapping 详解
SpringMVC RequestMapping 详解 RequestMapping这个注解在SpringMVC扮演着非常重要的角色,可以说是随处可见.它的知识点很简单.今天我们就一起学习Spring ...
- 转载 Spring、Spring MVC、MyBatis整合文件配置详解
Spring.Spring MVC.MyBatis整合文件配置详解 使用SSM框架做了几个小项目了,感觉还不错是时候总结一下了.先总结一下SSM整合的文件配置.其实具体的用法最好还是看官方文档. ...
- Spring学习 6- Spring MVC (Spring MVC原理及配置详解)
百度的面试官问:Web容器,Servlet容器,SpringMVC容器的区别: 我还写了个文章,说明web容器与servlet容器的联系,参考:servlet单实例多线程模式 这个文章有web容器与s ...
- 2017.3.31 spring mvc教程(二)核心流程及配置详解
学习的博客:http://elf8848.iteye.com/blog/875830/ 我项目中所用的版本:4.2.0.博客的时间比较早,11年的,学习的是Spring3 MVC.不知道版本上有没有变 ...
- 利用Intellij+MAVEN搭建Spring+Mybatis+MySql+SpringMVC项目详解
http://blog.csdn.net/noaman_wgs/article/details/53893948 利用Intellij+MAVEN搭建Spring+Mybatis+MySql+Spri ...
- web.xml常用配置详解
web.xml常用配置详解 context-param 指定 ServletContext(上下文) 配置文件路径,基本配置一般是Spring配置文件,或者是spring-security的配置文件. ...
随机推荐
- 【leetcode 简单】第十题 实现strStr()
实现 strStr() 函数. 给定一个 haystack 字符串和一个 needle 字符串,在 haystack 字符串中找出 needle 字符串出现的第一个位置 (从0开始).如果不存在,则返 ...
- 信息收集之zoomeye
一.浏览器上使用api接口 1.https://api.zoomeye.org/user/login post传参:{"username" : "username&quo ...
- HDU 2094 产生冠军 (map容器)
title: 产生冠军 杭电 2094 tags: [acm,stl] 题目链接 Problem Description 有一群人,打乒乓球比赛,两两捉对撕杀,每两个人之间最多打一场比赛. 球赛的规则 ...
- 33 - 并发编程-线程同步-Event-lock
目录 1 线程同步 1.1 Event 1.1.1 什么是Flag? 1.1.2 Event原理 1.1.3 吃包子 1.2 Lock 1.2.1 lock方法 1.2.2 计数器 1.2.3 非阻塞 ...
- U3D模拟仿真实现
最近在做一个模拟仿真系统,数据源是一个实时数据库,场景中包含一些监测点.监测点给信号的方式是有物体到了监测点给上料信号,物体离开了监测点给下料信号:注意,如果有多个物体到达或离开监测点,那给信号的时间 ...
- mini_httpd在RedHat 5下安装
1.安装mini_httpdcd /usr/src/redhat/SOURCES wget http://www.acme.com/software/mini_httpd/mini_httpd-1.1 ...
- golang基础之三-字符串,时间,流程控制,函数
strings和strconv的使用 strings strings.HasPrefix(s string,preffix string) bool:判断字符串s是否以prefix开头 stirngs ...
- mongo备份&恢复
1.备份数据: $mongodump -h 127.0.0.1 -u traderaccount -p kasumi -d traderaccount -o "/traderaccount& ...
- Linux下进程信息/proc/pid/status的深入分析
https://blog.csdn.net/beckdon/article/details/48491909
- IEEEXtreme 10.0 - Mysterious Maze
这是 meelo 原创的 IEEEXtreme极限编程大赛题解 Xtreme 10.0 - Mysterious Maze 题目来源 第10届IEEE极限编程大赛 https://www.hacker ...