
Android 侧滑菜单的简单实现(SlidingMenu)二
在上一篇博文中已经简单的实现了侧滑菜单,代码也很简单,就几行代码。
这篇文章依然讲侧滑菜单,与前一篇文章不同的是,这篇文章用不同的代码方式来实现侧滑菜单。
在前面的文章中已经用了在Activity中通过SlidingMenu构造方法直接设置侧滑菜单,这里换成通过Activity继承SlidingActivity来实现侧滑。
代码如下:
public class MainActivity extends SlidingActivity
重写onCreate()方法:
  @Override

    public void onCreate(Bundle savedInstanceState) {

        super.onCreate(savedInstanceState);

        setContentView(R.layout.activity_main);

        setBehindContentView(R.layout.slidingmenu);// 设置侧滑布局

        SlidingMenu menu = getSlidingMenu();// 获取SlidingMenu

        menu.setMode(SlidingMenu.LEFT);

        // 设置触摸屏幕的模式

        menu.setTouchModeAbove(SlidingMenu.TOUCHMODE_FULLSCREEN);

        // 设置滑动菜单视图的宽度

        menu.setBehindOffsetRes(R.dimen.slidingmenu_offset);

        // 设置渐入渐出效果的值

        menu.setFadeDegree(0.35f);

    }
其余的跟上一篇博文的一样。
运行结果如下:
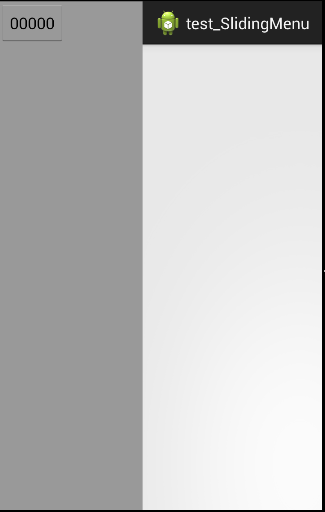
跟上一篇博文的效果完全一样。
另外还有一种方式,就是把SlidingMenu当作一般的控件使用,在XML布局中直接使用即可。
方式如下:
activity_main.xml:
<?xml version="1.0" encoding="utf-8"?>

<LinearLayout xmlns:android="http://schemas.android.com/apk/res/android"

    android:layout_width="match_parent"

    android:layout_height="match_parent"

    android:orientation="vertical" >

    <com.jeremyfeinstein.slidingmenu.lib.SlidingMenu

       xmlns:sliding="http://schemas.android.com/apk/res-auto"

            android:id="@+id/slidingmenulayout"

            android:layout_width="120dp"

            android:layout_height="170dp"

            android:background="#ffffffff"

            sliding:behindOffset="0dp"

            sliding:behindScrollScale="1"

            sliding:fadeDegree="0.3"

            sliding:fadeEnabled="true"

            sliding:touchModeAbove="fullscreen"

            sliding:viewAbove="@layout/pic" >

    </com.jeremyfeinstein.slidingmenu.lib.SlidingMenu>

</LinearLayout>
还需要其它的布局文件:
pic.xml:(其实就是放一张图片)
<?xml version="1.0" encoding="utf-8"?>

<ImageView xmlns:android="http://schemas.android.com/apk/res/android"

    android:layout_width="200dp"

    android:layout_height="200dp"

    android:src="@drawable/ic_launcher" />
slidingmenu.xml:(侧滑菜单的布局文件)
<?xml version="1.0" encoding="utf-8"?>

<LinearLayout xmlns:android="http://schemas.android.com/apk/res/android"

    android:layout_width="match_parent"

    android:layout_height="match_parent"

    android:background="#ff999999"

    android:orientation="vertical" >

    <Button

        android:layout_width="wrap_content"

        android:layout_height="wrap_content"

        android:text="00000" />

</LinearLayout>
接下来是在Activity中的代码了:
  @Override

    protected void onCreate(Bundle savedInstanceState) {

        // TODO Auto-generated method stub

        super.onCreate(savedInstanceState);

        setContentView(R.layout.activity_main);

        slidingmenu = (SlidingMenu) findViewById(R.id.slidingmenulayout);

        slidingmenu.setMode(SlidingMenu.LEFT);

        // 设置侧滑布局

        slidingmenu.setMenu(R.layout.slidingmenu);

        slidingmenu.setOnClickListener(new OnClickListener() {

            @Override

            public void onClick(View v) {

                if (slidingmenu.isMenuShowing())

                    slidingmenu.toggle();

            }

        });

    }
运行结果如下:
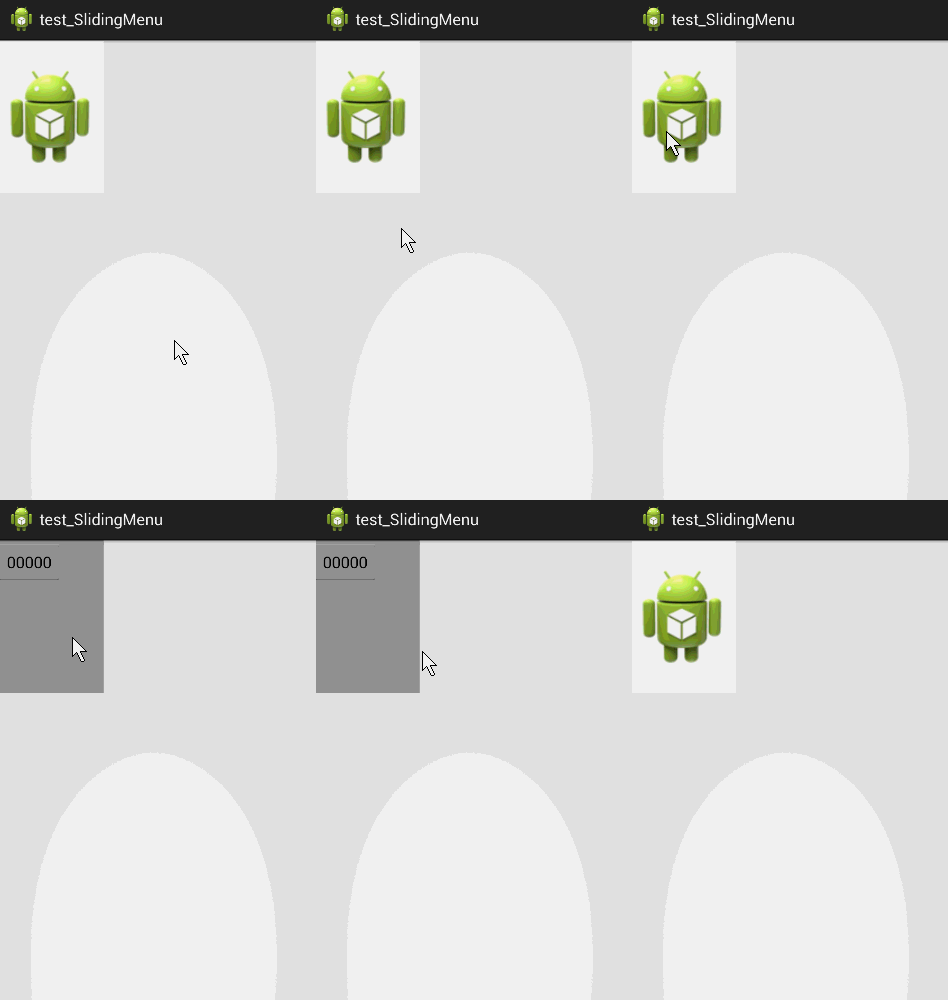
下面是SlidingMenu的常用属性:
viewAbove- a reference to the layout that you want to use as the above view of the SlidingMenuviewBehind- a reference to the layout that you want to use as the behind view of the SlidingMenutouchModeAbove- an enum that designates what part of the screen is touchable when the above view is showing. Margin means only the left margin. Fullscreen means the entire screen. Default is margin.behindOffset- a dimension representing the number of pixels that you want the above view to show when the behind view is showing. Default is 0.behindWidth- a dimension representing the width of the behind view. Default is the width of the screen (equivalent to behindOffset = 0).behindScrollScale- a float representing the relationship between the above view scrolling and the behind behind view scrolling. If set to 0.5f, the behind view will scroll 1px for every 2px that the above view scrolls. If set to 1.0f, the behind view will scroll 1px for every 1px that the above view scrolls. And if set to 0.0f, the behind view will never scroll; it will be static. This one is fun to play around with. Default is 0.25f.shadowDrawable- a reference to a drawable to be used as a drop shadow from the above view onto the below view. Default is no shadow for now.shadowWidth- a dimension representing the width of the shadow drawable. Default is 0.fadeEnabled- a boolean representing whether or not the behind view should fade when the SlidingMenu is closing and "un-fade" when openingfadeDegree- a float representing the "amount" of fade.1.0fwould mean fade all the way to black when the SlidingMenu is closed.0.0fwould mean do not fade at all.selectorEnabled- a boolean representing whether or not a selector should be drawn on the left side of the above view showing a selected view on the behind view.selectorDrawable- a reference to a drawable to be used as the selector NOTE : in order to have the selector drawn, you must call SlidingMenu.setSelectedView(View v) with the selected view. Note that this will most likely not work with items in a ListView because of the way that Android recycles item views.
还有一些到时候再查吧。
Android 侧滑菜单的简单实现(SlidingMenu)二的更多相关文章
- Android 侧滑菜单的简单实现(SlidingMenu)
在我还没有学习Android的时候就用过侧滑菜单的APP,当时第一个感觉是:哇塞,这效果不错!当然,现在自己都已经学Android了,这效果当然也要做出来啊~ SlidingMenu是一种比较新的设置 ...
- Android侧滑菜单代码实现
前两天学习了hyman老师讲的Android侧滑菜单的实现,经过自己的整理分享出来给大家学习一下 现在很多APP都有菜单侧滑的功能,本篇文章主要讲解使用自定义的HorizontalScrollView ...
- android侧滑菜单笔记
一.SlidingPaneLayout v4包下的控件,使用简单,功能简洁.官方文档明确说明该控件只能左侧滑动.使用如下: <android.support.v4.widget.SlidingP ...
- DrawerLayoutDemo【侧边栏(侧滑菜单)简单实现】
版权声明:本文为HaiyuKing原创文章,转载请注明出处! 前言 简单实现侧边栏(侧滑菜单)效果: 点击触发打开左侧侧边栏,手势滑动关闭左侧侧边栏: 手势滑动打开右侧侧边栏,手势滑动关闭右侧侧边栏: ...
- 教你用DrawLayout 实现Android 侧滑菜单
现在的APP越来越注重用户体验,百度视频客户端有一个特效还是挺吸引人的,在主界面手指向右滑动,就可以将菜单展示出来,而主界面会被隐藏大部分,但是仍有左侧的一小部分同菜单一起展示.类似的还有天天动听,人 ...
- Android侧滑菜单和轮播图之滑动冲突
接手一个项目,有一个问题需要修改:轮播图不能手动滑动,手动滑动轮播图只会触发侧滑菜单. 猜测:viewpager控件(轮播图)的触摸事件被SlidingMenu控件(侧滑菜单,非第三方项目,乃是上个开 ...
- android 侧滑菜单
就是用手一滑才出现,占手机半个多屏幕的菜单.为了美观和页面转跳,很多时候要用到. 实现的话就是使用官方的DrawerLayout,注意这个布局一定要是最顶层的布局. 在DrawerLayout里面直接 ...
- Android笔记(五十二) 侧滑菜单SlidingMenu
SlidingMenu是一个优秀的开源项目,可以实现侧滑菜单,简单介绍一下这SlidingMenu的使用: 常用属性和方法: setTouchModeAbove(int i )是否可以通过滑动手势打开 ...
- 第三方侧滑菜单SlidingMenu在android studio中的使用
南尘:每天进步一点点! 前面讲了官方的侧滑菜单DrawerLayout的使用,其实早在官方没有推出这个之前,就有很多第三方的jar包如SlidingMenu等,感谢开源的力量. SlidingMenu ...
随机推荐
- IOC使用Unity 实现依赖注入
转自:http://www.cnblogs.com/techborther/archive/2012/01/06/2313498.html http://www.cnblogs.com/xishuai ...
- heidsoft logo
- java中的正则操作总结
http://www.cnblogs.com/nerxious/archive/2013/01/03/2842910.html 正则表达式在处理字符串的效率上是相当高的 关于正则表达式的使用,更多的是 ...
- Linux pipe函数
1. 函数说明 pipe(建立管道): 1) 头文件 #include<unistd.h> 2) 定义函数: int pipe(int filedes[2]); 3) 函数说明: pipe ...
- C++析构函数为什么要为虚函数
注:本文内容来源于zhice163博文,感谢作者的整理. .为什么基类的析构函数是虚函数? 在实现多态时,当用基类操作派生类,在析构时防止只析构基类而不析构派生类的状况发生. 下面转自网络:源地址 h ...
- 日志文件 的管理 logrotate 配置
于Linux 的系统安全来说,日志文件是极其重要的工具.系统管理员可以使用logrotate 程序用来管理系统中的最新的事件, 对于Linux 的系统安全来说,日志文件是极其重要的工具.系统管理员可以 ...
- 日志分析(四) Elasticsearch的精确查询
在需要做精确查询时,往往不希望做全文模糊搜索,这时,需要告知Elasticsearch在处理我们提供的字符串时,需要做精确匹配. 此时,在需要做精确匹配的字符串上,加上””,如”/user/info” ...
- 实例源码--Android理财工具源码
下载源码 技术要点: 1.Sqlite数据库的综合使用 2.控件的综合使用 3. 源码带详细的中文注释 ...... 详细介绍: 1. Sqlite数据库的综合使用 本套源码采用了Sqlite ...
- java_数组作缓存池的不可变类实例
package ming; public class CacheImmutale { private static int MAX_SIZE = 10; private static CacheImm ...
- Kruskal算法 Swordfish
http://acm.zju.edu.cn/onlinejudge/showProblem.do?problemId=203 Swordfish Time Limit: 2 Seconds ...