Spring源码分析 手写简单IOC容器
Spring的两大特性就是IOC和AOP。
IOC Container,控制反转容器,通过读取配置文件或注解,将对象封装成Bean存入IOC容器待用,程序需要时再从容器中取,实现控制权由程序员向程序的转变。
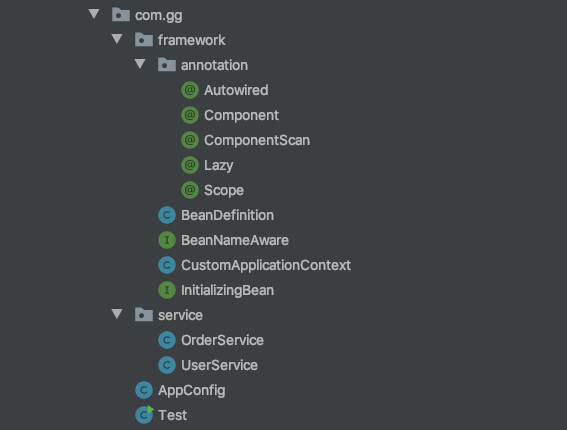
一、代码结构
二、注解扫描
1、新建OrderService、UserService、Test类用于模拟实际开发
@Component("orderService")

@Scope("prototype")

public class OrderService implements BeanNameAware {

    @Autowired

    private UserService userService;

    public void test() {

        System.out.println(userService);

    }

    public void setBeanName(String name) {

        this.beanName = beanName;

    }

}
@Component("userService")

public class UserService {

}
public class Test {

    public static void main(String[] args) {

        //对应AnnotationConfigApplicationContext

        //扫描 (判断是否存在Component) + 实例化(Bean的生命周期:1、实例化 2、依赖注入)

        CustomApplicationContext customApplicationContext = new CustomApplicationContext(AppConfig.class);

        Object userService1 = customApplicationContext.getBean("orderService");

        System.out.println(userService);

        System.out.println(userService1);

    }

}
2、新建注解Component、ComponentScan、Autowired、Scope
@Retention(RetentionPolicy.RUNTIME)

@Target(ElementType.TYPE)

public @interface Component {  // 用于将类注册成Bean

    String value() default "";

}
@Retention(RetentionPolicy.RUNTIME)

@Target(ElementType.TYPE)

public @interface ComponentScan { //用于配置类扫描的包

    String value() default "";

}
@Retention(RetentionPolicy.RUNTIME)

@Target({ElementType.CONSTRUCTOR, ElementType.FIELD, ElementType.METHOD})

public @interface Autowired { //属性注入

}
@Retention(RetentionPolicy.RUNTIME)

@Target(ElementType.TYPE)

public @interface Scope { //bean的范围

    String value() default "singleton";

}
3、定义CustomApplicationContext实现注解扫描
- 对应Spring的AnnotationConfigApplicationContext,通过传入配置文件对象,读取ComponentScan的Value进行包扫描,扫描后获取带@Component注解的类
public class CustomApplicationContext {

    private Class configClass;

    public CustomApplicationContext(Class configClass) {

        this.configClass = configClass;

        //扫描(判断类上是否存在Component)(class文件) --> 形成beanDefinition

        List<Class> classList = scan(configClass);

    }

  	private List<Class> scan(Class configClass) {

        List<Class> list = new ArrayList<Class>();

      	//存在注解,通过value获取要扫描包路径

        if (configClass.isAnnotationPresent(ComponentScan.class)){

            ComponentScan componentScan = (ComponentScan)configClass.getAnnotation(ComponentScan.class);

            String path = componentScan.value();

            path = path.replace(".","/"); //包转化为包路径(com.gg.service)

            //扫描path路径下到类

            ClassLoader classLoader = CustomApplicationContext.class.getClassLoader();

          			// 利用类加载器,根据包路径获取URL/target/classes/com/gg/service

            URL resource = classLoader.getResource(path);

            File file = new File(resource.getFile());

            if (file.isDirectory()) {

                for (File f: file.listFiles()){

                    String absolutePath = f.getAbsolutePath(); //类的完整路径

                    absolutePath = absolutePath.substring(absolutePath.indexOf("com"),absolutePath.indexOf(".class"));

                    absolutePath = absolutePath.replace("/",".");

                    //com.gg.service.userService

                    Class clazz = null;

                    try {

                        clazz = classLoader.loadClass(absolutePath);

                        // 存在注解,将类加入数组

                        if (clazz.isAnnotationPresent(Component.class)) {

                            list.add(clazz);

                        }

                    } catch (ClassNotFoundException e) {

                        e.printStackTrace();

                    }

                }

            }

        }

        return list;

    }

}
4、将扫描获得的类封装成beanDefinition
- 扫描得到的类,将beanName、类型、类的范围封装成beanDefinition
- getBean时不用重新扫描,直接冲beanDefinitionMap获取
    private Map<String,BeanDefinition> beanDefinitionMap = new ConcurrentHashMap<String, BeanDefinition>();

public CustomApplicationContext(Class configClass) {

    this.configClass = configClass;

    List<Class> classList = scan(configClass); //扫描得到class

    for (Class clazz: classList){

            Component component = (Component) clazz.getAnnotation(Component.class);

            String beanName = component.value();

            BeanDefinition beanDefinition = new BeanDefinition();

            if (clazz.isAnnotationPresent(Scope.class)){

                Scope scope = (Scope) clazz.getAnnotation(Scope.class);

                beanDefinition.setScope(scope.value());

            }else{

                beanDefinition.setScope("singleton");//默认为单例

            }

            beanDefinition.setBeanClass(clazz);

            beanDefinitionMap.put(beanName,beanDefinition);

    }
public class BeanDefinition { //bean的定义

    private String scope;

    private Class beanClass;

    public String getScope() {

        return scope;

    }

    public void setScope(String scope) {

        this.scope = scope;

    }

    public Class getBeanClass() {

        return beanClass;

    }

    public void setBeanClass(Class beanClass) {

        this.beanClass = beanClass;

    }

}
- 至此,我们通过新建CustomApplicationContext,将添加注解的类加入到beanDefinitionMap。
三、实例化Bean
1、单例类先实例化,存入单例池
- 从beanDefinitionMap取出BeanDefinition,对单例类调用createBean()实例化,添加到单例池
private Map<String,Object> singletonPool = new ConcurrentHashMap<String, Object>();

public CustomApplicationContext(Class configClass) {

    this.configClass = configClass;

    //扫描将注解的类存入beanDefinitionMap

    List<Class> classList = scan(configClass);

    for (Class clazz: classList){

            Component component = (Component) clazz.getAnnotation(Component.class);

            String beanName = component.value();

            BeanDefinition beanDefinition = new BeanDefinition();

            if (clazz.isAnnotationPresent(Scope.class)){

                Scope scope = (Scope) clazz.getAnnotation(Scope.class);

                beanDefinition.setScope(scope.value());

            }else{

                beanDefinition.setScope("singleton");

            }

            beanDefinition.setBeanClass(clazz);

            beanDefinitionMap.put(beanName,beanDefinition);

    }

		//将单例类添加到单例池singletonPool

    for (String beanName : beanDefinitionMap.keySet()){

        BeanDefinition beanDefinition = beanDefinitionMap.get(beanName);

        if (beanDefinition.getScope().equals("singleton")){

            //实例化bean

            Object bean = createBean(beanName,beanDefinition);

            singletonPool.put(beanName,bean);

        }

    }

}
private Object createBean(String beanName,BeanDefinition beanDefinition) {

    //实例化、填充属性、Aware、初始化

    Class beanClass = beanDefinition.getBeanClass();

    try {

        // 从beanDefinition中获取类型,并实例化

        Object bean = beanClass.getDeclaredConstructor().newInstance();

        //属性填充

        Field[] fields = beanClass.getDeclaredFields(); //DeclaredFields 所有属性

        for(Field field: fields){

            if (field.isAnnotationPresent(Autowired.class)){

                Object annotationField = getBean(field.getName());

                field.setAccessible(true); //反射产生对象要打开权限

                field.set(bean,annotationField);

            }

        }

        // Aware

        if (bean instanceof BeanNameAware){

            ((BeanNameAware)bean).setBeanName(beanName); //实现该端口就调用此方法

        }

        // 初始化

        if (bean instanceof InitializingBean){

            ((InitializingBean)bean).afterPropertiesSet(); //实现该端口就调用此方法

        }

        return bean;

    } catch (InstantiationException e) {

        e.printStackTrace();

    } catch (IllegalAccessException e) {

        e.printStackTrace();

    } catch (InvocationTargetException e) {

        e.printStackTrace();

    } catch (NoSuchMethodException e) {

        e.printStackTrace();

    }

    return null;

}
- 新建BeanNameAware、InitializingBean接口,实例类时,通过判断是否实现该接口,在实例初始化时
public interface BeanNameAware {

    public void setBeanName(String name);

}
public interface InitializingBean {

    public void afterPropertiesSet();

}
- 通过调用createBean()实例化beanDefinition中的类,单例在启动时实例,原型在调用getBean()再实例
2、getBean()
public Object getBean(String beanName){

    BeanDefinition beanDefinition = beanDefinitionMap.get(beanName);

    if (beanDefinition.getScope().equals("prototype")){

        return createBean(beanName,beanDefinition);

    }else{

        Object bean = singletonPool.get(beanName);

        if (bean == null){

            Object newBean = createBean(beanName,beanDefinition);

            singletonPool.put(beanName,newBean);

            return newBean;

        }

        return bean;

    }

}
Spring源码分析 手写简单IOC容器的更多相关文章
- Spring源码分析之-加载IOC容器
本文接上一篇文章 SpringIOC 源码,控制反转前的处理(https://mp.weixin.qq.com/s/9RbVP2ZQVx9-vKngqndW1w) 继续进行下面的分析 首先贴出 Spr ...
- 源码分析 | 手写mybait-spring核心功能(干货好文一次学会工厂bean、类代理、bean注册的使用)
作者:小傅哥 博客:https://bugstack.cn - 汇总系列原创专题文章 沉淀.分享.成长,让自己和他人都能有所收获! 一.前言介绍 一个知识点的学习过程基本分为:运行helloworld ...
- 面试必会之ArrayList源码分析&手写ArrayList
简介 ArrayList是我们开发中非常常用的数据存储容器之一,其底层是数组实现的,我们可以在集合中存储任意类型的数据,ArrayList是线程不安全的,非常适合用于对元素进行查找,效率非常高. 线程 ...
- spring源码分析之玩转ioc:bean初始化和依赖注入(一)
最近赶项目,天天加班到十一二点,终于把文档和代码都整完了,接上继续整. 上一篇聊了beanProcess的注册以及对bean的自定义修改和添加,也标志着创建bean的准备工作都做好了,接下来就是开大招 ...
- Spring源码 20 手写模拟源码
参考源 https://www.bilibili.com/video/BV1tR4y1F75R?spm_id_from=333.337.search-card.all.click https://ww ...
- Spring源码分析(十九)容器的功能扩展概览
摘要: 本文结合<Spring源码深度解析>来分析Spring 5.0.6版本的源代码.若有描述错误之处,欢迎指正. 经过前面几章的分析,相信大家已经对 Spring 中的容器功能有了简单 ...
- 《四 spring源码》手写springmvc
手写SpringMVC思路 1.web.xml加载 为了读取web.xml中的配置,我们用到ServletConfig这个类,它代表当前Servlet在web.xml中的配置信息.通过web.xml ...
- 《四 spring源码》手写springioc框架
手写SpringIOCXML版本 /** * 手写Spring专题 XML方式注入bean * * * */ public class ClassPathXmlApplicationContext { ...
- spring源码分析系列3:BeanFactory核心容器的研究
目录 @(spring源码分析系列3:核心容器的研究) 在讲容器之前,再明确一下知识点. BeanDefinition是Bean在容器的描述.BeanDefinition与Bean不是一个东西. Be ...
随机推荐
- 关于DateTimeOffset的爱恨情仇
为什么要上DataTimeOffset?因为DateTime无法解决时区问题,经常需要时间戳转换日期,DateTimeOffset就是应运而生,数据格式储存了和UTC的时区差,C#几乎全几乎全版本支持 ...
- javaWeb Maven Runner设置中文乱码
将Runner设置为 -DarchetypeCatal! 使maven在没有网络的情况下在本地查找下载好的插件 配置 -Dfile.encoding=gb2312 防止中文乱码
- 糟糕,你写的 BUG 要被存1000年了!
摘要:代码冰封,祖传千年! 把大象放在冰箱需要几步? 三步!把代码放在北极需要几步?纳尼? GitHub刚刚公布了一组照片,你写的代码(BUG)上周已经被打包运往北极保存. 只要你2月2日以前贡献过的 ...
- 铁大树洞APP视频讲解和原型演示
首先放上我们团队视频讲解演示的视频:https://v.youku.com/v_show/id_XNDYyMzA3MTgzNg==.html 团队名称:超能陆战队 团队成员:刘梦鑫(队长) 段行行 徐 ...
- 用python分析1225万条淘宝数据,终于搞清楚了我的交易行为
大家好,我是黄同学
- 【av68676164(p55-p58)】 Intel CPU和Linux内存管理
7.4.1 Intel CPU物理结构 https://www.cnblogs.com/megachen/p/9768115.html x86实模式 实模式 20位:1M内存空间 地址表示方式:段地址 ...
- CSS学习第三天
定位布局: 相对定位:相对于自身的位置进行偏移position需要搭配left right top bottom position: relative; 绝对定位:相对于有position属 ...
- Elasticsearch聚合语句
聚合的范围是search query过滤出的数据 四种聚合类型: 一.Bucketing 桶聚合,常规的分类然后计算每个分类的文档数量 二.Metric 分类并对一组文档进行sum.avg等数学运算 ...
- JavaScript设计模式之策略模式【组合委托】
前言:语言只是工具,思想才是核心 今天要总结的是 策略模式 策略在开发中的应用非常广泛,所以也是非常常见且使用的设计模式. 在实际开发中,往往在实现一个功能时,有多种解决方案可行. 常见场景: 解压: ...
- 笔记:phpstudy、虚拟机CentOS安装、Linux命令
一.phpstudy 1.phpstudy实现w(Windows)a(Apache)m(Mysql)p(php)环境 Apache 用来发布Web服务 80端口 MySQL 开源的建议灵活的 ...