CentOS学习笔记--MySQL安装
MySQL安装
Linux中使用最广泛的数据库就是MySQL,使用在线yum的方式安装的版本落后MySQL网站好几个小版本,本节亲自测试安装新版的MySQL。
测试机器环境:
VMware Workstation 10 虚拟机
内存:1G
Linux版本:CentOS MinimalCD 6.5
JAVA:JAVA_HOME=/opt/jdk
安装mysql前需要查询系统中含有的有关mysql的软件。
rpm -qa | grep -i mysql //grep -i是不分大小写字符查询,只要含有mysql就显示
屏幕显示:
mysql-libs-5.1.71-1.el6.i686  //它是好几个软件的依赖,其中在mini版本中postfix软件依赖mysql-libs,网络上很多建议都是直接删除,

yum remove mysql-libs 或者 rpm -e --nodeps mysql-libs-5.1.71-1.el6.i686,总觉得这样做不好。
查找mysql官方资料,得到安装方法是用MySQL-shared-compat将mysql-libs-5.1.71-1.el6.i686替换为同版本后在安装mysql。
下载mysql地址:http://dev.mysql.com/downloads/mysql/

CentOS是RedHatLinux系列的,因此选择RedHatLinux(见红线地方),网页会自动变成RedHatLinux有关的mysql下载:
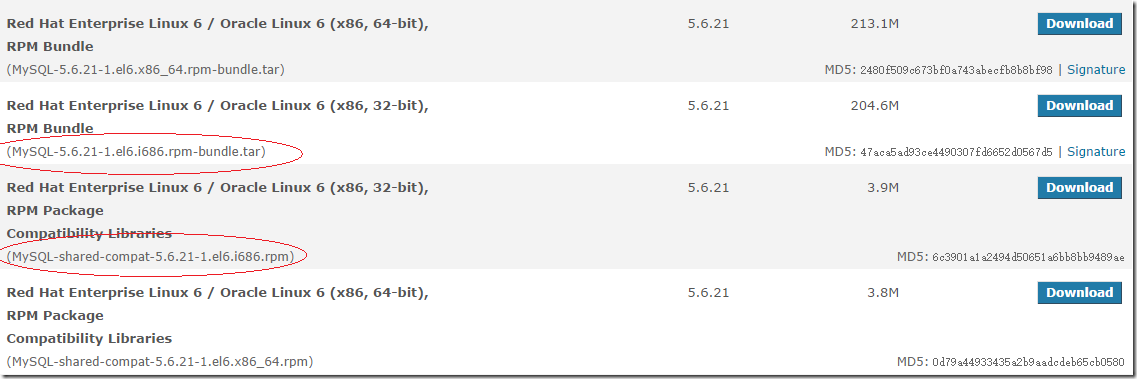
需要下载2个内容,一个是MySQL-5.6.21-1.el6.i686.rpm-bundle.tar,这个是几个程序的合集包,另一个是MySQL-shared-compat-5.6.21-1.el6.i686.rpm,这个是软件包包括MySQL 3.23和MySQL 4.0的共享库。如果你安装了应用程序动态连接MySQL 3.23,但是你想要升级到ySQL 4.0而不想打破库的从属关系,则安装该软件包而不要安装MySQL-shared。从MySQL 4.0.13起包含该安装软件包。
将2个文件上传到CentOS中,解压MySQL-5.6.21-1.el6.i686.rpm-bundle.tar。
#tar xvf MySQL-5.6.21-1.el6.i686.rpm-bundle.tar

MySQL-client-5.6.21-1.el6.i686.rpm

MySQL-devel-5.6.21-1.el6.i686.rpm

MySQL-shared-5.6.21-1.el6.i686.rpm

MySQL-test-5.6.21-1.el6.i686.rpm

MySQL-server-5.6.21-1.el6.i686.rpm

MySQL-embedded-5.6.21-1.el6.i686.rpm

#ls -l

total 415068

-rw-r--r--. 1 root root  210442240 Nov 11 11:12 MySQL-5.6.21-1.el6.i686.rpm-bundle.tar

-rw-r--r--. 1 7155 wheel  17813608 Sep 12 16:25 MySQL-client-5.6.21-1.el6.i686.rpm

-rw-r--r--. 1 7155 wheel   3131328 Sep 12 16:25 MySQL-devel-5.6.21-1.el6.i686.rpm

-rw-r--r--. 1 7155 wheel  83106000 Sep 12 16:25 MySQL-embedded-5.6.21-1.el6.i686.rpm

-rw-r--r--. 1 7155 wheel  54611632 Sep 12 16:26 MySQL-server-5.6.21-1.el6.i686.rpm

-rw-r--r--. 1 7155 wheel   1878756 Sep 12 16:27 MySQL-shared-5.6.21-1.el6.i686.rpm

-rw-r--r--. 1 root root    4141488 Nov 18 14:42 MySQL-shared-compat-5.6.21-1.el6.i686.rpm

-rw-r--r--. 1 7155 wheel  49887932 Sep 12 16:27 MySQL-test-5.6.21-1.el6.i686.rpm
安装MySQL-shared-compat替换mysql-libs,如果不替换,在删除mysql-libs,会提示postfix依赖于mysql-libs:
# rpm -i MySQL-shared-compat-5.6.21-1.el6.i686.rpm

# rpm -qa | grep -i mysql

mysql-libs-5.1.71-1.el6.i686

MySQL-shared-compat-5.6.21-1.el6.i686

# yum remove mysql-libs
测试MySQL-server安装,提示需要安装perl:
# rpm -ivh --test MySQL-server-5.6.21-1.el6.i686.rpm

# yum install perl
安装MySQL-server,MySQL-client:
# rpm -ivh  MySQL-server-5.6.21-1.el6.i686.rpm

Preparing...                ########################################### [100%]

   1:MySQL-server           ########################################### [100%]

………………

………………

A RANDOM PASSWORD HAS BEEN SET FOR THE MySQL root USER !

You will find that password in '/root/.mysql_secret'.

You must change that password on your first connect,

no other statement but 'SET PASSWORD' will be accepted.

See the manual for the semantics of the 'password expired' flag.

Also, the account for the anonymous user has been removed.

In addition, you can run:

  /usr/bin/mysql_secure_installation

………………

………………

# rpm -ivh  MySQL-client-5.6.21-1.el6.i686.rpm

Preparing...                ########################################### [100%]

   1:MySQL-client           ########################################### [100%]
在安装MySQL-server,见上面的一段话,大意是全新安装设置的root密码在/root/.mysql_secret中,这是一个随机密码,你需要运行/usr/bin/mysql_secure_installation,删除anonymous用户。当然不建议用root用户来运行,rpm包已经建了一个mysql用户,可以使用这个用户:
#more .mysql_secret

# The random password set for the root user at Tue Nov 18 22:57:46 2014 (local t

ime): NljqL63OYlGo5cqy    <– 得到root访问mysql的密码:NljqL63OYlGo5cqy

# service mysql start

Starting MySQL... SUCCESS!

# /usr/bin/mysql_secure_installation --user=mysql

NOTE: RUNNING ALL PARTS OF THIS SCRIPT IS RECOMMENDED FOR ALL MySQL

      SERVERS IN PRODUCTION USE!  PLEASE READ EACH STEP CAREFULLY!

In order to log into MySQL to secure it, we'll need the current

password for the root user.  If you've just installed MySQL, and

you haven't set the root password yet, the password will be blank,

so you should just press enter here.

Enter current password for root (enter for none):    <–使用刚才得到的root的密码 NljqL63OYlGo5cqy

OK, successfully used password, moving on...

Setting the root password ensures that nobody can log into the MySQL

root user without the proper authorisation.

You already have a root password set, so you can safely answer 'n'.

Change the root password? [Y/n] y   <– 是否更换root用户密码,输入y并回车,强烈建议更换

New password:      <– 设置root用户的密码

Re-enter new password:    <– 再输入一次你设置的密码

Password updated successfully!

Reloading privilege tables..

 ... Success!

By default, a MySQL installation has an anonymous user, allowing anyone

to log into MySQL without having to have a user account created for

them.  This is intended only for testing, and to make the installation

go a bit smoother.  You should remove them before moving into a

production environment.

Remove anonymous users? [Y/n] y   <– 是否删除匿名用户,生产环境建议删除,所以输入y并回车

 ... Success!

Normally, root should only be allowed to connect from 'localhost'.  This

ensures that someone cannot guess at the root password from the network.

Disallow root login remotely? [Y/n] y    <–是否禁止root远程登录,根据自己的需求选择Y/n并回车,建议禁止

 ... Success!

By default, MySQL comes with a database named 'test' that anyone can

access.  This is also intended only for testing, and should be removed

before moving into a production environment.

Remove test database and access to it? [Y/n] y    <– 是否删除test数据库,输入y并回车

 - Dropping test database...

 ... Success!

 - Removing privileges on test database...

 ... Success!

Reloading the privilege tables will ensure that all changes made so far

will take effect immediately.

Reload privilege tables now? [Y/n] y   是否重新加载权限表,输入y并回车

 ... Success!

All done!  If you've completed all of the above steps, your MySQL

installation should now be secure.

Thanks for using MySQL!

Cleaning up...
至此,MySQL已经安装完成,最后看一下是否已将MySQL加到开机服务里:
#  chkconfig

auditd          0:off   1:off   2:on    3:on    4:on    5:on    6:off

blk-availability        0:off   1:on    2:on    3:on    4:on    5:on    6:off

crond           0:off   1:off   2:on    3:on    4:on    5:on    6:off

ip6tables       0:off   1:off   2:on    3:on    4:on    5:on    6:off

iptables        0:off   1:off   2:on    3:on    4:on    5:on    6:off

iscsi           0:off   1:off   2:off   3:on    4:on    5:on    6:off

iscsid          0:off   1:off   2:off   3:on    4:on    5:on    6:off

lvm2-monitor    0:off   1:on    2:on    3:on    4:on    5:on    6:off

mdmonitor       0:off   1:off   2:on    3:on    4:on    5:on    6:off

multipathd      0:off   1:off   2:off   3:off   4:off   5:off   6:off

mysql           0:off   1:off   2:on    3:on    4:on    5:on    6:off   <-看到这个OK了

netconsole      0:off   1:off   2:off   3:off   4:off   5:off   6:off

netfs           0:off   1:off   2:off   3:on    4:on    5:on    6:off

network         0:off   1:off   2:on    3:on    4:on    5:on    6:off

postfix         0:off   1:off   2:on    3:on    4:on    5:on    6:off

rdisc           0:off   1:off   2:off   3:off   4:off   5:off   6:off

restorecond     0:off   1:off   2:off   3:off   4:off   5:off   6:off

rsyslog         0:off   1:off   2:on    3:on    4:on    5:on    6:off

saslauthd       0:off   1:off   2:off   3:off   4:off   5:off   6:off

sshd            0:off   1:off   2:on    3:on    4:on    5:on    6:off

udev-post       0:off   1:on    2:on    3:on    4:on    5:on    6:off
MySQL安装后涉及的目录如下:
| 目录 | 目录中的内容 |
| /usr/bin | 客户端程序和脚本 |
| /usr/sbin | Mysqld服务器 |
| /var/lib/mysql | 数据库的日志文件 |
| /usr/share/info | 信息格式手册 |
| /usr/share/man | Unix 手册页 |
| /usr/include/mysql | 包括 (标题) 的文件 |
| /usr/lib/mysql | mysql的lib包 |
| /usr/share/mysql | 杂项的支持文件,包括错误消息) 字符设置的文件,示例配置文件,SQL 数据库安装 |
| /usr/share/sql-bench | 基准 |
现在好了,可以测试你的MySQL了。
CentOS学习笔记--MySQL安装的更多相关文章
- CentOS学习笔记--Tomcat安装
Tomcat安装 通常情况下我们要配置Tomcat是很容易的一件事情,但是如果您要架设多用户多服务的Java虚拟主机就不那么容易了.其中最大的一个问题就是Tomcat执行权限.普通方式配置的Tomca ...
- linux 学习笔记 mysql安装总结
1 安装方式 下载2禁制源码安装包 mysql-5.5.27-linux2.6-i686.tar.gz 备注:2禁制额包解压缩后直接就可以使用 不用Make 2 步骤 shell>groupad ...
- CentOS学习笔记--JDK安装
JDK安装 大部分的服务都离不开JAVA环境,CentOS里都是OpenJDK,显然我们还是使用JAVA的JDK好.(注:minimal版没有安装OpenJDK,其它版本需要删除这个.) JDK下载 ...
- 【Linux】CentOS 学习笔记之一(安装配制)
如何打开命令窗口:应用程序>系统工具>终端 如何获取root 权限:在终端下,输入su 再输入密码(密码不显示在屏幕上) 如何将英文版转换成中文: [root@localhost ~]# ...
- CentOS学习笔记--SCSI 设备热插拔
CentOS学习笔记--SCSI 设备热插拔 处于运行中的服务器,因业务要求也许不允许重启机器,而新添加的SCSI设备(主要是硬盘)如何实现热插拔呢? 首先需要查看一下设备: #cat /proc/s ...
- MySQL学习笔记-MySQL体系结构总览
MySQL体系结构总览 不管是用哪种数据库,了解数据库的体系结构都是极为重要的.MySQL体系结构主要由数据库和数据库实例构成. 数据库:物理操作系统文件或者其它文件的集合,在mysql中,数据库文件 ...
- OracleDesigner学习笔记1――安装篇
OracleDesigner学习笔记1――安装篇 QQ:King MSN:qiutianwh@msn.com Email:qqking@gmail.com 一. 前言 Oracle是当 ...
- Java学习笔记——MySQL的安装使用以及SQL语法简介
在 Java 的开发中,数据库的应用是非常必要的,下面,我们为Java对于数据库的应用做一些必要的准备工作.. Java 对数据库的应用统称为 JDBC. JDBC(Java Data Base Co ...
- CUBRID学习笔记 2 安装教程
下载地址 http://www.cubrid.org/?mid=downloads&item=any&os=detect&cubrid=9.3.0 选择适合你的服务器版本 l ...
随机推荐
- 你应该知道的jQuery技巧
帮助提高你jQuery应用的简单小技巧. 回到顶部按钮 图片预加载 判断图片是否加载完 自动修补破损图像 Hover切换class类 禁用输入 停止正在加载的链接 toggle fade/slide ...
- VVDocumenter-Xcode 规范注释生成器 插件之安装调试适应新版本
1.下载地址: 很多时候,为了快速开发,很多的技术文档都是能省则省,这个时候注释就变得异常重要,再配合Doxygen这种注释自动生成文档的,就完美了.但是每次都要手动输入规范化的注释,着实也麻烦,但有 ...
- IDEA激活服務器
IDEA: http://www.iteblog.com/idea/key.php webstorm11:http://15.idea.lanyus.com/
- linux内核设计与实现--进程管理
进程就是出于执行期的程序.进程的另一个名字是任务. 执行线程,简称线程(thread),是在进程中活动的对象.每个线程都有一个独立的程序计数器.进程栈和一组进程寄存器.内核调度的对象是线程,而不是进程 ...
- [Flex] PopUpButton系列 —— 将DataGrid作为弹出内容
<?xml version="1.0" encoding="utf-8"?> <!--Flex中如何创建一个可以弹出DataGrid作为菜单的 ...
- 在RAC中,当私有网线拔了后,会怎么样?
原文链接http://blog.mchz.com.cn/?p=4305 实际环境: OS:oel5.5_x64 ORACLE:10205 3节点rac 架设于vmware esxi虚拟机上 所需测试项 ...
- 转载KMP
出处: http://www.ruanyifeng.com/blog/2013/05/Knuth%E2%80%93Morris%E2%80%93Pratt_algorithm.html 在假期之前,断 ...
- Android下实现控件的叠加显示
<FrameLayout android:layout_width="fill_parent" android:layout_height="match_paren ...
- 初探接口测试框架--python系列6
点击标题下「蓝色微信名」可快速关注 坚持的是分享,搬运的是知识,图的是大家的进步,没有收费的培训,没有虚度的吹水,喜欢就关注.转发(免费帮助更多伙伴)等来交流,想了解的知识请留言,给你带来更多价值,是 ...
- Mac OS下Boot2Docker的网络映射设置
Mac系统下安装Boot2Docker造成了三层网络:Mac->VirtualBox->Docker,通过docker run 参数-p/-P,能手动或自动设置VirtualBox与Doc ...