
基于CentOS 7.2个人网盘的实现
首先使用YUM安装依赖环境:
[root@sishen ~]#yum install python python-setuptools python-imaging python-ldap python-memcached MySQL-python mariadb mariadb-server
启动MySQL并设置其开机启动:
[root@sishen ~]# systemctl start mariadb
[root@sishen ~]# systemctl enable mariadb
MySQL安全初始化
[root@sishen ~]# mysql_secure_installation
NOTE: RUNNING ALL PARTS OF THIS SCRIPT IS RECOMMENDED FOR ALL MariaDB
SERVERS IN PRODUCTION USE! PLEASE READ EACH STEP CAREFULLY!
In order to log into MariaDB to secure it, we'll need the current
password for the root user. If you've just installed MariaDB, and
you haven't set the root password yet, the password will be blank,
so you should just press enter here.
Enter current password for root (enter for none):
OK, successfully used password, moving on...
Setting the root password ensures that nobody can log into the MariaDB
root user without the proper authorisation.
You already have a root password set, so you can safely answer 'n'.
Change the root password? [Y/n] y #注意这里我是第二次初始化了,所以跟初次安装时的提示不一样,如果是初次安装,直接回车即可,这一步除了设置mysql的root密码之外,其他选项可以直接回车,也可以依据个人需要进行设置。
New password:
Re-enter new password:
Password updated successfully!
Reloading privilege tables..
... Success!
By default, a MariaDB installation has an anonymous user, allowing anyone
to log into MariaDB without having to have a user account created for
them. This is intended only for testing, and to make the installation
go a bit smoother. You should remove them before moving into a
production environment.
Remove anonymous users? [Y/n]
... Success!
Normally, root should only be allowed to connect from 'localhost'. This
ensures that someone cannot guess at the root password from the network.
Disallow root login remotely? [Y/n]
... Success!
By default, MariaDB comes with a database named 'test' that anyone can
access. This is also intended only for testing, and should be removed
before moving into a production environment.
Remove test database and access to it? [Y/n]
- Dropping test database...
... Success!
- Removing privileges on test database...
... Success!
Reloading the privilege tables will ensure that all changes made so far
will take effect immediately.
Reload privilege tables now? [Y/n]
... Success!
Cleaning up...
All done! If you've completed all of the above steps, your MariaDB
installation should now be secure.
Thanks for using MariaDB!
下载seafile
[root@sishen ~]# wget https://mc.qcloudimg.com/static/archive/3d8addbe52be88df4f6139ec7e35b453/seafile-server_5.1.4_x86-64.tar.gz
创建安装目录并解压
[root@sishen ~]# mkdir -p /opt/seafile/installed
[root@sishen ~]# mv seafile-server_5.1.4_x86-64.tar.gz /opt/seafile/installed/
[root@sishen installed]# tar -zxf seafile-server_5.1.4_x86-64.tar.gz -C /opt/seafile/
[root@sishen installed]# cd ../seafile-server-5.1.4/
[root@sishen seafile-server-5.1.4]# ls
check_init_admin.py seaf-fuse.sh seahub setup-seafile.sh
reset-admin.sh seaf-gc.sh seahub.sh upgrade
runtime seafile setup-seafile-mysql.py
seaf-fsck.sh seafile.sh setup-seafile-mysql.sh
[root@sishen seafile-server-5.1.4]# ./setup-seafile-mysql.sh
Checking python on this machine ...
Checking python module: setuptools ... Done.
Checking python module: python-imaging ... Done.
Checking python module: python-mysqldb ... Done.
-----------------------------------------------------------------
This script will guide you to setup your seafile server using MySQL.
Make sure you have read seafile server manual at
https://github.com/haiwen/seafile/wiki
Press ENTER to continue
-----------------------------------------------------------------
#这里根据提示直接回车
What is the name of the server? It will be displayed on the client.
3 - 15 letters or digits
[ server name ] seafile #这里输入服务名,有意义即可
What is the ip or domain of the server?
For example: www.mycompany.com, 192.168.1.101
[ This server's ip or domain ] 192.168.75.130 #输入主机的ip地址
Where do you want to put your seafile data?
Please use a volume with enough free space
[ default "/opt/seafile/seafile-data" ] #这里默认无需修改,直接回车
Which port do you want to use for the seafile fileserver?
[ default "8082" ] #这里默认无需修改,直接回车
-------------------------------------------------------
Please choose a way to initialize seafile databases:
-------------------------------------------------------
[1] Create new ccnet/seafile/seahub databases
[2] Use existing ccnet/seafile/seahub databases
[ 1 or 2 ] 1 #这里选择1
What is the host of mysql server?
[ default "localhost" ] #默认无需修改,直接回车
What is the port of mysql server?
[ default "3306" ] #默认无需修改,直接回车
What is the password of the mysql root user?
[ root password ] #这里输入上面mysql安全初始化时设置的root for mysql的密码
verifying password of user root ... done
Enter the name for mysql user of seafile. It would be created if not exists.
[ default "root" ] #这里直接回车
Enter the database name for ccnet-server:
[ default "ccnet-db" ] #这里直接回车
Enter the database name for seafile-server:
[ default "seafile-db" ] #这里直接回车
Enter the database name for seahub:
[ default "seahub-db" ] #这里直接回车
---------------------------------
This is your configuration
---------------------------------
server name: seafile
server ip/domain: 192.168.75.130
seafile data dir: /opt/seafile/seafile-data
fileserver port: 8082
database: create new
ccnet database: ccnet-db
seafile database: seafile-db
seahub database: seahub-db
database user: root
---------------------------------
Press ENTER to continue, or Ctrl-C to abort #这里直接回车
---------------------------------
Generating ccnet configuration ...
done
Successly create configuration dir /opt/seafile/ccnet.
Generating seafile configuration ...
Done.
done
Generating seahub configuration ...
----------------------------------------
Now creating seahub database tables ...
----------------------------------------
creating seafile-server-latest symbolic link ... done
-----------------------------------------------------------------
Your seafile server configuration has been finished successfully.
-----------------------------------------------------------------
run seafile server: ./seafile.sh { start | stop | restart }
run seahub server: ./seahub.sh { start <port> | stop | restart <port> }
-----------------------------------------------------------------
If you are behind a firewall, remember to allow input/output of these tcp ports:
-----------------------------------------------------------------
port of seafile fileserver: 8082
port of seahub: 8000
When problems occur, Refer to
https://github.com/haiwen/seafile/wiki
for information.
启动seafile
[root@sishen seafile-server-5.1.4]# ./seafile.sh start
[11/30/17 02:24:31] ../common/session.c(132): using config file /opt/seafile/conf/ccnet.conf
Starting seafile server, please wait ...
Seafile server started
Done.
[root@sishen seafile-server-5.1.4]# ./seahub.sh start
LC_ALL is not set in ENV, set to en_US.UTF-8
Starting seahub at port 8000 ...
----------------------------------------
It's the first time you start the seafile server. Now let's create the admin account
----------------------------------------
What is the email for the admin account?
[ admin email ] 1255560195@qq.com
What is the password for the admin account?
[ admin password ] #这个密码一会登录的时候要用到,最好记下来。
Enter the password again:
[ admin password again ]
----------------------------------------
Successfully created seafile admin
----------------------------------------
Seahub is started
Done.
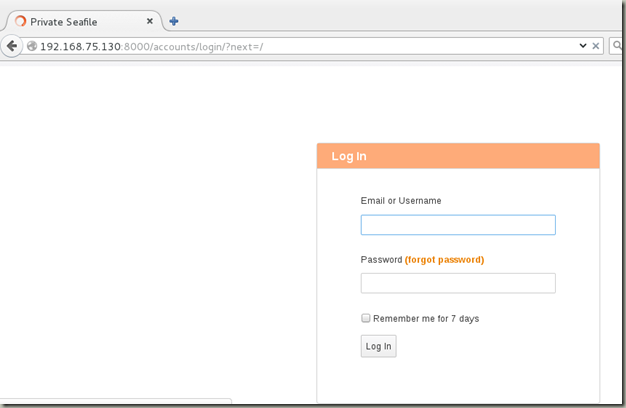
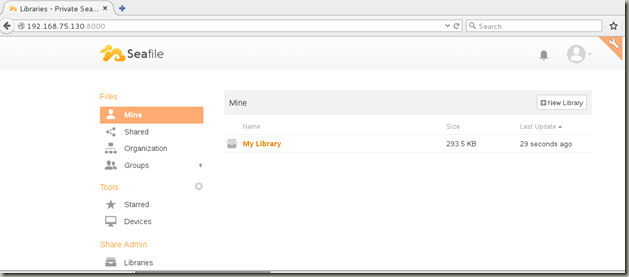
测试登录
基于CentOS 7.2个人网盘的实现的更多相关文章
- 基于CentOS 搭建 Seafile 专属网盘
系统要求:CentOS 7.2 64 位操作系统 安装 Seafile 安装依赖环境 使用 yum 安装 Python 及 MySQL: yum install python python-setup ...
- 基于 CentOS 搭建Seafile个人网盘
一.安装 Seafile 安装依赖环境使用 yum 安装 Python 及 MySQL: yum install python python-setuptools python-imaging pyt ...
- 基于Ubuntu搭建Seafile专属网盘
系统要求: Ubuntu 16.04.1 LTS 64 位操作系统 安装 Seafile 服务器 安装依赖环境 在 Debian/Ubuntu 系统下,可以使用以下命令安装 MySQL: sudo a ...
- CentOS里下载百度网盘 / 360 网盘资源的方法
wget -c --referer=引用地址 -O 文件名 "真实下载地址" 例如,我下载资源原在的页面为http://pan.baidu.com/s/1cfJXZ ,实际下载地址 ...
- Centos搭建Seafile个人网盘
1.安装依赖环境 yum install python python-setuptools python-imaging python-ldap python-memcached MySQL-pyth ...
- vfd-cloud——一个适合练习上手的云存储网盘springboot项目(开发中)
vfd-cloud 一个基于SpringBoot的云存储网盘项目,适合练手学习SpringBoot,用到的技术栈列到了下面.支持用户的注册登陆及修改密码,利用邮箱进行验证.支持 ...
- 『实践』VirtualBox 5.1.18+Centos 6.8+hadoop 2.7.3搭建hadoop完全分布式集群及基于HDFS的网盘实现
『实践』VirtualBox 5.1.18+Centos 6.8+hadoop 2.7.3搭建hadoop完全分布式集群及基于HDFS的网盘实现 1.基本设定和软件版本 主机名 ip 对应角色 mas ...
- [原创] 【2014.12.02更新网盘链接】基于EasySysprep4.1的 Windows 7 x86/x64 『视频』封装
[原创] [2014.12.02更新网盘链接]基于EasySysprep4.1的 Windows 7 x86/x64 『视频』封装 joinlidong 发表于 2014-11-29 14:25:50 ...
- CentOS 7 使用OwnCloud建立私有云储存网盘
使用OwnCloud建立属于自己私有的云存储网盘 OwnCloud概述: OwnCloud 一款文件主机服务软件,就是我们平时使用的云存储,不过这是在自己主机的服务器上建立属于自己的私有云,OwnCl ...
随机推荐
- Jmeter代理服务器录制请求
1.文档前提说明 1)本文使用jmeter的版本为 apache-jmeter-2.13 及以上版本 2)java版本要求在 1.8.0 以上 注:jmeter版本一般和java相应的版本一起使用,如 ...
- 用Delphi7 调用.NET 2.0的WebService 所要注意的问题(Document格式和UTF8编码)
Delphi7 调用VS.NET 2005开发的基于.NET 2.0的WebService时发生了错误.查阅资料 http://www.community.borland.com/article/bo ...
- 无线网络中的MAC协议(1)
前文我们对传统的有线网络的MAC协议进行了分析,接下来我们在对无线网络的MAC也进行一个详细的介绍.那么无线网络中的MAC工作方式是如何的呢?无线局域网(WLAN)中MAC所对应的标准为IEEE 80 ...
- POJ2976 Dropping tests —— 01分数规划 二分法
题目链接:http://poj.org/problem?id=2976 Dropping tests Time Limit: 1000MS Memory Limit: 65536K Total S ...
- asp+jQuery解决中文乱码
1. [代码][ASP/Basic]代码 '在客户端使用javascript的escape()方法对数据进行编码,在服务器端使用对等的VbsUnEscape()对数据进行解码,同样在服务器端使用Vbs ...
- 牛人的ACM经验 (转)
一:知识点 数据结构: 1,单,双链表及循环链表 2,树的表示与存储,二叉树(概念,遍历)二叉树的 应用(二叉排序树,判定树,博弈 ...
- hihocoder-1347 小h的树上的朋友(lca+线段树)
题目链接: 小h的树上的朋友 时间限制:18000ms 单点时限:2000ms 内存限制:512MB 描述 小h拥有n位朋友.每位朋友拥有一个数值Vi代表他与小h的亲密度.亲密度有可能发生变化. 岁月 ...
- LibSVM学习详细说明
代码文件主要针对Matlab进行说明,但个人仍觉得讲解的支持向量机内容非常棒,可以做为理解这一统计方法的辅助资料; LibSVM是台湾林智仁(Chih-Jen Lin)教授2001年开发的一套支持向量 ...
- 使用FPDF输出中文
① 下载FPDF相关资料=>https://github.com/DCgithub21/cd_FPDF ② 查看目录文件 注:ttf2pt1.zip为字体转换程序 ③ 运行example.ph ...
- django上课笔记5-FK关联
一.FK关联 FK关联 url.py里 from app01 import views urlpatterns = [ url(r'^admin/', admin.site.urls), url(r' ...