DeepLearning.ai-Week2-Keras tutorial-the Happy House
1 - Import Packages
import numpy as np

from keras import layers

from keras.layers import Input, Dense, Activation, ZeroPadding2D, BatchNormalization, Flatten, Conv2D

from keras.layers import AveragePooling2D, MaxPooling2D, Dropout, GlobalMaxPooling2D, GlobalAveragePooling2D

from keras.models import Model

from keras.preprocessing import image

from keras.utils import layer_utils

from keras.utils.data_utils import get_file

from keras.applications.imagenet_utils import preprocess_input

import pydot

from IPython.display import SVG

from keras.utils.vis_utils import model_to_dot

from keras.utils import plot_model

from kt_utils import *

import keras.backend as K

K.set_image_data_format('channels_last')

import matplotlib.pyplot as plt

from matplotlib.pyplot import imshow

%matplotlib inline
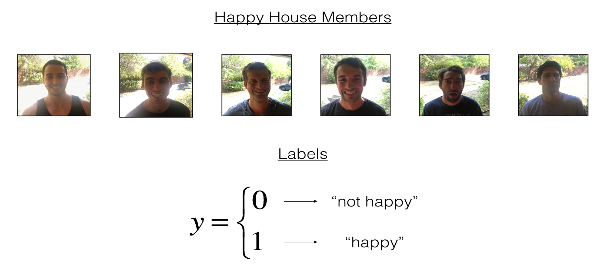
2 - The Happy House
2.1 - Dataset Description
2.2 - Normalize the dataset and learn about its shape
图像大小为(64, 64, 3),训练集有600张图像,测试集有150张图像。
X_train_orig, Y_train_orig, X_test_orig, Y_test_orig, classes = load_dataset()

# Normalize image vectors

X_train = X_train_orig/255.

X_test = X_test_orig/255.

# Reshape

Y_train = Y_train_orig.T

Y_test = Y_test_orig.T

print ("number of training examples = " + str(X_train.shape[0]))

print ("number of test examples = " + str(X_test.shape[0]))

print ("X_train shape: " + str(X_train.shape))

print ("Y_train shape: " + str(Y_train.shape))

print ("X_test shape: " + str(X_test.shape))

print ("Y_test shape: " + str(Y_test.shape))
Result:

number of training examples = 600

number of test examples = 150

X_train shape: (600, 64, 64, 3)

Y_train shape: (600, 1)

X_test shape: (150, 64, 64, 3)

Y_test shape: (150, 1)
3 - Building a model in Keras
这个作业比较开放,模型架构完全有自己决定。但建议使用作业提供的初始架构,然后再进行调整和改进。总之,我们可以修改模型的架构以及超参数。
使用Keras训练和测试模型,有如下步骤:
* 创建模型
* 编译模型:$model.compile(optimizer = "...", loss = "...", metrics = ["accuracy"])$
* 训练模型:$model.fit(x = ..., y = ..., epochs = ..., batch_size = ...)$
* 测试模型:$model.evaluate(x = ..., y = ...)$
综上,即是Create->Compile->Fit/Train->Evaluate/Test。
# GRADED FUNCTION: HappyModel

def HappyModel(input_shape):

    """

    Implementation of the HappyModel.

    Arguments:

    input_shape -- shape of the images of the dataset

    Returns:

    model -- a Model() instance in Keras

    """

    ### START CODE HERE ###

    # Feel free to use the suggested outline in the text above to get started, and run through the whole

    # exercise (including the later portions of this notebook) once. The come back also try out other

    # network architectures as well.

    X_input = Input(input_shape)

    # Zero-Padding: pads the border of X_input with zeroes

    X = ZeroPadding2D((3, 3))(X_input)

    # CONV -> BN -> RELU Block applied to X

    X = Conv2D(32, (7, 7), strides=(1, 1), name="conv0")(X)

    X = BatchNormalization(axis=3, name="bn0")(X)

    X = Activation("relu")(X)

    # MAXPOOL

    X = MaxPooling2D((2, 2), name="max_pool")(X)

    # FLATTEN X (means convert it to a vector) + FULLYCONNECTED

    X = Flatten()(X)

    X = Dense(1, activation="sigmoid", name="fc")(X)

    # Create model. This creates your Keras model instance, you'll use this instance to train/test the model.

    model = Model(inputs=X_input, outputs=X, name="HappyModel")

    ### END CODE HERE ###

    return model
3.1 - 创建模型
### START CODE HERE ### (1 line)

happyModel = HappyModel(X_train[0, :, :, :].shape)

### END CODE HERE ###
3.2 - 编译模型
### START CODE HERE ### (1 line)

happyModel.compile(optimizer="adam", loss="mse", metrics=["accuracy"])

### END CODE HERE ###
3.3 - 训练模型
我选择迭代10次,每一个批次有16个样本。
### START CODE HERE ### (1 line)

happyModel.fit(x=X_train, y=Y_train, epochs=40, batch_size=16)

### END CODE HERE ###
Result:

Epoch 1/10

600/600 [==============================] - 15s 25ms/step - loss: 1.5877 - acc: 0.6433

Epoch 2/10

600/600 [==============================] - 15s 25ms/step - loss: 0.3024 - acc: 0.8617

Epoch 3/10

600/600 [==============================] - 15s 25ms/step - loss: 0.1550 - acc: 0.9317

Epoch 4/10

600/600 [==============================] - 15s 25ms/step - loss: 0.1032 - acc: 0.9683

Epoch 5/10

600/600 [==============================] - 15s 26ms/step - loss: 0.1603 - acc: 0.9367

Epoch 6/10

600/600 [==============================] - 16s 26ms/step - loss: 0.0952 - acc: 0.9733

Epoch 7/10

600/600 [==============================] - 15s 26ms/step - loss: 0.0820 - acc: 0.9767

Epoch 8/10

600/600 [==============================] - 16s 26ms/step - loss: 0.0670 - acc: 0.9833

Epoch 9/10

600/600 [==============================] - 15s 26ms/step - loss: 0.0699 - acc: 0.9750

Epoch 10/10

600/600 [==============================] - 16s 27ms/step - loss: 0.1436 - acc: 0.9467
3.4 - 测试模型
### START CODE HERE ### (1 line)

preds = happyModel.evaluate(x=X_test, y=Y_test)

### END CODE HERE ###

print()

print ("Loss = " + str(preds[0]))

print ("Test Accuracy = " + str(preds[1]))
Result:

150/150 [==============================] - 2s 11ms/step

Loss = 4.14517145475

Test Accuracy = 0.559999998411
4 - Summary
happyModel.summary()
Result:

Layer (type)                 Output Shape              Param #

=================================================================

input_2 (InputLayer)         (None, 64, 64, 3)         0

_________________________________________________________________

zero_padding2d_1 (ZeroPaddin (None, 70, 70, 3)         0

_________________________________________________________________

conv0 (Conv2D)               (None, 64, 64, 32)        4736

_________________________________________________________________

bn0 (BatchNormalization)     (None, 64, 64, 32)        128

_________________________________________________________________

activation_1 (Activation)    (None, 64, 64, 32)        0

_________________________________________________________________

max_pool (MaxPooling2D)      (None, 32, 32, 32)        0

_________________________________________________________________

flatten_1 (Flatten)          (None, 32768)             0

_________________________________________________________________

fc (Dense)                   (None, 1)                 32769

=================================================================

Total params: 37,633

Trainable params: 37,569

Non-trainable params: 64

_________________________________________________________________
plot_model(happyModel, to_file='HappyModel.png')

SVG(model_to_dot(happyModel).create(prog='dot', format='svg'))
Result:

5 - References
https://web.stanford.edu/class/cs230/
DeepLearning.ai-Week2-Keras tutorial-the Happy House的更多相关文章
- DeepLearning.ai学习笔记(三)结构化机器学习项目--week2机器学习策略(2)
一.进行误差分析 很多时候我们发现训练出来的模型有误差后,就会一股脑的想着法子去减少误差.想法固然好,但是有点headlong~ 这节视频中吴大大介绍了一个比较科学的方法,具体的看下面的例子 还是以猫 ...
- DeepLearning.ai学习笔记汇总
第一章 神经网络与深度学习(Neural Network & Deeplearning) DeepLearning.ai学习笔记(一)神经网络和深度学习--Week3浅层神经网络 DeepLe ...
- Coursera深度学习(DeepLearning.ai)编程题&笔记
因为是Jupyter Notebook的形式,所以不方便在博客中展示,具体可在我的github上查看. 第一章 Neural Network & DeepLearning week2 Logi ...
- Coursera机器学习+deeplearning.ai+斯坦福CS231n
日志 20170410 Coursera机器学习 2017.11.28 update deeplearning 台大的机器学习课程:台湾大学林轩田和李宏毅机器学习课程 Coursera机器学习 Wee ...
- 吴恩达deepLearning.ai循环神经网络RNN学习笔记_看图就懂了!!!(理论篇)
前言 目录: RNN提出的背景 - 一个问题 - 为什么不用标准神经网络 - RNN模型怎么解决这个问题 - RNN模型适用的数据特征 - RNN几种类型 RNN模型结构 - RNN block - ...
- 吴恩达deepLearning.ai循环神经网络RNN学习笔记_没有复杂数学公式,看图就懂了!!!(理论篇)
本篇文章被Google中国社区组织人转发,评价: 条理清晰,写的很详细! 被阿里算法工程师点在看! 所以很值得一看! 前言 目录: RNN提出的背景 - 一个问题 - 为什么不用标准神经网络 - RN ...
- 【Deeplearning.ai 】吴恩达深度学习笔记及课后作业目录
吴恩达深度学习课程的课堂笔记以及课后作业 代码下载:https://github.com/douzujun/Deep-Learning-Coursera 吴恩达推荐笔记:https://mp.weix ...
- Coursera DeepLearning.ai Logistic Regression逻辑回归总结
既<Machine Learning>课程后,Andrew Ng又推出了新一系列的课程<DeepLearning.ai>,注册了一下可以试听7天.之后每个月要$49,想想还是有 ...
- Deeplearning.ai课程笔记--汇总
从接触机器学习就了解到Andrew Ng的机器学习课程,后来发现又出来深度学习课程,就开始在网易云课堂上学习deeplearning.ai的课程,Andrew 的课真是的把深入浅出.当然学习这些课程还 ...
- 课程四(Convolutional Neural Networks),第二 周(Deep convolutional models: case studies) —— 2.Programming assignments : Keras Tutorial - The Happy House (not graded)
Keras tutorial - the Happy House Welcome to the first assignment of week 2. In this assignment, you ...
随机推荐
- go操作redis和mysql示例
一:redis示例 使用redis的包是: github.com/garyburd/redigo/redis 1:编写第一个示例: 链接,设置,获取 redis_basic.go package ma ...
- python模块之os模块
os模块 用途:调用封装好的方法调用操作系统的功能,处理文件和目录,OS模块不受平台限制. os.name字符串指示你正在使用的平台.比如对于Windows,它是'nt',而对于Linux/Unix用 ...
- 【优秀的艺术文字和图标设计软件】Art Text 3.2.3 for Mac
[简介] Art Text 3.2.3 版本,这是一款Mac上简单易用的艺术文字和图标设计软件,今这款软件内置了大量的背景纹理和特效,能够让我们非常快速的制作出漂亮的图标,相比专业的PS,Art ...
- Struts2_API
1.访问servletAPI方法1 public String execute() throws Exception { //request域对象==>map (struts2并不推荐使用原生r ...
- 体验Hadoop3.0生态圈-CDH6.1时代的来临
体验Hadoop3.0生态圈-CDH6.1时代的来临 作者:尹正杰 版权声明:原创作品,谢绝转载!否则将追究法律责任. 我在公司使用的是CDH5.15.1这个发行版本,具体的部署文档之前也有给大家分享 ...
- Hadoop ha CDH5.15.1-hadoop集群启动后,两个namenode都是standby模式
Hadoop ha CDH5.15.1-hadoop集群启动后,两个namenode都是standby模式 作者:尹正杰 版权声明:原创作品,谢绝转载!否则将追究法律责任. 一说起周五,想必大家都特别 ...
- rancher2.0部署
1.安装前准备 #当前环境介绍 操作系统:CentOS7.3 硬件:2C 4G内存 官网要求Docker版本: 1.12.6 1.13.1 17.03.2 #关闭防火墙 systemctl stop ...
- python 函数动态参数,名称空间,global,nonlocal
##################################总结######################################动态参数 *args:位置参数动态传参,接收到的是元 ...
- Hudson持续集成管理平台搭建
IP: 10.0.70.106 8G 内存 (Hudson 多 个 工程 在 同 时 构建 的情况下 比 较耗内存) 环 境: CentOS 6.5 . JDK7 注:Hudson 只是一个持续集成 ...
- Quartus II 中 Verilog 常见警告/错误汇总
Verilog 常见错误汇总 1.Found clock-sensitive change during active clock edge at time <time> on regis ...