在Spring中注入Java集合
集合注入重要是对数组、List、Set、map的注入,具体注入方法请参照一下代码(重点是applicationContext.xml中对这几个集合注入的方式):
1.在工程中新建一个Department类,该类包含在com.LHB.collection包当中

 1 package com.LHB.collection;

 2 import java.util.List;

 3 import java.util.Map;

 4 import java.util.Properties;

 5 import java.util.Set;

 6 public class Department {

 7     private String name;

 8     private String[] empName;

 9     private List<Employee> empList;    //List集合

10     private Set<Employee> empSets;     //Set集合

11     private Map<String,Employee> empMap; //map集合

12     private Properties pp;    //Properties的使用

13

14     public Properties getPp() {

15         return pp;

16     }

17     public void setPp(Properties pp) {

18         this.pp = pp;

19     }

20     public Map<String, Employee> getEmpMap() {

21         return empMap;

22     }

23     public void setEmpMap(Map<String, Employee> empMap) {

24         this.empMap = empMap;

25     }

26     public Set<Employee> getEmpSets() {

27         return empSets;

28     }

29     public void setEmpSets(Set<Employee> empSets) {

30         this.empSets = empSets;

31     }

32     public List<Employee> getEmpList() {

33         return empList;

34     }

35     public void setEmpList(List<Employee> empList) {

36         this.empList = empList;

37     }

38     public String getName() {

39         return name;

40     }

41     public void setName(String name) {

42         this.name = name;

43     }

44     public String[] getEmpName() {

45         return empName;

46     }

47     public void setEmpName(String[] empName) {

48         this.empName = empName;

49     }

50 }
2.继续在包中创建Employee类
 1 package com.LHB.collection;

 2 public class Employee {

 3     private String name;

 4     private int id;

 5     public int getId() {

 6         return id;

 7     }

 8     public void setId(int id) {

 9         this.id = id;

10     }

11     public String getName() {

12         return name;

13     }

14     public void setName(String name) {

15         this.name = name;

16     }

17

18 }
3.创建applicationContext.xml配置文件,配置重点在数组,List,Set,Map,propertes装载值的环节
 1 <?xml version="1.0" encoding="UTF-8"?>

 2 <beans xmlns="http://www.springframework.org/schema/beans"

 3        xmlns:xsi="http://www.w3.org/2001/XMLSchema-instance"

 4        xmlns:context="http://www.springframework.org/schema/context"

 5        xsi:schemaLocation="http://www.springframework.org/schema/beans

 6                 http://www.springframework.org/schema/beans/spring-beans.xsd

 7                 http://www.springframework.org/schema/context

 8                 http://www.springframework.org/schema/context/spring-context.xsd">

 9

10    <bean id="department" class="com.LHB.collection.Department">

11        <property name="name" value="财务部门" />

12        <!-- 给数组注入值 -->

13        <property name="empName">

14            <list>

15                <value>小米</value>

16                <value>小明</value>

17                <value>小四</value>

18            </list>

19        </property>

20

21        <!-- 给list注入值 可以有相同的多个对象  -->

22        <property name="empList">

23            <list>

24                <ref bean="emp1" />

25                <ref bean="emp2"/>

26            </list>

27        </property>

28        <!-- 给set注入值 不能有相同的对象 -->

29        <property name="empSets">

30            <set>

31                <ref bean="emp1" />

32                <ref bean="emp2"/>

33            </set>

34        </property>

35

36        <!-- 给map注入值 只要map中的key值不一样就可以装配value -->

37        <property name="empMap">

38            <map>

39                <entry key="1" value-ref="emp1" />

40                <entry key="2" value-ref="emp2" />

41            </map>

42        </property>

43

44        <!-- 给属性集合配置 -->

45        <property name="pp">

46            <props>

47                <prop key="pp1">hello</prop>

48                <prop key="pp2">world</prop>

49            </props>

50        </property>

51    </bean>

52    <bean id="emp1" class="com.LHB.collection.Employee">

53        <property name="name">

54            <value>北京</value>

55        </property>

56    </bean>

57     <bean id="emp2" class="com.LHB.collection.Employee">

58        <property name="name">

59            <value>天津</value>

60        </property>

61    </bean>

62

63 </beans>
4.继续在该包中新建App1.java测试类
 1 package com.LHB.collection;

 2 import java.util.Enumeration;

 3 import java.util.Iterator;

 4 import java.util.Map;

 5 import java.util.Map.Entry;

 6 import java.util.Properties;

 7

 8 import org.springframework.context.ApplicationContext;

 9 import org.springframework.context.support.ClassPathXmlApplicationContext;

10 public class App1 {

11

12     public static void main(String[] args) {

13         // TODO Auto-generated method stub

14

15         //通过类路径应用上下文获取配置文件applicationContext.xml

16         ApplicationContext ac = new ClassPathXmlApplicationContext("com/LHB/collection/applicationContext.xml");

17         //通过getBean()获取到applicationContext.xml文件中Bean对象

18         Department dm = (Department) ac.getBean("department");

19         System.out.println(dm.getName());

20         //取出数组中的值

21         for(String emName : dm.getEmpName()){

22             System.out.println(emName);

23         }

24

25         System.out.println("*********通过List集合取出数据******");

26         for(Employee e : dm.getEmpList()){

27             System.out.println("name = "+ e.getName());

28         }

29

30         System.out.println("*********通过Set集合取出数据******");

31         for(Employee e : dm.getEmpSets()){

32             System.out.println("name = "+ e.getName());

33         }

34

35         System.out.println("*********通过Map集合取出数据(迭代器)******");

36         //迭代器

37         Map<String,Employee> empMap = dm.getEmpMap();

38         Iterator it = empMap.keySet().iterator();

39         while(it.hasNext()){

40             String key = (String) it.next();

41             Employee emp = empMap.get(key);

42             System.out.println("key = " + key + " " + emp.getName());

43         }

44         System.out.println("*********通过Map集合取出数据(Emtry简洁法)******");

45         //简洁方法

46         for(Entry<String,Employee> entry : dm.getEmpMap().entrySet()){

47

48             System.out.println(entry.getKey()+ " " + entry.getValue().getName());

49         }

50

51         System.out.println("*********通过Propertis取出数据(通过Entry对象取)******");

52         Properties pp = dm.getPp();

53         for(Entry<Object,Object> entry : pp.entrySet()){

54             System.out.println(entry.getKey().toString() + ", "+ entry.getValue().toString());

55         }

56         System.out.println("*********通过Propertis取出数据(通过Enumeration对象取)******");

57         Enumeration en = pp.keys();

58         while(en.hasMoreElements()){

59             String key = (String) en.nextElement();

60             System.out.println(key + " " + pp.getProperty(key));

61         }

62     }

63 }
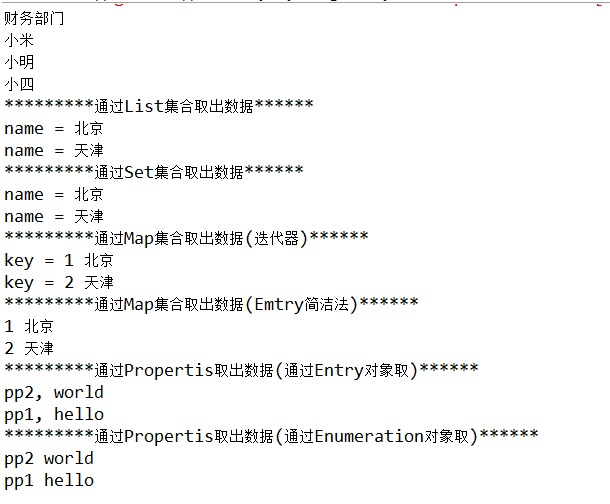
运行结果如下:
在Spring中注入Java集合的更多相关文章
- Spring实战(十二) Spring中注入AspectJ切面
1.Spring AOP与AspectJ Spring AOP与AspectJ相比,是一个功能比较弱的AOP解决方案. AspectJ提供了许多它不能支持的类型切点,如在创建对象时应用通知,构造器切点 ...
- Spring中基于java的配置
Spring中为了减少XML配置,可以声明一个配置类类对bean进行配置,主要用到两个注解@Configuration和@bean 例子: 首先,XML中进行少量的配置来启动java配置: <? ...
- Spring中注入List,Set,Map,Properties的xml文件配置方法
下面的例子展示了如何注入 List – <list/> Set – <set/> Map – <map/> Properties – <props/> ...
- 【Spring】28、Spring中基于Java的配置@Configuration和@Bean用法.代替xml配置文件
Spring中为了减少xml中配置,可以生命一个配置类(例如SpringConfig)来对bean进行配置. 一.首先,需要xml中进行少量的配置来启动Java配置: <?xml version ...
- Spring中注入对象为NULL
Java工程报错, java.lang.reflect.InvocationTargetException,网上搜索过后,发现是注入错误,通过调试发现,具体报错位置是某个dao层对象为null,进而引 ...
- Spring中基于Java的配置@Configuration和@Bean用法
spring中为了减少xml中配置,可以声明一个配置类(例如SpringConfig)来对bean进行配置. 一.首先,需要xml中进行少量的配置来启动Java配置: <?xml version ...
- Spring中基于Java的配置@Configuration和@Bean用法 (转)
spring中为了减少xml中配置,可以生命一个配置类(例如SpringConfig)来对bean进行配置. 一.首先,需要xml中进行少量的配置来启动Java配置: <?xml version ...
- Spring中注入bean学习的总结
1.在类上直接加注解@Component,那么这个类就直接注入到Spring容器中了 ,像@Contrloller,@Service这些本质上都是@Component, 2.@Configurati ...
- Spring中使用要点集合
1.InitializingBean和init-method方法 Spring的InitializingBean为bean提供了定义初始化方法的方式.InitializingBean是一个接口,它仅仅 ...
随机推荐
- 表结构变更后出现的ERROR OGG-01161 Bad column index (88)
2014-07-31 09:38:31 ERROR OGG-01668 PROCESS ABENDING. 2014-07-31 09:38:31 ERROR OGG-01161 Bad column ...
- 【转载】如何在Oracle中复制表结构和表数据
1. 复制表结构及其数据: create table table_name_new as select * from table_name_old 2. 只复制表结构: create table ta ...
- ADS ARM 汇编和GNU ARM汇编
Linux/Unix内核源代码用的编译器是GCC,而GCC采用的是AT&T的汇编格式,这与ADS下使用的汇编格式是不同的. 两种汇编格式的部分对比如下: GNU ARM汇编 ADS ARM汇编 ...
- Showing a tooltip
We can provide a balloon help for any of our widgets. #!/usr/bin/python # -*- coding: utf-8 -*- &quo ...
- photoshop 切片工具进行切图
1.使用切片工具切图 2.存储为web所用格式 3.选择图片格式 4.只保存切片(选择所有用户切片) 5.查看:
- SCSS 实用知识汇总
1.变量声明 $nav-color: #F90; nav { //$width 变量的作用域仅限于{}内 $width: 100px; width: $width; color: $nav-color ...
- How to set up OpenERP for various timezone kindly follow the following steps to select timezone in OpenERP
How to set up OpenERP for different Time Zones Click on the "Edit Preferences" wheel a ...
- _x和__all__(有所理解即可)
# -*- coding: utf-8 -*- #python 27 #xiaodeng #_x和__all__(有所理解即可) #_x #不能使用from module import *导入 [注意 ...
- jQuery+PHP动态显示(项目)实时时间和倒计时
jQuery动态显示当前时间: html代码:<div id="current_time"></div> setInterval()使用:setInt ...
- 【jQuery】form表单元素序列化为json对象
序列化form表单元素为json对象: <!Doctype html> <html xmlns=http://www.w3.org/1999/xhtml> <head&g ...