【ElasticSearch】03 部署
Windows集群部署:
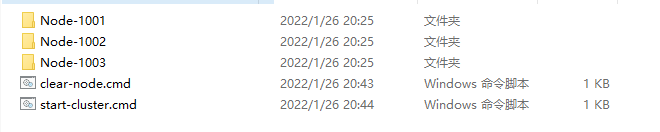
把包解压成三个节点 【kibana-7.16.3-windows-x86_64.zip】
- Node-1001

- Node-1002

- Node-1003
修改集群的配置信息
- Node-1001\config\elasticsearch.yml

- Node-1002\config\elasticsearch.yml

- Node-1003\config\elasticsearch.yml
配置信息:
============================== Node-1001 ==========================

# 集群名称一致

cluster.name: Cloud9-WIN-ES-CAT

#节点名称,集群内要唯一

node.name: node-1001

node.master: true

node.data: true

# ip 地址

network.host: localhost

# http 端口

http.port: 1001

# tcp 监听端口

transport.tcp.port: 9301

# 跨域配置

http.cors.enabled: true

http.cors.allow-origin: "*"

============================== Node-1002 ==========================

# 集群名称一致

cluster.name: Cloud9-WIN-ES-CAT

#节点名称,集群内要唯一

node.name: node-1002

node.master: true

node.data: true

# 候选主节点

discovery.seed_hosts: ["localhost:9301"]

discovery.zen.fd.ping_timeout: 1m

discovery.zen.fd.ping_retries: 5

# ip 地址

network.host: localhost

# http 端口

http.port: 1002

# tcp 监听端口

transport.tcp.port: 9302

# 跨域配置

http.cors.enabled: true

http.cors.allow-origin: "*"

============================== Node-1003 ==========================

# 集群名称一致

cluster.name: Cloud9-WIN-ES-CAT

#节点名称,集群内要唯一

node.name: node-1003

node.master: true

node.data: true

#候选主节点的地址,在开启服务后可以被选为主节点

discovery.seed_hosts: ["localhost:9301", "localhost:9302"]

discovery.zen.fd.ping_timeout: 1m

discovery.zen.fd.ping_retries: 5

# ip 地址

network.host: localhost

# http 端口

http.port: 1003

# tcp 监听端口

transport.tcp.port: 9303

# 跨域配置

http.cors.enabled: true

http.cors.allow-origin: "*"
(可选)编写辅助启动脚本【start-cluster.cmd】:
@echo off

start %CD%\Node-1001\bin\elasticsearch.bat

start %CD%\Node-1002\bin\elasticsearch.bat

start %CD%\Node-1003\bin\elasticsearch.bat
(可选)编写辅助清除脚本【clear-nodes.cmd】:
@ECHO OFF

RD /S /Q %CD%\Node-1001\data\nodes

RD /S /Q %CD%\Node-1002\data\nodes

RD /S /Q %CD%\Node-1003\data\nodes
启动之前,删除data目录下的nodes目录
然后依次启动
bin\elasticsearch.bat
请求节点地址,查看节点运行状态【GET请求】
http://localhost:1001/_cluster/health

http://localhost:1002/_cluster/health

http://localhost:1003/_cluster/health
响应这些信息表示正常
{

    "cluster_name": "Cloud9-WIN-ES-CAT",

    "status": "green",

    "timed_out": false,

    "number_of_nodes": 1,

    "number_of_data_nodes": 1,

    "active_primary_shards": 3,

    "active_shards": 3,

    "relocating_shards": 0,

    "initializing_shards": 0,

    "unassigned_shards": 0,

    "delayed_unassigned_shards": 0,

    "number_of_pending_tasks": 0,

    "number_of_in_flight_fetch": 0,

    "task_max_waiting_in_queue_millis": 0,

    "active_shards_percent_as_number": 100.0

}
或者是查看cat/nodes?v查看集群状态
http://localhost:1001/_cat/nodes?v

http://localhost:1002/_cat/nodes?v

http://localhost:1003/_cat/nodes?v
响应的信息:
ip        heap.percent ram.percent cpu load_1m load_5m load_15m node.role   master name

127.0.0.1           20          97  19                          cdfhilmrstw -      node-1003

127.0.0.1           21          97  19                          cdfhilmrstw -      node-1002

127.0.0.1           16          97  19                          cdfhilmrstw *      node-1001
# 测试集群是否是相互通信的?
# 在1001节点创建一个sample索引
PUT http://localhost:1001/sample
# 然后去1002节点和1003节点上面查看sample索引信息
# 如果其他节点能够找到1001节点的索引,说明集群是相互通信的
GET http://localhost:1003/sample

GET http://localhost:1002/sample
Linux集群部署:
首先提供集群服务环境 (每台虚拟机最少提供2G内存,内存过低将导致服务无法集群通信)
192.168.177.128

192.168.177.129

192.168.177.130
每台机器都需要有ES的包
elasticsearch-7.16.0-linux-x86_64.tar.gz
解压包到/opt/module目录下面
mkdir -p /opt/module/

tar -zxvf elasticsearch-7.16.0-linux-x86_64.tar.gz -C /opt/module/
# (可选)变更目录名称
mv /opt/module/elasticsearch-7.16.0 /opt/module/es
# 创建elasticsearch用户, 设置密码123456
useradd user-es

passwd user-es
# 权限赋予
chown -R user-es:user-es /opt/module/elasticsearch-7.16.0/
# 编辑集群参数
mv /opt/module/elasticsearch-7.16.0/config/elasticsearch.yml /opt/module/elasticsearch-7.16.0/config/elasticsearch.yml.bak

vim /opt/module/elasticsearch-7.16.0/config/elasticsearch.yml

= = = = = 1号节点 192.168.177.128 = = = = =

# 集群名称

cluster.name: cluster-es

# 节点名称,每个节点的名称不能重复

node.name: node-1

# ip地址,每个节点的地址不能重复

network.host: 192.168.177.128

# 是否具有资格主节点

node.master: true

node.data: true

http.port: 9200

# head 插件需要这打开这两个配置

http.cors.allow-origin: "*"

http.cors.enabled: true

http.max_content_length: 200mb

# es7.x 之后新增的配置,初始化一个新的集群时需要此配置来选举 master

cluster.initial_master_nodes: ["node-1"]

# es7.x 之后新增的配置,节点发现

discovery.seed_hosts: ["192.168.177.128:9300","192.168.177.129:9300","192.168.177.130:9300"]

gateway.recover_after_nodes: 2

network.tcp.keep_alive: true

network.tcp.no_delay: true

transport.tcp.compress: true

# 集群内同时启动的数据任务个数,默认是 2 个

cluster.routing.allocation.cluster_concurrent_rebalance: 16

# 添加或删除节点及负载均衡时并发恢复的线程个数,默认 4 个

cluster.routing.allocation.node_concurrent_recoveries: 16

# 初始化数据恢复时,并发恢复线程的个数,默认 4 个

cluster.routing.allocation.node_initial_primaries_recoveries: 16

= = = = = 2号节点 192.168.177.129 = = = = =

# 集群名称

cluster.name: cluster-es

# 节点名称,每个节点的名称不能重复

node.name: node-2

# ip地址,每个节点的地址不能重复

network.host: 192.168.177.129

# 是否具有资格主节点

node.master: true

node.data: true

http.port: 9200

# head 插件需要这打开这两个配置

http.cors.allow-origin: "*"

http.cors.enabled: true

http.max_content_length: 200mb

# es7.x 之后新增的配置,初始化一个新的集群时需要此配置来选举 master

cluster.initial_master_nodes: ["node-1"]

# es7.x 之后新增的配置,节点发现

discovery.seed_hosts: ["192.168.177.128:9300","192.168.177.129:9300","192.168.177.130:9300"]

gateway.recover_after_nodes: 2

network.tcp.keep_alive: true

network.tcp.no_delay: true

transport.tcp.compress: true

# 集群内同时启动的数据任务个数,默认是 2 个

cluster.routing.allocation.cluster_concurrent_rebalance: 16

# 添加或删除节点及负载均衡时并发恢复的线程个数,默认 4 个

cluster.routing.allocation.node_concurrent_recoveries: 16

# 初始化数据恢复时,并发恢复线程的个数,默认 4 个

cluster.routing.allocation.node_initial_primaries_recoveries: 16

= = = = = 3号节点 192.168.177.130 = = = = =

# 集群名称

cluster.name: cluster-es

# 节点名称,每个节点的名称不能重复

node.name: node-3

# ip地址,每个节点的地址不能重复

network.host: 192.168.177.130

# 是否具有资格主节点

node.master: true

node.data: true

http.port: 9200

# head 插件需要这打开这两个配置

http.cors.allow-origin: "*"

http.cors.enabled: true

http.max_content_length: 200mb

# es7.x 之后新增的配置,初始化一个新的集群时需要此配置来选举 master

cluster.initial_master_nodes: ["node-1"]

# es7.x 之后新增的配置,节点发现

discovery.seed_hosts: ["192.168.177.128:9300","192.168.177.129:9300","192.168.177.130:9300"]

gateway.recover_after_nodes: 2

network.tcp.keep_alive: true

network.tcp.no_delay: true

transport.tcp.compress: true

# 集群内同时启动的数据任务个数,默认是 2 个

cluster.routing.allocation.cluster_concurrent_rebalance: 16

# 添加或删除节点及负载均衡时并发恢复的线程个数,默认 4 个

cluster.routing.allocation.node_concurrent_recoveries: 16

# 初始化数据恢复时,并发恢复线程的个数,默认 4 个

cluster.routing.allocation.node_initial_primaries_recoveries: 16
# 解除进程限制
vim /etc/security/limits.conf

= = = = = 配置参数 = = = =

# 每个进程可以打开的文件数的限制

user-es soft nofile 65536

user-es hard nofile 65536

vim /etc/security/limits.d/20-nproc.conf

= = = = = 配置参数 = = = =

# 每个进程可以打开的文件数的限制

user-es soft nofile 65536

user-es hard nofile 65536

# 操作系统级别对每个用户创建的进程数的限制

* hard nproc 4096

# 注:* 带表 Linux 所有用户名称

vim /etc/sysctl.conf

= = = = = 配置参数 = = = =

# 在文件中增加下面内容

# 一个进程可以拥有的 VMA(虚拟内存区域)的数量,默认值为 65536

vm.max_map_count=655360
# 重新加载
sysctl -p
# 关闭防火墙
systemctl stop firewalld
# 切换ES用户,启动elasticsearch集群
su user-es
# 清空遗留的节点数据
# 所有节点都执行一遍
rm -rf /opt/module/elasticsearch-7.16.0/data/nodes
# 启动elasticsearch
/opt/module/elasticsearch-7.16.0/bin/elasticsearch -d
# 访问
http://192.168.177.128:9200/_cat/nodes?v

http://192.168.177.129:9200/_cat/nodes?v

http://192.168.177.130:9200/_cat/nodes?v
# 如果每个地址访问都是下面一样的内容,则集群部署成功
ip              heap.percent ram.percent cpu load_1m load_5m load_15m node.role   master name

192.168.177.128           32          94   2    0.28    0.62     0.32 cdfhilmrstw *      node-1

192.168.177.129           25          95   7    0.19    0.65     0.37 cdfhilmrstw -      node-2

192.168.177.130           20          94   0    0.24    0.58     0.31 cdfhilmrstw -      node-3
【ElasticSearch】03 部署的更多相关文章
- ELK日志监控平台安装部署简介--Elasticsearch安装部署
最近由于工作需要,需要搭建一个ELK日志监控平台,本次采用Filebeat(采集数据)+Elasticsearch(建立索引)+Kibana(展示)架构,实现日志搜索展示功能. 一.安装环境描述: 1 ...
- 【分布式搜索引擎】Elasticsearch如何部署以及优化查询性能
一.Elasticsearch生产集群如何部署 (1)es生产集群部署5台机器,若每台机器是6核64G的,那么集群总内存是320G (2)假如我们es集群的日增量数据大概是2000万条,每天日增量数据 ...
- ElasticSearch安装部署,基本配置(Ubuntu14.04)
ElasticSearch部署文档(Ubuntu 14.04) 安装java sudo add-apt-repository ppa:webupd8team/java sudo apt-get upd ...
- elasticSearch的部署和使用
部署服务 docker run启动elastic服务 docker pull elasticsearch:6.7.2 docker run -d -p 9200:9200 -p 9300:9300 - ...
- MatrixOne从入门到实践03——部署MatrixOne
MatrixOne从入门到实践--部署MatrixOne 前两章节我们简单介绍了MatrixOne和源码编译了MatrixOne.本章节将使用不同的部署方式,来部署MatrixOne的服务. 注意:不 ...
- ElasticSearch 单点部署
1.下载指定的ES版本(7.17.3) https://www.elastic.co/downloads/past-releases/elasticsearch-7-17-3 2.单点部署elasti ...
- ElasticSearch安装部署
官网:http://www.elasticsearch.org ElasticSearch is an open-source and distributed search engine which ...
- elastic-search单机部署以及中文分词IKAnalyzer安装
前提条件 elasticsearch使用版本5.6.3,需要jdk版本1.8,低于该版本不能使用 下载 https://artifacts.elastic.co/downloads/elasticse ...
- Docker笔记四:Elasticsearch实例部署
在运行或启动elasticsearch容器前,先在宿主机上执行 sysctl -w vm.max_map_count=262144: 解决" max virtual memory areas ...
- elasticsearch单机部署多个节点
cp -r elasticsearch-2.4.4 elasticsearch-2.4.4-2 mv elasticsearch-2.4.4 elasticsearch-2.4.4-1 总共cp了三个 ...
随机推荐
- OpenStack 认证服务(keystone)安装前期部署检查
一,检查安装完成情况 1.连接情况 (1) 从控制节点到计算节点的连通性测试 [1]ping计算节点的内网ip [2]ping计算节点的外网ip [3]ping计算节点的主机名 (2)从计算节点到控制 ...
- xhs全参xs,xt,xscommon逆向分析
声明 本文章中所有内容仅供学习交流,抓包内容.敏感网址.数据接口均已做脱敏处理,严禁用于商业用途和非法用途,否则由此产生的一切后果均与作者无关,若有侵权,请联系我立即删除! 目标网站 aHR0cHM6 ...
- 燕千云ITAM:解锁数字化时代下企业竞争新优势
数字化时代下,企业的IT资产管理(ITAM)尤为关键.企业通过在成长的每个阶段实施有效的IT资产管理策略,以确保资源的最优化利用和风险的有效控制,并在竞争激烈的市场环境中保持优势.然而实际实践中,企业 ...
- 随机二次元图片API上线
Tips:当你看到这个提示的时候,说明当前的文章是由原emlog博客系统搬迁至此的,文章发布时间已过于久远,编排和内容不一定完整,还请谅解` 随机二次元图片API上线 日期:2017-12-6 阿珏 ...
- Ceph提供nfs服务
目录 Ceph提供nfs服务 1. 前期准备 1.1 检查模块 1.2 检查是否有nfs-ganesha集群 2. 创建nfs服务 2.1 ceph提供的nfs的架构 3. nfs导出 3.1 创建c ...
- mysql5.7msi安装
本文介绍的是只安装MySQL数据库的过程,并不包含各种其他附加工具.安装完成之后通常使用Navicat或SQLyog进行可视化操作. 清华的镜像网站只保存最新的几个MySQL版本,所以直链可能已经失效 ...
- 3D捕鱼大富翁源码分析
今天接受了一个捕鱼的源码,技术栈采用: 客户端:Unity 服务端:Java 数据库:mysql 缓存:redis 先来几张成品图 编辑编辑 编辑编辑 编辑 在代码中看到有腾讯推广渠道, ...
- EthernetIP IO从站设备数据 转opc ua项目案例
1 案例说明 设置网关采集EthernetIP IO设备数据 把采集的数据转成opc ua协议转发给其他系统. 2 VFBOX网关工作原理 VFBOX网关是协议转换网关,是把一种协议转换成另外一种协议 ...
- Android Verified Boot 2.0 AVB详解(基于Android P)
原文地址:https://android.googlesource.com/platform/external/avb/+/master/ 译文地址:https://blog.csdn.net/sha ...
- Python_12 多继承与多态
一.查缺补漏 1. self和super的区别:self调用自己方法,super调用父类方法 当使用 self 调用方法时,会从当前类的方法列表中开始找,如果没有,就从父类中再找 而当使用 super ...