CentOS7+Nginx配置Tomcat负载均衡环境
1.准备两个Tomcat
配置两个Tomcat一个端口是8080另外一个端口是8081,分别在webapps下面添加一个测试用的web项目,修改index.jsp文件,8080端口的index.jsp页面加入:
This page is from 8080 port
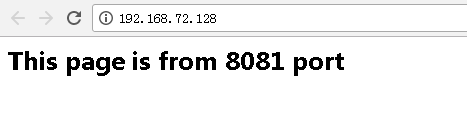
8081的端口的index.jsp加入:
This page is from 8081 port
之后启动两个Tomcat,8080端口跟8081端口都要开放
开放端口:

firewall-cmd --zone=public --add-port=8080/tcp --permanent

查看开放的端口:

firewall-cmd --list-ports
2.配置Nginx
使用whereis nginx命令找到nginx所在的目录并进入目录内的conf文件夹找到ngnix.conf配置文件,在conf文件夹下创建一个vhosts文件夹并在里面创建一个webapp.conf文件内容如下:
upstream www.test.com {  #这里的名称要跟proxy_pass内的名称一致


	server 127.0.0.1:8080 weight=1; #weight:权重,默认是1,数值越大提供服务的次数就越多


	server 127.0.0.1:8081 weight=1;


        server 127.0.0.1:8083 down; #down表示当前的服务暂不参于负载


        server 127.0.0.1:8084 backup; #backup 其它所有非backup机器down或者忙时,才会请求backup机器。

}

server {

	listen 80;

	server_name www.test.com;

	access_log logs/bbs.access.log;

	error_log logs/bbs.error.log;

	#root html;

	#index index.html index.htm index.jsp index.php;

	location / {

		proxy_pass http://www.test.com; #这里的http://www.test.com与上面的upstream要一样

		#Proxy Settings

		proxy_redirect off;

		proxy_set_header Host $host;

		proxy_set_header X-Real-IP $remote_addr;

		proxy_set_header X-Forwarded-For $proxy_add_x_forwarded_for;

		proxy_next_upstream error timeout invalid_header http_500 http_502 http_503 http_504;

		proxy_max_temp_file_size 0;

		proxy_connect_timeout 90;

		proxy_send_timeout 90;

		proxy_read_timeout 90;

		proxy_buffer_size 4k;

		proxy_buffers 4 32k;

		proxy_busy_buffers_size 64k;

		proxy_temp_file_write_size 64k;

	}

}
接着将创建的vhosts/webapps.conf文件include到nginx.conf文件内。
#user  nobody;

worker_processes  1;

#error_log  logs/error.log;

#error_log  logs/error.log  notice;

#error_log  logs/error.log  info;

#pid        logs/nginx.pid;

events {

    worker_connections  1024;

}

http {

    include       mime.types;

    default_type  application/octet-stream;

    #log_format  main  '$remote_addr - $remote_user [$time_local] "$request" '

    #                  '$status $body_bytes_sent "$http_referer" '

    #                  '"$http_user_agent" "$http_x_forwarded_for"';

    #access_log  logs/access.log  main;

    sendfile        on;

    #tcp_nopush     on;

    #keepalive_timeout  0;

    keepalive_timeout  65;

    #gzip  on;

    include vhosts/webapp.conf;#这里把webapp.conf文件include进来

    server {

        listen       80;

        server_name  localhost;

        #charset koi8-r;

        #access_log  logs/host.access.log  main;

        location / {

           root   html;

            index  index.html index.htm;

        }

        #error_page  404              /404.html;

        # redirect server error pages to the static page /50x.html

        #

        error_page   500 502 503 504  /50x.html;

        location = /50x.html {

            root   html;

        }

        # proxy the PHP scripts to Apache listening on 127.0.0.1:80

        #

        #location ~ \.php$ {

        #    proxy_pass   http://127.0.0.1;

        #}

        # pass the PHP scripts to FastCGI server listening on 127.0.0.1:9000

        #

        #location ~ \.php$ {

        #    root           html;

        #    fastcgi_pass   127.0.0.1:9000;

        #    fastcgi_index  index.php;

        #    fastcgi_param  SCRIPT_FILENAME  /scripts$fastcgi_script_name;

        #    include        fastcgi_params;

        #}

        # deny access to .htaccess files, if Apache's document root

        # concurs with nginx's one

        #

        #location ~ /\.ht {

        #    deny  all;

        #}

    }
重新加载Nginx:
./nginx -s reload
在地址栏输入地址看下效果:

把8080端口的Tomcat关闭后再访问:
3.随机启动
通过vi /lib/systemd/system/nginx.service来添加nginx.service文件,并输入如下内容:
[Unit]

Description=nginx 1.13.7

After=network.target

[Service]

Type=forking

ExecStart=/usr/local/nginx/sbin/nginx

ExecReload=/usr/local/nginx/sbin/nginx -s reload

ExecStop=/usr/local/nginx/sbin/nginx -s quit

PrivateTmp=true

[Install]

WantedBy=multi-user.target
注意:如果不是安装在/usr/local/nginx/目录下,请根据实际安装路径修改ExecStart、ExecReload、ExecStop中的值。
更改nginx.service为可执行:
chmod 755 /lib/systemd/system/nginx.service
设置开机自启动
systemctl enable nginx.service
CentOS7+Nginx配置Tomcat负载均衡环境的更多相关文章
- nginx配置tomcat负载均衡,nginx.conf配置文件的配置
- Linux配置Nginx+Tomcat负载均衡
cd /usr/local/tomcat1/webapps/ROOT/ tar -zxvf nginx-1.14.2.tar.gz -C /usr/local 一.Linux配置Nginx 一.下载N ...
- 基于nginx的tomcat负载均衡和集群
要集群tomcat主要是解决SESSION共享的问题,因此我利用memcached来保存session,多台TOMCAT服务器即可共享SESSION了. 你可以自己写tomcat的扩展来保存SESSI ...
- Nginx+Tomcat 负载均衡、动静分离集群
目录: 一.Nginx负载均衡实现原理 二.Nginx动静分离实现原理 三.Nginx+Tomcat 负载均衡.动静分离集群部署 一.Nginx负载均衡实现原理 1.Nginx实现负载均衡是通过反向代 ...
- 配置apache和nginx的tomcat负载均衡
概述 本篇文章主要介绍apache和nginx的相关配置,tomcat的相关安装配置我在前面有写过一篇,详细介绍通过两种配置方法配置nginx. tomcat配置参考:http://www.cnblo ...
- nginx多tomcat负载均衡
目的 先说说我要干什么,如题:使用nginx实现多个tomcat服务器的负载均衡. nginx 大名鼎鼎,相信很多人都听过,以前感觉很厉害,用了之后发现真的很厉害.nginx可以做以下几件事: 反向代 ...
- Nginx配置之负载均衡、限流、缓存、黑名单和灰度发布
一.Nginx安装(基于CentOS 6.5) 1.yum命令安装 yum install nginx –y(若不能安装,执行命令yum install epel-release) 2. 启动.停止和 ...
- CentOS系统下做nginx和tomcat负载均衡
系统总是频繁更新,为了避免更新系统的时候领导看不到东西,打算用ngix做代理,后台部署两个tomcat做负载均衡,避免更新一台就无法使用系统的问题,这两天看了写资料,把几个关键点记录在这里以便备忘. ...
- 基于Centos7+Nginx+Tomcat8的负载均衡服务器的搭建
由于工作的需求,在使用中,需要搭建负载均衡,研究了Apache+Tomat负载均衡的方案,并且通过检索相关的文章,进行了比较发现,Apache负载负载均衡在使用的效率上,远远不如Nginx的效率高,因 ...
随机推荐
- Redis(window版本)安装及使用
1.打开redis官网http://redis.io/点击Download 2.往下拉,找到Windows,由图片中的文字可以看出Redis项目不正式支持Windows. 但是,Microsoft开放 ...
- 从零搭建和配置OSX开发环境
对于每一名开发者来说,更换系统或者更换电脑的时候,都免不了花上不短的时间去折腾开 发环境的问题.我本人也是三番两次,深知这个过程的繁琐.所有,根据我自己以往的经验, 以及参考一下他人的意见,整理一下关 ...
- Event IO Process
先了解一下process和event loop EventLoop 除了异步Server和Client库之外,Swoole扩展还提供了直接操作底层epoll/kqueue事件循环的接口.可将其他扩展创 ...
- (Nginx反向代理+NFS共享网页根目录)自动部署及可用性检测
1.nginx反向代理安装配置 #!/usr/bin/bash if [ -e /etc/nginx/nginx.conf ] then echo 'Already installed' exit e ...
- MySQL安装教程(mysql5.6_bundle)
1.下载软件包 下载链接:https://dev.mysql.com/downloads/mysql/5.6.html#downloads centos6--MySQL-5.6.35-1.el6.x8 ...
- Vue + Element UI 实现权限管理系统(工具模块封装)
封装 axios 模块 封装背景 使用axios发起一个请求是比较简单的事情,但是axios没有进行封装复用,项目越来越大,会引起越来越多的代码冗余,让代码变得越来越难维护.所以我们在这里先对 axi ...
- 批量设置样式json版
<!doctype html> <html> <head> <meta charset="utf-8"> <meta name ...
- 原生js(form)验证,可以借鉴下思路,应用到工作中
我在工作中时常使用form验证,在目前的公司做的表单验证用的angular的form组件,对于一个有追求的前端,或者应用在移动端写个form验证,引入angular或者jquery组件等验证,难免显得 ...
- 我在大学毕业后学习Linux系统的心得经验
扣着手指头一算,自己已经毕业快半年了,这半年莫名其妙进外包圈子溜达了一圈,有幸退的早还是正常干一些事情吧,外包终究不是太适合刚入社会的毕业生,今天想把自己的学习和工作经验写成一篇文章,希望能够帮助到正 ...
- Java工厂方法模式
工厂方法模式: /** * 工厂方法模式:也叫工厂模式,属于创建型模式,父类工厂(接口)负责定义产品对象的公共接口, * 而子类工厂负责创建具体的产品对象. * 目的:是为了把产品的实例化操作延迟到子 ...