asp.net core网关Ocelot的简单介绍& Ocelot集成Identity认证
文章简介
Ocelot网关简介
Ocelot集成Idnetity认证处理
Ocelot网关简介
Ocelot是一个基于netcore实现的API网关,本质是一组按特定顺序排列的中间件。Ocelot内部实现了路由转发,限流,熔断,请求聚合,服务发现(集成consul,eureka等),负载均衡,认证(集成Identity)功能。
这里简单介绍下ocelot的配置文件,也就是说以下图为例,请求地址为localhost:18002/users会被转发到localhost:18000/api/users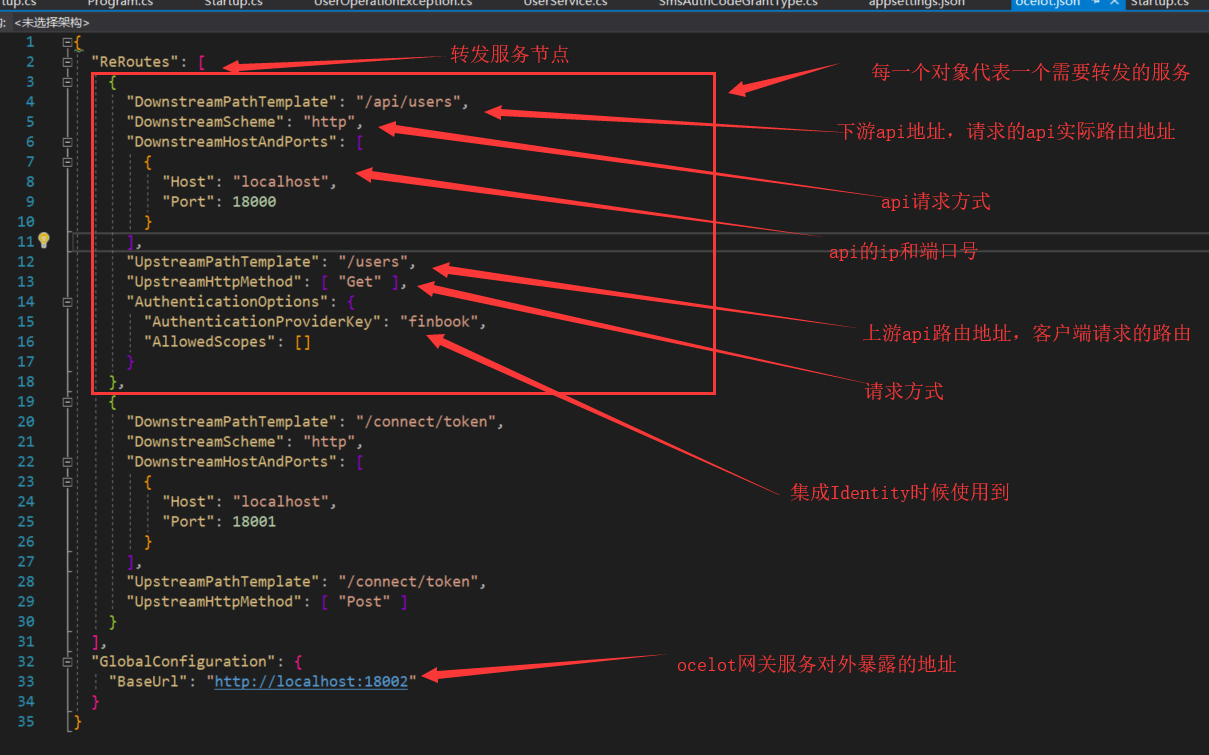
更多关于Ocelot的介绍可以看https://www.cnblogs.com/jesse2013/p/net-core-apigateway-ocelot-docs.html这篇博客或者https://ocelot.readthedocs.io/en/latest/index.html官方文档。
Ocelot集成Identity认证
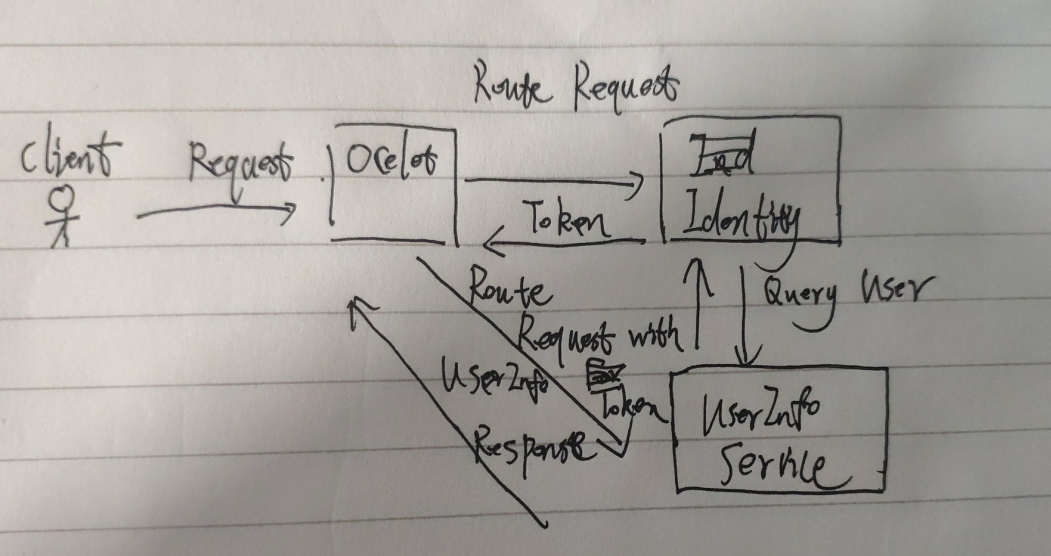
这里我们实现一个Ocelot集成Idnetity做认证的Demo;我们这里客户端请求ocelot网关服务,ocelot网关服务集成Idnetity获取token,再通过返回的token请求用户信息服务,如下图所示。这里扩展一个知识点,我们的Identity服务使用扩展认证,这个认证需要实现IExtensionGrantValidator接口的ValidateAsync方法,从http请求上下文中获取自定义参数,获取方法为context.Request.Raw。(oauth2默认的认证方式有password,authcode等,扩展认证文档=》http://docs.identityserver.io/en/latest/topics/extension_grants.html?highlight=IExtensionGrantValidator)
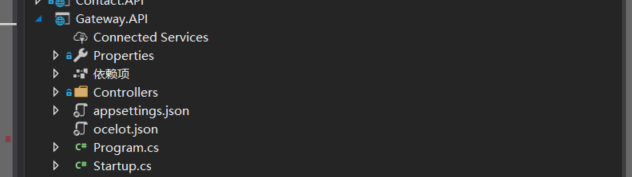
首先我们创建三个服务,分别为Ocelot网关服务(端口号设置为18002),Identity认证服务(端口号设置为18001),UserInfo用户信息服务(端口号设置为18000),如下图所示=》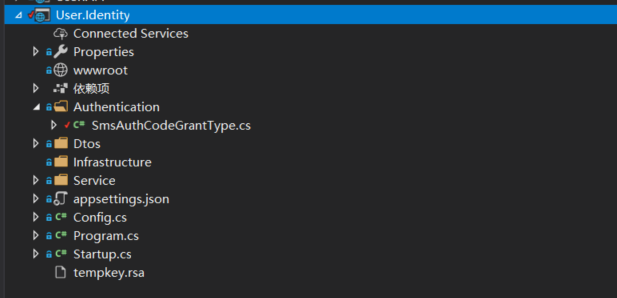
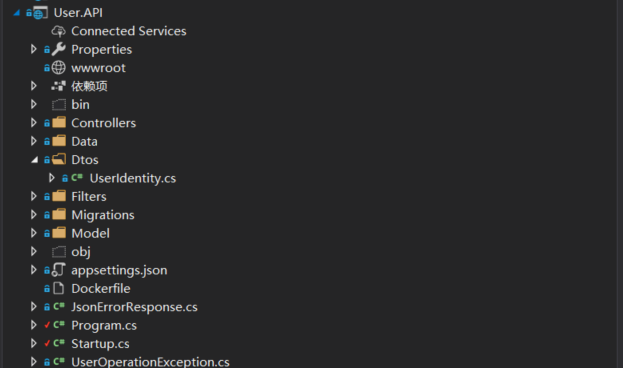
- 首先我们配置User.API服务,这个服务很简单,开放一个返回用户信息的端口,关键代码如下所示 =》
 namespace User.API.Controllers

 {

     [Route("api/users")]

     public class UserController : BaseController

     {

         private readonly UserContext _userContext;

         private ILogger<UserController> _logger;

         public UserController(UserContext userContext, ILogger<UserController> logger)

         {

             _userContext = userContext;

             _logger = logger;

         }

         [HttpGet]

         public async Task<IActionResult> Get()

         {

             var user = await _userContext.Set<AppUser>()

                 .AsNoTracking()

                 .Include(u => u.userProperties)

                 .FirstOrDefaultAsync(t => t.Id == );

             if (user == null)

             {

                 _logger.LogError("登录用户为空");

                 throw new UserOperationException("用户登录异常");

             }

             return Json(user);

         }

 ..... other
User.Api
         [Route("check_or_create")]

         [HttpPost]

         public async Task<IActionResult> CheckOrCreate(string phone)

         {

             var user = await _userContext.Users.SingleOrDefaultAsync(u => u.Phone == phone);

             if (user == null)

             {

                 user = new AppUser { Phone = phone };

                 _userContext.Users.Add(new AppUser { Phone = phone });

                 await _userContext.SaveChangesAsync();

             }

             return Ok(new {

                 user.Id,

                 user.Name,

                 user.Company,

                 user.Title,

                 user.Avatar

             });

         }
User.Api 验证用户手机号,返回用户信息
- 然后配置我们的Identity认证服务,引入IdnttiyServer4 nuget包,添加Ids4配置文件Config.cs。注意:这里的client_grant_type为sms_auth_code
     public class Config

     {

         public static IEnumerable<Client> GetClients()

         {

             return new List<Client>{

                 new Client{

                     ClientId = "android",

                     ClientSecrets = new List<Secret>

                     {

                         new Secret("secret".Sha256())

                     },

                     RefreshTokenExpiration  = TokenExpiration.Sliding,

                     AllowOfflineAccess = true,

                     RequireClientSecret = false,

                     AllowedGrantTypes = new List<string>{"sms_auth_code"},

                     AlwaysIncludeUserClaimsInIdToken = true,

                     AllowedScopes = new List<string>

                     {

                         "gateway_api",

                         IdentityServerConstants.StandardScopes.OfflineAccess,

                         IdentityServerConstants.StandardScopes.OpenId,

                         IdentityServerConstants.StandardScopes.Profile

                     }

                 }

             };

         }

         public static IEnumerable<IdentityResource> GetIdentityResources()

         {

             return new List<IdentityResource>

             {

                 new IdentityResources.OpenId(),

                 new IdentityResources.Profile()

             };

         }

         public static IEnumerable<ApiResource> GetApiResources()

         {

             return new List<ApiResource>

             {

                 new ApiResource("gateway_api","user service")

             };

         }

     }
Config
编写我们的自定义自定义验证服务类,我们验证客户端传入的手机号&验证码是否正确(Demo逻辑中只需要填写正确手机号就可以了)
     public class SmsAuthCodeGrantType : IExtensionGrantValidator

     {

         private IUserService _userService;

         private IAuthCodeService _authCodeService;

         public SmsAuthCodeGrantType(IUserService userService, IAuthCodeService authCodeService)

         {

             _userService = userService;

             _authCodeService = authCodeService;

         }

         public string GrantType => "sms_auth_code";

         /// <summary>

         ///

         /// </summary>

         /// <param name="context"></param>

         /// <returns></returns>

         public async Task ValidateAsync(ExtensionGrantValidationContext context)

         {

             var phone = context.Request.Raw["phone"];

             var code = context.Request.Raw["auth_code"];

             var errorValidationResult = new GrantValidationResult(TokenRequestErrors.InvalidGrant);

             if (string.IsNullOrWhiteSpace(phone) || string.IsNullOrWhiteSpace(code))

             {

                 context.Result = errorValidationResult;

                 return;

             }

             //检查验证码

             if (!_authCodeService.Validate(phone, code))

             {

                 context.Result = errorValidationResult;

                 return;

             }

             //完成用户注册

             var userinfo = await _userService.CheckOrCreate(phone);

             if (userinfo== null)

             {

                 context.Result = errorValidationResult;

                 return;

             }

             var claims = new Claim[]

             {

                 new Claim("name",userinfo.Name??string.Empty),

                 new Claim("company",userinfo.Company??string.Empty),

                 new Claim("title",userinfo.Tiltle??string.Empty),

                 new Claim("avatar",userinfo.Avatar??string.Empty),

             };

             context.Result = new GrantValidationResult(userinfo.Id.ToString(),

                 GrantType,

                 claims);

         }

     }
SmsAuthCodeGrantType
其他的验证服务和与User.API服务通信的服务类和返回的UserInfoDto
     public class UserInfo

     {

         public int Id { get; set; }

         public string Name { get; set; }

         public string Company { get; set; }

         public string Tiltle { get; set; }

         public string Avatar { get; set; }

     }
UserInfo
     public interface IAuthCodeService

     {

         /// <summary>

         /// 根据手机号验证验证码

         /// </summary>

         /// <param name="phone"></param>

         /// <param name="authCode"></param>

         /// <returns></returns>

         bool Validate(string phone, string authCode);

     }
IAuthCodeService
     public class TestAuthCodeService : IAuthCodeService

     {

         public bool Validate(string phone, string authCode)

         {

             return true;

         }

     }
TestAuthCodeService
     public interface IUserService

     {

         /// <summary>

         /// 检查手机号是否注册,未注册就注册

         /// </summary>

         /// <param name="phone"></param>

         Task<UserInfo> CheckOrCreate(string phone);

     }
IUserService
     public class UserService : IUserService

     {

         private HttpClient _httpClient;

         private string _userServiceUrl = "http://localhost:18000";

         public UserService(HttpClient httpClient)

         {

             _httpClient = httpClient;

         }

         public async Task<UserInfo> CheckOrCreate(string phone)

         {

             var from = new Dictionary<string, string>

             {

                 { "phone",phone }

             };

             var content = new FormUrlEncodedContent(from);

             var response = await _httpClient.PostAsync(_userServiceUrl + "/api/users/check_or_create", content);

             if (response.StatusCode == System.Net.HttpStatusCode.OK)

             {

                 var result = await response.Content.ReadAsStringAsync();

                 var userinfo = JsonConvert.DeserializeObject<UserInfo>(result);

                 //int.TryParse(userId,out int UserIdInt);

                 return userinfo;

             }

             return null;

         }

     }
UserService
配置Startup,注意要在我们的DI容器中注入自定义服务验证类(SmsAuthCodeGrantType)
     public class Startup

     {

         public Startup(IConfiguration configuration)

         {

             Configuration = configuration;

         }

         public IConfiguration Configuration { get; }

         // This method gets called by the runtime. Use this method to add services to the container.

         public void ConfigureServices(IServiceCollection services)

         {

             services.AddMvc();

             services.AddIdentityServer()

                 .AddExtensionGrantValidator<SmsAuthCodeGrantType>()

                 .AddDeveloperSigningCredential()

                 .AddInMemoryClients(Config.GetClients())

                 .AddInMemoryIdentityResources(Config.GetIdentityResources())

                 .AddInMemoryApiResources(Config.GetApiResources());  //identityserver 认证

             services.AddScoped<IAuthCodeService, TestAuthCodeService>()

                 .AddScoped<IUserService, UserService>();

             services.AddSingleton(new HttpClient());

         }

         // This method gets called by the runtime. Use this method to configure the HTTP request pipeline.

         public void Configure(IApplicationBuilder app, IHostingEnvironment env)

         {

             if (env.IsDevelopment())

             {

                 app.UseDeveloperExceptionPage();

             }

             app.UseIdentityServer();

             app.UseMvc();

         }

     }
Startup
- 最后配置我们的网关Ocelot站点,首先添加nuget包IdentityServer4.AccessTokenValidation和Ocelot。添加配置文件ocelot.json,其实就是博客开头的配置文件截图,这里特别说明下AuthenticationOptions节点,AuthenticationOptions是ocelot集成Identity所需要配置节点,AuthenticationProviderKey需要跟startup的authenticationScheme匹配
 {

   "ReRoutes": [

     {

       "DownstreamPathTemplate": "/api/users",

       "DownstreamScheme": "http",

       "DownstreamHostAndPorts": [

         {

           "Host": "localhost",

           "Port":

         }

       ],

       "UpstreamPathTemplate": "/users",

       "UpstreamHttpMethod": [ "Get" ],

       "AuthenticationOptions": {

         "AuthenticationProviderKey": "finbook",

         "AllowedScopes": []

       }

     },

     {

       "DownstreamPathTemplate": "/connect/token",

       "DownstreamScheme": "http",

       "DownstreamHostAndPorts": [

         {

           "Host": "localhost",

           "Port":

         }

       ],

       "UpstreamPathTemplate": "/connect/token",

       "UpstreamHttpMethod": [ "Post" ]

     }

   ],

   "GlobalConfiguration": {

     "BaseUrl": "http://localhost:18002"

   }

 }
ocelot.json
将配置文件加载到服务中,修改Program的CreateWebHostBuilder方法
     public class Program

     {

         public static void Main(string[] args)

         {

             CreateWebHostBuilder(args).Build().Run();

         }

         public static IWebHostBuilder CreateWebHostBuilder(string[] args) =>

             WebHost.CreateDefaultBuilder(args)

                 .UseStartup<Startup>()

                 .UseContentRoot(Directory.GetCurrentDirectory())

                 .ConfigureAppConfiguration((hostingContext, config) =>

                 {

                     config

                        .SetBasePath(hostingContext.HostingEnvironment.ContentRootPath)

                        //.AddJsonFile("appsettings.json", true, true)

                        //.AddJsonFile($"appsettings.{hostingContext.HostingEnvironment.EnvironmentName}.json", true, true)

                        .AddJsonFile("ocelot.json")

                        .AddEnvironmentVariables();

                 })

                 .UseUrls("http://+:18002");

     }
Program
配置startup,在DI容器中加入Identity自定义认证,加入Ocelot,启用Ocelot中间件
     public class Startup

     {

         public Startup(IConfiguration configuration)

         {

             Configuration = configuration;

         }

         public IConfiguration Configuration { get; }

         // This method gets called by the runtime. Use this method to add services to the container.

         public void ConfigureServices(IServiceCollection services)

         {

             services.AddMvc().SetCompatibilityVersion(CompatibilityVersion.Version_2_2);

             //添加 认证信息

             var authenticationProviderKey = "finbook";

             services.AddAuthentication()

                 .AddIdentityServerAuthentication(authenticationProviderKey, options =>

                 {

                     options.Authority = "http://localhost:18001";

                     options.ApiName = "gateway_api";

                     options.SupportedTokens = IdentityServer4.AccessTokenValidation.SupportedTokens.Both;

                     options.ApiSecret = "secret";

                     options.RequireHttpsMetadata = false;

                 });

             services.AddOcelot();

         }

         // This method gets called by the runtime. Use this method to configure the HTTP request pipeline.

         public void Configure(IApplicationBuilder app, IHostingEnvironment env)

         {

             if (env.IsDevelopment())

             {

                 app.UseDeveloperExceptionPage();

             }

             else

             {

                 // The default HSTS value is 30 days. You may want to change this for production scenarios, see https://aka.ms/aspnetcore-hsts.

                 app.UseHsts();

             }

             //app.UseAuthentication();

             app.UseOcelot(); //.Wait()

             app.UseHttpsRedirection();

             app.UseMvc();

         }

     }
Startup
- 验证运行
首先获取token,访问ocelot网关的/connect/token地址,转发到Idnetity服务,注意下grant_type参数要和Identity服务中的配置相同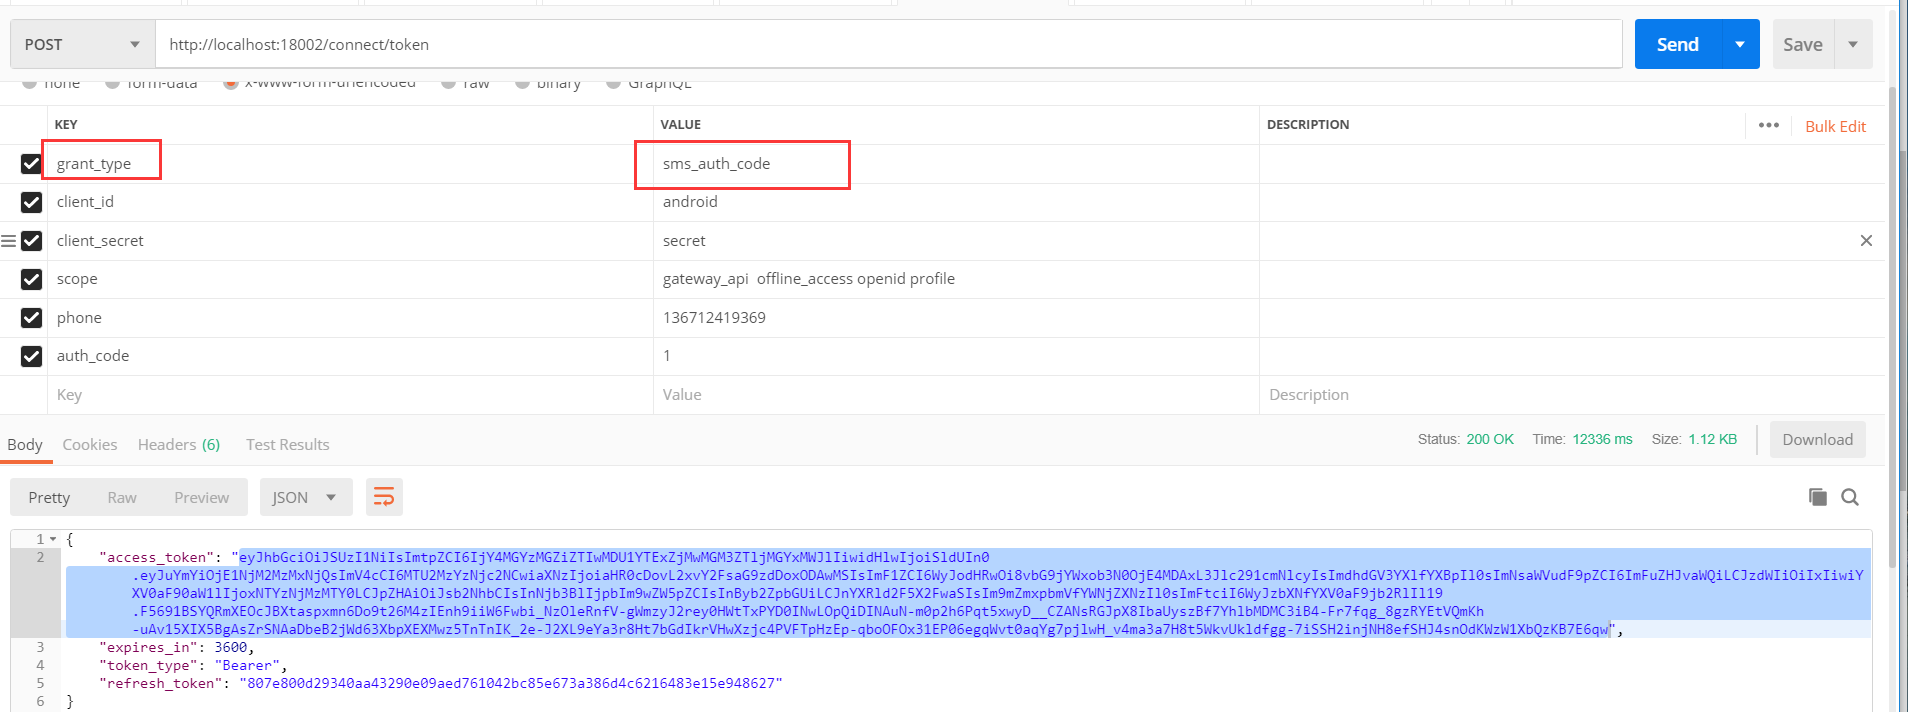
接下来根据获取到的token,请求用户信息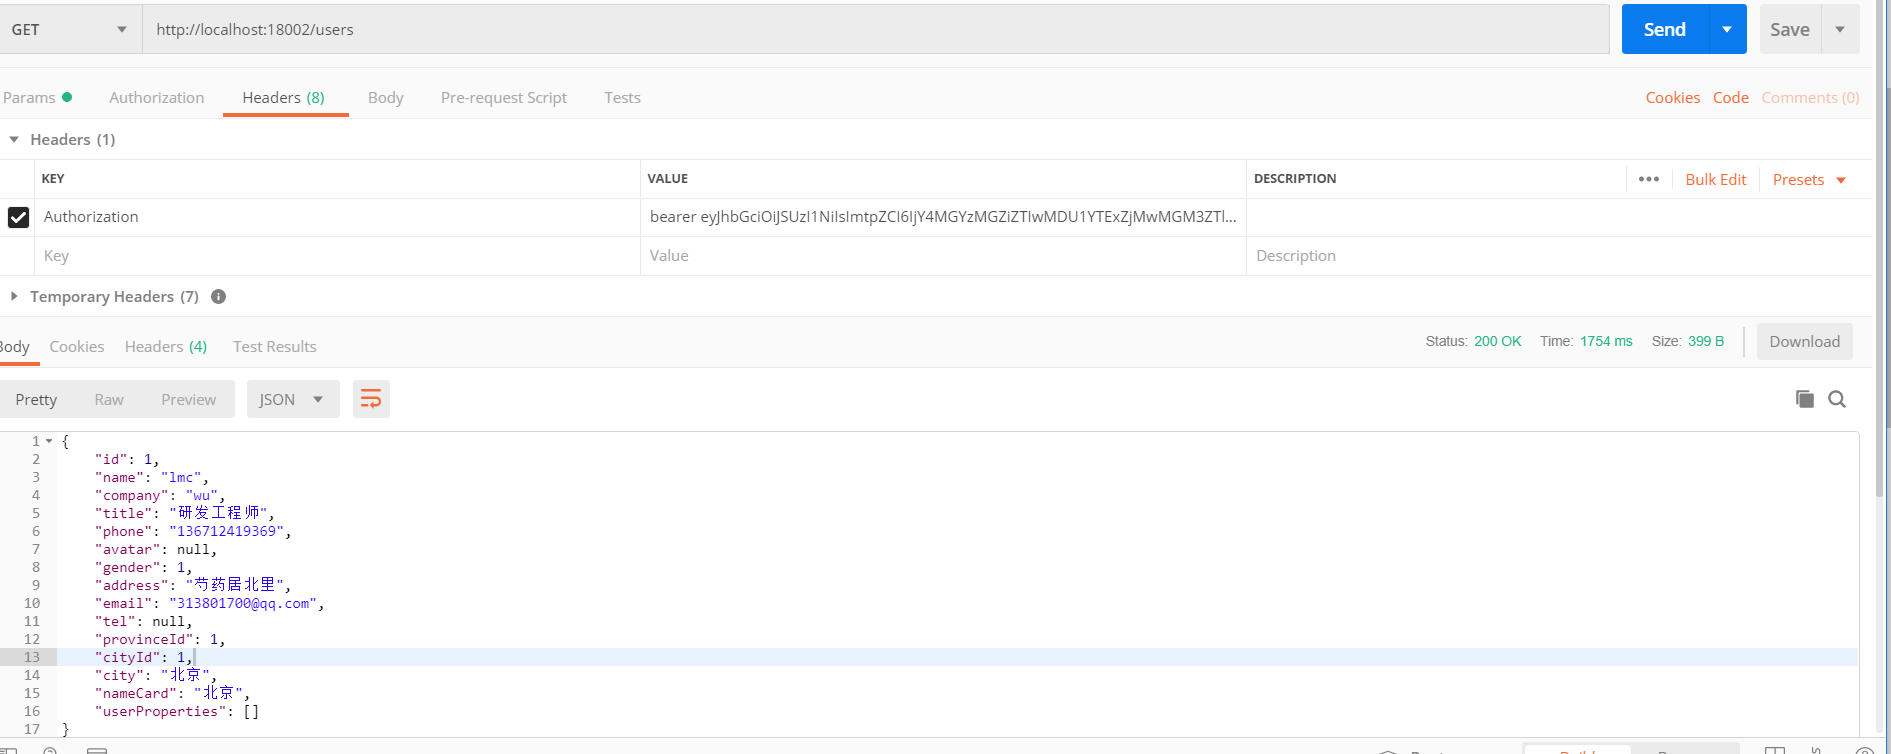
Demo地址=》https://github.com/madeinchinalmc/User.Api
asp.net core网关Ocelot的简单介绍& Ocelot集成Identity认证的更多相关文章
- ASP.NET Core 中的 Razor 页面介绍
标题:ASP.NET Core 中的 Razor 页面介绍 地址:https://docs.microsoft.com/zh-cn/aspnet/core/razor-pages/index?view ...
- ASP.NET Core应用程序容器化、持续集成与Kubernetes集群部署(一)(转载)
本文结构 ASP.NET Core应用程序的构建 ASP.NET Core应用程序容器化所需注意的问题 应用程序的配置信息 端口侦听 ASP.NET Core的容器版本 docker镜像构建上下文(B ...
- asp.net core系列 53 IdentityServer4 (IS4)介绍
一.概述 在物理层之间相互通信必须保护资源,需要实现身份验证和授权,通常针对同一个用户存储.对于资源安全设计包括二个部分,一个是认证,一个是API访问. 1 认证 认证是指:应用程序需要知道当前用户的 ...
- ASP.NET Core身份认证服务框架IdentityServer4 介绍
IdentityServer4是ASP.NET Core 2的OpenID Connect和OAuth 2.0框架.它可以在您的应用程序中提供以下功能: 它使你的应用程序具有如下特点: 认证即服务 适 ...
- Workflow Core + asp.net core 5.0 实现简单审批工作流
我们知道企业业务系统到处都可以审批工作流的,但也很少有像OA系统一样复杂多级多条件的审批工作流需要设计,所以我们需要一个轻量级的容易上手的workflow框架,通过GitHub,我发现danielge ...
- Asp.net core与golang web简单对比测试
最近因为工作需要接触了go语言,又恰好asp.net core发布RC2,就想简单做个对比测试. 下面是测试环境: CPU:E3-1230 v2 内存:16G 电脑有点不给力 操作系统:Centos7 ...
- 在ASP.NET Core MVC中构建简单 Web Api
Getting Started 在 ASP.NET Core MVC 框架中,ASP.NET 团队为我们提供了一整套的用于构建一个 Web 中的各种部分所需的套件,那么有些时候我们只需要做一个简单的 ...
- 基于Asp.Net Core 2.1的简单问答社区系统源代码分享
看见园子里很多人都在分享源代码,我也来凑个热闹. 该项目基于.NET CORE 2.1(其实是从1.1开始开发的),经历过不停的调整终于有个能拿出手的版本了,第一次在博客园发文章. 使用到的技术以及框 ...
- asp.net core系列 72 Exceptionless使用介绍
一.Exceptionless介绍 Exceptionless专注于.net平台提供实时错误和日志报告.主要包括:错误通知.智能分组异常.详细错误报告堆栈跟踪.支持离线.UI查看重要错误和确定优先级. ...
随机推荐
- python selenium模拟登陆163邮箱。
selenium是可以模拟浏览器操作. 有些爬虫是异步加载的,通过爬取网页源码是得不到需要的内容.所以可以模拟浏览器去登陆该网站进行爬取操作. 需要安装selenium通过pip install xx ...
- 修改Mysql数据库的字符集
1.先检查数据库的默认字符集是否是引起不能存储中文的原因: 登录数据库后执行下面的命令 mysql> show variables like 'character%'; 由上图可以看出,data ...
- win10在bios上还原系统
遇到两次,win10系统,自动更新后,c盘好像被格式化了,桌面啥都没了,那个气啊.记录下怎么恢复的. 参考https://www.kafan.cn/edu/50206642.html,中的方法1. 通 ...
- JS-拷贝对象
As it is well known to us all, 拷贝对象分为浅拷贝和深拷贝,深拷贝只会复制地址,深拷贝才会复制内容,那么 JS 如何进行这两种拷贝呢? # 浅拷贝 ## Object.a ...
- mybatis原理与设计模式-日志模块- 适配器模式
在讲设计模式之前,得先知道java程序设计中得六大原则,才能更好得理解我们得系统为什么需要设计模式 1 单一职责原则 一个类只负责一种职责,只有这种职责的改变会导致这个类的变更.绕口一点的正统说法:不 ...
- linux搭建集群
磁盘分布 /boot 系统启动时需要的内存(200m) / 系统的可用磁盘大小(10240m) swap 交换内存 建议和内存一致(200m) 名字统一设置: 虚拟机名字 计算机名字 网络中的名字 默 ...
- 后台date类型转换为json字符串时,返回前台页面的是long类型的时间戳问题解决
学习springboot框架,写个博客系统,在后台管理的日志管理中,遇到了后台查询的日期格式的结果返回到页面变成了日期的时间戳了.然后摸索了三种方法来解决.页面的显示问题如下图. 问题页面回顾: 本案 ...
- 16. Django基础数据访问
如果我们想使用Django对数据库进行访问,我们可以使用django自带的shell. 进入blog目录,打开cmd命令窗口,输入python manage.py shell,如下图所示: 插入数据 ...
- A + B Problem II HDU - 1002
非常简单的大数加法,因为不会Java只能手写大数加法了;博客存一下以后回来看看 #include<bits/stdc++.h> using namespace std; +; char A ...
- servlet项目找不到java文件(由于照抄代码造成的bug)
其实这个bug非常简单,实际上是由于路径配置问题,也是由于我照抄代码造成的(好孩子不要学!) 情况是这样的:java文件没有问题但是启动项目的时候出现了bug: 然后当我把GetData.java和J ...