爬虫之request相关请求
一.解析json格式数据
(1)
# (1)解析json 对象数据

# import requests

# 返回的数据进行解析

# response = requests.get('http://httpbin.org/get')  # 快代理的网站

# import json

# res1 = json.loads(response.text)  # 反序列化

# print(res1)

'''

{

  "args": {},

  "headers": {

    "Accept": "text/html,application/xhtml+xml,application/xml;q=0.9,image/webp,image/apng,*/*;q=0.8,application/signed-exchange;v=b3",

    "Accept-Encoding": "gzip, deflate, br",

    "Accept-Language": "zh-CN,zh;q=0.9,en;q=0.8",

    "Host": "httpbin.org",

    "Sec-Fetch-Mode": "navigate",

    "Sec-Fetch-Site": "none",

    "Sec-Fetch-User": "?1",

    "Upgrade-Insecure-Requests": "1",

    "User-Agent": "Mozilla/5.0 (Windows NT 10.0; Win64; x64) AppleWebKit/537.36 (KHTML, like Gecko) Chrome/78.0.3904.108 Safari/537.36"

  },

  "origin": "112.65.24.96, 112.65.24.96",

  "url": "https://httpbin.org/get"

}

'''

# res2 = response.json()  # 直接获取json数据

# print(res2 == res1)  # True

# 总结我们用第二种很显然比第一种牛逼 省事
(2)https 加密
# (2)SSL 个人理解是对于https 的再次进行加密

# https = http + ssl

'''

import requests

response = requests.get('https://www.12306.cn',

                     cert=('/path/server.crt',

                           '/path/key'))

print(response.status_code)

'''
(3)代理池
# 使用代理

# ip 代理收费(通过代理访问自己的服务,服务端取出客户端的ip地址)

#    IPv4 地址 . . . . . . . . . . . . : 192.168.42.1 我的电脑

# import requests

# proxies = {

#     'http':'http://mofujin:123456@localhost:9743',  # 带用户名 密码的代理 @前是用户 名和密码

#     # 'http':'http://183.166.96.85:9999'

#

# }

#

# # 请求响应

# response = requests.get('https://www.12306.cn',

#                      proxies=proxies)  # 请求用代理

# print(response.status_code)  # 200 只能说明请求成功

# print(response.json())

# print(response.headers)

# '''

# {'Date': 'Tue, 26 Nov 2019 08:26:01 GMT', 'Content-Type': 'text/html', 'Transfer-Encoding': 'chunked',

# 'Connection': 'keep-alive', 'Expires': 'Mon, 25 Nov 2019 23:14:21 GMT', 'Cache-Control': 'max-age=0', 'Age': '33100', 'X-Cache': 'HIT from cache.51cdn.com', 'X-Via': '1.1 PSsdzbwt5rq17:7 (Cdn Cache Server V2.0), 1.1 wt102:8 (Cdn Cache Server V2.0)'}

# '''

# print(response.iter_content())

# <generator object iter_slices at 0x00000123406EAEB8> iter 》》》 可迭代对象

# ip 代理收费(通过代理访问自己的服务,服务端取出客户端的ip地址)  》》》》获取客户端的ip地址

'''

    思路:

    if 'HTTP_X_FORWARDED_FOR' in request.META:

            ip_address = request.META['HTTP_X_FORWARDED_FOR']

        else:

            ip_address = request.META['REMOTE_ADDR']

1

'''
(5)超时时间
# (3)超时的设置|

# import requests

# response = requests.get('https://www.baidu.com',

#                         timeout=0.1)

# print(response.status_code)
(6)文件上传
# (4)上传文件

import requests

files = {'file':open('a.jpg','rb')}

response = requests.post('http://httpbin/org/post',fieles=files)

print(response.status_cod
二。requests 之beatifulsoup
介绍

Beautiful Soup 是一个可以从HTML或XML文件中提取数据的Python库.它能够通过你喜欢的转换器实现惯用的文档导航,
查找,修改文档的方式.Beautiful Soup会帮你节省数小时甚至数天的工作时间.你可能在寻找 Beautiful Soup3 的文档,
Beautiful Soup 3 目前已经停止开发,官网推荐在现在的项目中使用Beautiful Soup 4, 移植到BS4
必须下载和安装解析器
#安装 Beautiful Soup

pip install beautifulsoup4

#安装解析器

Beautiful Soup支持Python标准库中的HTML解析器,还支持一些第三方的解析器,其中一个是 lxml .根据操作系统不同,可以选择下列方法来安装lxml:

$ apt-get install Python-lxml

$ easy_install lxml

$ pip install lxml

另一个可供选择的解析器是纯Python实现的 html5lib , html5lib的解析方式与浏览器相同,可以选择下列方法来安装html5lib:

$ apt-get install Python-html5lib

$ easy_install html5lib

$ pip install html5lib
原因:
下表列出了主要的解析器,以及它们的优缺点,官网推荐使用lxml作为解析器,因为效率更高. 在Python2.7.3之前的版本和Python3中3.2.2之前的版本,必须安装lxml或html5lib, 因为那些Python版本的标准库中内置的HTML解析方法不够稳定.
# bs4 是干嘛的

# get >>>  name  find

# 作业 通过bs4 爬取梨视频 并把视屏地址保存到数据库 只要视频地址

# ************

# Beautiful Soup 是一个可以从HTML或XML文件中提取数据的Python库.它能够通过你喜欢的转换器实现惯用的文档导航,查找,修改文档的方式.Beautiful Soup会帮你节省数小时甚至数天的工作时间.你可能在寻找 Beautiful Soup3 的文档,Beautiful Soup 3 目前已经停止开发,官网推荐在现在的项目中使用Beautiful Soup 4, 移植到BS4

import requests

from bs4 import BeautifulSoup

# print(BeautifulSoup)  # <class 'bs4.BeautifulSoup'>

url = 'https://www.autohome.com.cn/news/1/#liststart'  # 汽车之家的新闻网站

res = requests.get(url)

# print(res.text)

soup = BeautifulSoup(res.text, 'lxml')  # 解析

div = soup.find(id='auto-channel-lazyload-article')  # 新闻文章开始div(1)入口

# div是个对选对象

print(type(div))

# 找到第一个ul标签

ul = div.find(name='ul')

ul_list = div.find_all(class_='article')  #   #找出下面所有类名为article的标签 ul 标签 class

print(len(ul_list))

li_list =ul.find_all(name='li')   # 获取ul 中没一个新闻

for li in li_list:

    h3 = li.find(name='h3')  # 获取标题

    if h3:

        title = h3.text  # 直接获取标题

        print(title)

    # 每一个li下面的a 标签 链接 get()

    a = li.find(name='a')

    if a:

        article_url = a.get('href')  # 取出a标签的属性href

        print(article_url)  # 整体新闻的链接

    # 在获取该新闻的图片 li.find(name='img')>>> (2)链接img.get('src')属性

    # li 列表栏下是否有img 这个标签名

    img = li.find(name='img')

    if img:

        img_url = img.get('src')

        print(img_url)  # 图片链接

    # 简介的内容的获取

    p = li.find(name='p')

    if p:

        content = p.text

        print(content)

'''

思路:(1)找到url整个新闻的排版内容的链接 >>>(2)获取新闻的排版的一个大类(div = soup.find(id='auto-channel-lazyload-article')  # 新闻文章开始div 入口)

(2)在获取每一个ul 新闻中的图片链接和标题和图片 和简介 (规律就是先找标签a.find(name='a',内容a.text/链接a.get('href属性')))

find:

  -name="标签名"  标签

  -id,class_,=""  把这个标签拿出来

  -标签.text  取标签的内容

  -标签.get(属性名) 取标签属性的内容

find_all

'''
bs4中文文档:https://www.crummy.com/software/BeautifulSoup/bs4/doc/index.zh.html
三.爬虫请求库之selenium 和驱动chromeDriver
3.1.介绍selenium的作用 就是解决js代码无法自身进行渲染的问题
Selenium是一个用于Web应用程序测试的工具。Selenium 测试直接运行在浏览器中,就像真正的用户在操作一样。
支持的浏览器包括IE,Mozilla和Firefox等。这个工具的主要功能包括:测试与浏览器的兼容性--测试你的应用程序看是否能够很好得工作在不同浏览器和操作系统之上。
测试系统功能--创建衰退测试检验软件功能和用户需求。
selenium最初是一个自动化测试工具,而爬虫中使用它主要是为了解决requests无法直接执行JavaScript代码的问题

selenium本质是通过驱动浏览器,完全模拟浏览器的操作,比如跳转、输入、点击、下拉等,来拿到网页渲染之后的结果,可支持多种浏览器

from selenium import webdriver

browser=webdriver.Chrome()

browser=webdriver.Firefox()

browser=webdriver.PhantomJS()

browser=webdriver.Safari()

browser=webdriver.Edge()
官网:https://selenium-python.readthedocs.io/
3.2 安装
1、有界面浏览器
Window 下配置ChromeDriver(简单4步完成)
第一步:当然是下载最新的chrome浏览器版本 https://www.google.cn/chrome/
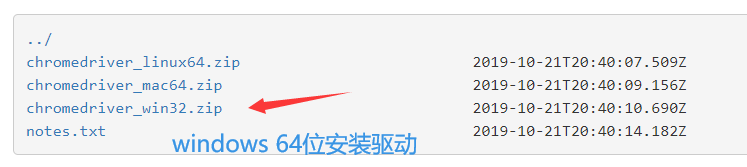
第二步:下载最新的ChromeDriver(是个.exe文件)::::http://npm.taobao.org/mirrors/chromedriver/
两个链接都可以 ::: http://chromedriver.storage.googleapis.com/index.html
(这样方便,不用看对应版本,如果想看对应版本,本文后面会有对应关系,自己参考。)
第三步:将下载好的ChromeDriver.exe文件放在Chrome的根目录下:
第四步:配置环境变量:
右键点击我的电脑----->属性--->高级系统设置---->环境变量------>在path路径下添加上文中浏览器{(可以运行一下测试)如果还是不行的话,可以重启一下电脑} 到此就OK了
选着自己的版本
# 报错 原因就是上面的驱动没有进行安装
selenium启动浏览器报错os.path.basename(self.path), self.start_error_message) selenium.common.exceptions.Web
2、无界面浏览器
PhantomJS不再更新
在 PhantomJS 年久失修, 后继无人的节骨眼
Chrome 出来救场, 再次成为了反爬虫 Team 的噩梦
自Google 发布 chrome 59 / 60 正式版 开始便支持Headless mode
这意味着在无 GUI 环境下, PhantomJS 不再是唯一选择
3.基本使用
from selenium import webdriver

from selenium.webdriver.common.keys import Keys #键盘按键操作

import time

# from selenium.webdriver.chrome.options import Options

# chrome_options = Options()

# chrome_options.add_argument('window-size=1920x3000') #指定浏览器分辨率

# chrome_options.add_argument('--disable-gpu') #谷歌文档提到需要加上这个属性来规避bug

# chrome_options.add_argument('--hide-scrollbars') #隐藏滚动条, 应对一些特殊页面

# chrome_options.add_argument('blink-settings=imagesEnabled=false') #不加载图片, 提升速度

# chrome_options.add_argument('--headless') #浏览器不提供可视化页面. linux下如果系统不支持可视化不加这条会启动失败

# chrome_options.binary_location = r"C:\Program Files (x86)\Google\Chrome\Application\chrome.exe" #手动指定使

# bro=webdriver.PhantomJS()

# bro=webdriver.Chrome(chrome_options=chrome_options)

bro=webdriver.Chrome()

bro.get('https://www.baidu.com')

# print(bro.page_source)

# time.sleep(3)

time.sleep(1)

#取到输入框

inp=bro.find_element_by_id('kw')

#往框里写字

inp.send_keys("美女")

inp.send_keys(Keys.ENTER) #输入回车

#另一种方式,取出按钮,点击su

time.sleep(3)

bro.close()
登录百度页面页面的基本使用 》》》 自动化测试
# from lxml import etree

from selenium import webdriver

import time

# 生成bro 浏览器对象

bro = webdriver.Chrome()

# 获链接地址

bro.get('http://baidu.com')

# 等待时间

bro.implicitly_wait(10)

# 一些关于查找的方式

# 1、find_element_by_id   根据id找

# 2、find_element_by_link_text     根据链接名字找到控件(a标签的文字)

# 3、find_element_by_partial_link_text   根据链接名字找到控件(a标签的文字)模糊查询

# 4、find_element_by_tag_name       根据标签名

# 5、find_element_by_class_name     根据类名

# 6、find_element_by_name           根据属性名

# 7、find_element_by_css_selector   根据css选择器

# 8、find_element_by_xpath          根据xpath选择

# 模拟百度的登录需要步骤

#   根据链接名字找到控件(标签的文字text)

d1_button = bro.find_element_by_link_text('登录')

d1_button.click()  # 点击登录事件

# 用户名

# 可以通过id (上面的text也可以用) 用户名登录

user_login = bro.find_element_by_id('TANGRAM__PSP_10__footerULoginBtn')

user_login.click()

time.sleep(1)

# 多方式或用户名

input_name = bro.find_element_by_name('userName')

# 通过qq 邮箱

input_name.send_keys('10243595@qq.com')

# 密码 id 相对来说方便 唯一性

input_password = bro.find_element_by_id('TANGRAM__PSP_10__password')

# 输入密码

input_password.send_keys('mo19910213')  # 示范

# 提交 找到提交框

submit_button = bro.find_element_by_id('TANGRAM__PSP_10__submit')

time.sleep(20)

submit_button.click()

print(bro.get_cookies())

# 关闭浏览器

bro.close()
4.爬取淘宝/京东商城的商品信息
# 爬取淘宝的相关数据

from selenium import webdriver

from selenium.webdriver.common.keys import Keys  # 键盘按键操作

import time

bro = webdriver.Chrome()  # 自动化测试对象

bro.get('https://www.jd.com')

bro.implicitly_wait(10)  # 等待时间

# 可以做celery的定义任务 task 中的函数任务

# 启动两条work 命令   celery_task  文件夹下必须celery 文件

# 注:windows下:celery worker -A celery_task -l info -P eventlet

def get_goods(bro):

    print('开始')

    goods_li = bro.find_elements_by_class_name('gl-item')  # 获取所有li 商品的列表的 find_elements_by_class_name(这一类)

    #  不是类css 选择器采用 . 其他选着标签内的名字即可

    # 遍历所有的商品

    for good in goods_li:

        # 商品图片路径

        img_url = good.find_element_by_css_selector('.p-img a img').get_attribute('src')  # css 就按css语法进行 类 下面的a 链接属性

        if not img_url:

            # 么有 就拼接 图片的路劲

            img_url = 'https:' + good.find_element_by_css_selector('.p-img a img').get_attribute('data-lazy-img')

            print(img_url,1)

        # 每一个商品的链接

        url = good.find_element_by_css_selector('.p-img a').get_attribute('href')

        price = good.find_element_by_css_selector('.p-price i').text  # 文本值

        good_name= good.find_element_by_css_selector('.p-name em').text.replace('\n','')

        #  评论数

        comment = good.find_element_by_css_selector('.p-commit a').text

        print("""

        商品链接:%s

        商品的图片:%s

        商品的价格:%s

        商品名字:%s

        评论数:%s

        """%(url, img_url, price, good_name, comment))

        # 商品链接:

        # 商品的图片:

        # 商品的价格:

        # 商品名字:

        # 评论数:

    next_page= bro.find_element_by_partial_link_text('下一页')

    time.sleep(1)

    next_page.click()

    time.sleep(1)

    get_goods(bro)  # 调用该函数

input_search = bro.find_element_by_id('key')

input_search.send_keys('童装女')

input_search.send_keys(Keys.ENTER)

#进入了另一个页面

try:

    get_goods(bro)

except Exception as e:

    print("结束")

finally:

    bro.close()
报错:一直为获取到商品的信息 根本都没有进入到for 循环》》》》 思路 打印商品或debug 看看出现在那一层问题 果然是在开始的goo_li 中bro.find_elements_class_name() 写错了 导致下面无法运行
补充:字符转中文
from urllib.parse import unquote_plus #字符转中文
from urllib.parse import urlencode #中文转字符
msg = '''
"client_id=c3cef7c66a1843f8b3a9e6a1e3160e20&grant_type=password×tamp=1574838172749&source=com.zhihu.web&signature=d9ca5ecd24ebcfd42360eabd392d860e837005d8&username=%2B8618953675221&password=lqz12345&captcha=&lang=cn&utm_source=&ref_source=other_https%3A%2F%2Fwww.zhihu.com%2Fsignin%3Fnext%3D%252F"
'''
print(unquote_plus(msg))
寻找控件的方法:
id(建议使用)
css选者器
xpath
对空间进行操作
赋值
点击
获取cookie(重要)
搭建自己的cookie池(类似代理池)》》》 放在redis 中 取cookie 作为登录使用
验证码, 加密
用程序破解
打码平台
手动识别
破解知乎登录 》》》目的:就是为了获取cookie >>> 用获cookie 进行登录
用python使用js代码 js 动态调试》》》(写入简历)
5.
1.博客园登录
# 通过selenium(自动测试)登录博客园 用requests 模块携带cookie发送请求
# 通过selenium(自动测试)登录博客园 用requests 模块携带cookie发送请求

# 渲染js

# webdriver 自动化测试

import requests

from selenium import webdriver

import time

import json

# 使用selenium打开网址 ,然后让用户完成手工登录 在获取cookie

# 博客园登录界面网址

url = "https://account.cnblogs.com/signin?returnUrl=https%3A%2F%2Fwww.cnblogs.com%2F"

# 驱动程序

driver = webdriver.Chrome()

# 获取连接

driver.get(url=url)

# 刷新

time.sleep(10)

driver.refresh()

# 获取cookie

ck = driver.get_cookies()

print(ck)  # 列表套着多个字典的数据格式[{},{}....{'domain': 'account.cnblogs.com'}]

# 將cookie 寫入文見中

with open('a.txt','w')as f:

    json.dump(ck,f)

    f.flush()

# 取cookie

time.sleep(3)

with open('a.txt','r')as f:

    res = json.load(f)

# 获取cookie中的name和value, 转化成requests 可以使用的形式

cookies = {}

for cookie in res:

    cookies[cookie['name']] = cookie['value']   # 设置value值

headers = { 'authority': 'i-beta.cnblogs.com',

    'method': 'GET',

    'path': '/',

    'scheme': 'https',

    'accept': 'text/html,application/xhtml+xml,application/xml;q=0.9,image/webp,image/apng,*/*;q=0.8,application/signed-exchange;v=b3',

    'accept-encoding': 'gzip, deflate, br',

    'accept-language': 'zh-CN,zh;q=0.9',

    'cache-control': 'max-age=0',

    'if-modified-since': 'Sun, 24 Nov 2019 06:14:53 GMT',

    # 'if-modified-since': 'Sun, 24 Nov 2019 06:14:53 GMT,

    'sec-fetch-mode': 'navigate',

    'sec-fetch-site': 'none',

    'sec-fetch-user': '?1',

    'upgrade-insecure-requests': '',

    'user-agent': 'Mozilla/5.0 (Macintosh; Intel Mac OS X 10_14_5) AppleWebKit/537.36 (KHTML, like Gecko) Chrome/78.0.3904.108 Safari/537.36'

}

# 使用cookie 完成请求

response = requests.get(url='https://i-beta.cnblogs.com/api/user', headers=headers, cookies=cookies)

print(123)

response.encoding = response.apparent_encoding

print(response.text)
2.知乎登录
安装pip install requests-html
安装
# 破解知乎登录

import time

# 需求 分析知乎登录过程 并执行代码登录, 拿到cookie值

from requests_html import HTMLSession  # 请求解析库

from http import cookiejar

import base64

from PIL import Image

import execjs  # 下载 pip install PyExecJS

# cnpm install jsdom python中运行js 代码

import hmac

from urllib.parse import urlencode  # js 转中文

from hashlib import sha1

class Spider:

    def __init__(self):

        self.session = HTMLSession()

        self.session.cookies = cookiejar.LWPCookieJar()  # 实列

        # 网址

        self.login_page_url = 'https://www.zhihu.com/signin?next=%2F'

        # 自动登录接口

        self.login_api = 'https://www.zhihu.com/api/v3/oauth/sign_in'

        # # 验证码

        self.captcha_api = 'https://www.zhihu.com/api/v3/oauth/captcha?lang=en'

        # 请求头

        self.headers = {

            'user-agent': 'Mozilla/5.0 (Windows NT 10.0; WOW64) AppleWebKit/537.36 (KHTML, like Gecko) Chrome/57.0.2987.98 Safari/537.36 LBBROWSER',

        }

        self.captcha = ''  # 存验证码

        self.signature = ''  # 存签名

    # 首次请求cookie

    def get_base_cookie(self):

        self.session.get(url=self.login_page_url, headers=self.headers)

    # 处理验证码

    def deal_captcha(self):

        r = self.session.get(url=self.captcha_api, headers=self.headers)

        r = r.json()

        if r.get('show_captcha'):

            while True:

                r = self.session.put(url=self.captcha_api, headers=self.headers)

                img_base64 = r.json().get('img_base64')

                # 写到文件中

                with open('captcha.png', 'wb')as f:

                    f.write(base64.b64decode(img_base64))

                captcha_img = Image.open('captcha.png')

                captcha_img.show()

                self.captcha = input('输入验证码:')

                r = self.session.post(url=self.captcha_api,

                                      headers=self.headers)

                if r.json().get('success'):

                    time.sleep(2)

                    break

    # 生成签名  >>> 散列验证模式

    def get_signature(self):

        a = hmac.new(b'd1b964811afb40118a12068ff74a12f4', digestmod=sha1)

        a.update(b'password')

        a.update(b'c3cef7c66a1843f8b3a9e6a1e3160e20')

        a.update(b'com.zhihu.web')

        a.update(str(int(time.time() * 1000)).encode('utf-8'))

        self.signature = a.hexdigest()

    def post_login_data(self):

        data = {

            'client_id': 'c3cef7c66a1843f8b3a9e6a1e3160e20',

            'grant_type': 'password',

            'timestamp': str(int(time.time() * 1000)),

            'source': 'com.zhihu.web',

            'signature': self.signature,

            'username': '+8618953675221',

            'password': 'lqz12345',

            'captcha': self.captcha,

            'lang': 'en',

            'utm_source': '',

            'ref_source': 'other_https://www.zhihu.com/signin?next=%2F',

        }

        #

        # 请求头

        headers = {

            'x-zse-83': '3_2.0',

            'content-type': 'application/x-www-form-urlencoded',

            'user-agent': 'Mozilla/5.0 (Windows NT 10.0; WOW64) AppleWebKit/537.36 (KHTML, like Gecko) Chrome/57.0.2987.98 Safari/537.36 LBBROWSER',

        }

        with open('aaa.js', 'rt', encoding='utf-8') as f:

            js = execjs.compile(f.read())

        data = js.call('b', urlencode(data))

        r = self.session.post(url=self.login_api, headers=headers, data=data)

        if r.status_code == 201:

            self.session.cookies.save('mycookie')

            print('登录成功')

        else:

            print('登录成功')

    def login(self):

        self.get_base_cookie()

        self.deal_captcha()

        self.get_signature()

        self.post_login_data()

if __name__ == '__main__':

    zhihu_spider = Spider()

    zhihu_spider.login()
???????????? 有问题
爬虫之request相关请求的更多相关文章
- python爬虫之性能相关
性能相关 在编写爬虫时,性能的消耗主要在IO请求中,当单进程单线程模式下请求URL时必然会引起等待,从而使得请求整体变慢. import requests def fetch_async(url): ...
- django中request相关用法
URL相关信息: HttpRquest对象包含当前请求url的一些信息,通过这些信息,你可以获得正在访问这个页面的用户,或者使用的浏览器: request.path :除域名以外的请求路径,以正斜杠开 ...
- jsp-servlet 的相关请求路径问题 —url
jsp-servlet 的相关请求路径问题 —url 本文章主要解决的几方面问题如下: 常见涉及路径元素: jsp页面请求和servlet请求转发.重定向的关系 如何避免下一步请求受上一步请求在UR ...
- Request.url请求路径的一些属性
Request.url请求路径的一些属性1,Request.UrlReferrer.AbsolutePath=获取URL的绝对路径例:"/Manager/Module/OfficialMan ...
- request 获取请求参数
/** * 根据request获取请求的用户参数 * @return * @return */ protected <T> T getParamConvertEntity(Class cl ...
- 【转】python3 urllib.request 网络请求操作
python3 urllib.request 网络请求操作 基本的网络请求示例 ''' Created on 2014年4月22日 @author: dev.keke@gmail.com ''' im ...
- Request.url请求属性
Request.url请求路径的一些属性1,Request.UrlReferrer.AbsolutePath=获取URL的绝对路径例:"/Manager/Module/OfficialMan ...
- 微信小程序request同步请求
今天在搞微信小程序的时候顺手用了async,await死活不起作用,后来查了一下子,竟然不支持,那没办法就换了一种实现wx.request同步请求的方案 祭出promise来搞一搞,下面直接贴代码,简 ...
- python爬虫之分析Ajax请求抓取抓取今日头条街拍美图(七)
python爬虫之分析Ajax请求抓取抓取今日头条街拍美图 一.分析网站 1.进入浏览器,搜索今日头条,在搜索栏搜索街拍,然后选择图集这一栏. 2.按F12打开开发者工具,刷新网页,这时网页回弹到综合 ...
随机推荐
- AES加密算法在Linux下出现随机加密结果
特别提示:本人博客部分有参考网络其他博客,但均是本人亲手编写过并验证通过.如发现博客有错误,请及时提出以免误导其他人,谢谢!欢迎转载,但记得标明文章出处:http://www.cnblogs.com/ ...
- 第11组 Beta冲刺(2/5)
第11组 Beta冲刺(2/5) 队名 不知道叫什么团队 组长博客 https://www.cnblogs.com/xxylac/p/11997386.html 作业博客 https://edu.cn ...
- jdbcTemplate的queryForList的使用方法
jdbcTemplate的queryForList的使用方法如下,它不一样的地方是,它获得的结果,会再放到一个map里去: List rows = jdbcTemplate.queryForList( ...
- Android 获取视频照片与刷新媒体库
1.获取本地所有视频 public void getLoadMedia() { Cursor cursor = UILApplication.instance.getApplicationContex ...
- Could not parse configuration: /hibernate.cfg.xml
hibernate需要联网验证dtd,错误原因:未联网或网速不行
- Jmeter(八)乱码处理
发贴的内容和标题在进行参数化之后, 由于包含中文, 情理之中地出现了乱码(得意地笑, 坐等你跳坑中.)
- Java学习笔记之ArrayList基本用法
原文地址,转载请注明出处:https://blog.csdn.net/GongchuangSu/article/details/51514389 ArrayList简介 ArrayList是一个其容量 ...
- Django 中 ModelForm 的使用
定义 ModelForm 定制 ModelForm Meta 在 Form 中另外定义 Field 值得一提的一些 Field 转化 AutoField BooleanField ForeignKey ...
- P4878 [USACO05DEC] 布局
题面lalala 这居然是个紫题???原谅我觉得这题是模板... 这个这个,这题的算法呢其实是一个叫差分约束的东西,也是今天下午我们机房的重点,如果不知道这个差分约束是个啥的人呢,自行百度一下谢谢.. ...
- Centos7的引导顺序
1.UEFI或BIOS初始化,运行POST开机自检(Power On Self Test) 2.选择启动设备 3.引导装载程序grub2 4.加载装载程序的配置文件:/etc/grub.d/ ...