
使用PAC file结合ATS控制访问
介绍:前面已经介绍了ATS的安装和PAC文件的写法格式,现在把nginx端口转发,pac file访问控制和ATS代理结合起来分别控制不同的机器访问不同URL权限的目的
效果如下

一、使用nginx端口转发
在机器192.168.43.85使用yum安装nginx
1.1 配置upstream
[root@localhost ~]# vim /etc/nginx/nginx.conf
user nginx;

worker_processes auto;

error_log /var/log/nginx/error.log;

pid /run/nginx.pid;

events {

    worker_connections ;

}

http {

    log_format  main  '$remote_addr - $remote_user [$time_local] "$request" '

                      '$status $body_bytes_sent "$http_referer" '

                      '"$http_user_agent" "$http_x_forwarded_for"';

    access_log  /var/log/nginx/access.log  main;

    sendfile            on;

    tcp_nopush          on;

    tcp_nodelay         on;

    keepalive_timeout   ;

    types_hash_max_size ;

    include             /etc/nginx/mime.types;

    default_type        application/octet-stream;

    include /etc/nginx/conf.d/ngx_http/http.conf.*;

}

stream {

        # Module ngx_stream_core_module

        preread_buffer_size         128k;       # Keep default value.

        preread_timeout             180s;

        proxy_protocol_timeout      180s;

        tcp_nodelay                 on;         # Enables the use of the TCP_NODELAY option.

        variables_hash_bucket_size  ;        # Keep default value.

        variables_hash_max_size     ;       # Keep default value.

        # Module ngx_stream_log_module

        log_format           stream '[$time_iso8601] '

                                    '$remote_addr '

                                    '$protocol '

                                    '"Status-Code: $status" '

                                    '"Bytes-Sent: $bytes_sent" '

                                    '"Bytes-Reveived: $bytes_received" '

                                    '"Session-Time: $session_time" '

                                    '"Upstream-Addr: $upstream_addr" '

                                    '"Upstream-Bytes-Sent: $upstream_bytes_sent" '

                                    '"Upstream-Bytes-Received: $upstream_bytes_received" '

                                    '"Upstream-Connect-Time: $upstream_connect_time"';

        access_log           /var/log/nginx/stream.acc stream;

error_log            /var/log/nginx/stream.err;

        open_log_file_cache  max=;

        # Module ngx_stream_proxy_module

        proxy_buffer_size            128k;      # Keep default value.

        proxy_connect_timeout        180s;

        proxy_download_rate          ;         # Keep default value.

        proxy_next_upstream          on;        # Keep default value.

        proxy_next_upstream_timeout  ;         # Keep default value.

        proxy_next_upstream_tries    ;         # Keep default value.

        proxy_protocol               off;       # Enables the PROXY protocol for connections to a proxied server.

        proxy_timeout                180s;

        proxy_upload_rate            ;         # Keep default value.

        # Module ngx_stream_upstream_module

        include  /etc/nginx/include/stream.upstream;        #配置upstrean的路径

        include  /etc/nginx/conf.d/ngx_stream/Proxy/stream.conf.*;     #限制访问upstream的路径
1.2 配置转发
[root@localhost ~]# vim /etc/nginx/conf.d/ngx_stream/Proxy/stream.conf.proxy10001
server {

#       include  conf.d/ngx_stream/Proxy/include/http.ipallow.;

        # Module ngx_stream_core_module

        listen      ;       #监听80端口,

        # Module ngx_stream_log_module

        access_log  /var/log/nginx/stream.proxy..acc stream;

        error_log   /var/log/nginx/stream.proxy..err;

        # Module ngx_http_proxy_module

        proxy_pass  proxy10001;   #转发

}
1.3 配置upstream的文件
[root@localhost ~]# vim /etc/nginx/include/stream.upstream
# Module ngx_stream_upstream_module

upstream proxy10001 {

        server 45.77.246.61:;

}
1.4 重启nginx
[root@localhost ~]# nginx -s reload
[root@localhost ~]# netstat -ntlp |grep 8000
tcp 0.0.0.0: 0.0.0.0:* LISTEN /nginx: master
关闭防火墙和selinx
1.5 客户端配置查看

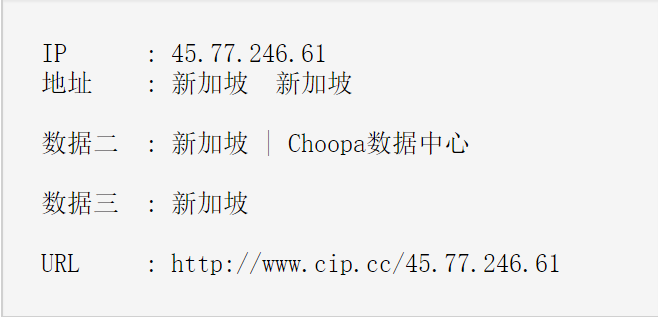
查看IP

二 结合pacfile
写一个PAC file,可以使用http下载
2.1 把PAC file 放在nginx的一个访问目录下
[root@localhost html]# pwd
/usr/share/nginx/html
[root@localhost html]# ll
-rw-r--r--. root root Jun : proxy10001.pac
2.2 配置文件
server {

        # Module ngx_http_core_module

        listen      ;

        # Module ngx_http_charset_module

        charset     utf-;

        # Module ngx_http_log_module

        access_log  /var/log/nginx/ngx_http/http.pacfiles.acc main;

        error_log   /var/log/nginx/ngx_http/http.pacfiles.err;

        location / {

                expires ;

                root  /usr/share/nginx/html;

        }

}
2.3 检测脚本
[root@localhost ~]# vim /etc/nginx/nginx.conf

查看
使用nginx的访问控制,控制pac文件可以被那些IP访问
2.4 从80口控制
[root@localhost ~]# vim /etc/nginx/conf.d/ngx_http/http.conf.pacfiles
server {

        # Core functionality

       include     conf.d/ngx_http/include/http.ipallow.;   #添加此配置

        # Module ngx_http_core_module

        listen      ;

        # Module ngx_http_charset_module

        charset     utf-;

        # Module ngx_http_log_module

        access_log  /var/log/nginx/ngx_http/http.pacfiles.acc main;

        error_log   /var/log/nginx/ngx_http/http.pacfiles.err;

        location / {

                expires ;

                root  /usr/share/nginx/html;

        }

}
[root@localhost ~]# vim /etc/nginx/conf.d/ngx_http/include/http.ipallow.10001
#allow 192.168.43.0/24;   #禁止本地访问

deny all;
查看IP
pacfile没有生效
[root@localhost ~]# vim /etc/nginx/conf.d/ngx_http/include/http.ipallow.10001
allow 192.168.43.0/24;   #允许本地访问

deny all;
但是,由于有缓存,导致每次在禁止访问后,但是依然可以访问到代理上
2.5 禁止浏览器缓存
配置
[root@localhost ~]# vim /etc/nginx/nginx.conf
user nginx;

worker_processes auto;

error_log /var/log/nginx/error.log;

pid /run/nginx.pid;

events {

    worker_connections ;

}

http {

    log_format  main  '$remote_addr - $remote_user [$time_local] "$request" '

                      '$status $body_bytes_sent "$http_referer" '

                      '"$http_user_agent" "$http_x_forwarded_for"';

    access_log  /var/log/nginx/access.log  main;

    sendfile            on;

    tcp_nopush          on;

    tcp_nodelay         on;

    keepalive_timeout   ;

    types_hash_max_size ;

    add_header Cache-Control no-store;   #禁止缓存

    add_header Cache-Control no-cache;    #禁止缓存

    include             /etc/nginx/mime.types;

    default_type        application/octet-stream;

    include /etc/nginx/conf.d/ngx_http/http.conf.*;

}
则每次更改权限后,不会有缓存,可立即生效!
使用PAC file结合ATS控制访问的更多相关文章
- linux 运维,代理,acl控制访问
运维概述:运行 & 维护,Operation & MaintanceIT运维.业务运维.日常管理运维采用相关的方法.手段.技术.制度.流程和文档等,对IT运行环境.IT业务系统和IT运 ...
- Linux iptables 应用控制访问SSH服务
Title:Linux iptables 应用控制访问SSH服务 --2012-02-23 17:51 今天用到了以前从来没有用到过的,iptables控制访问,只允许外部访问SSH服务(22号端口 ...
- asp.net core 使用 AccessControlHelper 控制访问权限
asp.net core 使用 AccessControlHelper 控制访问权限 Intro 由于项目需要,需要在基于 asp.net mvc 的 Web 项目框架中做权限的控制,于是才有了这个权 ...
- vertx 异步编程指南 step7-保护和控制访问
保护和控制访问与Vert.x很容易.在本节中,我们将: 从HTTP转移到HTTPS,以及 使用基于组的权限将用户身份验证添加到Web应用程序,以及 使用JSON Web令牌(JWT)控制对Web AP ...
- php控制访问人数的方法
php控制访问人数的方法 <pre>//添加访问人数 public function addfangwen() { header("Content-type:text/html; ...
- python网络爬虫(三)requests库的13个控制访问参数及简单案例
酱酱~小编又来啦~
- Identity Server 4资源拥有者密码认证控制访问API
基于上一篇文章中的代码进行继续延伸,只需要小小的改动即可,不明白的地方可以先看看本人上一篇文章及源码: Identity Server 4客户端认证控制访问API 一.QuickStartIdenti ...
- Blazor组件自做十一 : File System Access 文件系统访问 组件
Blazor File System Access 文件系统访问 组件 Web 应用程序与用户本地设备上的文件进行交互 File System Access API(以前称为 Native File ...
- VS2008 解决Unable to copy file 对路径的访问被拒绝。
在VS2008 + WINDOWS 7 环境下重新生成解决方案时遇到以下问题 Unable to delete file "F:\XX.exe". 对路径"F:\XX.e ...
随机推荐
- QT 中如何实现一个简单的动画
QT可以实现一下简单的动画,比如 运动的时钟 闪烁的按钮. 动画的实现: (1)创建一个定时器 (2)调用QWidget::update()通知界面重绘 实现一个按钮闪烁的例子: circlewidg ...
- JavaScript原型链中toString()方法输出alert()和console.log()得到不同的结果
<script language="javascript"> function myObj(){ var total = 0; } myObj.prototype.ad ...
- HDFS概念名称节点和数据节点-名称节点
- PyODPS DataFrame 的代码在哪里跑
在使用 PyODPS DataFrame 编写数据应用时,尽管编写的是同一个脚本文件,但其中的代码会在不同位置执行,这可能导致一些无法预期的问题,本文介绍当出现相关问题时,如何确定代码在何处执行,以及 ...
- hdu 3832 Earth Hour(最短路变形)
Earth Hour Time Limit: 2000/1000 MS (Java/Others) Memory Limit: 125536/65536 K (Java/Others)Total ...
- H3C 路由器SSH服务配置命令(续)
- props & children
一. choosing the type at runtime import React from 'react'; import { PhotoStory, VideoStory } from '. ...
- Android 设置ImageView宽度固定,其高度按比例缩放适应
今天和项目经理对喷了一下,他说在应用的列表数据中的图片应该宽度固定,高度按比例缩放自适应,我说,那岂不是很丑!直接让运营那边把图片处理成固定宽高比不就好了,省的我客户端麻烦了. 这家伙不同意,为毛呢, ...
- Project Euler Problem 14-Longest Collatz sequence
记忆化搜索来一发.没想到中间会爆int #include <bits/stdc++.h> using namespace std; const int MAXN = 1000000; in ...
- oracle用NOT EXISTS替代NOT IN
在子查询中,NOT IN子句将执行一个内部的排序和合并. 无论在哪种情况下,NOT IN都是最低效的 (因为它对子查询中的表执行了一个全表遍历). 为了避免使用NOT IN ,我们可以把它改写成外连 ...