springboot项目中进行并发测试
一 利用工具包:
  <dependency>

            <groupId>org.springframework.boot</groupId>

            <artifactId>spring-boot-starter-test</artifactId>

            <scope>test</scope>

        </dependency>

        <dependency>

            <groupId>org.databene</groupId>

            <artifactId>contiperf</artifactId>

            <version>2.3.</version>

            <scope>test</scope>

        </dependency>
引入者两个依赖:
就可以进行测试了,看测试代码:

package com.cxy.springs;

import com.cxy.springs.entity.TUser;

import com.cxy.springs.service.TUserService;

import org.databene.contiperf.PerfTest;

import org.databene.contiperf.junit.ContiPerfRule;

import org.junit.Rule;

import org.junit.Test;

import org.junit.runner.RunWith;

import org.springframework.beans.factory.annotation.Autowired;

import org.springframework.boot.test.context.SpringBootTest;

import org.springframework.test.context.junit4.SpringRunner;

@RunWith(SpringRunner.class)

@SpringBootTest

public class SpringsApplicationTests {

    @Autowired

    public TUserService userService;

    @Test

    public void contextLoads() {

    }

    //引入 ContiPerf 进行性能测试

    @Rule

    public ContiPerfRule contiPerfRule = new ContiPerfRule();

    @Test

    //10个线程 执行10次

    @PerfTest(invocations = ,threads = )

    public void test() {

        TUser load = userService.load();

        System.out.println(load.getPhone());

    }

}
结果:
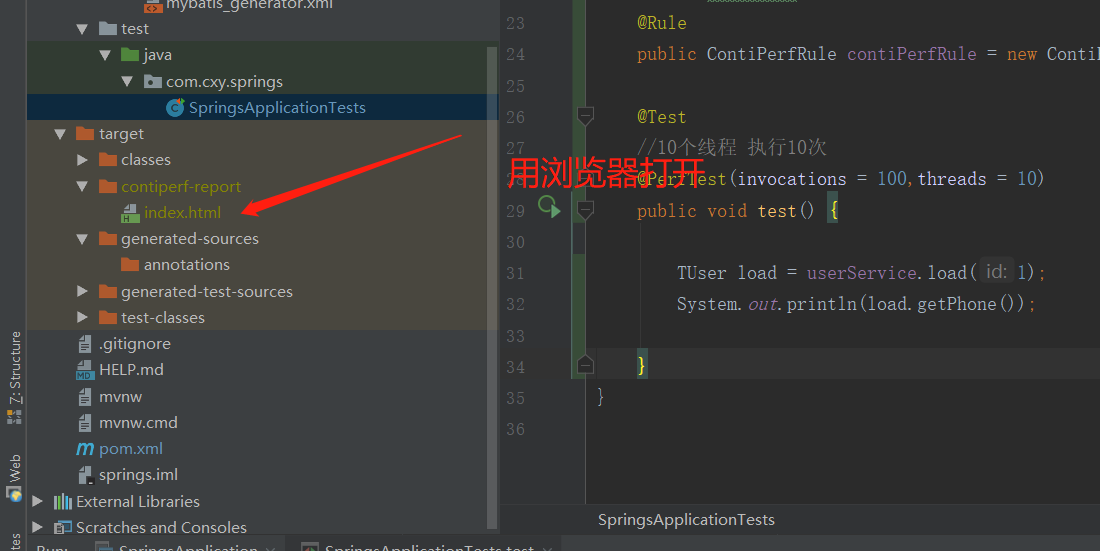
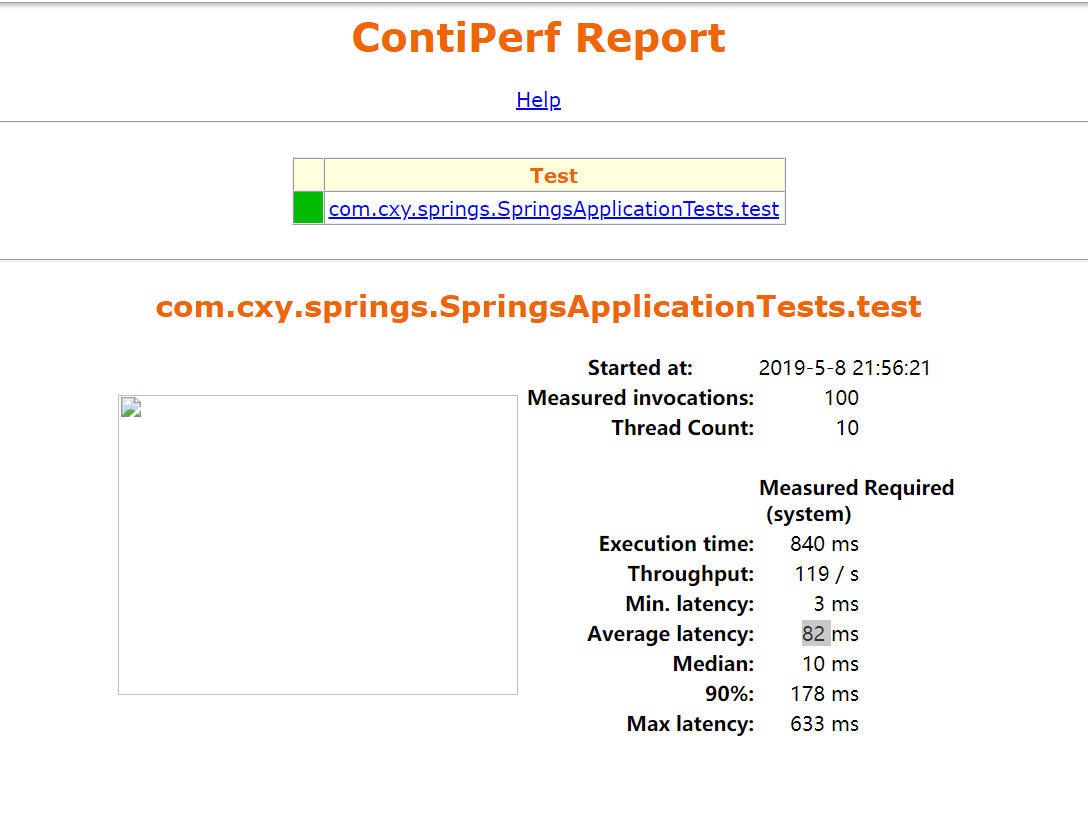
不知道为什么我的图片挂了
第二种方式:
利用concurrent包下列进行测试,不过他们没有具体的相应时间:
package com.cxy.springs;

import com.cxy.springs.entity.TUser;

import com.cxy.springs.service.TUserService;

import org.databene.contiperf.PerfTest;

import org.databene.contiperf.junit.ContiPerfRule;

import org.junit.Rule;

import org.junit.Test;

import org.junit.runner.RunWith;

import org.springframework.beans.factory.annotation.Autowired;

import org.springframework.boot.test.context.SpringBootTest;

import org.springframework.test.context.junit4.SpringRunner;

import java.util.concurrent.CountDownLatch;

import java.util.concurrent.ExecutorService;

import java.util.concurrent.Executors;

import java.util.concurrent.Semaphore;

@RunWith(SpringRunner.class)

@SpringBootTest

public class SpringsApplicationTests {

    @Autowired

    public TUserService userService;

    @Test

    public void contextLoads() {

    }

    //引入 ContiPerf 进行性能测试

    @Rule

    public ContiPerfRule contiPerfRule = new ContiPerfRule();

    @Test

    //10个线程 执行10次

    @PerfTest(invocations = ,threads = )

    public void test() {

        TUser load = userService.load();

        System.out.println(load.getPhone());

    }

    @Test

    public  void  test2()throws Exception{

        ExecutorService executorService = Executors.newCachedThreadPool();

        final Semaphore semaphore = new Semaphore();

        final CountDownLatch countDownLatch = new CountDownLatch();

        long l = System.currentTimeMillis();

        for (int i = ; i < ; i++) {

            final int count = i;

            executorService.execute(() -> {

                try {

                    semaphore.acquire();

                    TUser load = userService.load();

                    System.out.println(load.getPhone());

                    semaphore.release();

                } catch (Exception e) {

                    // log.error("exception" , e);

                }

                countDownLatch.countDown();

            });

        }

        countDownLatch.await();

        long a = System.currentTimeMillis();

        System.out.println(a-l);

        executorService.shutdown();

        //log.info("size:{}" , map.size());

    }

}
这个开始时候给了5000个,直接把我数据库搞炸了,
后来改了,也还是可以测试的,如果需要使用这个那么需要整合线程池了,不然那么多的连接夯在那里会一直不走
springboot项目中进行并发测试的更多相关文章
- SpringBoot12 QueryDSL01之QueryDSL介绍、springBoot项目中集成QueryDSL
1 QueryDSL介绍 1.1 背景 QueryDSL的诞生解决了HQL查询类型安全方面的缺陷:HQL查询的扩展需要用字符串拼接的方式进行,这往往会导致代码的阅读困难:通过字符串对域类型和属性的不安 ...
- Springboot项目中 前端展示本地图片
Springboot项目中 前端展示本地图片 本文使用的是Springboot官方推荐的thymeleaf(一种页面模板技术) 首先在pom文件加依赖 <dependency> <g ...
- 在SpringBoot项目中添加logback的MDC
在SpringBoot项目中添加logback的MDC 先看下MDC是什么 Mapped Diagnostic Context,用于打LOG时跟踪一个“会话“.一个”事务“.举例,有一个web ...
- 自身使用的springboot项目中比较全的pom.xml
在学习的时候常建新的项目,mark下商用的jar <dependency> <groupId>org.mybatis</groupId> <artifactI ...
- springboot 项目中获取默认注入的序列化对象 ObjectMapper
在 springboot 项目中使用 @SpringBootApplication 会自动标记 @EnableAutoConfiguration 在接口中经常需要使用时间类型,Date ,如果想要格式 ...
- springboot项目中js、css静态文件路径访问
springboot静态文件访问的问题,相信大家也有遇到这个问题,如下图项目结构. 项目结构如上所示,静态页面引入js.css如下所示. 大家肯定都是这样写的,但是运行的话就是出不来效果,图片也不显示 ...
- 解决springboot项目中@Value注解参数值为null的问题
1.错误场景: springboot项目中在.properties文件(.yml)文件中配置了属性值,在Bean中使用@Value注解引入该属性,Bean的构造器中使用该属性进行初始化,此时有可能会出 ...
- springboot项目中引用其他springboot项目jar
1. 剔除要引入的springboot项目中不需要的文件:如Application和ApplicationTests等 2.打包 不能使用springboot项目自带的打包插件进行打包: 3.打包 4 ...
- 在前后端分离的SpringBoot项目中集成Shiro权限框架
参考[1].在前后端分离的SpringBoot项目中集成Shiro权限框架 参考[2]. Springboot + Vue + shiro 实现前后端分离.权限控制 以及跨域的问题也有涉及
随机推荐
- element-ui表格点击一行展开
转载:https://www.cnblogs.com/xiaochongchong/p/8127282.html <template> <el-table :data="t ...
- Java Collection - ArrayList & LinkedList
总结 ref: https://blog.csdn.net/qq_32679815/article/details/78907437 1-ArrayList是实现了基于动态数组的数据结构,Linked ...
- Hibernate与数据库交互方式和Hibernate常用的几个方法
第一种,适合sql语言水平比较高的人用 HQL(Hibernate Query Language) 面向对象的查询语言,与SQL不同,HQL中的对象名是区分大小写的(除了JAVA类和属性其他部分不区分 ...
- 获取硬件信息的delphi源码CPUID、操作系统、Mac物理地址、计算机名称、IP地址、用户名
{-----------------------------------------------------------------------------作者:sushengmiyan 2013.0 ...
- CF 1063B Labyrinth
传送门 解题思路 看上去很简单,\(bfs\)写了一发被\(fst\)...后来才知道好像一群人都被\(fst\)了,这道题好像那些每个点只经过一次的传统\(bfs\)都能被叉,只需要构造出一个一块一 ...
- typedef void (*funcptr)(void) typedef void (*PFV)(); typedef int32_t (*PFI)();
看到以下代码,不明白查了一下: /** Pointer to Function returning Void (any number of parameters) */ typedef void (* ...
- LightOJ-1138-Trailing Zeroes (III)-二分+求N!末尾0
You task is to find minimal natural number N, so that N! contains exactly Q zeroes on the trail in d ...
- 猥琐发育,3月份Java干货已到达战场!
时间真的过得很快,又是月底了,又到了我们总结这个月干货的时候了.3月份这个月我们都带来了哪些干货呢?我们一起回顾一下. 坑爹,手机端链接点不开,请切换到电脑端或者关注我们的微信公众号进行阅读. 扫描关 ...
- <Django>第一篇:入门的例子
1.MVT框架 Model(模型):数据库交互相关.在这部分一般需要进行三个操作: (1)面向数据库:模型对象.列表 (2)定义模型类:指定属性及类型,确定表结构(设计表),需要迁移(生成表) (3) ...
- 解析Asp.net Core中使用Session的方法
2017年就这么悄无声息的开始了,2017年对我来说又是特别重要的一年. 元旦放假在家写了个Asp.net Core验证码登录, 做demo的过程中遇到两个小问题,第一是在Asp.net Core中引 ...