记录vue用 html5+做移动APP 用barcode做扫一扫功能时安卓 的bug(黑屏、错位等等)和解决方法
最近做项目时,要用到扫一扫二维码的功能,在html5+里面有提供barcode功能,于是照过来用了,
写的代码如下 :
扫码页面:
<style lang="less" scoped>

#camera {

  height: %;

  width: %;

  .van-icon {

    top: -2px;

    font-size: 30px;

    color: #fff;

    &.back {

      left: 10px;

    }

    &.light {

      right: 10px;

    }

  }

  #scan {

    width: %;

    height: %;

    z-index: ;

    position: fixed;

    left: ;

    top: ;

    background: rgba(, , , );

  }

  .tips {

    text-align: center;

    position: absolute;

    width: %;

    top: %;

    color: #fff;

    z-index: ;

    left: %;

  }

  .action {

    position: fixed;

    z-index: ;

    width: %;

    left: ;

    bottom: ;

    .items {

      display: flex;

      justify-content: space-around;

      background: rgba(, , , 0.35);

      width: %;

      padding: 4px;

      margin: 4px auto;

      .item {

        flex-basis: 50px;

        text-align: center;

        img {

          width: 27px;

        }

      }

    }

  }

}

</style>

<template>

  <div id="camera">

    <div id="scan"></div>

    <div class="tips">"加载中...</div>

    <div class="action">

      <div class="items">

        <div

          class="item"

          @click="openLight"

        ><img src="../assets/img/png-60@3x.png"></div>

        <div

          class="item"

          @click="getPicture()"

        ><img src="../assets/img/png-59@3x.png"></div>

        <div

          class="item"

          @click="cancelScan()"

        ><img src="../assets/img/png-61@3x.png"></div>

      </div>

    </div>

  </div>

</template>

<script  type='text/ecmascript-6'>

let scan = null;

export default {

  data() {

    return {

      codeUrl: "",

      isLight: false,

      showEnter: false,

      extra: null,

      type: ""

    };

  },

  mounted() {

    if (window.plus) {

      let s = plus.navigator.checkPermission("camera");

      if (s !== "notdeny") {

        plus.nativeUI.alert("相机权限未获取,请往设置应用程序里面开启权限!");

      }

    }

    this.startScan(); //`进入页面就调取扫一扫

  },

  beforeDestroy() {

    if (!window.plus) return;

    scan.cancel();

    scan.close();

  },

  methods: {

    // 打开闪光灯

    openLight() {

      this.isLight = !this.isLight;

      scan.setFlash(this.isLight);

    },

    //创建扫描控件

    startRecognize() {

      let that = this;

      if (!window.plus) return;

      scan = null;

      scan = new plus.barcode.Barcode(

        "scan",

        [plus.barcode.QR, plus.barcode.EAN8, plus.barcode.EAN13],

        {

          frameColor: "#1294cb",

          scanbarColor: "#1294cb",

          top: "100px",

          left: "0px",

          width: "100%",

          height: "500px",

          position: "fixed"

        }

      );

      scan.onmarked = onmarked;

      function onmarked(type, result, file) {

        result = result.replace(/\n/g, "");

        that.storage.save("cameraData", result);

        that.codeUrl = result; //扫描后返回值

        that.$router.go(-);

      }

    },

    // //开始扫描

    startScan() {

      if (!window.plus) return;

      this.startRecognize(); //创建控件

      setTimeout(() => {

        scan.start();

      }, );

    },

    // 取消扫描

    cancelScan() {

      let l = plus.webview.all().length;

      this.$toast(l);

      if (l > ) {

        let ws = plus.webview.currentWebview();

        plus.webview.close(ws);

      } else {

        this.$router.go(-);

      }

      // this.$router.go(-1);

      if (!window.plus) return;

      plus.navigator.setStatusBarStyle("dark");

      if (scan) {

        scan.cancel(); //关闭扫描

        scan.close(); //关闭条码识别控件

      }

    },

    getPicture() {

      plus.gallery.pick(src => {

        plus.barcode.scan(

          src,

          (type, result) => {

            scan.cancel(); //关闭扫描

            scan.close();

            this.storage.save("cameraData", result);

            this.$router.go(-);

          },

          error => {

          this.$toast({

              position: "bottom",

              message: error.message

            });

          }

        );

      });

    }

  }

};

</script>
去扫一扫前的页面:
<template>

  <div id="workshop">

    <div id="scan">

      <div

        id="header"

        :style="{height:statubar}"

      >

        <div

          class="wrap"

          :style="{'padding-top':paddingTop}"

        >

          <div class="back">

            <van-icon

              name="arrow-left"

              @click="$router.go(-1)"

            />

          </div>

          <div class="title">扫一扫</div>

          <div class="history">

            <span>

              历史记录

            </span>

          </div>

        </div>

      </div>

      <div class="searchBox">

        <van-row>

          <van-col span="">

            <van-button

              size="large"

              :square="true"

              @click="goCamera"

            >

              <img

                class="right"

                src="../../assets/img/png-73@3x.png"

              />

            </van-button>

          </van-col>

          <van-col

            span=""

            class="van-hairline--surround"

          >

            <van-search

              v-model="value"

              :placeholder="pla"

              @keydown.stop="search"

              shape="round"

            >

              <span slot="left-icon"></span>

            </van-search>

          </van-col>

        </van-row>

      </div>

    </div>

  </div>

</template>

<script>

export default {

  name: "orderScan",

  data() {

    return {

      result: {},

      value: "",

    };

  },

  methods: {

    // 去扫码

    goCamera() {

        this.$router.go("/camera")

    },

    // 手动输入时搜索

    search(e) {

      if (e.keyCode == ) {

        this.onSearch();

      }

    },

 // 搜索结果

    onSearch() {}

  },

  mounted() {

    let camera = sessionStorage.getItem("cameraData");

    if (camera && camera != "null") {

      this.value = sessionStorage.getItem("cameraData");

      sessionStorage.removeItem("cameraData");

    }

  }

};

</script>
两个页面运行的效果如下
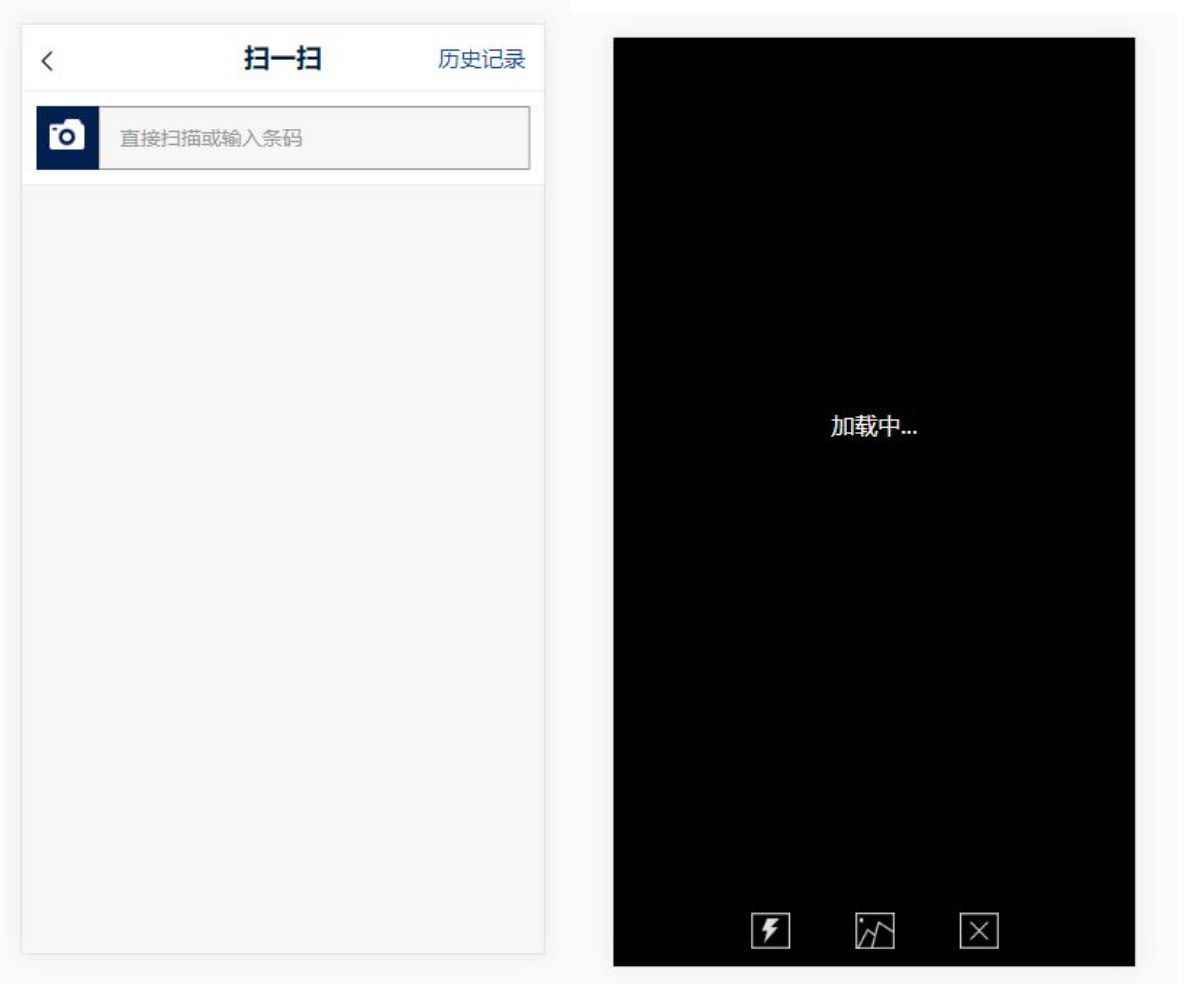
当时以为很容易,结果做出后遇到各种BUG,有时黑屏,有时位置偏移,有时扫码框偏移等等
比如下图 这个扫码框已经偏移了
很奇怪,看官方提供的APP怎么扫都是没有问题。于是乎百度各种解决方法,看到 有的说是因为摄像头很耗资源,要用单独的webview来分配,用完即关,看看官方的案例,貌似确实也是新建一个webview来启动的。
心想应该就是这样吧,于是,把方法改了一下。去扫一扫前的页面的$router.go("/camera")时直接改成生成新一个webview,改后的JS代码如下;
  goCamera() {

      //新建一个webview来启动扫一扫,不再$router.push()的跳转

      let h = location.href;

      let n = h.indexOf("#");

      let r = h.substr(n);

      h = h.replace(r, "#/camera");

      let ws = plus.webview.create(h);

      ws.show();

    },
在扫码页面,修改扫码成功后router.go(-1)改成关闭当前的webview,进入页面时设置一个定时器来加载摄像头的资源的JS更改如下
let scan = null;

export default {

  data() {

    return {

      codeUrl: "",

      isLight: false,

      showEnter: false,

      extra: null,

      scan: null,

      type: ""

    };

  },

  mounted() {

    setTimeout(() => {

      // 设置500毫秒等资源加载

      if (window.plus) {

        let s = plus.navigator.checkPermission("camera");

        if (s !== "notdeny") {

          plus.nativeUI.alert("相机权限未获取,请往设置应用程序里面开启权限!");
      return;

        }

        this.startScan(); //`进入页面就调取扫一扫

      }

    }, );

  },

  beforeDestroy() {

    if (!window.plus) return;

    scan.cancel();

    scan.close();

    // scan = null;

  },

  methods: {

    // 打开闪光灯

    openLight() {

      this.isLight = !this.isLight;

      scan.setFlash(this.isLight);

    },

    //创建扫描控件

    startRecognize() {

      let that = this;

      if (!window.plus) return;

      scan = null;

      scan = new plus.barcode.Barcode(

        "scan",

        [plus.barcode.QR, plus.barcode.EAN8, plus.barcode.EAN13],

        {

          frameColor: "#1294cb",

          scanbarColor: "#1294cb",

          top: "100px",

          left: "0px",

          width: "100%",

          height: "500px",

          position: "fixed"

        }

      );

      scan.onmarked = onmarked;

      function onmarked(type, result, file) {

        result = result.replace(/\n/g, "");

        that.storage.save("cameraData", result);

        if (plus.webview.all().length > ) {

          // 扫码成功后关闭当前的webview

          let ws = plus.webview.currentWebview();

          plus.webview.close(ws);

        }

      }

    },

    // //开始扫描

    startScan() {

      if (!window.plus) return;

      this.startRecognize(); //创建控件

      setTimeout(() => {

        scan.start();

      }, );

    },

    // 取消扫描

    cancelScan() {

      let l = plus.webview.all().length;if (l > ) {

        let ws = plus.webview.currentWebview();

        plus.webview.close(ws);

      } else {

        this.$router.go(-);

      }

      // this.$router.go(-1);

      if (!window.plus) return;

      plus.navigator.setStatusBarStyle("dark");

      if (scan) {

        scan.cancel(); //关闭扫描

        scan.close(); //关闭条码识别控件

      }

    },

    // 从相册选择图片扫码

    getPicture() {

      plus.gallery.pick(src => {

        plus.barcode.scan(

          src,

          (type, result) => {

            scan.cancel();

            scan.close();

            this.storage.save("cameraData", result);

            if (plus.webview.all().length > ) {

              // 扫码成功后关闭当前的webview

              let ws = plus.webview.currentWebview();

              plus.webview.close(ws);

            }

          },

          error => {

        this.$toast({

              position: "bottom",

              message:  error.message

            });

          }

        );

      });

    }

  }

};
至于扫码成功的数据切换,我是用localStorage来保存。
改成这样新生成一个webview方法后,我自己测试了N遍,没遇到过那些问题了,我也用我同事的手机测试过,也没有问题。但愿是解决了吧
记录vue用 html5+做移动APP 用barcode做扫一扫功能时安卓 的bug(黑屏、错位等等)和解决方法的更多相关文章
- vue项目使用前端框架开发,实现滑动效果,若不刷新页面则无法达到预期效果的问题及解决方法
滑动等效果的初始化时机很重要,在vue项目开发中,需到mounted()钩子函数 (当组件中的DOM结构被渲染好并放到页面中后,会执行这个钩子函数,此时即可初始化滑动效果的js代码). 若组件未挂载到 ...
- vue项目使用html5+ barcode扫码在苹果遇到的问题以及自己的解决方法
之前在记录扫码 在安卓时,会出现黑屏,错位,闪退等等问题.解决方法在另一篇文章里 https://www.cnblogs.com/huzhuhua/p/11064764.html . 当时以为 是 ...
- Android 编程下通过 Theme 和 Style 避免 APP 启动闪黑屏
之前在做 APP 的时候不太关注这个问题,因为自己在使用其他 APP 的时候也会在应用启动的初始有一个黑屏闪过后才会出现应用的欢迎页.直到最近开发过程中发现自己在欢迎页启动的线程由于请求和处理的数据量 ...
- Vue+DataTables warning:table id=xxxx -Cannot reinitialize DataTable.报错解决方法
问题描述: 使用DataTables来写列表,用vue来渲染数据,有搜索功能,每次点击搜索就会报错,如下图所示. 问题排查: 找了一系列原因,最后发现是我每次请求完数据之后都会添加分页功能,从而导致了 ...
- cordova+vue做的app解决引入cordova-plugin-splashscreen后启动先显示黑屏在显示启动页
先上项目目录结构cordova项目结构 android platform 结构 图中用红框框起来的为主要修改文件 这篇主要的讲cordova项目引用了cordova-plugin-splashscre ...
- html5文章 -- 使用 jQuery Mobile 与 HTML5 开发 Web App ——开发原则 | Kayo's Melody
最近专注研究 jQuery Mobile —— 一款很方便就可以把 Web App 包装成适合 Android 与 iPhone 等触屏移动设备的 Javascript 库,结合 jQuery Mob ...
- HTML5 Plus移动App(5+App)开发入门指南
HTML5 Plus移动App,简称5+App,是一种基于HTML.JS.CSS编写的运行于手机端的App,这种App可以通过扩展的JS API任意调用手机的原生能力,实现与原生App同样强大的功能和 ...
- atitit.html5 vs 原生 app的区别与选择
atitit.html5 vs 原生 app的区别与选择 1. html5的优点 1 1.1. 最大优势::在跨平台(ios苹果,android安卓等) 1 1.2. 开放性 1 1.3. 快速的更 ...
- h5做的app和原生app的区别
之所以说h5做的app和原生app的区别,是因为一位博友的问题: 随着 h5 的普及,是不是不再需要开发 app ? 我的回答是要分业务需求,分场合而定. 比如现在的微信小程序这么流行,甚至也取代了不 ...
随机推荐
- 软工个人项目(Java实现)
一. Github地址: https://github.com/RuiBingo/PersonalWork 二.个人PSP表格: PSP2.1 PSP阶段 预估耗时(分钟) 实际耗时(分钟) Plan ...
- rocksdb和leveldb性能比较——写性能
前面学习了一下rocksdb,这个db是对leveldb的一个改进,是基于leveldb1.5的版本上的改进,而且leveldb1.5以后也在不断的优化,下面从写入性能对两者进行对比. 前言 比较的l ...
- mysql 之优化
# ### part1 : sql语句优化 # (1) mysql 执行流程 客户端: 发送链接请求,然后发送sql语句 服务端: 1.连接层: 提供和客户端链接的服务 show processlis ...
- nginx 文件服务器配置,模板配置文件,有注释
# For more information on configuration, see: # * Official English Documentation: http://nginx.org/e ...
- [PHP] Ubuntu快速安装起PHP7.4
先安装一下这个命令 add-apt-repositoryapt-get install software-properties-common 添加第三方源:add-apt-repository ppa ...
- 如何把转入成功的XXX.sql导入到自己的数据库里
1.新建自己的mysql连接,mysql连接名随便起,如cxf 密码尽量写123456或者root,防止忘记.按照图示右键(如果想在已有的mysql连接基础上建立数据库连接直接看第二步) 2.右键名 ...
- Node.js—简介
一.Node.js是什么 1. 基本概述 Node.js是一个可以让JavaScript运行在服务器端的平台.它是一个为实时Web应用开发而诞生的平台,它从诞生之初就充分考虑了在实时响应.超大规模数据 ...
- python 给多人发送邮件,且将结果添加为附件
import unittest,HTMLTestRunnerimport osdef runa(): path=os.getcwd() print(path) a=unittest.defaultTe ...
- CME Futures & Options Order Book
http://algo-logic.com/futures-options-orderbook Algo-Logic Systems’ Futures & Options (F&O) ...
- 卷积核filter和kernal的区别
在一堆介绍卷积的帖子中,这篇特别之处在于很萌的示例配色,令人眼前一亮,当然直观也是很直观滴,保证了能在昏昏欲睡见周公子前看完. https://towardsdatascience.com/types ...