Centos常用命令之:压缩与解压缩
在Linux中,压缩文件的扩展名主要是:[*.tar,*.tar.gz,*.tgz,*.gz,*.Z,*.bz2],虽然,我们知道,在LInux中,文件的扩展名没有什么作用,但是由于在Linux中支持的压缩命令非常的多,为了在解压缩的时候知道用那种方式来解压缩,就需要带上特定的扩展名。
扩展名对应的压缩方式:
◇*.Z:compress程序压缩的文件
◇*.gz:gzip程序压缩的文件
◇*.bz2:bzip2程序压缩的文件
◇*.tar:tar程序打包的数据,并没有压缩过
◇*.tar.gz:tar程序打包的文件,并且经过gzip程序的压缩
◇*.tar.bz2:tar程序打包的文件,并且经过bzip2程序的压缩
其中compress是比较老的一款压缩软件,已经被gzip取代了,用gzip也可以解开compress压缩的文件。
但是由于这些压缩方式都只能针对单个文件。这时候打包软件[tar]就显得很重要了。
◇compress
用法:compress [-rcV] 文件或目录 ← 压缩命令
默认情况下,压缩后的文件后缀为.Z,并且压缩前的源文件会消失。
-r:可以连同目录下的文件也同时给与压缩
-c:将压缩数据输出成为standard output(输出到屏幕)
-v:可以秀出压缩后的文件资讯以及压缩过程中的一些档名变化
默认情况下,我们的Centos中并没用安装compress这个软件,我们可以用下面的命令来在线安装
yum install ncompress
实例:
[root@localhost stu]# ll

总用量 12

-rw-r--r--. 1 fuwh fuwh 2865 7月  26 10:45 lin

-rw-r--r--. 1 fuwh fuwh 2865 7月  26 10:45 lin1

-rw-r--r--. 1 fuwh fuwh 2865 7月  26 10:46 lin2

[root@localhost stu]# compress -v lin

lin:  -- replaced with lin.Z Compression: 27.95%

[root@localhost stu]# ll

总用量 12

-rw-r--r--. 1 fuwh fuwh 2865 7月  26 10:45 lin1

-rw-r--r--. 1 fuwh fuwh 2865 7月  26 10:46 lin2

-rw-r--r--. 1 fuwh fuwh 2064 7月  26 10:45 lin.Z
如果想要压缩后的文件还保留的话,可以用[-c]选项
[root@localhost stu]# ll

总用量 12

-rw-r--r--. 1 fuwh fuwh 2865 7月  26 10:45 lin1

-rw-r--r--. 1 fuwh fuwh 2865 7月  26 10:46 lin2

-rw-r--r--. 1 fuwh fuwh 2064 7月  26 10:45 lin.Z

[root@localhost stu]# compress -c lin1 > lin11.Z

[root@localhost stu]# ll

总用量 16

-rw-r--r--. 1 fuwh fuwh 2865 7月  26 10:45 lin1

-rw-r--r--. 1 root root 2064 7月  26 10:58 lin11.Z

-rw-r--r--. 1 fuwh fuwh 2865 7月  26 10:46 lin2

-rw-r--r--. 1 fuwh fuwh 2064 7月  26 10:45 lin.Z

[root@localhost stu]#
如果要解压缩的话,就用uncompress命令
[root@localhost stu]# ll

总用量 16

-rw-r--r--. 1 fuwh fuwh 2865 7月  26 10:45 lin1

-rw-r--r--. 1 root root 2064 7月  26 10:58 lin11.Z

-rw-r--r--. 1 fuwh fuwh 2865 7月  26 10:46 lin2

-rw-r--r--. 1 fuwh fuwh 2064 7月  26 10:45 lin.Z

[root@localhost stu]# uncompress lin11.Z

[root@localhost stu]# ll

总用量 16

-rw-r--r--. 1 fuwh fuwh 2865 7月  26 10:45 lin1

-rw-r--r--. 1 root root 2865 7月  26 10:58 lin11

-rw-r--r--. 1 fuwh fuwh 2865 7月  26 10:46 lin2

-rw-r--r--. 1 fuwh fuwh 2064 7月  26 10:45 lin.Z

[root@localhost stu]#
◇gzip,zcat
使用gzip压缩的文件扩展名为.gz,还可以解开copmress压缩的文件。
使用方法:gzip [-cdtv#] 文件名
-c:将压缩的数据输出到屏幕上
-d:解压缩的参数,也可以使用gunzip命令
-t:可以用来检验压缩档的一致性,看看文件有无错误
-v:可以显示出文件的压缩比率
-#:压缩等级,-1最快,但是压缩比最差,-9最慢,但是压缩比最好,默认是-6
zcat可以用来读取压缩后的文件内容
实例:
[root@localhost stu]# ll

总用量 16

-rw-r--r--. 1 fuwh fuwh 2865 7月  26 10:45 lin

-rw-r--r--. 1 fuwh fuwh 2865 7月  26 10:45 lin1

-rw-r--r--. 1 root root 2865 7月  26 10:58 lin11

-rw-r--r--. 1 fuwh fuwh 2865 7月  26 10:46 lin2

[root@localhost stu]# gzip -v lin

lin:     45.1% -- replaced with lin.gz

[root@localhost stu]# ll

总用量 16

-rw-r--r--. 1 fuwh fuwh 2865 7月  26 10:45 lin1

-rw-r--r--. 1 root root 2865 7月  26 10:58 lin11

-rw-r--r--. 1 fuwh fuwh 2865 7月  26 10:46 lin2

-rw-r--r--. 1 fuwh fuwh 1596 7月  26 10:45 lin.gz

[root@localhost stu]# gzip -c lin2 > lin2.gz

[root@localhost stu]# ll

总用量 20

-rw-r--r--. 1 fuwh fuwh 2865 7月  26 10:45 lin1

-rw-r--r--. 1 root root 2865 7月  26 10:58 lin11

-rw-r--r--. 1 fuwh fuwh 2865 7月  26 10:46 lin2

-rw-r--r--. 1 root root 1597 7月  26 11:13 lin2.gz

-rw-r--r--. 1 fuwh fuwh 1596 7月  26 10:45 lin.gz

[root@localhost stu]# zcat lin.gz

■◇□※

■terterm

连不上的原因:防火墙未关闭

....后面内容省略....

[root@localhost stu]# gunzip lin2.gz

gzip: lin2 already exists; do you wish to overwrite (y or n)? y

[root@localhost stu]# gzip -d lin.gz

[root@localhost stu]# ll

总用量 16

-rw-r--r--. 1 fuwh fuwh 2865 7月  26 10:45 lin

-rw-r--r--. 1 fuwh fuwh 2865 7月  26 10:45 lin1

-rw-r--r--. 1 root root 2865 7月  26 10:58 lin11

-rw-r--r--. 1 root root 2865 7月  26 11:13 lin2

[root@localhost stu]#
◇bzip2,bzcat
bzip2的压缩比率比gzip还要好,用法和gzip基本上一样。压缩的后缀名为.bz2。
用法:bzip2 [-cdkzv#] 文件名
-c:将压缩的过程产生的数据输出到屏幕上
-d:解压缩的参数,也可以使用bunzip2来解压缩。
-k:保留原始文件
-z:压缩的参数
-v:可以显示压缩比率
-#:与gzip一样压缩比参数
可以使用bzcat来读取压缩后的文件。
实例:
[root@localhost stu]# ll

总用量 16

-rw-r--r--. 1 fuwh fuwh 2865 7月  26 10:45 lin

-rw-r--r--. 1 fuwh fuwh 2865 7月  26 10:45 lin1

-rw-r--r--. 1 root root 2865 7月  26 10:58 lin11

-rw-r--r--. 1 root root 2865 7月  26 11:13 lin2

[root@localhost stu]# bzip2 -zv lin

  lin:      1.694:1,  4.722 bits/byte, 40.98% saved, 2865 in, 1691 out.

[root@localhost stu]# ll

总用量 16

-rw-r--r--. 1 fuwh fuwh 2865 7月  26 10:45 lin1

-rw-r--r--. 1 root root 2865 7月  26 10:58 lin11

-rw-r--r--. 1 root root 2865 7月  26 11:13 lin2

-rw-r--r--. 1 fuwh fuwh 1691 7月  26 10:45 lin.bz2

[root@localhost stu]# bzip2 -cvk lin2 > lin2.bz2

  lin2:     1.694:1,  4.722 bits/byte, 40.98% saved, 2865 in, 1691 out.

[root@localhost stu]# ll

总用量 20

-rw-r--r--. 1 fuwh fuwh 2865 7月  26 10:45 lin1

-rw-r--r--. 1 root root 2865 7月  26 10:58 lin11

-rw-r--r--. 1 root root 2865 7月  26 11:13 lin2

-rw-r--r--. 1 root root 1691 7月  26 11:27 lin2.bz2

-rw-r--r--. 1 fuwh fuwh 1691 7月  26 10:45 lin.bz2

[root@localhost stu]# bzip2 -d lin.bz2

[root@localhost stu]# ll

总用量 20

-rw-r--r--. 1 fuwh fuwh 2865 7月  26 10:45 lin

-rw-r--r--. 1 fuwh fuwh 2865 7月  26 10:45 lin1

-rw-r--r--. 1 root root 2865 7月  26 10:58 lin11

-rw-r--r--. 1 root root 2865 7月  26 11:13 lin2

-rw-r--r--. 1 root root 1691 7月  26 11:27 lin2.bz2

-rw-r--r--. 1 root root    0 7月  26 11:27 lin3

[root@localhost stu]#
◇tar
前面的压缩命令都是对单个文件的压缩,tar命令主要用来将多个文件或目录打包成一个大文件。
使用方法:
tar [-j | -z] [cv] [-f 创建的档名] filename <-- 打包与压缩
tar [-j | -z] [tv] [-f 创建的档名] <-- 查看档名
tar [-j | -z] [xv] [-f 创建的档名] [-C 目录] 解压缩
-c:创建打包文件,可搭配-v来查看过程中被打包的档名
-t:查看打包文件的内容含有哪些档名
-x:解打包或解压缩的功能,可搭配-C在特定目录中解开,需要注意,-c,-t,-x不能一起出现
-j:通过bizp2的支持来进行压缩/解压缩,此时的档名为*.tar.bz2
-z:通过gzip的支持来进行压缩/解压缩,此时的档名为*.tar.gz
-v:在压缩/解压缩的过程中,将正在处理的档名显示出来
-f filename:-f后面要立刻接要被处理的档名。所以如果和其他选项一起写的时候,需要写在最后面。
-C 目录:在解压缩的时候指定解压缩的目录
例子:
[root@localhost fuwh]# ll

总用量 8

drwxrwxr-x. 2 fuwh fuwh 4096 7月  26 11:55 stu

drwxrwxr-x. 3 fuwh fuwh 4096 7月  25 10:27 stu2

[root@localhost fuwh]# tar -zcv -f stu2.tar.gz stu2

stu2/

stu2/stu22/

stu2/stu22/aa.txt

[root@localhost fuwh]# tar -jcv -f stu2.tar.bz2 stu

stu/

stu/lin

stu/lin11

stu/lin1

stu/lin2

stu/lin3

[root@localhost fuwh]# ll

总用量 16

drwxrwxr-x. 2 fuwh fuwh 4096 7月  26 11:55 stu

drwxrwxr-x. 3 fuwh fuwh 4096 7月  25 10:27 stu2

-rw-r--r--. 1 root root 2439 7月  26 11:57 stu2.tar.bz2

-rw-r--r--. 1 root root  165 7月  26 11:57 stu2.tar.gz

[root@localhost fuwh]#
通常,我们在网上下一些开发用的软件,都是tar.gz格式的。比如:
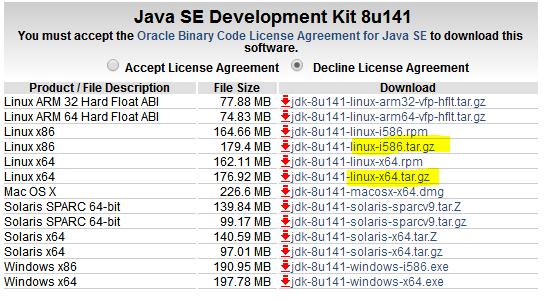
这个时候,我们就可以用 tar -zxvf 文件名 来解压缩了。
[root@localhost data]# ll

总用量 53424

-rw-r--r--. 1 fuwh fuwh 54703519 7月  26 12:02 server-jre-8                                                                                u141-linux-x64.tar.gz

[root@localhost data]# tar -zxvf server-jre-8u141-linux-x64                                                                                .tar.gz

jdk1.8.0_141/

jdk1.8.0_141/THIRDPARTYLICENSEREADME.txt

jdk1.8.0_141/lib/

jdk1.8.0_141/lib/jexec

。。。中略。。。

[root@localhost data]# ll

总用量 53428

drwxr-xr-x. 7 uucp  143     4096 7月  12 20:45 jdk1.8.0_141

-rw-r--r--. 1 fuwh fuwh 54703519 7月  26 12:02 server-jre-8                                                                                u141-linux-x64.tar.gz

[root@localhost data]#
Centos常用命令之:压缩与解压缩的更多相关文章
- centos常用命令
应用程序->附件->终端 一:使用CentOS常用命令查看cpumore /proc/cpuinfo | grep "model name" grep " ...
- CentOS常用命令大全
一:使用CentOS常用命令查看cpumore /proc/cpuinfo | grep "model name" grep "model name" /pro ...
- CentOS常用命令备忘
1. 查看进程 ps -a 杀掉进程 kill PID 2. 添加计划任务crontab -e 例如:30 21 * * * service httpd restart 每天21:30重启apache ...
- 第3章 CentOS常用命令
一.CentOS常用命令 1.1 文件和目录 # cd /home 进入 '/home' 目录 # cd .. ...
- CentOS 常用命令大全
下面,就给大家介绍这些CentOS常用命令. 一:使用CentOS常用命令查看cpu more /proc/cpuinfo | grep "model name" grep &qu ...
- CentOS 常用命令及快捷键整理
常用命令: 文件和目录: # cd /home 进入 '/home' 目录 # cd .. ...
- CentOS常用命令、快照、克隆大揭秘
不多说,直接上干货! cat是查看文件内容, cp –cp是连目录及件文件都拷贝 cp是拷贝文件 a.txt里的内容是, abc def ghi cat a.txt |grep –v gh ...
- Linux常用命令之压缩解压
压缩是一种通过特定的算法来减小计算机文件大小的机制.这种机制对网络用户是非常有用和高效的,因为它可以减小文件的字节总数,使文件能够通过互联网实现更快传输,此外还可以减少文件的磁盘占用空间.下面简介下z ...
- Linux学习笔记(7)Linux常用命令之压缩解压命令
(1)gzip gzip命令用于压缩文件,英文原意为GNU zip,所在路径/bin/gzip,其语法格式为: gzip [文件] 压缩后的文件格式为.gz. 例:将/etc目录下的services文 ...
- linux 常用命令-tar(压缩、解压)
linux中通过tar命令来压缩解压文件,常用命令如下 主选项(主选项是必须要有的,作用是告诉这次操作的主要目的): 1)c: (create)创建压缩包或者打包 2)x:(extract)拆包 3) ...
随机推荐
- Django学习(六)---博客文章页面的超链接设置
Django中的超链接 超链接的目标地址 href后面是目标地址 template中可以用 {% url 'app_name : url_name' param %} app_name:应用命名 ...
- C语言博客作业字符数组
一.PTA实验作业 7-12 IP地址转换 本题PTA提交列表 设计思路 3.代码截图 7-7删除字符串中的子串 本题PTA提交列表 设计思路 定义字符型数组s[81]储存主串,sub[81]储存子串 ...
- 201621123062《java程序设计》第五周作业总结
1. 本周学习总结 1.1 写出你认为本周学习中比较重要的知识点关键词 关键词:interface.Comparable.comparator 1.2 尝试使用思维导图将这些关键词组织起来.注:思维导 ...
- Python split()方法
Python split()方法 描述 Python split()通过指定分隔符对字符串进行切片,如果参数num 有指定值,则仅分隔 num 个子字符串 语法 split()方法语法: str.sp ...
- 在Nginx上配置多个站点
有时候你想在一台服务器上为不同的域名运行不同的站点.比如www.siteA.com作为博客,www.siteB.com作为论坛.你可以把两个域名的IP都解析到你的服务器上,但是没法在Nginx的根目录 ...
- 偶遇vue-awesome-swiper的坑
最近用vue重构一个移动端的项目,碰到了不少坑,今天拿移动端最著名的轮播插件swiper为例来说,由于这个项目没用UI库,纯手写的样式,沿用老的插件,自然而然的选择了vue-awesome-swipe ...
- php框架中的phalcon框架的安装,及初步认识,从表单提交简单的数据到数据库中
php框架中的phalcon框架的安装,及初步认识,从表单提交简单的数据到数据库中 1.phalcon框架的安装: phalcon框架在windows本地安装可以利用wamp软件,安装之后可以查看对应 ...
- awk sed tr替换换行符为逗号,并合并为一行
在群里看到的.记录以备用. sed 帮助命令:http://man.linuxde.net/sed 文件里有如下行,我想将每行的回车符替换为逗号,并将所有行合并到一行,用awk或sed怎么写啊TOP ...
- web api 如何通过接收文件流的方式,接收客户端及前端上传的文件
服务端接收文件流代码: public async Task<HttpResponseMessage> ReceiveFileByStream() { var stream = HttpCo ...
- .Net EntityFramwork6.0 EF框架开发入门
一.环境 开发环境:Sqlserver2008 R2.Visual Studio2012 二.准备工作 1.新建MVC空项目 2.通过NuGet获取 EntityFramework 包 操作截图 ...