Macaca 等待机制
工具软件自己的问题
不支持面向页面设计模式 , 更不用说面向组件
搭建环境
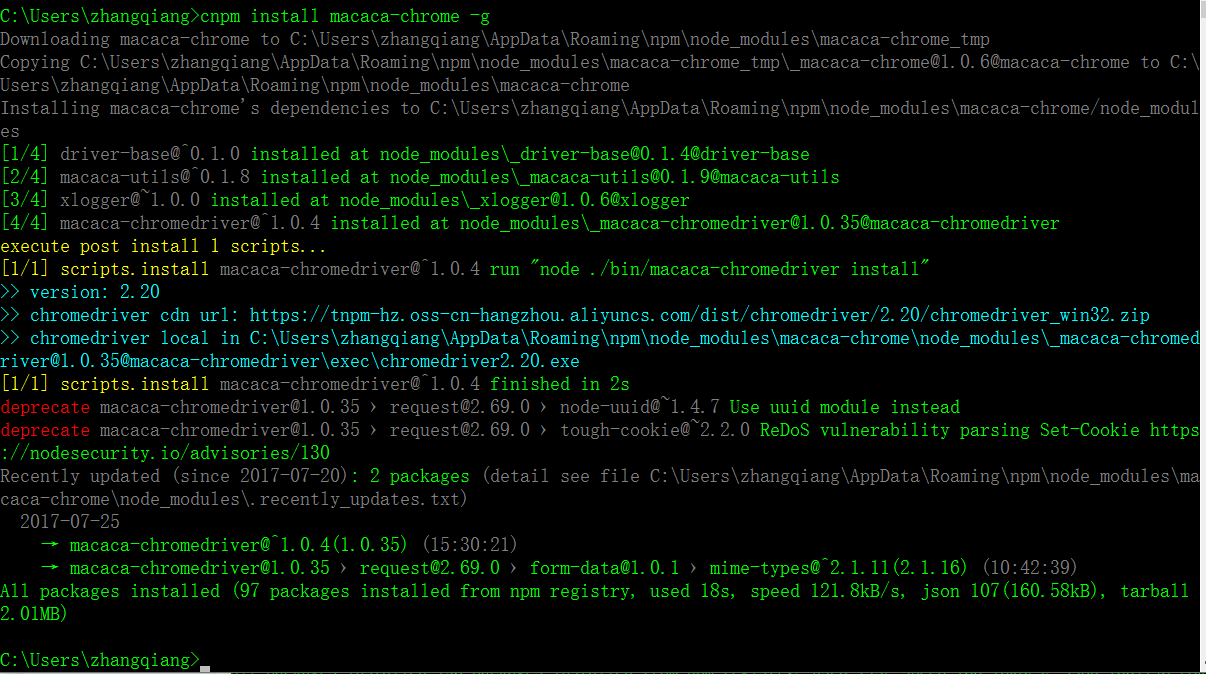
C:\Windows\system32>cnpm install macaca-electron -g

Downloading macaca-electron to C:\Users\zhangqiang\AppData\Roaming\npm\node_modules\macaca-electron_tmp

Copying C:\Users\zhangqiang\AppData\Roaming\npm\node_modules\macaca-electron_tmp\_macaca-electron@1.1.6@macaca-electron to C:\Users\zhangqiang\AppData\Roaming\npm\node_modules\macaca-electron

Installing macaca-electron's dependencies to C:\Users\zhangqiang\AppData\Roaming\npm\node_modules\macaca-electron/node_modules

[1/7] co@^4.6.0 installed at node_modules\_co@4.6.0@co

[2/7] webdriver-dfn-error-code@^1.0.3 installed at node_modules\_webdriver-dfn-error-code@1.0.4@webdriver-dfn-error-code

[3/7] driver-base@^0.1.0 installed at node_modules\_driver-base@0.1.4@driver-base

[4/7] xlogger@^1.0.0 installed at node_modules\_xlogger@1.0.6@xlogger

[5/7] selenium-atoms@~1.0.1 installed at node_modules\_selenium-atoms@1.0.2@selenium-atoms

[6/7] electron-prebuilt@^0.37.6 installed at node_modules\_electron-prebuilt@0.37.8@electron-prebuilt

[7/7] macaca-utils@~0.1.8 installed at node_modules\_macaca-utils@0.1.9@macaca-utils

execute post install 1 scripts...

[1/1] scripts.postinstall electron-prebuilt@^0.37.6 run "node install.js"

Downloading electron-v0.37.8-win32-x64.zip

[============================================>] 100.0% of 49.65 MB (4.84 MB/s)

[1/1] scripts.postinstall electron-prebuilt@^0.37.6 finished in 23s

Recently updated (since 2017-06-19): 3 packages (detail see file C:\Users\zhangqiang\AppData\Roaming\npm\node_modules\macaca-electron\node_modules\.recently_updates.txt)

  2017-06-23

    → electron-prebuilt@0.37.8 › extract-zip@1.6.5 › concat-stream@1.6.0 › readable-stream@2.3.2 › string_decoder@~1.0.0(1.0.3) (02:36:15)

  2017-06-22

    → electron-prebuilt@0.37.8 › extract-zip@1.6.5 › concat-stream@1.6.0 › readable-stream@^2.2.2(2.3.2) (21:48:21)

    → electron-prebuilt@0.37.8 › extract-zip@1.6.5 › concat-stream@1.6.0 › readable-stream@2.3.2 › safe-buffer@~5.1.0(5.1.1) (04:19:28)

All packages installed (166 packages installed from npm registry, used 37s, speed 81.41kB/s, json 183(271.17kB), tarball 2.66MB)[3/7] driver-base@^0.1.0 installed at node_modules\_driver-base@0.1.4
x
C:\Windows\system32>cnpm install macaca-electron -g
Downloading macaca-electron to C:\Users\zhangqiang\AppData\Roaming\npm\node_modules\macaca-electron_tmp
Copying C:\Users\zhangqiang\AppData\Roaming\npm\node_modules\macaca-electron_tmp\_macaca-electron@1.1.6@macaca-electron to C:\Users\zhangqiang\AppData\Roaming\npm\node_modules\macaca-electron
Installing macaca-electron's dependencies to C:\Users\zhangqiang\AppData\Roaming\npm\node_modules\macaca-electron/node_modules
[1/7] co@^4.6.0 installed at node_modules\_co@4.6.0@co
[2/7] webdriver-dfn-error-code@^1.0.3 installed at node_modules\_webdriver-dfn-error-code@1.0.4@webdriver-dfn-error-code
[3/7] driver-base@^0.1.0 installed at node_modules\_driver-base@0.1.4@driver-base
[4/7] xlogger@^1.0.0 installed at node_modules\_xlogger@1.0.6@xlogger
[5/7] selenium-atoms@~1.0.1 installed at node_modules\_selenium-atoms@1.0.2@selenium-atoms
[6/7] electron-prebuilt@^0.37.6 installed at node_modules\_electron-prebuilt@0.37.8@electron-prebuilt
[7/7] macaca-utils@~0.1.8 installed at node_modules\_macaca-utils@0.1.9@macaca-utils
execute post install 1 scripts...
[1/1] scripts.postinstall electron-prebuilt@^0.37.6 run "node install.js"
Downloading electron-v0.37.8-win32-x64.zip
[============================================>] 100.0% of 49.65 MB (4.84 MB/s)
[1/1] scripts.postinstall electron-prebuilt@^0.37.6 finished in 23s
Recently updated (since 2017-06-19): 3 packages (detail see file C:\Users\zhangqiang\AppData\Roaming\npm\node_modules\macaca-electron\node_modules\.recently_updates.txt)
2017-06-23
→ electron-prebuilt@0.37.8 › extract-zip@1.6.5 › concat-stream@1.6.0 › readable-stream@2.3.2 › string_decoder@~1.0.0(1.0.3) (02:36:15)
2017-06-22
→ electron-prebuilt@0.37.8 › extract-zip@1.6.5 › concat-stream@1.6.0 › readable-stream@^2.2.2(2.3.2) (21:48:21)
→ electron-prebuilt@0.37.8 › extract-zip@1.6.5 › concat-stream@1.6.0 › readable-stream@2.3.2 › safe-buffer@~5.1.0(5.1.1) (04:19:28)
All packages installed (166 packages installed from npm registry, used 37s, speed 81.41kB/s, json 183(271.17kB), tarball 2.66MB)


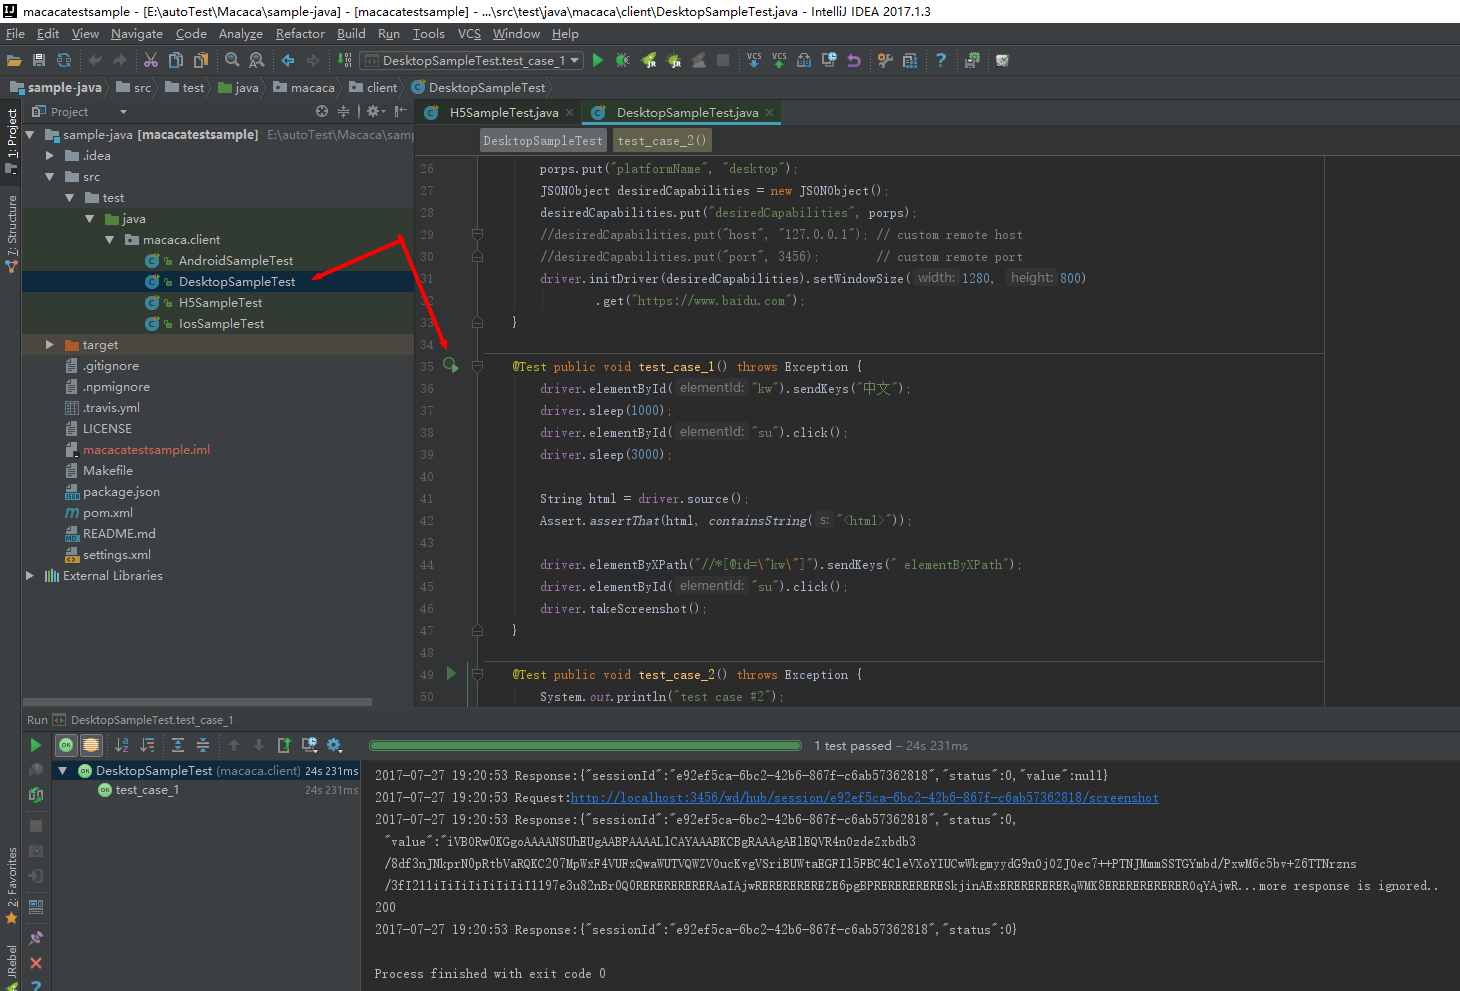
运行
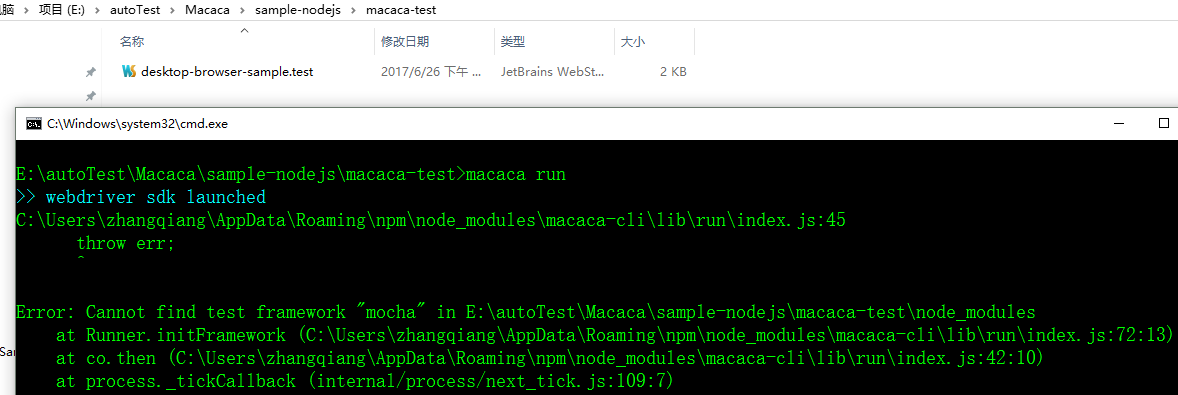

到入到IDEA
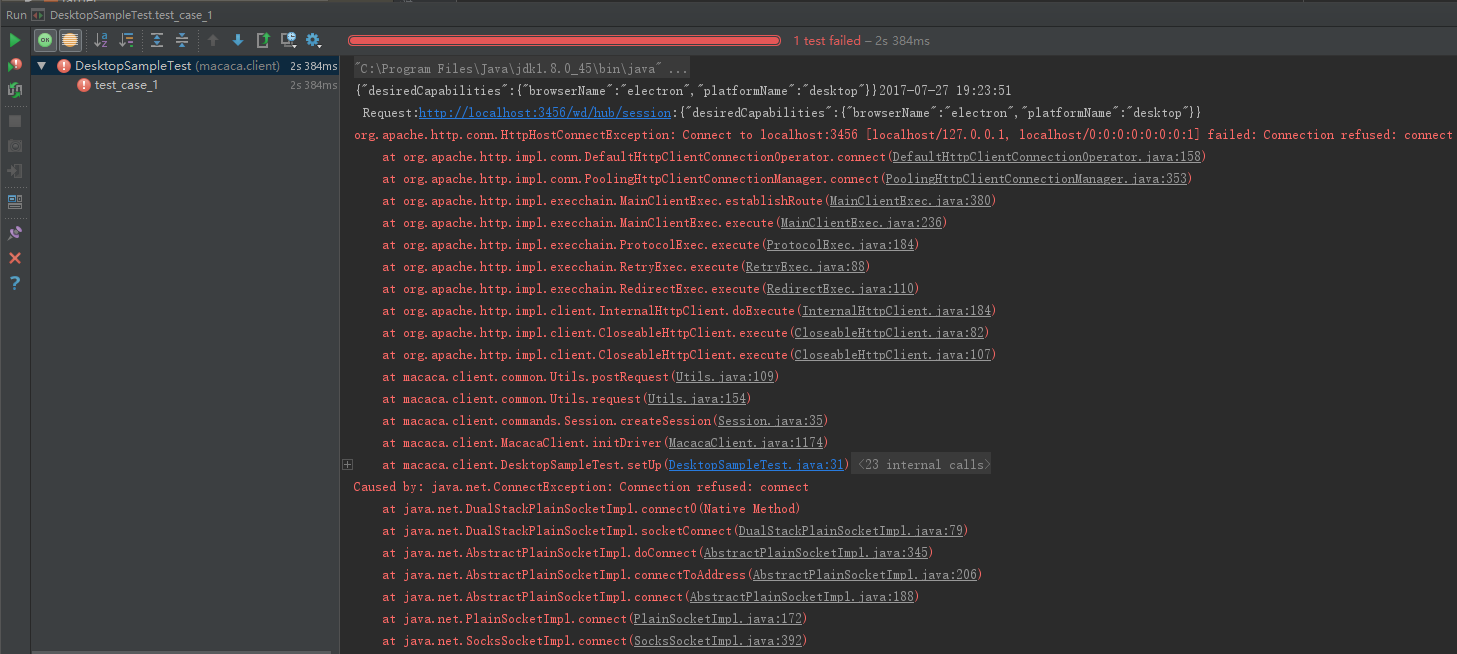
问题

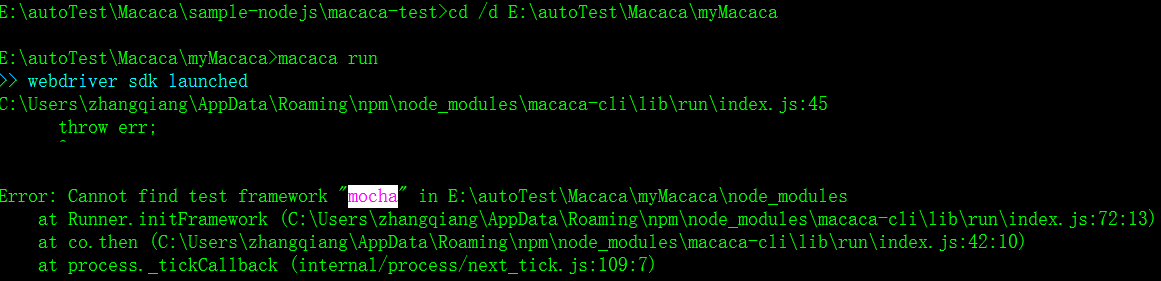
找不到 macha 框架
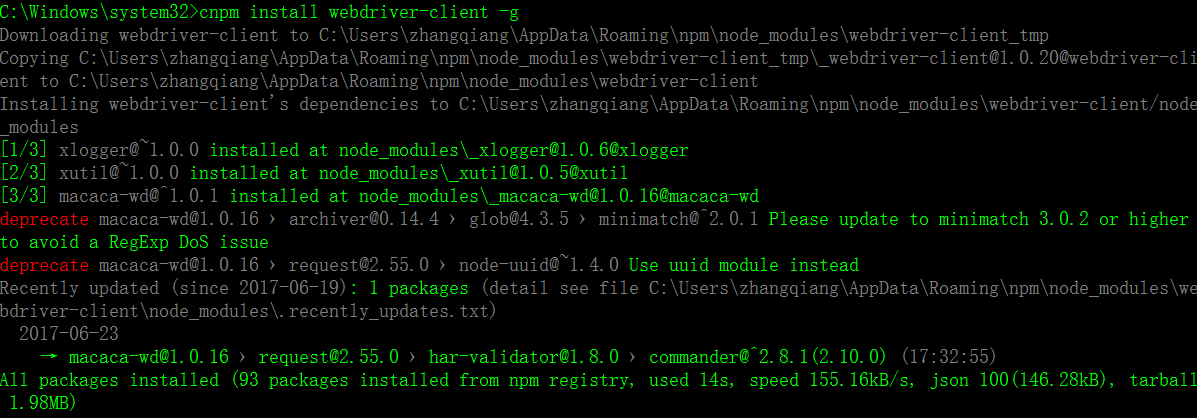
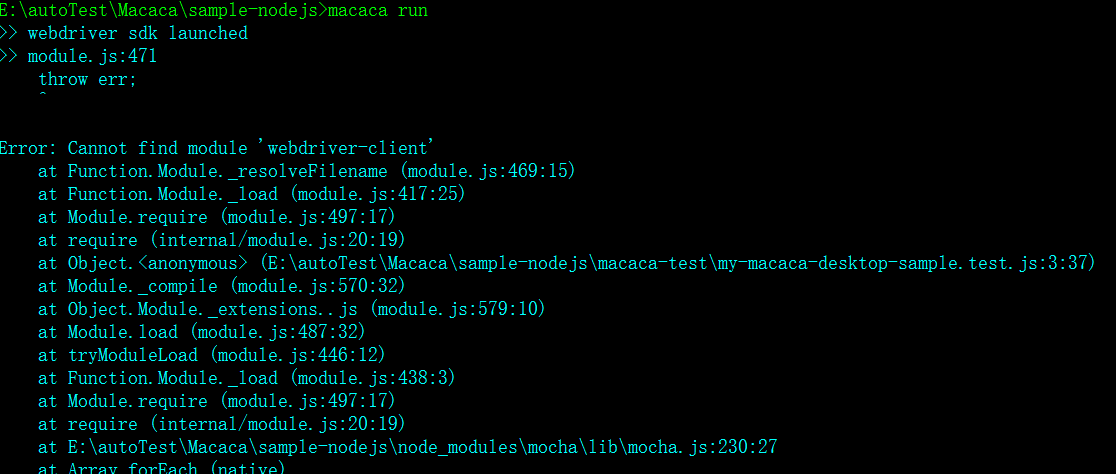
在项目路径里找不到 webdriver-client

macaca run 怎么指定运行哪个测试 js 文件

Error: >> session.js:40:14 [master] pid:19012 Error: Cannot find module 'macaca-android'

    at Function.Module._resolveFilename (module.js:536:15)

at Function.Module._load (module.js:466:25)x
Error: >> session.js:40:14 [master] pid:19012 Error: Cannot find module 'macaca-android'
at Function.Module._resolveFilename (module.js:536:15)
at Function.Module._load (module.js:466:25)
Macaca 等待机制的更多相关文章
- WebDriver元素等待机制
能否构建健壮和可靠的测试是UI自动化测试能否成功的关键因素之一.但实际情况是当一个测试接着一个测试执行的时候,常会遇到各种不同的状况.比如脚本去定位元素或去验证程序的运行状态时,有时会发现找不到元素, ...
- Python+Selenium笔记(十):元素等待机制
(一) 前言 突然的资源受限或网络延迟,可能导致找不到目标元素,这时测试报告会显示测试失败.这时需要一种延时机制,来使脚本的运行速度与程序的响应速度相匹配,WebDriver为这种情况提供了隐式等待 ...
- selenium等待机制
等待机制 因为你要查找的标签由于网速等原因迟迟没有加载出来,你就直接获取这个标签,很明显是报错,现有的简单粗暴的解决办法就是time.sleep(3),睡几秒,也就是设置线程等待,等这个标签加载出 ...
- selenium WebDriverWait类等待机制的实现
在自动化测试脚本的运行过程中,可以通过设置等待的方式来避免由于网络延迟或浏览器卡顿导致的偶然失败,常用的等待方式有三种: 很多人学习python,不知道从何学起.很多人学习python,掌握了基本语法 ...
- selenium等待机制学习笔记
转载至: https://blog.csdn.net/huilan_same/article/details/52544521 1. 强制等待 第一种也是最简单粗暴的一种办法就是强制等待sleep(x ...
- appnium显式等待机制
强制等待: sleep不推荐全局隐式等待 全局隐式等待: 在服务端等待 driver.manage().timeouts().implicitlyWait(10, TimeUnit.SECONDS); ...
- selenium(Java)WebDriverWait等待机制
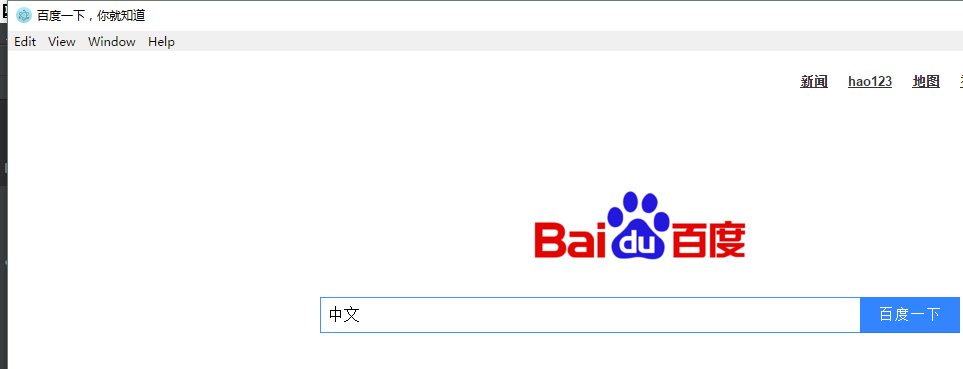
//标题是不是“百度一下,你就知道” 18 new WebDriverWait(driver,5).until(ExpectedConditions.titleIs("百度一下,你就知道&q ...
- 再谈AbstractQueuedSynchronizer:共享模式与基于Condition的等待/通知机制实现
共享模式acquire实现流程 上文我们讲解了AbstractQueuedSynchronizer独占模式的acquire实现流程,本文趁热打铁继续看一下AbstractQueuedSynchroni ...
- 再谈AbstractQueuedSynchronizer2:共享模式与基于Condition的等待/通知机制实现
共享模式acquire实现流程 上文我们讲解了AbstractQueuedSynchronizer独占模式的acquire实现流程,本文趁热打铁继续看一下AbstractQueuedSynchroni ...
随机推荐
- osgQt支持触摸屏
1. osgQt的构造函数添加:setAttribute(Qt::WA_AcceptTouchEvents);//wyh 2. event()修改,支持触摸时间 bool GLWidget::even ...
- org.eclipse.wst.common.project.facet.core.xml
Ctrl+Shift+R *core.xml 修改Dynamic Web module 由3.1 切至2.几
- 基于Xcode5的本地化
一.程序名国际化 1.首先添加应用对多语言支持的国际化文件 点击工程根目录,然后选择PROJECT下的项目,然后选择Info选项卡,在底部可以看到Localizations,点击“+”号,可以 ...
- 学习tomcat(一)----用IDEA调试tomcat源码
一直在使用tomcat,但却不怎么熟悉tomcat的"运作流程",今天就 参照参考文章进行了代码搭建(代码的github在文末),并修改了一些操作.学习下tomcat的" ...
- Vue.js的库,包,资源的列表大全。
官方资源 外部资源 社区 播客 官方示例 入门 开发工具 语法高亮 代码片段 自动补全 组件集合 库和插件 路由 ajax/数据 状态管理 校验 UI组件 i18n 示例 模板 脚手架 整合 插件/指 ...
- javascript高级程序设计读书笔记----严格模式
ECMAScript5最早引入“严格模式". 使用 "use strict"开启严格模式 function test(){ "use strict"; ...
- C#统计英文文本中的单词数并排序
思路如下:1.使用的Hashtable(高效)集合,记录每个单词出现的次数2.采用ArrayList对Hashtable中的Keys按字母序排列3.排序使用插入排序(稳定) public void S ...
- c++调用c#写的DLL
c++调用c#写的DLL: 此文章演示了建立c#的dll: c++建立工程,引入dll: 不能解决的问题: 指定dll的路径,在代码里面直接写 #using "xxx.dll" 必 ...
- 4.Python的版本
Python2: 英文支持没问题,中文报错,默认编码:ascii码 显示中午需要添加代码在首行:# -*- encoding:utf -8 -*- 用户交互 raw_input python2 里还 ...
- APIO2012 派遣dispatching | 左偏树
题目链接:戳我 就是尽可能地选取排名小的,加起来就可以了.然后我们考虑利用一个大根堆,一个一个合并,如果超过派遣的钱,我们就把费用最大的那个忍者丢出队列. 左偏树,作为一个十分优秀的可并堆,我们这道题 ...