Xmemcached集群与SpringBoot整合
创建SpringBoot项目xmemcached_springboot,添加开发需要的包名和类名,项目的目录结构如下:
添加XMemcached依赖:
<dependency>

            <groupId>com.googlecode.xmemcached</groupId>

            <artifactId>xmemcached</artifactId>

            <version>2.4.0</version>

        </dependency>
添加XMemcached相关配置到属性文件application.yml
###################  memcached配置  ###################

memcached:

  servers: 192.168.84.128:2222 192.168.84.128:6666

  poolSize: 10

  sanitizeKeys: false

  openCache: true # true为启动缓存 false为标准实现
编写读取上述属性的读取类:XMemcachedProperties.java
package com.czhappy.xmemcached_springboot.properties;

import org.springframework.boot.context.properties.ConfigurationProperties;

import org.springframework.stereotype.Component;

@Component

@ConfigurationProperties(prefix = "memcached")

public class XMemcachedProperties {

    private String servers;

    private int poolSize;

    private boolean sanitizeKeys;

    private boolean openCache;

    public boolean isOpenCache() {

        return openCache;

    }

    public void setOpenCache(boolean openCache) {

        this.openCache = openCache;

    }

    public String getServers() {

        return servers;

    }

    public void setServers(String servers) {

        this.servers = servers;

    }

    public int getPoolSize() {

        return poolSize;

    }

    public void setPoolSize(int poolSize) {

        this.poolSize = poolSize;

    }

    public boolean isSanitizeKeys() {

        return sanitizeKeys;

    }

    public void setSanitizeKeys(boolean sanitizeKeys) {

        this.sanitizeKeys = sanitizeKeys;

    }

}
编写XMemcachedConfig.java,构建builder和client
package com.czhappy.xmemcached_springboot.config;

import com.czhappy.xmemcached_springboot.properties.XMemcachedProperties;

import net.rubyeye.xmemcached.MemcachedClient;

import net.rubyeye.xmemcached.MemcachedClientBuilder;

import net.rubyeye.xmemcached.XMemcachedClientBuilder;

import net.rubyeye.xmemcached.command.BinaryCommandFactory;

import net.rubyeye.xmemcached.impl.KetamaMemcachedSessionLocator;

import org.springframework.beans.factory.annotation.Autowired;

import org.springframework.context.annotation.Bean;

import org.springframework.context.annotation.Configuration;

@Configuration

public class XMemcachedConfig {

    @Autowired

    private XMemcachedProperties xMemcachedProperties;

    // 构建builder

    @Bean

    public MemcachedClientBuilder getXMBuilder(){

        MemcachedClientBuilder memcachedClientBuilder = null;

        try{

            String servers = xMemcachedProperties.getServers();

            System.out.println("servers="+servers);

            memcachedClientBuilder = new XMemcachedClientBuilder(servers);

            // 开启/关闭failure模式

            memcachedClientBuilder.setFailureMode(false);

            memcachedClientBuilder.setSanitizeKeys(xMemcachedProperties.isSanitizeKeys());

            memcachedClientBuilder.setConnectionPoolSize(xMemcachedProperties.getPoolSize());

            memcachedClientBuilder.setCommandFactory(new BinaryCommandFactory());

            memcachedClientBuilder.setOpTimeout(3000);

            memcachedClientBuilder.setSessionLocator(new KetamaMemcachedSessionLocator());

            // 诸多XMemcached配置

            return memcachedClientBuilder;

        }catch(Exception e){

            e.printStackTrace();

        }

        return null;

    }

    // client

    @Bean

    public MemcachedClient getXMClient(MemcachedClientBuilder memcachedClientBuilder){

        MemcachedClient memcachedClient = null;

        try{

            memcachedClient = memcachedClientBuilder.build();

            return memcachedClient;

        }catch(Exception e){

            e.printStackTrace();

        }

        return null;

    }

}
编写ShowApi.java文件,此处仅实现新增和查询方法,其他方法可参考添加
package com.czhappy.xmemcached_springboot.utils;

import net.rubyeye.xmemcached.MemcachedClient;

import org.springframework.beans.factory.annotation.Autowired;

import org.springframework.stereotype.Service;

@Service

public class ShowApi {

    @Autowired

    private MemcachedClient memcachedClient;

    /**

     * 新增

     * @param key

     * @param value

     */

    public void showAdd(String key, String value){

        try {

            memcachedClient.set(key, 0, value);

        }catch (Exception e){

            e.printStackTrace();

        }

    }

    public String showQuery(String key){

        try {

            return memcachedClient.get(key);

        }catch (Exception e){

            e.printStackTrace();

        }

        return "";

    }

}
编写测试类,添加数据并打印查询的结果:
package com.czhappy.xmemcached_springboot;

import com.czhappy.xmemcached_springboot.utils.ShowApi;

import org.junit.Test;

import org.junit.runner.RunWith;

import org.springframework.beans.factory.annotation.Autowired;

import org.springframework.boot.test.context.SpringBootTest;

import org.springframework.test.context.junit4.SpringRunner;

@RunWith(SpringRunner.class)

@SpringBootTest

public class XmemcachedSpringbootApplicationTests {

    @Autowired

    private ShowApi showApi;

    @Test

    public void contextLoads() {

        String key = "goods_name";

        String value = "apple";

        showApi.showAdd(key, value);

        System.out.println(showApi.showQuery(key));

    }

}
为了测试memcached集群和数据存储,我们分别启动端口为2222和6666的memcached服务端


运行测试类,可以看到后台打印出存储的结果

说明数据保存成功,我们也可以去服务端直接查询
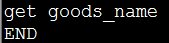
2222端口:
6666端口:
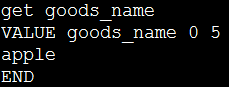
数据具体存储在哪个memcached上我们是无法预知的,它是由客户端XMemcached内部hash算法判断实现,此处我们可以知道数据是存储成功了,通过查询最终结果能知道存在端口为6666的服务端上。
Xmemcached集群与SpringBoot整合的更多相关文章
- springboot和Redis集群版的整合
此篇接上一个文章springboot和Redis单机版的整合 https://www.cnblogs.com/lin530/p/12019023.html 下面接着介绍和Redis集群版的整合. 1. ...
- RabbitMQ 3.9.7 镜像模式集群与Springboot 2.5.5 整合
1. 概述 老话说的好:做人要懂得变通,善于思考,有时稍微转个弯,也许问题就解决了. 言归正传,之前我们聊了 RabbitMQ 3.9.7 镜像模式集群的搭建,今天我们来聊聊 RabbitMQ 3.9 ...
- docker搭建redis主从集群和sentinel哨兵集群,springboot客户端连接
花了两天搭建redis主从集群和sentinel哨兵集群,讲一下springboot客户端连接测试情况 redis主从集群 从网上查看说是有两种方式:一种是指定配置文件,一种是不指定配置文件 引用地址 ...
- springboot+shiro+redis(集群redis版)整合教程
相关教程: 1. springboot+shiro整合教程 2. springboot+shiro+redis(单机redis版)整合教程 3.springboot+shiro+redis(单机red ...
- 如何在Windows上部署Redis集群和SpringBoot进行整合
一.安装Redis的Windows版本并进行配置 (1)下载链接 https://github.com/microsoftarchive/redis/releases (2)将下载后的Redis复制成 ...
- RocketMQ 4.7.1 环境搭建、集群、MQ整合SpringBoot
导读 之前学过ActiveMQ但是并发量不是很大点我直达,所以又学阿里开源的RocketMQ,据说队列可以堆积亿级别.下面是网上找的消息队列对比图,仅供参考 部署 官网 点我直达 前置条件 推荐使用6 ...
- Elasticsearch 分片集群原理、搭建、与SpringBoot整合
单机es可以用,没毛病,但是有一点我们需要去注意,就是高可用是需要关注的,一般我们可以把es搭建成集群,2台以上就能成为es集群了.集群不仅可以实现高可用,也能实现海量数据存储的横向扩展. 新的阅读体 ...
- 04.redis集群+SSM整合使用
redis集群+SSM整合使用 首先是创建redis-cluster文件夹: 因为redis最少需要6个节点(三主三从),为了更好的理解,我这里创建了两台虚拟机(192.168.0.109 192.1 ...
- jedis集群版应用
1.pom文件添加依赖: 2.创建配置文件 <!-- jedis集群版配置(JedisCluster通过构造传参(2个参数)) --> <bean id="redisCli ...
随机推荐
- 010——C#选择文件路径
(一)具体教程查看:011——C#创建ECXEL文件(附教程) (二)代码:foldPath 就是获取到的文件路径 private void button1_Click(object sender, ...
- Oracle的dual是什么东西啊??(答:伪表)
1. dual 确实是一张表.是一张只有一个字段,一行记录的表.2.习惯上,我们称之为'伪表'.因为他不存储主题数据.3. 他的存在,是为了操作上的方便.因为select 都是要有特定对象的.如:se ...
- 为什么会选择redis数据库?
因为redis支持主从同步,而且数据都是缓存在内存中,所以基于redis的分布式爬虫,对请求和数据的高频读取效率非常高
- Scrapy不同的item指定不同的Pipeline
scrapy不同的item指定不同的Pipeline from items import AspiderItem, BspiderItem, CspiderItem class myspiderPip ...
- 用python实现不同格式99乘法表输出
前言:学习python已经有一段时间了,最近发现有时候会出现一个东西知道,也能写出来,但是说不出来的情况.思考后觉得是基础还不够扎实,只一味写代码,没有深入思考具体实现的逻辑,以及各个点之间的关联.所 ...
- Java学习日记——基础篇(二)基本语法
变量 变量和常量是程序处理的两种基本数据对象,变量是程序的基本组成单位 变量的目的就是确定目标并提供存放空间 public class Hello { public static void main( ...
- Java实现通过IP获取域名,通过域名获取IP
一.通过Linux命令实现 ping www.baidu.com nslookup www.baidu.com nslookup 14.215.177.166 为什么这个命令会有一个192.168.1 ...
- 会话技术cookie与session
目录 会话技术cookie 会话技术 cookie 服务器怎样把Cookie写 给客户端 服务器如何获取客户端携带的cookie session session简介 Session如何办到在一个ser ...
- uboot的仓库在哪里?
答: https://gitlab.denx.de/u-boot/u-boot# 1. 获取源码 git clone git@gitlab.denx.de:u-boot/u-boot.git Or g ...
- <JavaScript>尺寸类样式的获取
尺寸类样式的获取 offsetHeight HTMLElement.offsetHeight 是一个只读属性,它返回该元素的像素高度,高度包含该元素的垂直内边距和边框,且是一个整数.(content+ ...