简单的例子了解自定义ViewGroup(一)
在Android中,控件可以分为ViewGroup控件与View控件。自定义View控件,我之前的文章已经说过。这次我们主要说一下自定义ViewGroup控件。ViewGroup是作为父控件可以包含多个View控件,并管理其中包含的View控件。
一般自定义ViewGroup的流程如下:
onMeasure()onLayout()
我们一般不需要像自定义View一样重写onDraw(),这里需要多写一个onLayout来摆放子View的位置。除了onLayout方法之外,我们还需要确定LayoutParams,这个是子View告诉父布局的一些参数信息,比如MarginLayoutParams,则表明该ViewGroup支持margin,当然这个也可以没有。
下面我们通过一个例子来说明简单的自定义ViewGroup
一个简单的例子
这个例子,我们将写一个ViewGroup,该ViewGroup中4个button排成一列。这个例子主要说明onMeasure和onLayout的写法。
首先我们新建一个MyViewGroup继承ViewGroup,然后重写onMeasure方法。
   @Override

    protected void onMeasure(int widthMeasureSpec, int heightMeasureSpec) {

        super.onMeasure(widthMeasureSpec,heightMeasureSpec);

        measureChildren(widthMeasureSpec,heightMeasureSpec);

    }
这个重写非常的简单,调用父类的测量方法,然后测量所有的子控件的,只要子控件不是wrap_content都会测量精准。这里为了简单,没有去考虑wrap_content的情况,后面我们完善的时候会说道。
然后重写onLayout()方法
  @Override

    protected void onLayout(boolean changed, int l, int t, int r, int b) {

        int height = 0;

        int count = getChildCount();

        View child;

        Log.e("ri", count + "");

        for(int i = 0 ;i < count;i++) {

            child = getChildAt(i);

            child.layout(0, height, child.getMeasuredWidth(),height +  child.getMeasuredHeight());

            height += child.getMeasuredHeight();

        }

    }
这里的代码很好理解,因为我们要实现4个button一列显示,然后每个子View的宽度是一样的,并且每个子View的left和right是一样的。所以每个子View只有top和bottom不一样。我们首先定义个高度height初始为0,然后得到所有子View的个数,依次设置每个子View的top和bottom。top就是定义的height,bottom则为height加上子View的高度。设置完后height累加。
xml中布局如下:
 <com.example.byhieg.viewpratice.MyViewGroup android:layout_height="match_parent"

        android:layout_width="match_parent">

        <Button

            android:text="1"

            android:layout_width="50dp"

            android:layout_height="80dp" />

        <Button

            android:text="2"

            android:layout_width="50dp"

            android:layout_height="80dp" />

        <Button

            android:text="3"

            android:layout_width="50dp"

            android:layout_height="80dp" />

        <Button

            android:text="4"

            android:layout_width="50dp"

            android:layout_height="80dp" />

    </com.example.byhieg.viewpratice.MyViewGroup>
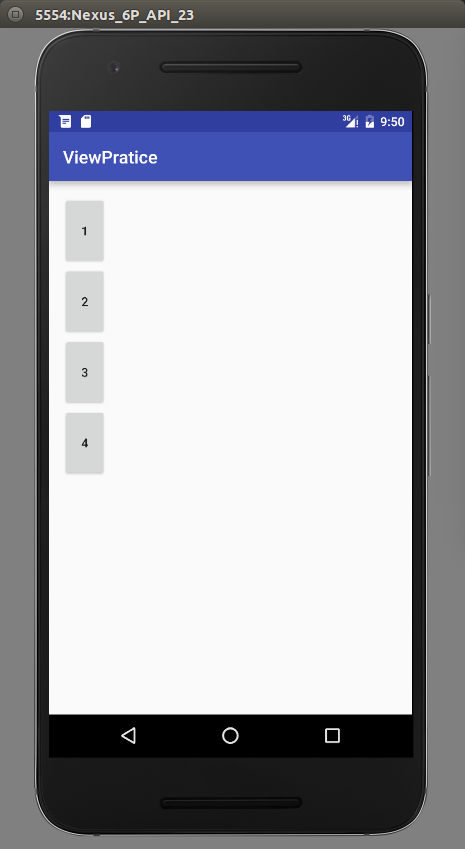
效果如下:
下面,我们继续完善这个控件,让他适应wrap_content。这里,我们主要重写onMeasure()
   @Override

    protected void onMeasure(int widthMeasureSpec, int heightMeasureSpec) {

        super.onMeasure(widthMeasureSpec,heightMeasureSpec);

        int widthMode = MeasureSpec.getMode(widthMeasureSpec);

        int widthSize = MeasureSpec.getSize(widthMeasureSpec);

        int heightMode = MeasureSpec.getMode(heightMeasureSpec);

        int heightSize = MeasureSpec.getSize(heightMeasureSpec);

        measureChildren(widthMeasureSpec,heightMeasureSpec);

        //开始处理wrap_content,如果一个子元素都没有,就设置为0

        if (getChildCount() == 0) {

            setMeasuredDimension(0,0);

        } else if (widthMode == MeasureSpec.AT_MOST && heightMode == MeasureSpec.AT_MOST) {

            //ViewGroup,宽,高都是wrap_content,根据我们的需求,宽度是子控件的宽度,高度则是所有子控件的总和

            View childOne = getChildAt(0);

            int childWidth = childOne.getMeasuredWidth();

            int childHeight = childOne.getMeasuredHeight();

            setMeasuredDimension(childWidth, childHeight * getChildCount());

        } else if (widthMode == MeasureSpec.AT_MOST) {

            //ViewGroup的宽度为wrap_content,则高度不需要管,宽度还是自控件的宽度

            View childOne = getChildAt(0);

            int childWidth = childOne.getMeasuredWidth();

            setMeasuredDimension(childWidth,heightSize);

        } else if (heightMode == MeasureSpec.AT_MOST) {

            //ViewGroup的高度为wrap_content,则宽度不需要管,高度为子View的高度和

            View childOne = getChildAt(0);

            int childHeight = childOne.getMeasuredHeight();

            setMeasuredDimension(widthSize, childHeight * getChildCount());

        }

    }
主要通过注释,就可以很明白wrap_content的情况下,如何计算viewGroup的高度和宽度。在viewGroup的onMeasure,我们是不需要在这里面考虑每一个View的宽高,这个通过measureChildren来通知每一个子View自己测量的。我们只需要考虑viewGroup的宽高在自适应的情况下,该是多大。
LayoutParams
在上面这个简单的ViewGroup中,我们是没有设置margin的,也就是说,即使我们在子View中设置了margin也是没有效的。我们需要修改我们的自定义ViewGroup来适应margin的情况。这里我们为了简化情况,只设定第一个button有一个android:layout_margin="30dp"的属性。
这里,我们修改onMeasure方法,让viewGroup的宽度变为原来的宽度加上margin的宽度,高度也是原来的高度加上margin的高度。代码如下:
@Override

    protected void onMeasure(int widthMeasureSpec, int heightMeasureSpec) {

        super.onMeasure(widthMeasureSpec,heightMeasureSpec);

        MarginLayoutParams params = null;

        int widthMode = MeasureSpec.getMode(widthMeasureSpec);

        int widthSize = MeasureSpec.getSize(widthMeasureSpec);

        int heightMode = MeasureSpec.getMode(heightMeasureSpec);

        int heightSize = MeasureSpec.getSize(heightMeasureSpec);

        measureChildren(widthMeasureSpec,heightMeasureSpec);

        //开始处理wrap_content,如果一个子元素都没有,就设置为0

        if (getChildCount() == 0) {

            setMeasuredDimension(0,0);

        } else if (widthMode == MeasureSpec.AT_MOST && heightMode == MeasureSpec.AT_MOST) {

            //ViewGroup,宽,高都是wrap_content,根据我们的需求,宽度是子控件的宽度,高度则是所有子控件的总和

            View childOne = getChildAt(0);

            params = (MarginLayoutParams) childOne.getLayoutParams();

            int childWidth = childOne.getMeasuredWidth();

            int childHeight = childOne.getMeasuredHeight();

            setMeasuredDimension(childWidth + params.leftMargin + params.rightMargin,

                                childHeight * getChildCount() + params.topMargin + params.bottomMargin);

        } else if (widthMode == MeasureSpec.AT_MOST) {

            //ViewGroup的宽度为wrap_content,则高度不需要管,宽度还是自控件的宽度

            View childOne = getChildAt(0);

            params = (MarginLayoutParams) childOne.getLayoutParams();

            int childWidth = childOne.getMeasuredWidth();

            setMeasuredDimension(childWidth + params.leftMargin + params.rightMargin,heightSize);

        } else if (heightMode == MeasureSpec.AT_MOST) {

            //ViewGroup的高度为wrap_content,则宽度不需要管,高度为子View的高度和

            View childOne = getChildAt(0);

            params = (MarginLayoutParams) childOne.getLayoutParams();

            int childHeight = childOne.getMeasuredHeight();

            setMeasuredDimension(widthSize, childHeight * getChildCount() + params.topMargin + params.bottomMargin);

        }

    }
这里,注意这个语句params = (MarginLayoutParams) childOne.getLayoutParams(); 如果不重写layoutParams相关的代码,这样直接转换会出现问题。所以,我们需要重写如下代码:让他返回MarginLayoutParams类型的对象
@Override

    public LayoutParams generateLayoutParams(AttributeSet attrs) {

        return new MarginLayoutParams(getContext(),attrs);

    }

    @Override

    protected LayoutParams generateDefaultLayoutParams() {

        return new MarginLayoutParams(LayoutParams.MATCH_PARENT,

                LayoutParams.MATCH_PARENT);

    }

    @Override

    protected LayoutParams generateLayoutParams(LayoutParams p) {

        return new MarginLayoutParams(p);

    }
同样,我们已经测量得到了viewGroup的宽和高,接下来,需要对添加了margin的view,重新摆放。主要的摆放规则,左边的坐标为Leftmargin,第一个view的上面的坐标为topMargin,同时,第二个view的上面的坐标要加上bottomMargin。这个只是一个简单的例子来说明放入margin之后要怎么考虑,一般不会这么具体到只计算第一个view的Margin。代码看看就好
@Override

    protected void onLayout(boolean changed, int l, int t, int r, int b) {

        int height = 0;

        int count = getChildCount();

        View child;

        Log.e("ri", count + "");

        child = getChildAt(0);

        MarginLayoutParams params = (MarginLayoutParams) child.getLayoutParams();

        int c1 = params.leftMargin;

        int c2 = params.topMargin;

        int c3 = c1 + child.getMeasuredWidth();

        int c4 = c2 + child.getMeasuredHeight();

        child.layout(c1,c2, c3,c4);

        height = c4 + params.bottomMargin;

        for(int i = 1 ;i < count;i++) {

            child = getChildAt(i);

            child.layout(c1, height, c3, height + child.getMeasuredHeight());

            height += child.getMeasuredHeight();

        }

    }

总结
这是自定义ViewGroup的第一篇文章,自定义ViewGroup是比自定义View知识点更多,而且应用也更广泛。这篇只是简单的介绍了自定义ViewGroup中需要复写的方法,但是一般的viewGroup不会是这样的。上面的东西,用一个LinearLayout布局实现,然后include该布局更方便。一般viewGroup都需要我们来实现view事件的分发以及滑动的处理,接下来的文章,讲介绍滑动的多种方式。
简单的例子了解自定义ViewGroup(一)的更多相关文章
- [安卓] 18、一个简单的例子做自定义动画按钮和自定义Actionbar
在做安卓UI的时候有时候需自定义具有动画效果的按钮或需要自定义一下actionbar~ 本节用一个简单的demo讲如何自定义具有动画效果的按钮,以及个性化的actionbar 下面是效果: 其中: △ ...
- android 自定义ViewGroup和对view进行切图动画实现滑动菜单SlidingMenu
示意图就不展示了,和上一节的一样,滑动菜单SlidingMenu效果如何大家都比较熟悉,在这里我简单说明一下用自定义ViewGroup来实现. 实现方法:我们自定义一个ViewGroup实现左右滑动, ...
- android 自定义ViewGroup和对view进行切图动画实现滑动菜单SlidingMenu[转]
http://blog.csdn.net/jj120522/article/details/8095852 示意图就不展示了,和上一节的一样,滑动菜单SlidingMenu效果如何大家都比较熟悉,在这 ...
- Jsp2.0自定义标签(第一天)——一个简单的例子
今天是学习自定义标签的第一天 Jsp2.0以来,自定义标签的实现比传统标签的实现容易了很多,一般只要extends类SimpleSupport重写doTag()方法即可. 先看最简单的例子,输出一个H ...
- 简单的自定义ViewGroup
自定义ViewGroup需要重写onMeasure, onLayout等方法.下面是一个实例,4个View分别显示在四个角. public class MyGroup extends ViewGrou ...
- android 手把手教您自定义ViewGroup(一)
1.概述 在写代码之前,我必须得问几个问题: 1.ViewGroup的职责是啥? ViewGroup相当于一个放置View的容器,并且我们在写布局xml的时候,会告诉容器(凡是以layout为开头的属 ...
- Android之自定义ViewGroup
概述 在写代码之前,我必须得问几个问题: 1.ViewGroup的职责是啥? ViewGroup相当于一个放置View的容器,并且我们在写布局xml的时候,会告诉容器(凡是以layout为开头的属性, ...
- Android ViewDragHelper完全解析 自定义ViewGroup神器
Android ViewDragHelper完全解析 自定义ViewGroup神器 转载请标明出处: http://blog.csdn.net/lmj623565791/article/detai ...
- Kotlin 第一弹:自定义 ViewGroup 实现流式标签控件
古人学问无遗力, 少壮工夫老始成.纸上得来终觉浅, 绝知此事要躬行. – 陆游 <冬夜读书示子聿> 上周 Google I/O 大会的召开,宣布了 Kotlin 语言正式成为了官方开发语言 ...
随机推荐
- docker for mac 学习记录
docker基本命令 docker run -d -p 80:80 --name webserver nginx 运行容器并起别名 docker ps 展示目前启动的容器 docker ps -a 展 ...
- Asp.Net 操作XML文件的增删改查 利用GridView
不废话,直接上如何利用Asp.NET操作XML文件,并对其属性进行修改,刚开始的时候,是打算使用JS来控制生成XML文件的,但是最后却是无法创建文件,读取文件则没有使用了 index.aspx 文件 ...
- java设计模式之--单例模式
前言:最近看完<java多线程编程核心技术>一书后,对第六章的单例模式和多线程这章颇有兴趣,我知道我看完书还是记不住多少的,写篇博客记录自己所学的只是还是很有必要的,学习贵在坚持. 单例模 ...
- redis成长之路——(一)
为什么使用redis Redis适合所有数据in-momory的场景,虽然Redis也提供持久化功能,但实际更多的是一个disk-backed的功能,跟传统意义上的持久化有比较大的差别,那么可能大家就 ...
- spring的BeanFactory加载过程
ApplicationContext spring = new ClassPathXmlApplicationContext("classpath*:spring/applicationCo ...
- Nginx学习笔记--001-Nginx快速搭建
Nginx ("engine x") 是一个高性能的HTTP和反向代理服务器,也是一个IMAP/POP3/SMTP服务器.Nginx是由Igor Sysoev为俄罗斯访问量第二的R ...
- Flexible 弹性盒子模型之CSS flex-grow 属性
实例 让第二个元素的宽度为其他元素的三倍: div:nth-of-type(1){flex-grow:1;} div:nth-of-type(2){flex-grow:3;} div:nth-of-t ...
- Android中Activity处理返回结果的实现方式
大家在网上购物时都有这样一个体验,在确认订单选择收货人以及地址时,会跳转页面到我们存入网站内的所有收货信息(包含收货地址,收货人)的界面供我们选择,一旦我们点击其中某一条信息,则会自动跳转到订单提交界 ...
- Linux实战教学笔记05:远程SSH连接服务与基本排错(新手扫盲篇)
第五节 远程SSH连接服务与基本排错 标签(空格分隔):Linux实战教学笔记-陈思齐 第1章 远程连接LInux系统管理 1.1 为什么要远程连接Linux系统 在实际的工作场景中,虚拟机界面或物理 ...
- [PHP源码阅读]array_push和array_unshift函数
在PHP中,在数组中添加元素也是一种很常用的操作,分别有在数组尾部和头部添加元素,看看PHP内部是如何实现数组插入的操作. 我在github有对PHP源码更详细的注解.感兴趣的可以围观一下,给个sta ...