Ubuntu下安装open-falcon-v0.2.1
在Ubuntu下安装open-falcon和Centos下安装的方法有点区别,因为Ubuntu使用的包管理器是apt-get,而Centos下使用的是Yum,建议不要再Ubuntu下使用yum
建议自己下载源码打包二进制包来安装,因为官方给出的二进制包应该是再centos下打包的,再Ubuntu下运行可能会出现问题
1.安装Go,首先去官网下载,需要fq
https://golang.org
顺便安装Goland,注册服务器 http://idea.youbbs.org
2.在/etc/profile中添加,后source /etc/profile
#Go

export GOROOT=/home/lintong/software/go

export PATH=$PATH:$GOROOT/bin:$GOPATH/bin

export GOPATH=/home/lintong/software/gopath
验证是否安装成功
go version

go version go1.10.2 linux/amd64
接下来参考
3.安装redis和mysql
sudo apt-get install redis-server

sudo apt-get install mysql-server
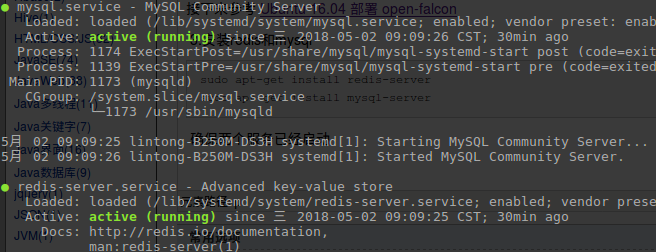
确保两个服务已经启动
systemctl status mysql redis-server
4.下载open-falcon源码,地址
https://github.com/open-falcon/falcon-plus
初始化MySQL表结构
mkdir -p $GOPATH/src/github.com/open-falcon

cd $GOPATH/src/github.com/open-falcon/falcon-plus/scripts/mysql/db_schema/

mysql -h 127.0.0.1 -u root -p < 1_uic-db-schema.sql

mysql -h 127.0.0.1 -u root -p < 2_portal-db-schema.sql

mysql -h 127.0.0.1 -u root -p < 3_dashboard-db-schema.sql

mysql -h 127.0.0.1 -u root -p < 4_graph-db-schema.sql

mysql -h 127.0.0.1 -u root -p < 5_alarms-db-schema.sql
5. 编译二进制包
cd $GOPATH/src/github.com/open-falcon/falcon-plus/

# make all modules

make all

# make specified module

make agent

# pack all modules

make pack
打包成功,在目录下多了文件open-falcon-v0.2.1.tar.gz
lintong@lintong-B250M-DS3H:~/software/go/src/github.com/open-falcon/falcon-plus$ make all

go build -o bin/agent/falcon-agent ./modules/agent

go build -o bin/aggregator/falcon-aggregator ./modules/aggregator

go build -o bin/graph/falcon-graph ./modules/graph

go build -o bin/hbs/falcon-hbs ./modules/hbs

go build -o bin/judge/falcon-judge ./modules/judge

go build -o bin/nodata/falcon-nodata ./modules/nodata

go build -o bin/transfer/falcon-transfer ./modules/transfer

go build -o bin/gateway/falcon-gateway ./modules/gateway

go build -o bin/api/falcon-api ./modules/api

go build -o bin/alarm/falcon-alarm ./modules/alarm

go build -ldflags "-X main.GitCommit=`git rev-parse --short HEAD` -X main.Version=0.2.1" -o open-falcon

lintong@lintong-B250M-DS3H:~/software/go/src/github.com/open-falcon/falcon-plus$ make agent

go build -o bin/agent/falcon-agent ./modules/agent

lintong@lintong-B250M-DS3H:~/software/go/src/github.com/open-falcon/falcon-plus$ make pack

go build -ldflags "-X main.GitCommit=`git rev-parse --short HEAD` -X main.Version=0.2.1" -o open-falcon

tar -C out -zcf open-falcon-v0.2.1.tar.gz .
6.解压到安装目录
mkdir ~/software/open-falcon-v0.2.1

tar -zxvf open-falcon-v0.2.1.tar.gz -C ~/software/open-falcon-v0.2.1/
7.安装open-falcon的前端框架dashboard
cd ~/software/open-falcon-v0.2.1

git clone https://github.com/open-falcon/dashboard.git
8.修改数据库密码,因为open-falcon需要操作数据库,这一步是官方教程中没有提到的
如果没有进行修改的话,在open-falcon-v0.2.1目录下使用./open-falcon start命令进行启动之后,使用./open-falcon check检查组件的状态,有些使用mysql的组件的状态是down
下面列出了使用mysql的组件,总共有6个:aggregator,graph、hbs、nodata、api、alarm模块
需要对这些组件的配置文件进行修改:
vim ~/software/open-falcon-v0.2.1/aggregator/config/cfg.json
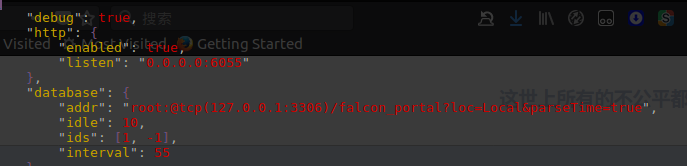
修改成

其他配置文件的修改方式类似
vim graph/config/cfg.json

vim hbs/config/cfg.json

vim nodata/config/cfg.json

vim api/config/cfg.json # 5处全部修改

vim alarm/config/cfg.json

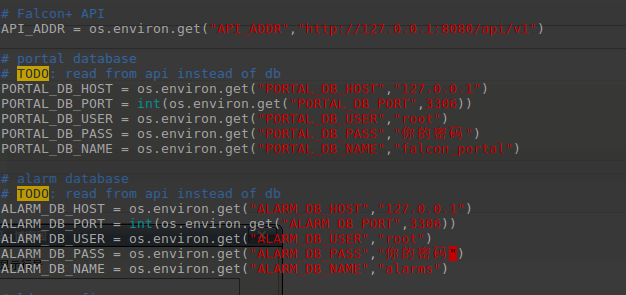
接下来需要在前端组件中,配置数据库密码
cd ~/software/open-falcon-v0.2.1/dashboard/rrd

vim config.py
9.安装Python的依赖,在Ubuntu下不要使用Yum
sudo apt-get install python-pip python-virtualenv

sudo apt-get install python-dev

sudo apt-get install ldap-utils

sudo apt-get install libmysqld-dev
10.安装virtualenv的运行环境,在服务器上是不建议直接pip安装的,因为Python包的冲突可能会影响到别人的服务
~/software/open-falcon-v0.2.1/dashboard

virtualenv ./env

./env/bin/pip install -r pip_requirements.txt -i https://pypi.douban.com/simple
如果出现 Failed building wheel for python-ldap 的问题
请参考 Installing python-ldap in Ubuntu
sudo apt-get install python-dev

sudo apt-get install libldap2-dev

sudo apt-get install libsasl2-dev

# 然后再

./env/bin/pip install python-ldap
请确保每个Python包都安装到位,成功如下
./env/bin/pip install -r pip_requirements.txt -i https://pypi.douban.com/simple

Looking in indexes: https://pypi.douban.com/simple

Requirement already satisfied: Flask==0.10.1 in ./env/lib/python2.7/site-packages (from -r pip_requirements.txt (line 1)) (0.10.1)

Requirement already satisfied: Flask-Babel==0.9 in ./env/lib/python2.7/site-packages (from -r pip_requirements.txt (line 2)) (0.9)

Requirement already satisfied: Jinja2==2.7.2 in ./env/lib/python2.7/site-packages (from -r pip_requirements.txt (line 3)) (2.7.2)

Requirement already satisfied: Werkzeug==0.9.4 in ./env/lib/python2.7/site-packages (from -r pip_requirements.txt (line 4)) (0.9.4)

Requirement already satisfied: gunicorn==19.1.1 in ./env/lib/python2.7/site-packages (from -r pip_requirements.txt (line 5)) (19.1.1)

Requirement already satisfied: python-dateutil==2.2 in ./env/lib/python2.7/site-packages (from -r pip_requirements.txt (line 6)) (2.2)

Requirement already satisfied: requests==2.3.0 in ./env/lib/python2.7/site-packages (from -r pip_requirements.txt (line 7)) (2.3.0)

Requirement already satisfied: mysql-python in ./env/lib/python2.7/site-packages (from -r pip_requirements.txt (line 8)) (1.2.5)

Requirement already satisfied: python-ldap in ./env/lib/python2.7/site-packages (from -r pip_requirements.txt (line 9)) (3.0.0)

Requirement already satisfied: itsdangerous>=0.21 in ./env/lib/python2.7/site-packages (from Flask==0.10.1->-r pip_requirements.txt (line 1)) (0.24)

Requirement already satisfied: speaklater>=1.2 in ./env/lib/python2.7/site-packages (from Flask-Babel==0.9->-r pip_requirements.txt (line 2)) (1.3)

Requirement already satisfied: Babel>=1.0 in ./env/lib/python2.7/site-packages (from Flask-Babel==0.9->-r pip_requirements.txt (line 2)) (2.5.3)

Requirement already satisfied: markupsafe in ./env/lib/python2.7/site-packages (from Jinja2==2.7.2->-r pip_requirements.txt (line 3)) (1.0)

Requirement already satisfied: six in ./env/lib/python2.7/site-packages (from python-dateutil==2.2->-r pip_requirements.txt (line 6)) (1.11.0)

Requirement already satisfied: pyasn1-modules>=0.1.5 in ./env/lib/python2.7/site-packages (from python-ldap->-r pip_requirements.txt (line 9)) (0.2.1)

Requirement already satisfied: pyasn1>=0.3.7 in ./env/lib/python2.7/site-packages (from python-ldap->-r pip_requirements.txt (line 9)) (0.4.2)

Requirement already satisfied: pytz>=0a in ./env/lib/python2.7/site-packages (from Babel>=1.0->Flask-Babel==0.9->-r pip_requirements.txt (line 2)) (2018.4)
11.启动open-falcon的后端,注意check的时候,每个组件需要都是up状态,down状态说明出了问题
cd ~/software/open-falcon-v0.2.1

./open-falcon start

[falcon-graph] 16736

[falcon-hbs] 16749

[falcon-judge] 16763

[falcon-transfer] 16774

[falcon-nodata] 16786

[falcon-aggregator] 16797

[falcon-agent] 16809

[falcon-gateway] 16819

[falcon-api] 16829

[falcon-alarm] 16844

./open-falcon check

        falcon-graph         UP           16736

          falcon-hbs         UP           16749

        falcon-judge         UP           16763

     falcon-transfer         UP           16774

       falcon-nodata         UP           16786

   falcon-aggregator         UP           16797

        falcon-agent         UP           16809

      falcon-gateway         UP           16819

          falcon-api         UP           16829

        falcon-alarm         UP           16844
以开发者模式启动前端组件
./env/bin/python wsgi.py
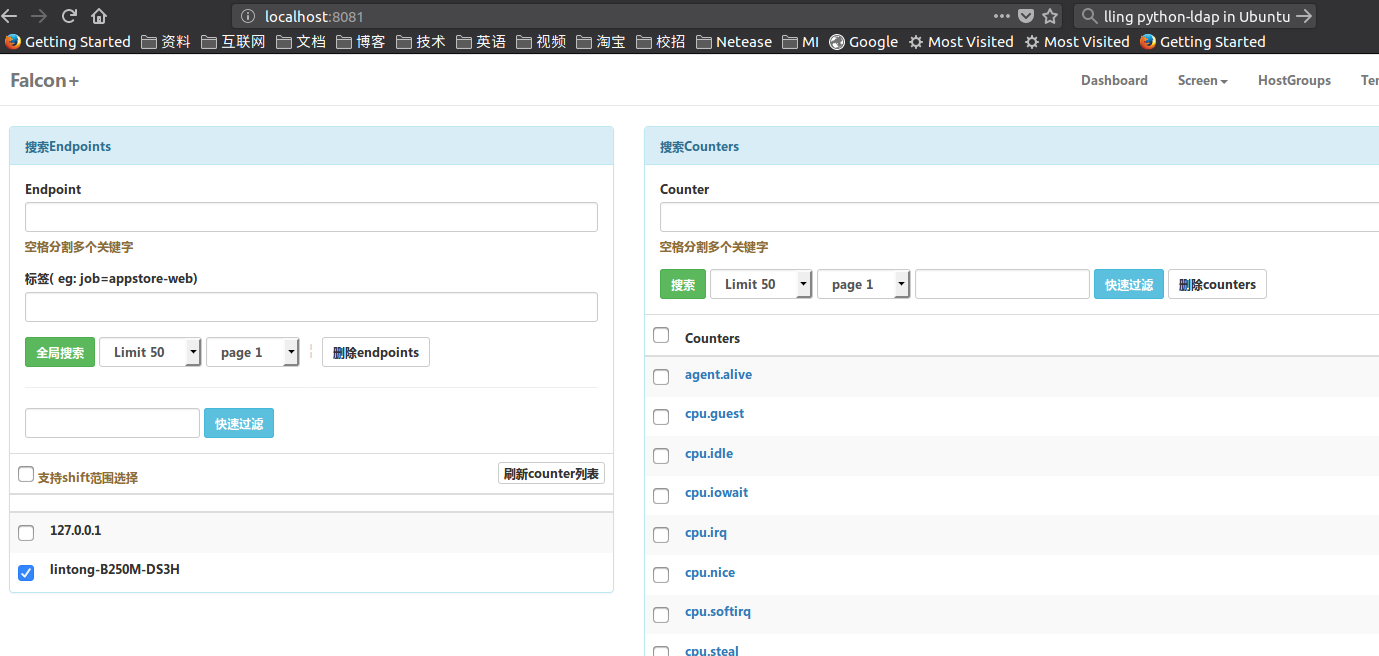
12.访问 127.0.0.1:8081,注册一个自己的账号和密码,然后登录,成功
Ubuntu下安装open-falcon-v0.2.1的更多相关文章
- ubuntu下安装nodejs
前言 继前几天在wins环境下使用cygwin模拟器安装nodejs出现了一些问题后,今天我决定在ubuntu下安装nodejs,安装过程非常顺利,没有报错,看来还是linux环境给力啊,由于刚接触l ...
- ubuntu下安装git,sublime,nodejs
用的是VMware10.0版本的虚拟机,很早之前下载的今天就直接用了,安装挺简单记得需要一个序列号.在这里:http://mirrors.163.com/ubuntu-releases/15.04/u ...
- 在Ubuntu下安装ovs-dpdk
在Ubuntu下安装ovs-dpdk 参考资料:https://software.intel.com/zh-cn/articles/using-open-vswitch-with-dpdk-on-ub ...
- Ubuntu 下安装QT
Ubuntu 下安装QT 本文使用的环境 QT Library: qt-everywhere-opensource-src-4.7.4.tar.gz QT Creator: qt-creator-li ...
- Ubuntu下安装JDK以及相关配置
1.查看系统位数,输入以下命令即可 getconf LONG_BIT 2.下载对应的JDK文件,我这里下载的是jdk-8u60-linux-64.tar.gz 3.创建目录作为JDK的安装目录,这里选 ...
- Ubuntu下安装mod_python报错(GIT错误)
Ubuntu下安装mod_python3.4.1版本报出如下错误: writing byte-compilation script '/tmp/tmpE91VXZ.py' /usr/bin/pytho ...
- TODO:Ubuntu下安装Node
TODO:Ubuntu下安装Node Node.js 是一个基于 Chrome V8 引擎的 JavaScript 运行环境.Node.js 使用了一个事件驱动.非阻塞式 I/O 的模型,使其轻量又高 ...
- Ubuntu杂记——Ubuntu下安装VMware
转战Ubuntu,不知道能坚持多久,但是自己还是要努力把转战过程中的学习到的给记录下来.这次就来记录一下,Ubuntu下如何安装VMware. 就我所知,Linux下有VirtualBox和VMwar ...
- 来杯Caffe——在ubuntu下安装Caffe框架并测试
Caffe是一种深度学习框架...blablabla...... Caffe要在ubuntu下安装 1. 安装依赖 sudo apt-get install libatlas-base-dev sud ...
- Ubuntu 下安装 Mysql
这里讲用Ubuntu下安装MySql ubuntu上安装mysql非常简单只需要几条命令就可以完成. 1. sudo apt-get install mysql-server 2. apt-get ...
随机推荐
- shell脚本使用--sleep
#!/bin/bash #filename.sh echo -n Count: tput sc count=; while true; do ]; then let count++; ; tput r ...
- css中px,em,rem,rpx的区别
今天看到一个面试题为 px,em的区别,为了更好地让读者区分css的长度单位,我总结下css中常用的长度单位: px,em,rem,rpx 像素px是我们在定义CSS中经常用到的尺寸大小单位,而em在 ...
- 如何实现织梦dedecms表单提交时发送邮箱功能【已解决】
我们通过织梦系统制作网站时,很多客户需要有在线留言功能,这时就会用到自定义表单.但是很多用户觉得经常登陆后台查看留言信息太麻烦了,于是想能否在提交留言是直接把内容发送到指定邮箱.网站经过测试终于实现了 ...
- Oracle分组小计、总计示例(grouping sets的使用)
1.首先创建一个表 create table TE ( ID VARCHAR2(2), T_CODE VARCHAR2(4), T_NAME VARCHAR2(4), T_A ...
- js+css3+HTML5拖动滑块(type="range")改变值
最近在做一个H5的改版项目,产品和设计给出的效果中有一个拖动滑块可以改变输入值的效果,类似如下图这样: 拿到这样的设计稿后,我有点懵了,自己写一个js?去网上找一个这样的效果?自己写一个可以,只是实现 ...
- 用css实现自定义虚线边框
开发产品功能的时候ui往往会给出虚线边框的效果图,于是乎,我们往往第一时间想到的是用css里的border,可是border里一般就提供两种效果,dashed或者dotted,ui这时就不满意了,说虚 ...
- jQuery 选择同时包含两个或多个class的元素的实现方法
Jquery选择器 多个 class属性参照以下案例 <element class="a b good list card"> 1. 交集选择: $(".a. ...
- Jetpack 架构组件 LiveData ViewModel MD
Markdown版本笔记 我的GitHub首页 我的博客 我的微信 我的邮箱 MyAndroidBlogs baiqiantao baiqiantao bqt20094 baiqiantao@sina ...
- 性能优化 Profiler MAT 内存泄漏 堆转储 MD
Markdown版本笔记 我的GitHub首页 我的博客 我的微信 我的邮箱 MyAndroidBlogs baiqiantao baiqiantao bqt20094 baiqiantao@sina ...
- Java+Selenium3框架设计篇5-如何实现邮件发送测试报告
https://blog.csdn.net/u011541946/article/details/77278837 本篇继续回答网友的问题,这个主题是如何通过邮件发送测试报告.通过邮件发送测试报告,这 ...