3.python 发送邮件之smtplib模块
SMTP(Simple Mail Transfer Protocol)是简单邮件传输协议,它是一组用于由源地址到目的地址的邮件传输规则。
python中对SMTP进行了简单的封装,可以发送纯文本邮件,HTML邮件以及带附件的邮件
python创建SMTP对象语法如下:
import smtplib

smtpObj = smtplib.SMTP( [host [, port [, local_hostname]]] )
参数说明:
- host: SMTP 服务器主机。 你可以指定主机的ip地址或者域名如: runoob.com,这个是可选参数。
- port: 如果你提供了 host 参数, 你需要指定 SMTP 服务使用的端口号,一般情况下 SMTP 端口号为25。
- local_hostname: 如果 SMTP 在你的本机上,你只需要指定服务器地址为 localhost 即可。
python SMTP对象使用sendmail方法发送邮件,语法如下:
SMTP.sendmail(from_addr, to_addrs, msg[, mail_options, rcpt_options])
参数说明:
- from_addr: 邮件发送者地址。
- to_addrs: 字符串列表,邮件发送地址。
- msg: 发送消息
这里要注意一下第三个参数,msg 是字符串,表示邮件。我们知道邮件一般由标题,发信人,收件人,邮件内容,附件等构成,发送邮件的时候,要注意 msg 的格式。这个格式就是 smtp 协议中定义的格式。
- email模块:负责构建邮件
- smtplib模块:负责发送邮件
email模块:支持发送的邮件内容为纯文本,HTML内容,图片,附件。email模块中有几类来针对不同的邮件内容形式,常用如下:
- MIMEText : (MIME媒体类型)内容形式为纯文本,HTML页面(导入方式 : from email.mime.text import MIMEText)
- MIMEImage : 内容形式为图片(导入方式 : from email.mime.image import MIMEImage)
- MIMEMultupart : 多形式组合,可包含文本和附件(导入方式 : from email.mime.multipart import MIMEMultipart)
1.MIMEText语法:
MIMEText(msg,type,chartset)
msg:文本内容
type:文本类型默认为plain(纯文本)
#发送HTML格式的时候,修改为html,但同时要求msg的内容也是html的格式。
chartset:文本编码,中文为“utf-8”
# 构造TEXT格式的消息
msg = MIMEText("hello.text","plain","utf-8")
msg["Subject"] = "xxxxx"
msg["From"] = "xxxx"
msg["To"] = "xxxx"
#发送以上构造的邮件内容要使用as_string将构造的邮件内容转换为string形式。
s.sendmail("xxx","xxx",msg.as_string)
2.MIMEImage,MIMEMultipart语法
msg = MIMEMultipart()
#实例化一个文本对象
msg_sub = MIMEText("hello.text","plain","utf-8")
#将text消息添加到MIMEMultipart中,作为邮件正文。
msg.attach(msg_sub)
#图片作为附件
import os
img_datas = open(os.getcwd()+ "/reports/xxxx.png","rb").read()
msg_img = MIMEImage(img_data)
msg_img.add_header('Content-Disposition','attachment', filename = "xxxx.png" )
msg_img.add_header('Content-ID','<0>')
#将图片添加到MIMEMultiplart中,作为附件发送。
msg.attach(mag_img)
~~~~~~~~~~~~~~~~~
下面来看具体代码:
发送文本邮件
# coding=utf-
import smtplib
from email.mime.text import MIMEText
# 发送纯文本格式的邮件
msg = MIMEText('hello,send by python_test...','plain','utf-8')
#发送邮箱地址
sender = 'bmjoker@163.com'
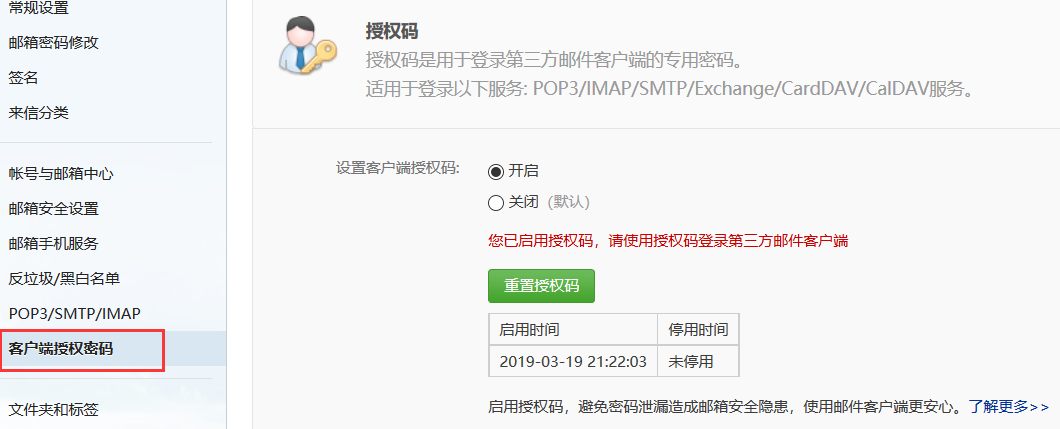
#邮箱授权码,非登陆密码
password = 'xxxxxxx'
#收件箱地址
#receiver = '19xxxxxxx9@qq.com'
mailto_list = ['19xxxxxxx9@qq.com'] #群发邮箱地址 #smtp服务器
smtp_server = 'smtp.163.com'
#发送邮箱地址
msg['From'] = sender
#收件箱地址
#msg['To'] = receiver
msg['To'] =';'.join(mailto_list) #发送多人邮件写法
#主题
msg['Subject'] = 'hello,i just want to test' server = smtplib.SMTP(smtp_server,) # SMTP协议默认端口是25
server.login(sender,password) #ogin()方法用来登录SMTP服务器
server.set_debuglevel() #打印出和SMTP服务器交互的所有信息。
server.sendmail(sender,mailto_list,msg.as_string()) #msg.as_string()把MIMEText对象变成str server.quit() # 第一个参数为发送者,第二个参数为接收者,可以添加多个例如:['hello@163.com','xxx@qq.com',]# 第三个参数为发送的内容
server.quit()
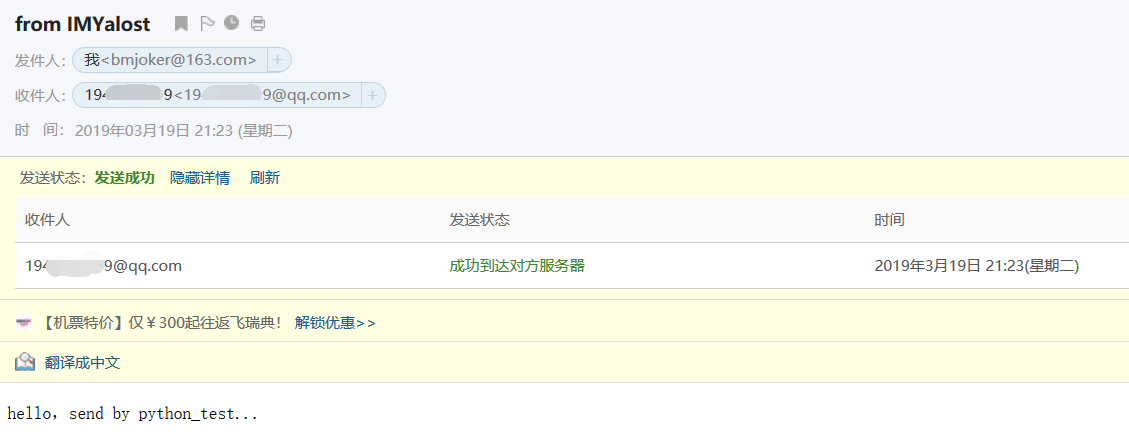
查看和SMTP服务器交互的所有信息:

其中login()用来登陆SMTP服务器,sendmail()用来发送邮件,群发邮件的话,可以传入一个收件人邮箱列表,邮箱的正文是str,使用as_string()把MIMEText对象变成str,password指的不是smtp服务器的登陆密码,是smtp客户端的授权密码:
发送带HTML的邮件:
import smtplib

from email.mime.text import MIMEText

from email.header import Header

sender = 'bmjoker@163.com' #发件邮箱

passwd = 'xxxxxxxx' #发送人邮箱授权码

receivers = '19xxxxxxx9@qq.com'   #收件邮箱

subject = 'python发邮Html邮件测试' #主题

content = "<html><h1>人生苦短,我是bmjoker</h1></html>"

msg = MIMEText(content,'html','utf-8')

# msg['Subject'] = subject

msg['Subject'] = Header(subject,'utf-8')

# msg['From'] = sender

msg['From'] = Header('hello','utf-8')

# msg['To'] = receivers

msg['To'] = Header('emmmm','utf-8')

try:

    s = smtplib.SMTP_SSL('smtp.163.com',)

    s.login(sender,passwd)

    s.sendmail(sender,receivers,msg.as_string())

    print('Send Success')

except:

    print('Send Failure')
emmm....遇到554/553问题居多,如果失败,请参考smtp退信排错:http://help.163.com/09/1224/17/5RAJ4LMH00753VB8.html
另附常见的邮箱服务器(pop3,smtp)地址,端口:
http://www.cnblogs.com/grefr/p/6089079.html
发送带图片的邮件:
import smtplib

from email.mime.image import MIMEImage

from email.mime.text import MIMEText

from email.mime.multipart import MIMEMultipart

sender = 'bmjoker@163.com'

passwd = 'xxxxxxxx'

receivers = '19xxxxxx9@qq.com'

subject = 'python发邮带img的邮件测试' #主题

# 创建一个带附件的实例

msg = MIMEMultipart()

msg['Subject'] = subject

msg['From'] = sender

msg['To'] = receivers

# 创建正文

msg.attach(MIMEText('使用python smtplib模块和email模块自动发送邮件测试','plain','utf-8'))

# 创建图片附件

import os

img_file = open(os.getcwd()+"/a4.jpg",'rb').read()

msg_img = MIMEImage(img_file)

msg_img.add_header('Content-Disposition','attachment', filename = "a4.jpg")

msg_img.add_header('Content-ID', '<0>')

msg.attach(msg_img)

try:

    s = smtplib.SMTP('smtp.163.com',)

    s.set_debuglevel() #输出发送邮件详细过程

    s.login(sender,passwd)

    s.sendmail(sender,receivers,msg.as_string())

    print('Send Succese')

except:

    print('Send Failure')
提示发送成功,不过emmm....
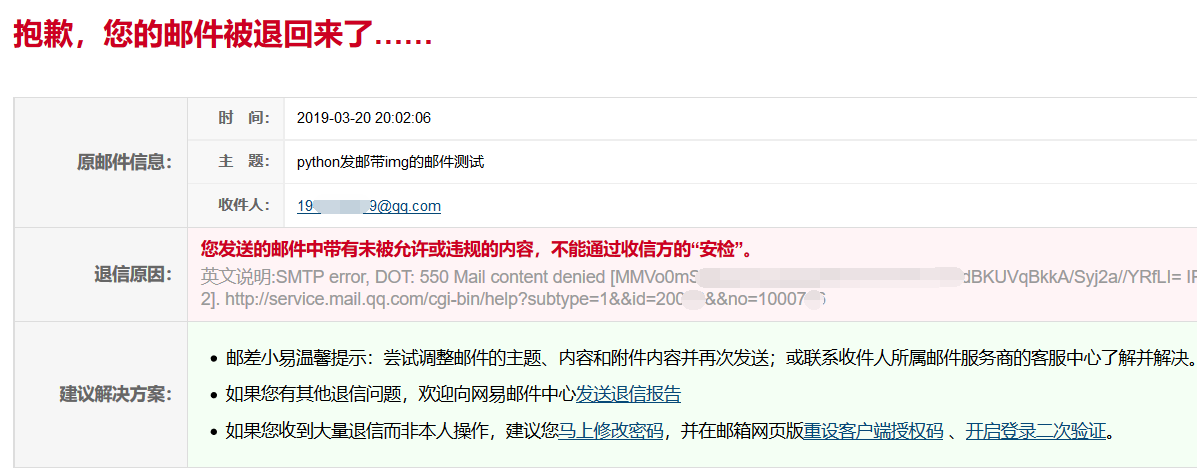
可能TX被APT攻击吓坏了吧....
发送带附件的邮件:
import smtplib

from email.mime.text import MIMEText

from email.mime.multipart import MIMEMultipart

from email.header import Header

sender = 'bmjoker@163.com'  #发件邮箱

passwd = 'xxxxxxxxxx'  # 邮箱授权码

receivers = '19xxxxxx9@qq.com'  #收件邮箱

subject = 'python发带附件的邮件测试' #主题

# 创建一个带附件的实例

msg = MIMEMultipart()

msg['Subject'] = subject

msg['From'] = sender

msg['To'] = receivers

#创建正文,将文本文件添加到MIMEMultipart中

msg.attach(MIMEText('使用python smtplib模块和email模块自动发送邮件测试','plain','utf-8'))

#构造附件1,传送当前目录下  文件

att1 = MIMEText(open('testdata.xlsx','rb').read(),'base64','utf-8') # rb以二进制方式读取

# att1["Content-Type"] = 'application/octet-stream'

# filename为附件名称,可以任意写,写什么名字,邮件中显示什么名字

att1["Content-Disposition"] = 'attachment; filename = "testdata.xlsx" '

#将附件添加到MIMEMultipart中

msg.attach(att1)

#构造附件2

att2 = MIMEText(open('db.cfg','rb').read(),'base64','utf-8')

# att2["Content-Type"] = 'application/octet-stream'

att2["Content-Disposition"] = 'attachment; filename = "db.cfg" '

#将附件添加到MIMEMultipart中

msg.attach(att2)

try:

    s = smtplib.SMTP('smtp.qq.com',2)

    s.set_debuglevel() #输出发送邮件详细过程

    s.login(sender,passwd)

    s.sendmail(sender,receivers,msg.as_string())

    print('Send Succese')

except:

    print('Send Failure')
3.python 发送邮件之smtplib模块的更多相关文章
- python:利用smtplib模块发送邮件
自动化测试中,测试报告一般都需要发送给相关的人员,比较有效的一个方法是每次执行完测试用例后,将测试报告(HTML.截图.附件)通过邮件方式发送. 参考代码:send_mail.py 一.python对 ...
- python:利用smtplib模块发送邮件详解
自动化测试中,测试报告一般都需要发送给相关的人员,比较有效的一个方法是每次执行完测试用例后,将测试报告(HTML.截图.附件)通过邮件方式发送. 首先我们要做: 进入163邮箱,点击设置中的pop3/ ...
- python之使用smtplib模块发送邮件
# 使用smtplib模块发送邮件 import smtplib from email.mime.text import MIMEText from email.header import Heade ...
- Python发送邮件:smtplib、sendmail
本地Ubuntu 18.04,本地Python 3.6.5, 阿里云Ubuntu 16.04,阿里云Python 3.5.2, smtplib,sendmail 8.15.2, 今天,打算实现通过电子 ...
- python发送邮件(smtplib)
我们在测试完成后,都会发一份邮件也就是我们的测试报告,那么既然要自动化,是不是也可以通过python帮助我们发送邮件?当然这么强大的python可以帮助你完成这个需求 SMTP SMTP(Simple ...
- python发送邮件(yagmail模块)
import yagmail user = 'xxxx@qq.com' passwd = 'xxxx' # 授权码,不是密码,需要在邮箱中设置,看邮箱类型,有的需要设置 res = yagmail.S ...
- python之smtplib模块 发送邮件
# -*- coding: utf-8 -*- #python 27 #xiaodeng #smtplib模块 发送邮件 import smtplib from email.mime.text imp ...
- 解读Python发送邮件
解读Python发送邮件 Python发送邮件需要smtplib和email两个模块.也正是由于我们在实际工作中可以导入这些模块,才使得处理工作中的任务变得更加的简单.今天,就来好好学习一下使用Pyt ...
- python 发送邮件 <QQ+腾讯企业邮箱>
一.使用QQ邮箱或者腾讯企业邮箱 python 发送邮件属于网络编程方向的,在工作中,我需要经常用邮件来检测我的程序运行状况.使用起来十分方便,这里我就用腾讯企业邮箱作为我的收发邮箱来使用. 使用py ...
随机推荐
- Spring IOC容器的初始化-(三)BeanDefinition的注册
---恢复内容开始--- 前言 在上一篇中有一处代码是BeanDefiniton注册的入口,我们回顾一下. 1.BeanDefiniton在IOC容器注册 首先我们回顾两点,1. 发起注册的地方:2. ...
- C#合成解析XML与JSON
http://www.xuanyusong.com/archives/1901 XML与JSON在开发中非常重要, 其实核心就是处理字符串.一个是XML的字符串一个是JSON的字符串,尤其是在处 ...
- Markdown编辑器推荐与语法教程--图片版
请参考Markdown编辑器推荐与语法教程--展示版或者Markdown编辑器推荐与语法教程--展示版看具体效果,当然,大家也可以下载Mou亲自体验一把 End
- MDK中STM32使用Printf函数详细解析【转载】
在用MDK调试STM32板子串口时,为了方便串口调试,调用了printf()函数,用Keil仿真是,串口不能正确的输出,软件仿真时,总是卡在那 里.有点纳闷,然后调用USART_SendData()函 ...
- 洛谷3778 [APIO2017]商旅
题目:https://www.luogu.org/problemnew/show/P3778 一看就是0/1分数规划.但不能直接套模板,因为有个商品种类的限制. 考虑从a买在b卖,商品种类根本没用,关 ...
- bzoj 1597 [Usaco2008 Mar]土地购买——斜率优化dp
题目:https://www.lydsy.com/JudgeOnline/problem.php?id=1597 又一道斜率优化dp.负数让我混乱.不过仔细想想还是好的. 还可以方便地把那个负号放到x ...
- 找到div下的第一个ul
$("div#div的id ul li a")//选择的是div下 ul下所有li下的所有a标签 $("div#div的id").children(" ...
- jenkin执行权限问题
jenkins执行报错 stderr: Permission denied, please try again. Permission denied, please try again. Permis ...
- fuser命令
fuser命令 http://blog.itpub.net/27573546/viewspace-765240/
- linux用rdate命令实现同步时间
用rdate命令实现同步时间 前两天说到用ntp时间服务器和ntpdate命令同步时间,今天简单记录下用rdate同步时间 http://blog.csdn.net/wyzxg/archive/201 ...