testNG安装与使用
1、Eclipse集成TestNG插件
a.下载TestNG离线插件并解压得到features和plugins两个文件夹;
b.将features文件下的org.testng.eclipse_6.9.8.201510130443复制到D:\eclipse\features目录下;
c.将plugins文件下的org.testng.eclipse_6.9.8.201510130443复制到D:\eclipse\plugins目录下;
注:重启Eclipse,windows=》preferences=》TestNG
2、导入testNG依赖包
a.进入maven中央仓库地址:https://mvnrepository.com/
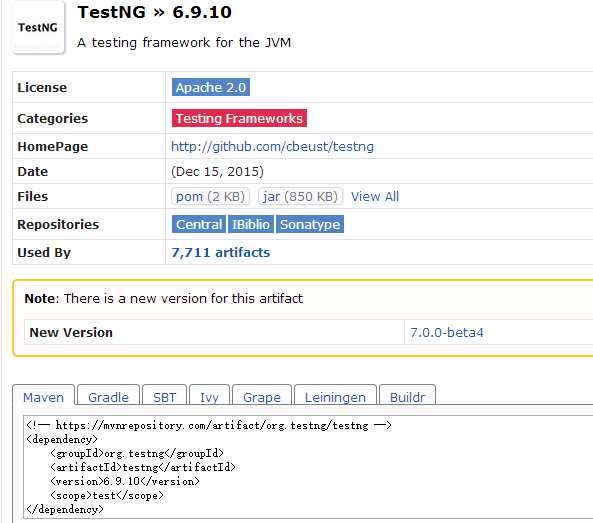
b.Maven项目下的pom.xml配置
  <dependencies>

    <!-- https://mvnrepository.com/artifact/org.testng/testng -->

    <dependency>

       <groupId>org.testng</groupId>

       <artifactId>testng</artifactId>

       <version>6.9.10</version>

       <scope>test</scope>

    </dependency>

  </dependencies>
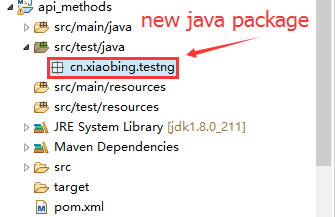
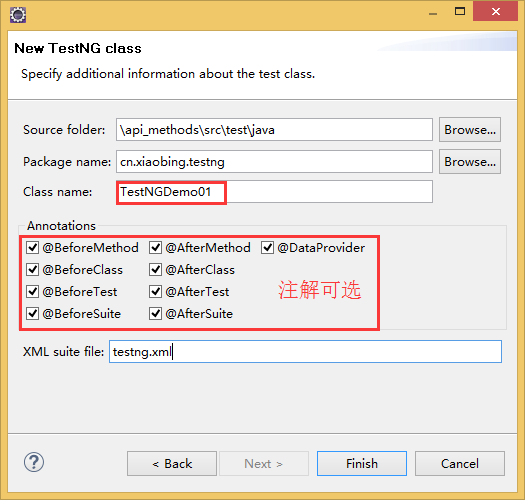
3.配置完成,新建TestNGDemo01类

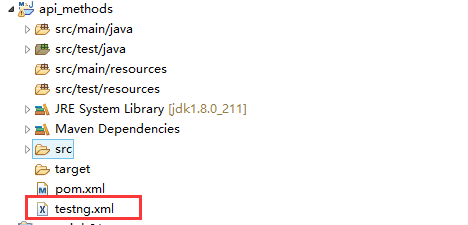
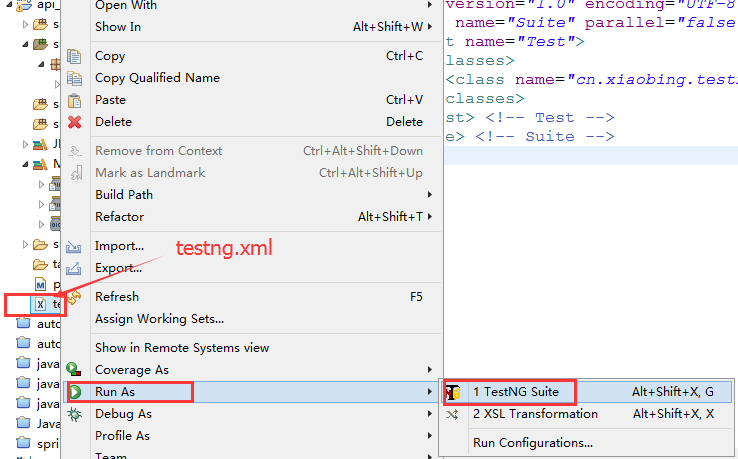
4.为了方便访问,也可以将testng.xml 拖动至项目根目录下:
5.运行套件执行类可以在这么配置

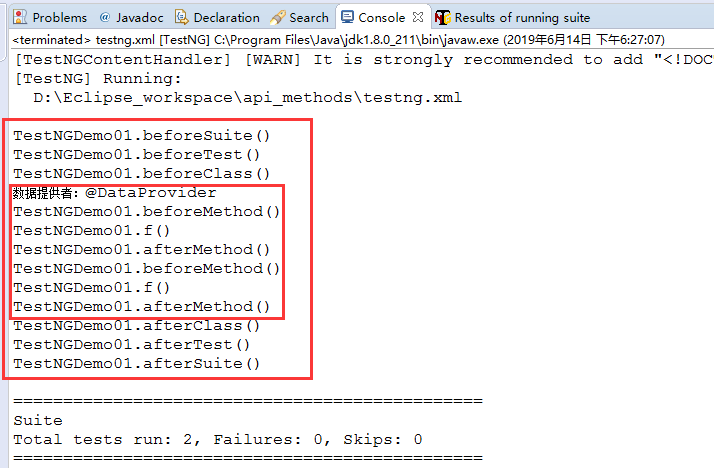
6.TestNGDemo01示例代码
package cn.xiaobing.testng;

import org.testng.annotations.Test;

import org.testng.annotations.BeforeMethod;

import org.testng.annotations.AfterMethod;

import org.testng.annotations.DataProvider;

import org.testng.annotations.BeforeClass;

import org.testng.annotations.AfterClass;

import org.testng.annotations.BeforeTest;

import org.testng.annotations.AfterTest;

import org.testng.annotations.BeforeSuite;

import org.testng.annotations.AfterSuite;

public class TestNGDemo01 {

  @Test(dataProvider = "dp")

  public void f(Integer n, String s) {

	  System.out.println("TestNGDemo01.f()");

  }

  @BeforeMethod

  public void beforeMethod() {

	  System.out.println("TestNGDemo01.beforeMethod()");

  }

  @AfterMethod

  public void afterMethod() {

	  System.out.println("TestNGDemo01.afterMethod()");

  }

  @DataProvider

  public Object[][] dp() {

	  System.out.println("数据提供者:@DataProvider");

    return new Object[][] {

      new Object[] { 1, "a" },

      new Object[] { 2, "b" },

    };

  }

  @BeforeClass

  public void beforeClass() {

	  System.out.println("TestNGDemo01.beforeClass()");

  }

  @AfterClass

  public void afterClass() {

	  System.out.println("TestNGDemo01.afterClass()");

  }

  @BeforeTest

  public void beforeTest() {

	  System.out.println("TestNGDemo01.beforeTest()");

  }

  @AfterTest

  public void afterTest() {

	  System.out.println("TestNGDemo01.afterTest()");

  }

  @BeforeSuite

  public void beforeSuite() {

	  System.out.println("TestNGDemo01.beforeSuite()");

  }

  @AfterSuite

  public void afterSuite() {

	  System.out.println("TestNGDemo01.afterSuite()");

  }

}
7.执行套件:
8.输出结果:

总结:亲测后总结,分享给需要的人,不足之处后续修正补充!
testNG安装与使用的更多相关文章
- 2.4 【配置环境】TestNG安装
两种方法可以安装TestNG Eclipse插件: (来源:http://blog.csdn.net/hongchangfirst/article/details/7679849/) 第一种,离线安 ...
- TestNG安装及使用
安装:https://www.cnblogs.com/xusweeter/p/6559196.html使用:https://www.cnblogs.com/liwu/p/5113936.html 作用 ...
- testNG安装一直失败解决方法
1.在eclipse界面选择“Help”--"Eclipse Marketplace"中进行查找TestNG 然后进“install” (成功) 2.在eclipse界面选择“He ...
- Selenium之TestNG安装
一.在Eclipse中安装TestNG 1.打开eclipse-->help-->Install New Software-->Add,输入Name和Location后,点击OK. ...
- TestNG安装及配置
1. 在idea中新建一个maven项目 2. 在pom.xml中添加testng和reportng依赖 <dependencies> <!-- 添加testNG依赖 --> ...
- Eclipse安装TestNG
1.在Eclipse中点击Help菜单,选择Install New Software选项,在弹出页面中输入安装地址即可安装. http://beust.com/eclipse 2. 3. 4. 等待T ...
- TestNG的安装和使用
一.TestNG安装 打开这个网址:https://marketplace.eclipse.org/content/testng-eclipse#group-external-install-butt ...
- testNG的安装
1,testNG介绍 TestNG ( Testing Next Generation ,下一代测试技术) testNG的强大之处在于它是 利用注释(注解) 来强化测试功能的测试框架,可以用来做接口测 ...
- JAVA+Maven+TestNG搭建接口测试框架及实例
1.配置JDK 见另一篇博客:http://www.cnblogs.com/testlurunxiu/p/5933912.html 2.安装Eclipse以及TestNG Eclipse下载地址:ht ...
随机推荐
- python 语法规范
在python shell 中输入 import this 可以看到python之禅 The Zen of Python, by Tim Peters Beautiful is better than ...
- springBoot 基础入门
来处:是spring项目中的一个子项目 优点 (被称为搭建项目的脚手架) 减少一切xml配置,做到开箱即用,快速上手,专注于业务而非配置 从创建项目上: -- 快速创建独立运 ...
- php flush() 页面缓冲及时输出 每隔一秒输出页面输出
<?php //方案一 ob_end_clean(); echo str_pad('', 1024); // 设置足够大,大过php.ini的output_buffering设置值 for ($ ...
- 【C++ Primer Plus】编程练习答案——第4章
1 void ch4_1() { 2 using namespace std; 3 string fname, lname; 4 char grade; 5 unsigned int age; 6 c ...
- Jetpack Compose学习(7)——MD样式架构组件Scaffold及导航底部菜单
Jetpack Compose学习(7)--MD样式架构组件Scaffold及导航底部菜单 | Stars-One的杂货小窝 Compose给我们提供了一个Material Design样式的首页组件 ...
- CentOS 7.9+19c单实例静默安装
一.环境准备 二.解压文件 三.文件配置 四.安装 五.相关调整 六.打补丁 一.环境准备0.依赖包安装 rpm -q --qf '%{NAME}-%{VERSION}-%{RELEASE} (%{A ...
- Linux安装配置Java
先从 Oracle 官网下载 Java 运行 tar -zxvf xxxx.tar.gz 指令将 Java 解压到 /usr/local/java 下(个人习惯,无所谓) 修改环境变量 vim /et ...
- node-gyp项目命名BUG
当我们编写node原生模块的时候,免不了对node-gyp项目进行命名,在node-gyp进行build的时候,会跟binding.gyp配置文件中的target_name生成对应的原生模块.但是,如 ...
- 第29篇-调用Java主类的main()方法
在第1篇中大概介绍过Java中主类方法main()的调用过程,这一篇介绍的详细一点,大概的调用过程如下图所示. 其中浅红色的函数由主线程执行,而另外的浅绿色部分由另外一个线程执行,这个线程最终也会负责 ...
- storm卡顿修改
最近的webstorm越来越卡了,有时候甚至会弹出 Out of memory的窗口,提示要设置 xmx的值, 8G内存跑你这小软件还会不够用???要内存?给你,看你还会不会卡成翔! 于是果断给x ...