
QML手动连接信号槽【Connections】
1、使用Connections
import QtQuick 2.6

import QtQuick.Window 2.2

import QtQuick.Controls 1.4

Window {

    visible: true

    width:

    height:

    title: qsTr("Hello World")

    Text {

        id: text1;

        text: qsTr("text1");

        anchors.top: parent.top;

        anchors.topMargin: ;

        anchors.horizontalCenter: parent.horizontalCenter;

        anchors.centerIn: parent;

        font.pixelSize: ;

        color: "red";

    }

    Text {

        id: text2;

        text: qsTr("text2");

        anchors.top: text1.bottom;

        anchors.topMargin: ;

        anchors.horizontalCenter: parent.horizontalCenter;

        font.pixelSize: ;

    }

    Button{

        id:btn;

        text: "btn";

        anchors.horizontalCenter: parent.horizontalCenter;

        anchors.top:text2.bottom;

        anchors.topMargin: ;

    }

    Connections{

        target: btn;

        onClicked:{

            text1.color=Qt.rgba(Math.random(),Math.random(),Math.random(),);

            text2.color=Qt.rgba(Math.random(),Math.random(),Math.random(),);

        }

    }

}
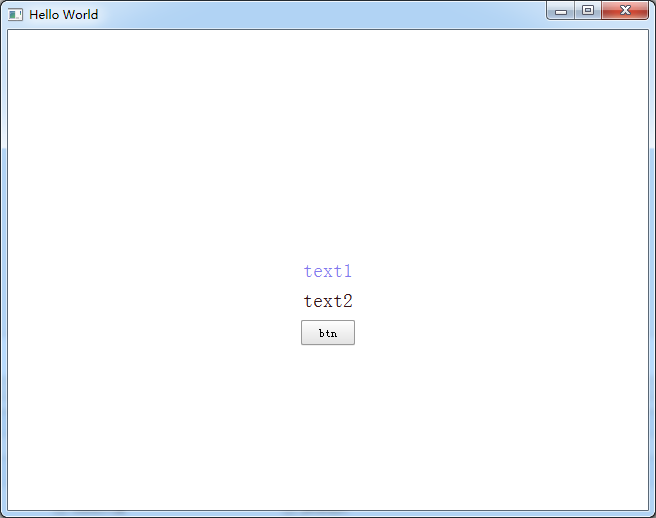
上述代码等于【在btn的onClicked里直接加改变颜色的代码】
import QtQuick 2.6

import QtQuick.Window 2.2

import QtQuick.Controls 1.4

Window {

    visible: true

    width:

    height:

    title: qsTr("Hello World")

    Text {

        id: text1;

        text: qsTr("text1");

        anchors.top: parent.top;

        anchors.topMargin: ;

        anchors.horizontalCenter: parent.horizontalCenter;

        anchors.centerIn: parent;

        font.pixelSize: ;

        color: "red";

    }

    Text {

        id: text2;

        text: qsTr("text2");

        anchors.top: text1.bottom;

        anchors.topMargin: ;

        anchors.horizontalCenter: parent.horizontalCenter;

        font.pixelSize: ;

    }

    Button{

        id:btn;

        text: "btn";

        anchors.horizontalCenter: parent.horizontalCenter;

        anchors.top:text2.bottom;

        anchors.topMargin: ;

        onClicked: {

            text1.color=Qt.rgba(Math.random(),Math.random(),Math.random(),);

            text2.color=Qt.rgba(Math.random(),Math.random(),Math.random(),);

        }

    }

}
2、使用signal.connect
QML手动连接信号槽【Connections】的更多相关文章
- _ZNote_编程语言_Qt_信号槽实现_拖拽方式使用控件
所谓的信号槽,实际上就是观察者模式. 当某个事件发生后,比如,按钮检测到自己被点击了一下,它就会发出一个信号(signal). 这种发出信号是没有目的的,类似于广播.如果对象对这个信号感兴趣,它就会使 ...
- Qt信号-槽原理剖析--(2)自己实现信号槽
时间乃是最大的革新家--培根 先了解一下相关宏: qt为c++增加的相关宏:signals, slots,emit 在qt的预编译过程中,这些宏会被替换. 1)#define signals publ ...
- QT学习之路--深入了解信号槽
槽函数可以和一个信号相连接,当这个信号发生时,它可以被自动调用.connect()语句的原型类似于:connect(sender, SIGNAL(signal), receiver, SLOT(slo ...
- QT学习之路---信号槽
#include<QApplication> #include<QPushButton> int main(int argc,char *argv[]) { QApplicat ...
- Qt 学习之路:深入 Qt5 信号槽新语法
在前面的章节(信号槽和自定义信号槽)中,我们详细介绍了有关 Qt 5 的信号槽新语法.由于这次改动很大,许多以前看起来不是问题的问题接踵而来,因此,我们用单独的一章重新介绍一些 Qt 5 的信号槽新语 ...
- QT信号槽connect的第五个参数
用过QT的小伙伴都知道连接信号槽的connect方法,但是这个方法有第五个参数,一般都是用的默认的 connect(th,SIGNAL(started()),tmpmyobject,SLOT(show ...
- [转]QT子线程与主线程的信号槽通信-亲测可用!
近用QT做一个服务器,众所周知,QT的主线程必须保持畅通,才能刷新UI.所以,网络通信端采用新开线程的方式.在涉及到使用子线程更新Ui上的控件时遇到了点儿麻烦.网上提供了很多同一线程不同类间采用信号槽 ...
- Qt_深入了解信号槽(signal&slot)
转自豆子空间 信号槽机制是Qt编程的基础.通过信号槽,能够使Qt各组件在不知道对方的情形下能够相互通讯.这就将类之间的关系做了最大程度的解耦. 槽函数和普通的C++成员函数没有很大的区别.它们也可以使 ...
- QT信号槽详解
1 QT信号槽详解 1.1 信号和槽的定义 信号是触发信号,例如按钮的点击触发一个clicked信号,槽是用来接收信号,并处理信号,相当于信号响应函数.一个信号可以关联多个槽函数,信 ...
随机推荐
- OBV15 案例5,上M10拉高出货
- MyBatis基础入门《三》Select查询集合
MyBatis基础入门<三>Select查询集合 描述: 代码新增了一个MybatisUtil工具类,查询数据库返回集合的时候,接收数据的三种方式.由于代码会渐渐增多,未涉及改动过的文件不 ...
- Windows搭建react-native开发环境
一.目标平台 windows+android 1. 必须软件 python2+ nodejs npm 2. 安装react-native命令行 $ npm install -g react-nativ ...
- Python全栈-day15-day16-常用模块
1.time模块 1)时间戳 import time# 通常来说,时间戳表示的是从1970年1月1日00:00:00开始按秒计算的偏移量 # 偏移量的是float类型 start_time = tim ...
- AmiGO2:在线浏览和查询GO信息的利器
GO数据库的信息是非常庞大的,为了有效的检索和浏览GO数据库的信息,官方提供了AmiGO, 可以方便的浏览,查询和下载对应信息,官网如下 http://amigo.geneontology.org/a ...
- redis启动
在redis的安装目录的bin目录下: 1.启动服务(指定配置文件) ./redis-server redis.conf 2.启动客户端 ./redis-cli
- 集合——iterator迭代器
Iterator接口: Iterator接口使用: 其中,集合Collection接口的定义也是使用多态,必须要创建它的子类对象才行,子类接口也是不能直接创建对象的(List接口): 其中wihle的 ...
- 【Error】:svnrdump: E130003: The XML response contains invalid XML
我这边的使用场景是在对远程服务器进行svnrdump dump操作时出现该问题,因为是对远程仓库多级子目录进行备份,结果出现错误. 在网上搜索了很多,有很多帖子是在checkout的时候出现问题,和我 ...
- 苹果企业版签名分发相关问题,蒲公英签名,fir.im分发,安装ipa设置信任
苹果企业版签名分发相关问题,蒲公英签名,fir.im分发,安装ipa设置信任蒲公英 - 高效安全的内测应用发布.管理平台https://www.pgyer.com/app/signature分发版 2 ...
- 普通程序员转型AI免费教程整合,零基础也可自学
普通程序员转型AI免费教程整合,零基础也可自学 本文告诉通过什么样的顺序进行学习以及在哪儿可以找到他们.可以通过自学的方式掌握机器学习科学家的基础技能,并在论文.工作甚至日常生活中快速应用. 可以先看 ...