Spring Boot整合Spring Security自定义登录实战
本文主要介绍在Spring Boot中整合Spring Security,对于Spring Boot配置及使用不做过多介绍,还不了解的同学可以先学习下Spring Boot。
本demo所用Spring Boot版本为2.1.4.RELEASE。
1、pom.xml中增加依赖
<dependency>

    <groupId>org.springframework.boot</groupId>

    <artifactId>spring-boot-starter-security</artifactId>

</dependency>
2、Spring Security配置类
package com.inspur.webframe.config;

import org.springframework.context.annotation.Bean;

import org.springframework.context.annotation.Configuration;

import org.springframework.security.config.annotation.web.builders.HttpSecurity;

import org.springframework.security.config.annotation.web.configuration.WebSecurityConfigurerAdapter;

import org.springframework.security.core.userdetails.UserDetailsService;

import com.inspur.webframe.security.UserDetailsServiceImpl;

@Configuration

public class SecurityConfig extends WebSecurityConfigurerAdapter {

    @Bean

    @Override

    protected UserDetailsService userDetailsService() {

        return new UserDetailsServiceImpl();

    }

    @Override

    protected void configure(HttpSecurity http) throws Exception {

        http

        .authorizeRequests().anyRequest().authenticated()

        .and()

            .csrf().disable() //禁用csrf

            .headers().frameOptions().disable() //禁用frame options

        .and()

            .formLogin().loginPage("/demo/login").loginProcessingUrl("/j_spring_security_check").failureUrl("/demo/login?error=true").defaultSuccessUrl("/demo/main").permitAll()

        .and()

            .logout().logoutUrl("/j_spring_security_logout").logoutSuccessUrl("/demo/login").permitAll();

    }

}
userDetailsService返回自己实现的UserDetailsService,见下面UserDetailsServiceImpl类。
configure方法中配置了如下内容:
登录页面url:/demo/login
登录处理url:/j_spring_security_check,对应登录页面中登录操作url
登录失败url:/demo/login?error=true
登录成功url:/demo/main
注销url:/j_spring_security_logout,对应欢迎页面中注销操作url
注销成功跳转url:/demo/login,调到登录页面
3、用户类
该类与数据库的用户表对应
package com.inspur.webframe.security;

import java.io.Serializable;

import com.inspur.common.entity.BaseEntity;

public class User extends BaseEntity implements Serializable {

    private static final long serialVersionUID = 1L;

    /**

     * 用户id

     */

    private String userid;

    /**

     * 用户密码

     */

    private String password;

    /**

     * 用户名

     */

    private String username;

    /**

     * 是否被锁定 1:是 0:否

     */

    private Integer isLocked;

    public Integer getIsLocked() {

        return isLocked;

    }

    public void setIsLocked(Integer isLocked) {

        this.isLocked = isLocked;

    }

    public String getUserid() {

        return userid;

    }

    public void setUserid(String userid) {

        this.userid = userid;

    }

    public String getPassword() {

        return password;

    }

    public void setPassword(String password) {

        this.password = password;

    }

    public String getUsername() {

        return username;

    }

    public void setUsername(String username) {

        this.username = username;

    }

    @Override

    public String toString() {

        return "User [userid=" + userid + ", password=" + password + ", username=" + username + "]";

    }

}
BaseEntity是一个基类,有id、创建时间、修改时间等基础信息,作为demo可以忽略
4、自定义UserDetails
该类需要实现org.springframework.security.core.userdetails.UserDetails接口,作为用户信息;该类关联用户类
package com.inspur.webframe.security;

import java.util.Collection;

import org.apache.commons.codec.binary.Base64;

import org.springframework.security.core.GrantedAuthority;

import org.springframework.security.core.userdetails.UserDetails;

import com.inspur.common.util.EncoderUtil;

public class SecurityUser implements UserDetails {

    private static final long serialVersionUID = 4118167338060103803L;

    private User systemUser = null;

    private Collection<? extends GrantedAuthority> authorities = null;

    public SecurityUser(User systemUser, Collection<? extends GrantedAuthority> authorities) {

        this.systemUser = systemUser;

        this.authorities = authorities;

    }

    public User getSystemUser() {

        return systemUser;

    }

    @Override

    public Collection<? extends GrantedAuthority> getAuthorities() {

        return authorities;

    }

    @Override

    public String getPassword() {

     //{MD5}e10adc3949ba59abbe56e057f20f883e,123456
       return systemUser.getPassword();

    }

    @Override

    public String getUsername() {

        return systemUser.getUserid();

    }

    @Override

    public boolean isAccountNonExpired() {

        return true;

    }

    @Override

    public boolean isAccountNonLocked() {

        return !(systemUser.getIsLocked() != null && systemUser.getIsLocked() == 1);

    }

    @Override

    public boolean isCredentialsNonExpired() {

        return true;

    }

    @Override

    public boolean isEnabled() {

        return true;

    }

}
spring security 有多种验证密码算法,这里使用的MD5算法,格式为:{MD5}e10adc3949ba59abbe56e057f20f883e;如果数据保存的密码格式不是这种格式,可以在getPassword()方法中转换成标准格式。
5、自定义UserDetailsService
该类需要实现org.springframework.security.core.userdetails.UserDetailsService接口,用于用户的登录认证
package com.inspur.webframe.security;

import java.util.ArrayList;

import java.util.List;

import org.slf4j.Logger;

import org.slf4j.LoggerFactory;

import org.springframework.beans.factory.annotation.Autowired;

import org.springframework.security.core.GrantedAuthority;

import org.springframework.security.core.authority.SimpleGrantedAuthority;

import org.springframework.security.core.userdetails.UserDetails;

import org.springframework.security.core.userdetails.UserDetailsService;

import org.springframework.security.core.userdetails.UsernameNotFoundException;

import com.inspur.common.dao.BaseDao;

public class UserDetailsServiceImpl implements UserDetailsService {

    protected static Logger logger = LoggerFactory.getLogger(UserDetailsServiceImpl.class);

    @Autowired

    private BaseDao baseDao;

    @Override

    public UserDetails loadUserByUsername(String username) throws UsernameNotFoundException {

        logger.info(username);

        User user = baseDao.selectForObject(User.class, "userid=?", username);

        logger.info("user={}", user);

        if (user != null) {

            //权限,应从数据取这里写死

            List<GrantedAuthority> authorities= new ArrayList<GrantedAuthority>();

            authorities.add(new SimpleGrantedAuthority("ROLE_USER"));

            authorities.add(new SimpleGrantedAuthority("ROLE_ADMIN"));

            SecurityUser u = new SecurityUser(user, authorities);

            logger.info(u.getPassword());

            return u;

        }

        throw new UsernameNotFoundException("用户(" + username + ")不存在");

    }

}
baseDao是我实现的操作数据库的工具类,类似spring的jdbcTemplate;不是重点,具体实现细节就不贴出来了,看代码也能看出意思
6、访问url的controller
package com.inspur.demo.web.controller;

import org.springframework.security.core.Authentication;

import org.springframework.stereotype.Controller;

import org.springframework.web.bind.annotation.RequestMapping;

import org.springframework.web.bind.annotation.RequestMethod;

import com.inspur.common.web.controller.BaseController;

@Controller

@RequestMapping(method = {RequestMethod.GET, RequestMethod.POST})

public class DemoController extends BaseController {

    @RequestMapping(value={"/demo/login", "/"})

    public String login() {

        return "/demo/login";

    }

    @RequestMapping(value={"/demo/main"})

    public String main(Authentication authentication) {

        logger.info("authentication.getPrincipal()={}", authentication.getPrincipal());

        return "/demo/main";

    }

}
7、thymeleaf
thymeleaf是spring推荐使用的模板引擎,可以优雅的来画页面。
- 引入依赖
<dependency>

    <groupId>org.springframework.boot</groupId>

    <artifactId>spring-boot-starter-thymeleaf</artifactId>

</dependency>
- 配置application.yml(或application.properties)
spring:

  resources:

    static-locations: classpath:/static/

  thymeleaf:

    encoding: utf-8

    cache: false
8、编写页面login.html
页面位置为/src/main/resources/templates/demo/login.html
<!DOCTYPE HTML>

<html>

  <head>

    <title>My JSP 'login.jsp' starting page</title>

    <meta http-equiv="pragma" content="no-cache">

    <meta http-equiv="cache-control" content="no-cache">

    <meta http-equiv="expires" content="0">

  </head>

  <body>

    <form th:action="@{/j_spring_security_check}" method="post">

    <input type="hidden"  name ="${_csrf.parameterName}"  value ="${_csrf.token}" />

      <table>

         <tr>

            <td> 用户名:</td>

            <td><input type="text" name="username"/></td>

         </tr>

         <tr>

            <td> 密码:</td>

            <td><input type="password" name="password"/></td>

         </tr>

         <tr>

            <td>

                <span style="color: red;" th:if="${param.error != null && session.SPRING_SECURITY_LAST_EXCEPTION != null }" th:text="${session.SPRING_SECURITY_LAST_EXCEPTION.message}"></span>

            </td>

         </tr>

         <tr>

            <td colspan="2" align="center">

                <input type="submit" value=" 登录 "/>

                <input type="reset" value=" 重置 "/>

            </td>

         </tr>

      </table>

   </form>

  </body>

</html>
/j_spring_security_check对应上面SecurityConfig配置的登录路径;session.SPRING_SECURITY_LAST_EXCEPTION.message表示登录错误的信息。
9、编写页面main.html
页面位置为/src/main/resources/templates/demo/main.html
<!DOCTYPE HTML>

<html>

  <head>

    <title>My JSP 'main.jsp' starting page</title>

    <meta http-equiv="pragma" content="no-cache">

    <meta http-equiv="cache-control" content="no-cache">

    <meta http-equiv="expires" content="0">

  </head>

  <body>

  欢迎! <a th:href="@{/j_spring_security_logout}">退出</a>

  </body>

</html>
/j_spring_security_check对应上面SecurityConfig配置的注销路径
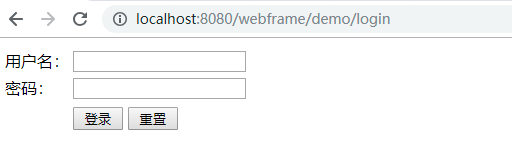
10、测试
访问登录页面http://localhost:8080/webframe/demo/login,我的server.servlet.context-path配置为/webframe
登录失败:

登录成功:

11、扩展功能-锁定用户
简单实现:用户表中需要有is_locked(是否锁定)、login_fail_times(连续登录失败次数)这两个字段;连续登录失败次数超过一定值就锁定用户。
增加listener监听登录事件。
package com.inspur.webframe.security;

import org.slf4j.Logger;

import org.slf4j.LoggerFactory;

import org.springframework.beans.factory.annotation.Autowired;

import org.springframework.context.ApplicationListener;

import org.springframework.security.authentication.event.AbstractAuthenticationEvent;

import org.springframework.security.authentication.event.AuthenticationFailureBadCredentialsEvent;

import org.springframework.security.authentication.event.AuthenticationSuccessEvent;

import org.springframework.stereotype.Component;

import com.inspur.common.dao.BaseDao;

@Component

public class LoginListener implements ApplicationListener<AbstractAuthenticationEvent> {

    private static Logger logger = LoggerFactory.getLogger(LoginListener.class);

    private static int MAX_FAIL_TIMES = 3;

    @Autowired

    private BaseDao baseDao;

    @Override

    public void onApplicationEvent(AbstractAuthenticationEvent event) {

        logger.info(event.getClass().toString());

        String userId = event.getAuthentication().getName();

        if (event instanceof AuthenticationSuccessEvent) {

            baseDao.update("update a_hr_userinfo set login_fail_times=0 where userid=? and login_fail_times>0", userId);

        } else if (event instanceof AuthenticationFailureBadCredentialsEvent) {

            baseDao.update("update a_hr_userinfo set login_fail_times=login_fail_times+1 where userid=?", userId);

            baseDao.update("update a_hr_userinfo set is_locked=1 where userid=? and login_fail_times>=?", userId, MAX_FAIL_TIMES);

        }

    }

}
登录成功login_fail_times清0,登录失败login_fail_times加1,到达3就锁定用户;这边也用到了baseDao,具体意思看代码也能明白。
Spring Boot整合Spring Security自定义登录实战的更多相关文章
- Spring Boot 整合Spring Data JPA
Spring Boot整合Spring Data JPA 1)加入依赖 <dependency> <groupId>org.springframework.boot</g ...
- Spring boot 整合spring Data JPA+Spring Security+Thymeleaf框架(上)
近期上班太忙所以耽搁了给大家分享实战springboot 框架的使用. 以下是spring boot 整合多个框架的使用. 首先是准备工作要做好. 第一 导入框架所需的包,我们用的事maven 进行 ...
- Spring Boot 整合 Spring Security,用户登录慢
场景 Spring Boot + Spring Security搭建一个Web项目. 临时用了inMemoryAuthentication. @EnableWebSecurity public cla ...
- Spring Boot整合Spring Security
Spring Boot对于该家族的框架支持良好,但是当中本人作为小白配置还是有一点点的小问题,这里分享一下.这个项目是使用之前发布的Spring Boot会员管理系统重新改装,将之前filter登录验 ...
- Spring Boot整合Spring Security总结
一.创建Spring Boot项目 引入Thymeleaf和Web模块以及Spring Security模块方便进行测试,先在pom文件中将 spring-boot-starter-security ...
- Spring Boot整合Spring Session实战
传统java web应用session都是由应用服务器(如tomcat)保存在内存中,这对应但节点应用来说没问题:但对于应用集群来说会造成各节点之间的session无法共享,一个节点挂掉后,其他节点接 ...
- Spring Boot整合Spring Batch
引言 Spring Batch是处理大量数据操作的一个框架,主要用来读取大量数据,然后进行一定的处理后输出指定的形式.比如我们可以将csv文件中的数据(数据量几百万甚至几千万都是没问题的)批处理插入保 ...
- Spring Boot 整合Spring Security 和Swagger2 遇到的问题小结
How to configure Spring Security to allow Swagger URL to be accessed without authentication @Configu ...
- Spring Boot 整合Spring Data以及rabbitmq,thymeleaf,向qq邮箱发送信息
首先得将自己的qq开启qq邮箱的POP3/SMTP服务 说明: p,e为路由key. 用户系统完成登录的时候,将{手机号-时间-IP}保存到队列Phone-queue中,msg-sys系统获得消息打印 ...
随机推荐
- docker容器日志查看
日志分两类,一类是 Docker 引擎日志:另一类是 容器日志. Docker 引擎日志 Docker 引擎日志 一般是交给了 Upstart(Ubuntu 14.04) 或者 systemd (Ce ...
- .NET Core入门程序
易百教程 https://www.yiibai.com/dotnet_core/dotnet_core_getting_started.html
- osg gdal加载tif数据文件
osg加载.tif地形数据文件 #ifdef _WIN32 #include <Windows.h> #endif // _WIN32 #include <iostream> ...
- [Sklearn] Linear regression models to fit noisy data
Ref: [Link] sklearn各种回归和预测[各线性模型对噪声的反应] Ref: Linear Regression 实战[循序渐进思考过程] Ref: simple linear regre ...
- Spring Cloud API网关服务 5.2
为什么需要API网关 通过前面内容的学习,我们已经可以构建一个简单的微服务架构系统.这个系统可以使用Spring Boot实现微服务的开发,使用Spring Cloud Eureka实现注册中心以及服 ...
- 利用cglib给javabean动态添加属性,不用在建VO
有的时候 比如你用的是hibernate或者Spring jdbc 来做dao层进行数据库相关的操作的时候,若果是单表的操作的时候 还比较简单 hibernate可直接返回(get,load)你的需要 ...
- k8s中正确删除一个pod
1.先删除pod 2.再删除对应的deployment 否则只是删除pod是不管用的,还会看到pod,因为deployment.yaml文件中定义了副本数量 实例如下: 删除pod [root@tes ...
- shell脚本通过子网掩码计算出掩码位数
子网掩码格式为255.255.255.0可以通过以下脚本计算掩码位数 #!/bin/sh #maskdigits.sh mask maskdigits () { a=$(echo "$1&q ...
- C# .NET WINFORM MUTEX 互斥
static class Program 里的全局变量: static System.Threading.Mutex appMutex; Main 方法里的内容: string exeName = & ...
- mac的公式编辑器: mathtype/latex
mathtype 收费版,且马上不能在mac系统上使用 latex 搜索一下: ➜ ~ brew search latex ==> Formulae gnome-latex latex2html ...