mybatis dao 层开发简易版 非整合 spring
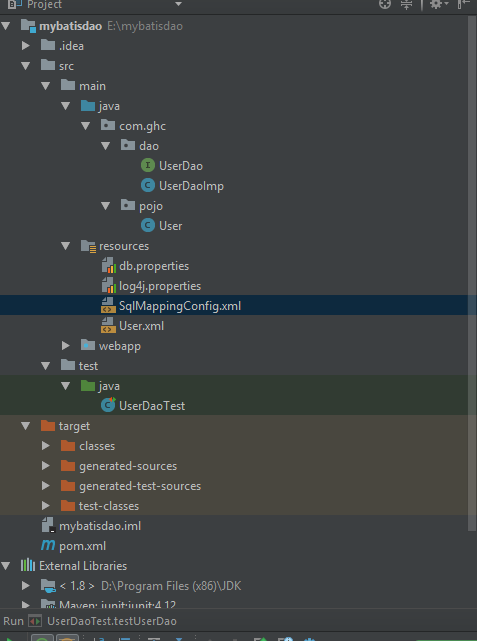
同样老习惯,先上项目结构截图
首先 补充上篇文中缺失的 mysql demo 用的 小脚本
drop database  if exists mybatis;

CREATE DATABASE `mybatis` DEFAULT CHARACTER SET utf8 ;

use mybatis;

/*

SQLyog v10.2

MySQL - 5.1.72-community : Database - mybatis

*********************************************************************

*/

/*Table structure for table `items` */

CREATE TABLE `items` (

  `id` int(11) NOT NULL AUTO_INCREMENT,

  `name` varchar(32) NOT NULL COMMENT '商品名称',

  `price` float(10,1) NOT NULL COMMENT '商品定价',

  `detail` text COMMENT '商品描述',

  `pic` varchar(64) DEFAULT NULL COMMENT '商品图片',

  `createtime` datetime NOT NULL COMMENT '生产日期',

  PRIMARY KEY (`id`)

) ENGINE=InnoDB AUTO_INCREMENT=4 DEFAULT CHARSET=utf8;

/*Table structure for table `user` */

CREATE TABLE `user` (

  `id` int(11) NOT NULL AUTO_INCREMENT,

  `username` varchar(32) NOT NULL COMMENT '用户名称',

  `birthday` date DEFAULT NULL COMMENT '生日',

  `sex` char(1) DEFAULT NULL COMMENT '性别',

  `address` varchar(256) DEFAULT NULL COMMENT '地址',

  PRIMARY KEY (`id`)

) ENGINE=InnoDB AUTO_INCREMENT=27 DEFAULT CHARSET=utf8;

/*Table structure for table `orders` */

CREATE TABLE `orders` (

  `id` int(11) NOT NULL AUTO_INCREMENT,

  `user_id` int(11) NOT NULL COMMENT '下单用户id',

  `number` varchar(32) NOT NULL COMMENT '订单号',

  `createtime` datetime NOT NULL COMMENT '创建订单时间',

  `note` varchar(100) DEFAULT NULL COMMENT '备注',

  PRIMARY KEY (`id`),

  KEY `FK_orders_1` (`user_id`),

  CONSTRAINT `FK_orders_id` FOREIGN KEY (`user_id`) REFERENCES `user` (`id`) ON DELETE NO ACTION ON UPDATE NO ACTION

) ENGINE=InnoDB AUTO_INCREMENT=6 DEFAULT CHARSET=utf8;

/*Table structure for table `orderdetail` */

CREATE TABLE `orderdetail` (

  `id` int(11) NOT NULL AUTO_INCREMENT,

  `orders_id` int(11) NOT NULL COMMENT '订单id',

  `items_id` int(11) NOT NULL COMMENT '商品id',

  `items_num` int(11) DEFAULT NULL COMMENT '商品购买数量',

  PRIMARY KEY (`id`),

  KEY `FK_orderdetail_1` (`orders_id`),

  KEY `FK_orderdetail_2` (`items_id`),

  CONSTRAINT `FK_orderdetail_1` FOREIGN KEY (`orders_id`) REFERENCES `orders` (`id`) ON DELETE NO ACTION ON UPDATE NO ACTION,

  CONSTRAINT `FK_orderdetail_2` FOREIGN KEY (`items_id`) REFERENCES `items` (`id`) ON DELETE NO ACTION ON UPDATE NO ACTION

) ENGINE=InnoDB AUTO_INCREMENT=5 DEFAULT CHARSET=utf8;
mysql 数据库及表结构
/*

SQLyog v10.2

MySQL - 5.1.72-community : Database - mybatis

*********************************************************************

*/

/*Data for the table `items` */

insert  into `items`(`id`,`name`,`price`,`detail`,`pic`,`createtime`) values (1,'台式机',3000.0,'该电脑质量非常好!!!!',NULL,'2016-02-03 13:22:53'),(2,'笔记本',6000.0,'笔记本性能好,质量好!!!!!',NULL,'2015-02-09 13:22:57'),(3,'背包',200.0,'名牌背包,容量大质量好!!!!',NULL,'2016-02-06 13:23:02');

/*Data for the table `user` */

insert  into `user`(`id`,`username`,`birthday`,`sex`,`address`) values (1,'王五',NULL,'',NULL),(10,'张三','2016-07-10','','北京市'),(16,'张小明',NULL,'','河南郑州'),(22,'陈小明',NULL,'','河南郑州'),(24,'张三丰',NULL,'','河南郑州'),(25,'陈小明',NULL,'','河南郑州'),(26,'王五',NULL,NULL,NULL);

/*Data for the table `orders` */

insert  into `orders`(`id`,`user_id`,`number`,`createtime`,`note`) values (3,1,'','2016-02-04 13:22:35',NULL),(4,1,'','2016-02-03 13:22:41',NULL),(5,10,'','2016-02-12 16:13:23',NULL);

/*Data for the table `orderdetail` */

insert  into `orderdetail`(`id`,`orders_id`,`items_id`,`items_num`) values (1,3,1,1),(2,3,2,3),(3,4,3,4),(4,4,2,3);
mysql 插入测试数据脚本
工程采用 maven 管理,pom.xml 内容如下
<?xml version="1.0" encoding="UTF-8"?>

<project xmlns="http://maven.apache.org/POM/4.0.0" xmlns:xsi="http://www.w3.org/2001/XMLSchema-instance"

  xsi:schemaLocation="http://maven.apache.org/POM/4.0.0 http://maven.apache.org/xsd/maven-4.0.0.xsd">

  <modelVersion>4.0.0</modelVersion>

  <groupId>com.ghc</groupId>

  <artifactId>mybatisdao</artifactId>

  <version>1.0-SNAPSHOT</version>

  <packaging>war</packaging>

  <name>mybatisdao Maven Webapp</name>

  <!-- FIXME change it to the project's website -->

  <url>http://www.example.com</url>

  <properties>

    <project.build.sourceEncoding>UTF-8</project.build.sourceEncoding>

    <maven.compiler.source>1.7</maven.compiler.source>

    <maven.compiler.target>1.7</maven.compiler.target>

  </properties>

  <dependencies>

    <!-- https://mvnrepository.com/artifact/junit/junit -->

    <dependency>

      <groupId>junit</groupId>

      <artifactId>junit</artifactId>

      <version>4.12</version>

      <scope>test</scope>

    </dependency>

    <!-- https://mvnrepository.com/artifact/org.mybatis/mybatis -->

    <dependency>

      <groupId>org.mybatis</groupId>

      <artifactId>mybatis</artifactId>

      <version>3.4.6</version>

    </dependency>

    <!-- https://mvnrepository.com/artifact/log4j/log4j -->

    <dependency>

      <groupId>log4j</groupId>

      <artifactId>log4j</artifactId>

      <version>1.2.17</version>

    </dependency>

    <!-- https://mvnrepository.com/artifact/mysql/mysql-connector-java -->

    <dependency>

      <groupId>mysql</groupId>

      <artifactId>mysql-connector-java</artifactId>

      <version>5.1.18</version>

    </dependency>

  </dependencies>

  <build>

    <finalName>mybatisdao</finalName>

    <pluginManagement><!-- lock down plugins versions to avoid using Maven defaults (may be moved to parent pom) -->

      <plugins>

        <plugin>

          <artifactId>maven-clean-plugin</artifactId>

          <version>3.0.0</version>

        </plugin>

        <!-- see http://maven.apache.org/ref/current/maven-core/default-bindings.html#Plugin_bindings_for_war_packaging -->

        <plugin>

          <artifactId>maven-resources-plugin</artifactId>

          <version>3.0.2</version>

        </plugin>

        <plugin>

          <artifactId>maven-compiler-plugin</artifactId>

          <version>3.7.0</version>

        </plugin>

        <plugin>

          <artifactId>maven-surefire-plugin</artifactId>

          <version>2.20.1</version>

        </plugin>

        <plugin>

          <artifactId>maven-war-plugin</artifactId>

          <version>3.2.0</version>

        </plugin>

        <plugin>

          <artifactId>maven-install-plugin</artifactId>

          <version>2.5.2</version>

        </plugin>

        <plugin>

          <artifactId>maven-deploy-plugin</artifactId>

          <version>2.8.2</version>

        </plugin>

      </plugins>

    </pluginManagement>

  </build>

</project>
pom.xml
接下来就是 四个 配置文件了, 其中 db.properties 里的 key 到 SqlMappingConfig.xml 里就引用不到,这点作为初学者也觉得无奈,暂且就硬编码吧

jdbc.driver=com.mysql.jdbc.Driver

jdbc.url=jdbc:mysql://localhost:3306/mybatis?characterEncoding=UTF-8

jdbc.username=root

jdbc.password=Mede645
db.properties 引用不到显得可有可无
log4j.rootLogger=DEBUG,A1

log4j.logger.org.springframework=debug

log4j.appender.A1=org.apache.log4j.ConsoleAppender

log4j.appender.A1.layout=org.apache.log4j.PatternLayout

log4j.appender.A1.layout.ConversionPattern=%d %5p [%t] (%F:%L) - %m%n
log4j.properties 不用重点关注
<?xml version="1.0" encoding="UTF-8" ?>

<!DOCTYPE configuration

        PUBLIC "-//mybatis.org//DTD Config 3.0//EN"

        "http://mybatis.org/dtd/mybatis-3-config.dtd">

<configuration>

    <!-- 加载属性文件 -->

    <properties resource="db.properties">

        <!--properties中还可以配置一些属性名和属性值 -->

        <!-- <property name="jdbc.driver" value=""/> -->

    </properties>

    <typeAliases>

        <typeAlias type="com.ghc.pojo.User" alias="user" />

    </typeAliases>

    <!-- 和spring整合后 environments配置将废除 -->

    <environments default="development">

        <environment id="development">

            <!-- 使用jdbc事务管理,事务控制由mybatis -->

            <transactionManager type="JDBC" />

            <!-- 数据库连接池,由mybatis管理 -->

            <dataSource type="POOLED">

                <property name="driver" value="com.mysql.jdbc.Driver" />

                <property name="url" value="jdbc:mysql://localhost:3306/mybatis?characterEncoding=UTF-8" />

                <property name="username" value="root" />

                <property name="password" value="Mede645" />

            </dataSource>

        </environment>

    </environments>

    <mappers>

        <mapper resource="User.xml"/>

    </mappers>

</configuration>
SqlMappingConfig.xml 很重要很重要
<?xml version="1.0" encoding="UTF-8" ?>

<!DOCTYPE mapper

        PUBLIC "-//mybatis.org//DTD Mapper 3.0//EN"

        "http://mybatis.org/dtd/mybatis-3-mapper.dtd">

<mapper namespace="com.ghc.dao.UserDao">

    <select id="findUserById" parameterType="java.lang.Integer" resultType="user">

        SELECT * FROM user WHERE id =#{userid} <!--简单类型 随意取名-->

    </select>

</mapper>
User.xml 这个配置文件也比较重要
<select id="findUserLike" parameterType="java.lang.String" resultType="user">

        SELECT * FROM user WHERE username LIKE '%${value}%'

    </select>

    <insert id="addUser" parameterType="user">

        INSERT INTO user(username,birthday,sex,address) values(#{userName},#{birthday},#{sex},#{address})

    </insert>

    <delete id="deleteUserById" parameterType="int">

        DELETE FROM user WHERE id=#{id}

    </delete>

    <update id="updateUserById" parameterType="user">

        UPDATE user set username=#{userName},birthday= #{birthday},sex=#{sex},address=#{address} WHERE id = #{id}

    </update>

上面是新增的 部分,下面请拷贝如有需要

<?xml version="1.0" encoding="UTF-8" ?>

<!DOCTYPE mapper

        PUBLIC "-//mybatis.org//DTD Mapper 3.0//EN"

        "http://mybatis.org/dtd/mybatis-3-mapper.dtd">

<mapper namespace="com.ghc.dao.UserDao">

    <select id="findUserById" parameterType="java.lang.Integer" resultType="user">

        SELECT * FROM user WHERE id =#{userid} <!--简单类型 随意取名-->

    </select>

    <select id="findUserLike" parameterType="java.lang.String" resultType="user">

        SELECT * FROM user WHERE username LIKE '%${value}%'

    </select>

    <insert id="addUser" parameterType="user">

        INSERT INTO user(username,birthday,sex,address) values(#{userName},#{birthday},#{sex},#{address})

    </insert>

    <delete id="deleteUserById" parameterType="int">

        DELETE FROM user WHERE id=#{id}

    </delete>

    <update id="updateUserById" parameterType="user">

        UPDATE user set username=#{userName},birthday= #{birthday},sex=#{sex},address=#{address} WHERE id = #{id}

    </update>

</mapper>
修改后的 User.xml
与持久层映射的 pojo 对象 , 就是 简单java 对象的意思,没事儿别整高大上,故作高深。。。。
package com.ghc.pojo;

import java.util.Date;

public class User {

    private int id;

    private String userName;

    private Date birthday;

    private String sex;

    private String address;

    public int getId() {

        return id;

    }

    public void setId(int id) {

        this.id = id;

    }

    public String getUserName() {

        return userName;

    }

    public void setUserName(String userName) {

        this.userName = userName;

    }

    public Date getBirthday() {

        return birthday;

    }

    public void setBirthday(Date birthday) {

        this.birthday = birthday;

    }

    public String getSex() {

        return sex;

    }

    public void setSex(String sex) {

        this.sex = sex;

    }

    public String getAddress() {

        return address;

    }

    public void setAddress(String address) {

        this.address = address;

    }

}
com.ghc.pojo.User
第一种方法采用 原始 dao 开发方法即先写 dao 接口,再写其实现类
package com.ghc.dao;

import com.ghc.pojo.User;

public interface UserDao{

    public User findUserById(int id) throws Exception;

}
com.ghc.dao.UserDao 接口
package com.ghc.dao;

import com.ghc.pojo.User;

import org.apache.ibatis.jdbc.SQL;

import org.apache.ibatis.session.SqlSessionFactory;

import java.io.IOException;

public class UserDaoImp implements UserDao {

    // 由于没有整合,这里无法使用spring容器自动注入,手动采取构造函数注入

    // SqlSessionFactoryBuilder 看做工具类,而 SqlSessionFactor 做成单例

    //private SqlSessionFactoryBuilder sqlSessionFactoryBuilder = new SqlSessionFactoryBuilder();

    private SqlSessionFactory sqlSessionFactory;

    public UserDaoImp(SqlSessionFactory sqlSessionFactory){

        this.sqlSessionFactory = sqlSessionFactory;

    }

    @Override

    public User findUserById(int id) throws IOException {

           return sqlSessionFactory.openSession().selectOne("com.ghc.dao.UserDao.findUserById",id);

    }

}
com.ghc.UserDaoImp 接口实现类
package com.ghc.dao;

import com.ghc.pojo.User;

import java.util.List;

public interface UserDao{

    User findUserById(int id) throws Exception;

    List<User> findUserLike(String userName) throws Exception;

    void addUser(User user) throws Exception;

    void deleteUserById(int id) throws Exception;

    void updateUserById(User user) throws Exception;

}
添加新功能的dao层接口
package com.ghc.dao;

import com.ghc.pojo.User;

import org.apache.ibatis.jdbc.SQL;

import org.apache.ibatis.session.SqlSession;

import org.apache.ibatis.session.SqlSessionFactory;

import java.io.IOException;

import java.util.List;

public class UserDaoImp implements UserDao {

    // 由于没有整合,这里无法使用spring容器自动注入,手动采取构造函数注入

    // SqlSessionFactoryBuilder 看做工具类,而 SqlSessionFactor 做成单例

    //private SqlSessionFactoryBuilder sqlSessionFactoryBuilder = new SqlSessionFactoryBuilder();

    private SqlSessionFactory sqlSessionFactory;

    public UserDaoImp(SqlSessionFactory sqlSessionFactory){

        this.sqlSessionFactory = sqlSessionFactory;

    }

    @Override

    public User findUserById(int id) throws IOException {

           return sqlSessionFactory.openSession().selectOne("com.ghc.dao.UserDao.findUserById",id);

    }

    @Override

    public List<User> findUserLike(String userName) throws Exception {

        return sqlSessionFactory.openSession().selectList("com.ghc.dao.UserDao.findUserLike",userName);

    }

    @Override

    public void addUser(User user) throws Exception {

        SqlSession sqlSession = sqlSessionFactory.openSession();

        sqlSession.insert("com.ghc.dao.UserDao.addUser",user);

        sqlSession.commit();

    }

    @Override

    public void deleteUserById(int id) throws Exception {

        SqlSession sqlSession = sqlSessionFactory.openSession();

        sqlSession.delete("com.ghc.dao.UserDao.deleteUserById",id );

        sqlSession.commit();

    }

    @Override

    public void updateUserById(User user) throws Exception {

        SqlSession sqlSession= sqlSessionFactory.openSession();

        sqlSession.update("com.ghc.dao.UserDao.updateUserById",user);

        sqlSession.commit();

    }

}
添加新功能后的dao层实现类
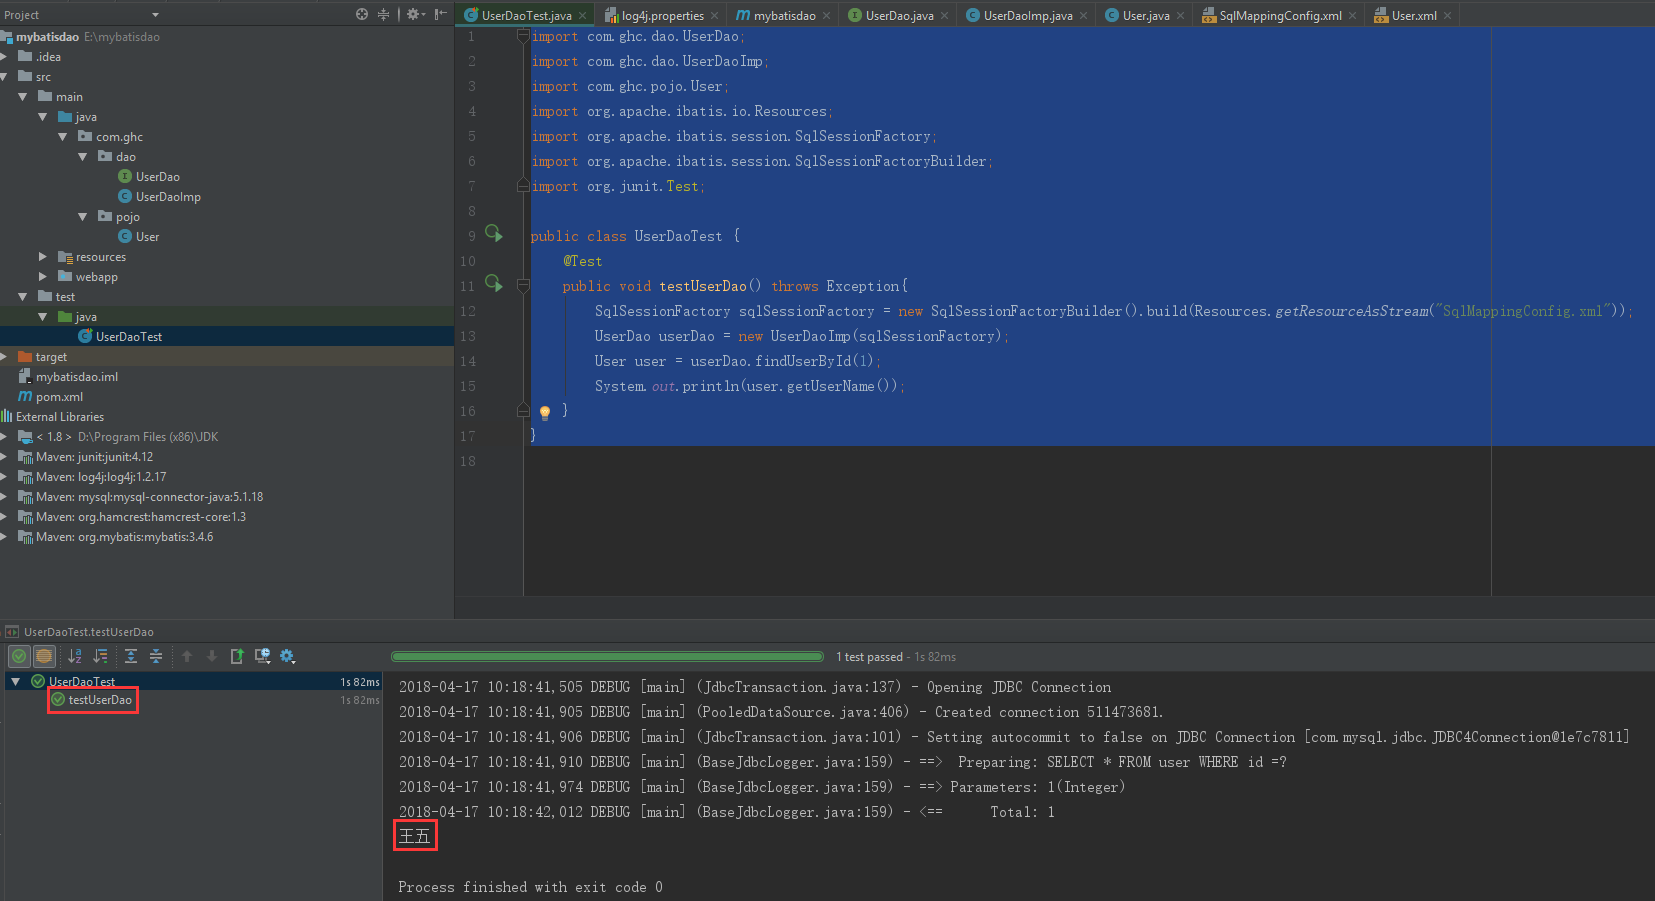
既然第一个 UserDao 开发好了,我们就可以直接拿来测试一波了
import com.ghc.dao.UserDao;

import com.ghc.dao.UserDaoImp;

import com.ghc.pojo.User;

import org.apache.ibatis.io.Resources;

import org.apache.ibatis.session.SqlSessionFactory;

import org.apache.ibatis.session.SqlSessionFactoryBuilder;

import org.junit.Test;

public class UserDaoTest {

    @Test

    public void testUserDao() throws Exception{

        SqlSessionFactory sqlSessionFactory = new SqlSessionFactoryBuilder().build(Resources.getResourceAsStream("SqlMappingConfig.xml"));

        UserDao userDao = new UserDaoImp(sqlSessionFactory);

        User user = userDao.findUserById(1);

        System.out.println(user.getUserName());

    }

}
junit测试一波咯
import com.ghc.dao.UserDao;

import com.ghc.dao.UserDaoImp;

import com.ghc.pojo.User;

import org.apache.ibatis.io.Resources;

import org.apache.ibatis.session.SqlSessionFactory;

import org.apache.ibatis.session.SqlSessionFactoryBuilder;

import org.junit.Test;

import java.util.List;

import java.util.Date;

public class UserDaoTest {

    @Test

    public void testUserDao() throws Exception{

        SqlSessionFactory sqlSessionFactory = new SqlSessionFactoryBuilder().build(Resources.getResourceAsStream("SqlMappingConfig.xml"));

        UserDao userDao = new UserDaoImp(sqlSessionFactory);

        User user = userDao.findUserById(1);

        System.out.println(user.getUserName());

        List<User> userList = userDao.findUserLike("小明");

        for(User u:userList){

            System.out.println(u.getUserName());

        }

        User user1 = new User();

        user1.setUserName("孔方兄");

        user1.setSex("某");

        user1.setBirthday(new Date());

        user1.setAddress("麓谷");

        userDao.addUser(user1);

       // userDao.deleteUserById(1);  因为主外键的问题所以暂注释掉

        // update 方法

        User user2 = new User();

        user2.setId(43);

        user2.setUserName("黑钻石王老五");

        user2.setBirthday(new Date());

        user2.setSex("南");

        user2.setAddress("北京天安门");

        userDao.updateUserById(user2);

    }

}
添加新功能后的测试文件
测试结果:
待续 第二种 只写接口方法。。。
mybatis dao 层开发简易版 非整合 spring的更多相关文章
- 基于Mybatis的Dao层开发
转自:https://www.cnblogs.com/rodge-run/p/6528398.html 基于Mybatis的Dao层开发 SqlSessionFactoryBuilder用于创建 Sq ...
- SSM框架之Mybatis(3)dao层开发
Mybatis(3)dao层开发 以实现类完成CRUD操作 1.持久层dao层接口的书写 src\main\java\dao\IUserDao.java package dao; import dom ...
- Spring Boot 2.X(二):集成 MyBatis 数据层开发
MyBatis 简介 概述 MyBatis 是一款优秀的持久层框架,支持定制化 SQL.存储过程以及高级映射.它采用面向对象编程的方式对数据库进行 CRUD 的操作,使程序中对关系数据库的操作更方便简 ...
- MyBatis dao层 方法传参
MyBatis dao层 方法传参有三种方法. 1. 以下标的方法获取参数. <update id="insertSuccessKilled"> INSER ...
- C#调用OpenCV开发简易版美图工具
前言 在C#调用OpenCV其实非常简单,因为C#中有很多OPenCV的开源类库. 本文主要介绍在WPF项目中使用OpenCVSharp3-AnyCPU开源类库处理图片,下面我们先来做开发前的准备工作 ...
- MyBatis Dao层的编写
传统的dao层编写 以前编写dao层,先新建一个包com.chy.dao,再写接口StudentDao: public interface StudentDao { public void inser ...
- (转)MyBatis框架的学习(三)——Dao层开发方法
http://blog.csdn.net/yerenyuan_pku/article/details/71700957 使用MyBatis开发Dao层,通常有两个方法,即原始Dao开发方法和Mappe ...
- MyBatis开发Dao层的两种方式(原始Dao层开发)
本文将介绍使用框架mybatis开发原始Dao层来对一个对数据库进行增删改查的案例. Mapper动态代理开发Dao层请阅读我的下一篇博客:MyBatis开发Dao层的两种方式(Mapper动态代理方 ...
- 02.MyBatis在DAO层开发使用的Mapper动态代理方式
在实际开发中,Mybatis作用于DAO层,那么Service层该如何调用Mybatis Mybatis鼓励使用Mapper动态代理的方式 Mapper接口开发方法只需要程序员编写Mapper接口(相 ...
随机推荐
- 能帮我们学习吉他的音乐软件——Guitar Pro
Guitar Pro是一款十分好用的吉他软件,也是目前广大音乐爱好者最喜欢的多音轨的音谱编辑软件.支持MIDI.MusicXML.PTB.GTP等多种格式文件的导入/导出. Guitar Pro 7. ...
- Unity利用SMSSDK实现短信验证码(附代码)
最近一直在研究如何给app更多实用性的功能,在app进行登录或者注册时,为了方便用户更加快捷的完成登录功能,所以就决定采用短信验证码的方式进行验证登录.在学习的过程中,先使用了Mob的短信服务进行短信 ...
- PAT甲题题解-1029. Median (25)-求两序列的中位数,题目更新了之后不水了
这个是原先AC的代码,但是目前最后一个样例会超内存,也就是开不了两个数组来保存两个序列了,意味着我们只能开一个数组来存,这就需要利用到两个数组都有序的性质了. #include <iostrea ...
- PAT甲题题解-1073. Scientific Notation (20)-字符串处理
题意:给出科学计数法的格式的数字A,要求输出普通数字表示法,所有有效位都被保留,包括末尾的0. 分两种情况,一种E+,一种E-.具体情况具体分析╮(╯_╰)╭ #include <iostrea ...
- Java实验报告(实验一)
课程:Java程序设计 班级: 1351 姓名:王玮怡 学号:20135116 成绩: 指导教师:娄嘉鹏 实验日期: ...
- 小组成员及其git链接
组名:天天向上 Github仓库:https://github.com/lvcaixia/test 组长:吕彩霞 201303014109(计科高职13-3) 第一题 https://github ...
- [Week17] 个人阅读作业
个人阅读作业Week17 reading buaa software 解决的问题 这是提出问题的博客链接:http://www.cnblogs.com/SivilTaram/p/4830893 ...
- 4种PHP回调函数风格
4种PHP回调函数风格 匿名函数 $server->on('Request', function ($req, $resp) use ($a, $b, $c) { echo "hell ...
- vue 请求后台数据2(copy)
https://blog.csdn.net/vergilgeekopen/article/details/68954940 需要引用vue-resource 安装请参考https://github.c ...
- spring注入 属性注入 构造器注入 set方法注入
spring注入 属性注入 构造器注入 set方法注入(外部bean注入)