react native 之 在现有的iOS工程中集成react native
在现有的iOS工程中集成react native, 或者说将react native引入到iOS 项目,是RN和iOS混合开发的必经之路
参考官网教程:https://reactnative.cn/docs/integration-with-existing-apps/
但是会有一些步骤报错,这里记录一下。首先我的项目结构是这样:
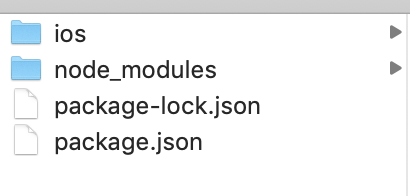
RNTEST 是最外面的文件夹的名字,也是iOS项目的名字。ios/ 下是iOS项目文件。
npm安装RN依赖都没问题,按照官网步骤来
最主要的是
cd ios
pod install
会报错。。。

错误提示是找不到XXX索引库,在Podfile文件中将这些对应的注释掉:
Podfile文件参考:https://github.com/facebook/react-native/blob/v0.60.0/template/ios/Podfile
platform :ios, '9.0'

require_relative '../node_modules/@react-native-community/cli-platform-ios/native_modules'

target 'RNTEST' do

  # Pods for HelloWorld

  pod 'React', :path => '../node_modules/react-native/'

  pod 'React-Core', :path => '../node_modules/react-native'

  #pod 'React-DevSupport', :path => '../node_modules/react-native/React'

  #pod 'React-fishhook', :path => '../node_modules/react-native/Libraries/fishhook'

  pod 'React-RCTActionSheet', :path => '../node_modules/react-native/Libraries/ActionSheetIOS'

  pod 'React-RCTAnimation', :path => '../node_modules/react-native/Libraries/NativeAnimation'

  pod 'React-RCTBlob', :path => '../node_modules/react-native/Libraries/Blob'

  pod 'React-RCTImage', :path => '../node_modules/react-native/Libraries/Image'

  pod 'React-RCTLinking', :path => '../node_modules/react-native/Libraries/LinkingIOS'

  pod 'React-RCTNetwork', :path => '../node_modules/react-native/Libraries/Network'

  pod 'React-RCTSettings', :path => '../node_modules/react-native/Libraries/Settings'

  pod 'React-RCTText', :path => '../node_modules/react-native/Libraries/Text'

  pod 'React-RCTVibration', :path => '../node_modules/react-native/Libraries/Vibration'

  #pod 'React-RCTWebSocket', :path => '../node_modules/react-native/Libraries/WebSocket'

  pod 'React-cxxreact', :path => '../node_modules/react-native/ReactCommon/cxxreact'

  pod 'React-jsi', :path => '../node_modules/react-native/ReactCommon/jsi'

  pod 'React-jsiexecutor', :path => '../node_modules/react-native/ReactCommon/jsiexecutor'

  pod 'React-jsinspector', :path => '../node_modules/react-native/ReactCommon/jsinspector'

  pod 'Yoga', :path => '../node_modules/react-native/ReactCommon/yoga'

  pod 'DoubleConversion', :podspec => '../node_modules/react-native/third-party-podspecs/DoubleConversion.podspec'

  pod 'glog', :podspec => '../node_modules/react-native/third-party-podspecs/glog.podspec'

  pod 'Folly', :podspec => '../node_modules/react-native/third-party-podspecs/Folly.podspec'

  use_native_modules!

end
结果:

之后就是在iOS工程中写相关代码, 可以运行起来,但是在Native调RN时
然后发现又报错了,改了package.json中的版本如下:

就可以了。
iOS项目代码参考的是慕课网上的教程。
要想在iOS中加载一个JSX页面,有两种方式:
一:在控制器导入头文件
//#import <React/RCTBundleURLProvider.h>

//#import <React/RCTRootView.h>

//#import <React/RCTEventEmitter.h>
然后加载JSX中注册的模块
//    NSURL *jsCodeLocation;

//

//    jsCodeLocation = [[RCTBundleURLProvider sharedSettings] jsBundleURLForBundleRoot:@"index" fallbackResource:nil];

//

//    RCTRootView *rootView =

//    [[RCTRootView alloc] initWithBundleURL: jsCodeLocation

//                                moduleName: @"App"

//                         initialProperties:nil

//                             launchOptions: nil];

//    self.view = rootView;
上面这个moduleName (任意取,但是要与OC中一致才能加载对应页面)就是在index.js中的这个:
import {AppRegistry} from 'react-native'

import App from './App';

import App2 from './App2';

AppRegistry.registerComponent('App1',()=>App);

AppRegistry.registerComponent('App2',()=>App2);

AppRegistry.registerComponent('App3',()=>App2);
二:借鉴AppDelegate中加载方式,首先导入头文件,遵循代理,实现代理方法,加载index.js中的模块
//

//  RNPageController.m

//  RNTEST

//

//  Created by LiuWei on 2019/10/18.

//  Copyright © 2019 udc. All rights reserved.

//

#import "RNPageController.h"

//#import <React/RCTBundleURLProvider.h>

//#import <React/RCTRootView.h>

//#import <React/RCTEventEmitter.h>

#import <React/RCTBridge.h>

#import <React/RCTBundleURLProvider.h>

#import <React/RCTRootView.h>

@interface RNPageController ()<RCTBridgeDelegate>

@end

@implementation RNPageController

- (void)viewDidLoad {

    [super viewDidLoad];

    // Do any additional setup after loading the view.

//    [self initRCTRootView];

    RCTBridge *bridge = [[RCTBridge alloc] initWithDelegate:self launchOptions:nil];

    RCTRootView *rootView = [[RCTRootView alloc] initWithBridge:bridge

                                                     moduleName:@"App1"

                                              initialProperties:nil];

    self.view=rootView;

}

//-(void)initRCTRootView{

//    NSURL *jsCodeLocation;

//

//    jsCodeLocation = [[RCTBundleURLProvider sharedSettings] jsBundleURLForBundleRoot:@"index" fallbackResource:nil];

//

//    RCTRootView *rootView =

//    [[RCTRootView alloc] initWithBundleURL: jsCodeLocation

//                                moduleName: @"App"

//                         initialProperties:nil

//                             launchOptions: nil];

//    self.view = rootView;

//}

- (NSURL *)sourceURLForBridge:(RCTBridge *)bridge

{

#if DEBUG

    return [[RCTBundleURLProvider sharedSettings] jsBundleURLForBundleRoot:@"index" fallbackResource:nil];

#else

    return [[NSBundle mainBundle] URLForResource:@"main" withExtension:@"jsbundle"];

#endif

}

@end
以上这种开发方式最终打包 ipa时,
先在ios/ 下创建一个 release_ios/
然后执行命令生成必要的jsbundle文件和图片资源文件
react-native bundle --entry-file index.js --platform ios --dev false --bundle-output release_ios/main.jsbundle --assets-dest release_ios/
--platform ios:代表打包导出的平台为iOS;--dev false:代表关闭JS的开发者模式;-entry-file index.js:代表js的入口文件为index.js;--bundle-output:后面跟的是打包后将JS bundle包导出到的位置;--assets-dest:后面跟的是打包后的一些资源文件导出到的位置;
好了之后将生成必要的jsbundle文件和图片资源文件拖进iOS项目
接下来就可以打包了
特别注意:如果项目用到了CodePush热更新:加载js文件的方式变成这样
...

  NSURL *jsCodeLocation;

#ifdef DEBUG     jsCodeLocation = [[RCTBundleURLProvider sharedSettings] jsBundleURLForBundleRoot:@"index" fallbackResource:nil];

#else     jsCodeLocation = [CodePush bundleURL];

#endif ...
最后Demo地址:https://github.com/nwgdegitHub/OCCallRNDemo.git
react native 之 在现有的iOS工程中集成react native的更多相关文章
- iOS原生项目中集成React Native
1.本文的前提条件是,电脑上已经安装了CocoaPods,React Native相关环境. 2.使用Xcode新建一个工程.EmbedRNMeituan [图1] 3.使用CocoaPods安装Re ...
- iOS原生项目集成React Native模块
今天周末,弄弄Native和React Native之间的交互.首先,先在iOS原生项目中集成React Native模块: 注意事项: 1.因为react native的版本问题,部分细节可能有所不 ...
- iOS 工程中文件变成红色是什么情况
iOS 工程中文件变成红色是原有的文件路径改变了,系统找不到了.
- 使用脚本删除ios工程中未使用图片
使用脚本删除ios工程中未使用图片 最近在读唐巧大神的<iOS开发进阶>,学到了一个大招:使用脚本删除ios中未使用的图片(纸书上有点小问题,参考github上的issue:使用脚本删除i ...
- 把 Reative Native 47 版本集成到已有的 Native iOS 工程中
一.搭建开发环境 http://reactnative.cn/docs/0.46/getting-started.html#content 二.创建一个模板 运行以下命令,创建一个最新版本的 reac ...
- iOS工程中的info.plist文件的完整研究
原地址:http://blog.sina.com.cn/s/blog_947c4a9f0100zf41.html 们建立一个工程后,会在Supporting files下面看到一个"工程名- ...
- iOS工程中的info.plist文件
我们建立一个工程后,会在Supporting files下面看到一个"工程名-Info.plist"的文件,这个是对工程做一些运行期配置的文件,很重要,不能删除. 如果你在网上下载 ...
- 使用 Swift 在 iOS 10 中集成 Siri —— SiriKit 教程
下载 Xcode 8,配置 iOS 10 和 Swift 3 (可选)通过命令行编译 除 非你想使用命令行编译,使用 Swift 3.0 的工具链并不需要对项目做任何改变.如果你想的话,打开 Xcod ...
- iOS开发中集成Reveal
[转]http://blog.devzeng.com/blog/ios-reveal-integrating.html 配置方式一简介有效. Reveal 是一个界面调试工具.使用Reveal,我们可 ...
随机推荐
- c++中byte数组与字符串的转化
我们不讨论与字符集有关的内容,只讨论在字节流传递过程中的问题. 我们在做一系统操作时会需要使用到数据流,比如接收网络数据,文件数据,图片数据,原始数据大多是以byte数组的形式提供,与其它语言(c#, ...
- LeetCode.859-伙伴字符串(Buddy Strings)
这是悦乐书的第330次更新,第354篇原创 01 看题和准备 今天介绍的是LeetCode算法题中Easy级别的第200题(顺位题号是859).给定两个字母A和B的小写字母,当且仅当我们可以在A中交换 ...
- 爬虫三之beautifulsoup
基本使用 from bs4 import BeautifulSoup soup = BeautifulSoup(html#,'lxml','xml','html5lib') soup.prettify ...
- go net库
1 使用Listen函数创建一个server ln, err := net.Listen("tcp", ":8080") if err != nil { // ...
- TApplication,TForm,TControl,TComponent,TWinControl研究(博客索引)good
TApplication,TForm,TControl,TComponent,TWinControl研究 http://blog.csdn.net/suiyunonghen/article/detai ...
- set(详解)
1.关于set C++ STL 之所以得到广泛的赞誉,也被很多人使用,不只是提供了像vector, string, list等方便的容器,更重要的是STL封装了许多复杂的数据结构算法和大量常用数据结构 ...
- 在django中使用循环与条件语言
{% if not Article_type_id %} <li class="active"><a href="/">全部</a ...
- 小程序之如和使用view内部组件来进行页面的排版功能
这篇文章主要介绍了关于小程序之如和使用view内部组件来进行页面的排版功能,有着一定的参考价值,现在分享给大家,有需要的朋友可以参考一下 涉及知识点: 1.垂直排列,水平排列 2.居中对齐 示例: 1 ...
- Qt读写Json
Qt操作Json 1.QJsonDocument 1.详细说明 QJsonDocument类提供了读写JSON文档的方法. QJsonDocument是一个封装了完整JSON文档的类,可以从基于UTF ...
- git的配置设置
git的基本配置 git是一个版本控制工具,既然是工具,那么就可以根据人的个人喜好来进行设置,git也提供了配置,可以根据自己的喜好来对它进行个性化的设计,以让自己舒服的玩. git有三个配置文件 / ...