
cocos2dx[3.2](11) 新事件分发机制
在2.x中处理事件需要用到委托代理(delegate),相信学过2.x的触摸事件的同学,都知道创建和移除的流程十分繁琐。
而在3.x中由于加入了C++11的特性,而对事件的分发机制通过事件分发器EventDispatcher 来进行统一的管理。
事件监听器主要有:
> 触摸事件 : EventListenerTouchOneByOne、EventListenerTouchAllAtOnce
> 鼠标响应事件 : EventListenerMouse
> 键盘响应事件 : EventListenerKeyboard
> 加速计事件 : EventListenerAcceleration
> 自定义事件 : EventListenerCustom
> 物理碰撞事件 : EventListenerPhysicsContact
> 游戏手柄事件 : EventListenerController
【事件分发器】
事件分发器EventDispatcher,用于统一管理事件监听器的所有事件的分发。
1、_eventDispatcher
_eventDispatcher是Node的属性,通过Director::getInstance()->getEventDispatcher() 获得。
_eventDispatcher的工作由三部分组成:
(1)事件分发器 :EventDispatcher。
(2)事件类型 :EventTouch, EventKeyboard 等。
(3)事件监听器 :EventListenerTouch, EventListenerKeyboard 等。
监听器实现了各种触发后的逻辑,在适当时候由事件分发器分发事件类型,然后调用相应类型的监听器。
2、添加/删除监听器
添加监听器:addEventListenerWithSceneGraphPriority ,
addEventListenerWithFixedPriority 。
删除监听器:removeEventListener ,
removeAllEventListeners 。
3、主要函数
包含监听器的添加、删除、暂停、恢复,优先级的设置,手动分发事件等。
//

class EventDispatcher : public Ref

{

/**

 *	添加监听器

 *		- addEventListenerWithSceneGraphPriority

 *		- addEventListenerWithFixedPriority

 *		- addCustomEventListener

 */

	//使用 场景图的优先级 为指定事件添加一个监听.

	//listener : 指定要监听的事件.

	//node     : 这个节点的绘制顺序是基于监听优先级.

	//优先级   : 0

	void addEventListenerWithSceneGraphPriority(EventListener* listener, Node* node);

	//使用 一定的优先级 为指定事件添加一个监听.

	//listener      : 指定要监听的事件.

	//fixedPriority : 这个监听器的固定优先级.

	//优先级        : fixedPriority。(但是不能为0,因为他是场景图的基本优先级)

	void addEventListenerWithFixedPriority(EventListener* listener, int fixedPriority);

	//用户自定义监听器

	EventListenerCustom* addCustomEventListener(const std::string &eventName, const std::function<void(EventCustom*)>& callback);

/**

 *	删除监听器

 *		- removeEventListener

 *		- removeEventListenersForType

 *		- removeEventListenersForTarget

 *		- removeCustomEventListeners

 *		- removeAllEventListeners

 */

	//删除指定监听器

	void removeEventListener(EventListener* listener);

	//删除某类型对应的所有监听器

	//EventListener::Type::

	//	单点触摸 : TOUCH_ONE_BY_ONE

	//	多点触摸 : TOUCH_ALL_AT_ONCE

	//	键盘     : KEYBOARD

	//	鼠标     : MOUSE

	//	加速计   : ACCELERATION

	//	自定义   : CUSTOM

	void removeEventListenersForType(EventListener::Type listenerType);

	//删除绑定在节点target上的所有监听器

	void removeEventListenersForTarget(Node* target, bool recursive = false);

	//删除名字为customEventName的所有自定义监听器

	void removeCustomEventListeners(const std::string& customEventName);

	//移除所有监听器

	void removeAllEventListeners();

/**

 *	暂停、恢复在节点target上的所有监听器

 *		- pauseEventListenersForTarget

 *		- resumeEventListenersForTarget

 */

	void pauseEventListenersForTarget(Node* target, bool recursive = false);

	void resumeEventListenersForTarget(Node* target, bool recursive = false);

/**

 *	其他

 *		- setPriority

 *		- setEnabled

 *		- dispatchEvent

 *		- dispatchCustomEvent

 */

	//设置某监听器的优先级

	void setPriority(EventListener* listener, int fixedPriority);

	//启用事件分发器

	void setEnabled(bool isEnabled);

	bool isEnabled() const;

	//手动派发自定义事件

	void dispatchEvent(Event* event);

	//给名字为eventName的自定义监听器, 绑定用户数据

	void dispatchCustomEvent(const std::string &eventName, void *optionalUserData = nullptr);

}

//
4、关于事件监听器的优先权
通过 addEventListenerWithSceneGraphPriority 添加的监听器,优先权为0。
通过 addEventListenerWithFixedPriority 添加的监听器,可以自定义优先权,但不能为0。
> 优先级越低,越先响应事件。
> 如果优先级相同,则上层的(z轴)先接收触摸事件。
5、使用步骤
(1)获取事件分发器 :dispatcher = Director::getInstance()->getEventDispatcher();
(2)创建监听器 :auto listener = EventListenerTouchOneByOne::create();
(3)绑定响应事件函数:listener->onTouchBegan = CC_CALLBACK_2(callback, this);
(4)将监听器添加到事件分发器dispatcher中:
dispatcher->addEventListenerWithSceneGraphPriority(Listener, this);
(5)编写回调响应函数:
bool callback(Touch* touch, Event* event) { ... }
【触摸事件】
1、单点触摸:EventListenerTouchOneByOne
单点触摸监听器相关:
//

	static EventListenerTouchOneByOne* create();

	std::function<bool(Touch*, Event*)> onTouchBegan; //只有这个返回值为 bool

	std::function<void(Touch*, Event*)> onTouchMoved;

	std::function<void(Touch*, Event*)> onTouchEnded;

	std::function<void(Touch*, Event*)> onTouchCancelled;

//
使用举例:
//

	//获取事件分发器

	auto dispatcher = Director::getInstance()->getEventDispatcher();

	//创建单点触摸监听器 EventListenerTouchOneByOne

	auto touchListener = EventListenerTouchOneByOne::create();

	//单点触摸响应事件绑定

	touchListener->onTouchBegan     = CC_CALLBACK_2(HelloWorld::onTouchBegan, this);

	touchListener->onTouchMoved     = CC_CALLBACK_2(HelloWorld::onTouchMoved, this);

	touchListener->onTouchEnded     = CC_CALLBACK_2(HelloWorld::onTouchEnded, this);

	touchListener->onTouchCancelled = CC_CALLBACK_2(HelloWorld::onTouchCancelled, this);

	//在事件分发器中,添加触摸监听器,事件响应委托给 this 处理

	dispatcher->addEventListenerWithSceneGraphPriority(touchListener, this);

	//单点触摸事件响应函数

	bool onTouchBegan(Touch *touch, Event *unused_event)     { CCLOG("began"); return true; }

	void onTouchMoved(Touch *touch, Event *unused_event)     { CCLOG("moved"); }

	void onTouchEnded(Touch *touch, Event *unused_event)     { CCLOG("ended"); }

	void onTouchCancelled(Touch *touch, Event *unused_event) { CCLOG("cancelled"); }

//
2、多点触摸:EventListenerTouchAllAtOnce
多点触摸监听器相关:
//

	static EventListenerTouchAllAtOnce* create();

	std::function<void(const std::vector<Touch*>&, Event*)> onTouchesBegan;

	std::function<void(const std::vector<Touch*>&, Event*)> onTouchesMoved;

	std::function<void(const std::vector<Touch*>&, Event*)> onTouchesEnded;

	std::function<void(const std::vector<Touch*>&, Event*)> onTouchesCancelled;

//
使用举例:
//

	//获取事件分发器

	auto dispatcher = Director::getInstance()->getEventDispatcher();

	//创建多点触摸监听器 EventListenerTouchAllAtOnce

	auto touchesListener = EventListenerTouchAllAtOnce::create();

	//多点触摸响应事件绑定

	touchesListener->onTouchesBegan     = CC_CALLBACK_2(HelloWorld::onTouchesBegan, this);

	touchesListener->onTouchesMoved     = CC_CALLBACK_2(HelloWorld::onTouchesMoved, this);

	touchesListener->onTouchesEnded     = CC_CALLBACK_2(HelloWorld::onTouchesEnded, this);

	touchesListener->onTouchesCancelled = CC_CALLBACK_2(HelloWorld::onTouchesCancelled, this);

	//在事件分发器中,添加触摸监听器,事件响应委托给 this 处理

	dispatcher->addEventListenerWithSceneGraphPriority(touchesListener, this);

	//多点触摸事件响应函数

	void onTouchesBegan(const std::vector<Touch*>& touches, Event *unused_event)    { CCLOG("began"); }

	void onTouchesMoved(const std::vector<Touch*>& touches, Event *unused_event)    { CCLOG("moved"); }

	void onTouchesEnded(const std::vector<Touch*>& touches, Event *unused_event)    { CCLOG("ended"); }

	void onTouchesCancelled(const std::vector<Touch*>&touches, Event *unused_event) { CCLOG("cancelled"); }

//
【鼠标事件】
EventListenerMouse,主要用于监听鼠标的点击、松开、移动、滚轮的事件。
鼠标事件监听器相关:
//

	static EventListenerMouse* create();

	std::function<void(Event* event)> onMouseDown; 	//按下鼠标, 单击鼠标

	std::function<void(Event* event)> onMouseUp; 	//松开鼠标, 按下的状态下松开

	std::function<void(Event* event)> onMouseMove;	//移动鼠标, 在屏幕中移动

	std::function<void(Event* event)> onMouseScroll;//滚动鼠标, 滚动鼠标的滚轮

//
使用举例:
//

	//获取事件分发器

	auto dispatcher = Director::getInstance()->getEventDispatcher();

	//创建鼠标事件监听器 EventListenerMouse

	EventListenerMouse* mouseListenter = EventListenerMouse::create();

	//鼠标事件响应函数

	mouseListenter->onMouseDown   = CC_CALLBACK_1(HelloWorld::onMouseDown,   this);

	mouseListenter->onMouseUp     = CC_CALLBACK_1(HelloWorld::onMouseUp,     this);

	mouseListenter->onMouseMove   = CC_CALLBACK_1(HelloWorld::onMouseMove,   this);

	mouseListenter->onMouseScroll = CC_CALLBACK_1(HelloWorld::onMouseScroll, this);

	//添加鼠标事件监听器,事件响应处理委托给this

	dispatcher->addEventListenerWithSceneGraphPriority(mouseListenter, this);

	//事件响应函数

	void onMouseDown(Event* event)   { CCLOG("Down"); }

	void onMouseUp(Event* event)     { CCLOG("UP"); }

	void onMouseMove(Event* event)   { CCLOG("MOVE"); }

	void onMouseScroll(Event* event) { CCLOG("Scroll"); }

//
【键盘事件】
EventListenerKeyboard,主要用于监听键盘某个键的按下、松开的事件。
键盘事件监听器相关:
//

	static EventListenerKeyboard* create();

	std::function<void(EventKeyboard::KeyCode, Event*)> onKeyPressed;  //按下某键

	std::function<void(EventKeyboard::KeyCode, Event*)> onKeyReleased; //松开某键

	//键盘按键枚举类型 EventKeyboard::KeyCode

	//KeyCode的值对应的不是键盘的键值、也不是ASCII码,只是纯粹的枚举类型

	//如:

	//	EventKeyboard::KeyCode::KEY_A

	//	EventKeyboard::KeyCode::KEY_1

	//	EventKeyboard::KeyCode::KEY_F1

	//	EventKeyboard::KeyCode::KEY_SPACE

	//	EventKeyboard::KeyCode::KEY_ALT

	//	EventKeyboard::KeyCode::KEY_SHIFT

//
使用举例:
//

	//获取事件分发器

	auto dispatcher = Director::getInstance()->getEventDispatcher();

	//创建键盘按键事件监听器

	EventListenerKeyboard* keyboardListener = EventListenerKeyboard::create();

	//绑定事件响应函数

	keyboardListener->onKeyPressed = CC_CALLBACK_2(HelloWorld::onKeyPressed, this);

	keyboardListener->onKeyReleased = CC_CALLBACK_2(HelloWorld::onKeyReleased, this);

	//添加监听器

	dispatcher->addEventListenerWithSceneGraphPriority(keyboardListener, this);

	//事件响应函数

	void onKeyPressed(EventKeyboard::KeyCode keyCode, Event* event) {

		if (EventKeyboard::KeyCode::KEY_J == keyCode) {

			CCLOG("Pressed: J");

		}

	}

	void onKeyReleased(EventKeyboard::KeyCode keyCode, Event* event) {

		if (EventKeyboard::KeyCode::KEY_SPACE == keyCode) {

			CCLOG("Released: SPACE");

		}

	}

//
【加速计事件】
EventListenerAcceleration,主要用于监听移动设备的所受重力方向感应事件。
重力感应来自移动设备的加速计,通常支持 (X, Y, Z) 三个方向的加速度感应,所以又称为三向加速计。在实际应用中,可以根据3个方向的力度大小来计算手机倾斜的角度或方向。
1、加速计信息类Acceleration
该类中每个方向的加速度,大小都为一个重力加速度大小。
//加速计信息

	class Acceleration

	{

		double x; double y; double z;

	};

//
2、开启加速计感应
在使用加速计事件监听器之前,需要先启用此硬件设备:
Device::setAccelerometerEnabled(true);
3、加速计监听器相关
//

	static EventListenerAcceleration* create(const std::function<void(Acceleration*, Event*)>& callback);

	std::function<void(Acceleration*, Event*)> onAccelerationEvent;

//
4、使用举例
//

	//标签: 显示加速计信息

	label = Label::createWithTTF("no used", "Marker Felt.ttf", 12);

	label->setPosition(visibleSize / 2);

	this->addChild(label);

	//小球: 可视化加速计

	ball = Sprite::create("ball.png");

	ball->setPosition(visibleSize / 2);

	this->addChild(ball);

	//获取事件分发器

	auto dispatcher = Director::getInstance()->getEventDispatcher();

	//需要开启移动设备的加速计

	Device::setAccelerometerEnabled(true);

	//创建加速计事件监听器

	auto accelerationListener = EventListenerAcceleration::create(CC_CALLBACK_2(HelloWorld::onAccelerationEvent, this));

	//添加加速计监听器

	dispatcher->addEventListenerWithSceneGraphPriority(accelerationListener, this);

	//事件响应函数

	void HelloWorld::onAccelerationEvent(Acceleration* acceleration, Event* event)

	{

		char s[100];

		sprintf(s, "X: %f; Y: %f; Z:%f; ", acceleration->x, acceleration->y, acceleration->z);

		label->setString(s);

		//改变小球ball的位置

		float x = ball->getPositionX() + acceleration->x * 10;

		float y = ball->getPositionY() + acceleration->y * 10;

		Vec2 pos = Vec2(x, y);

		pos.clamp(ball->getContentSize() / 2, Vec2(288, 512) - ball->getContentSize() / 2);

		ball->setPosition(pos); //设置位置

	}

//
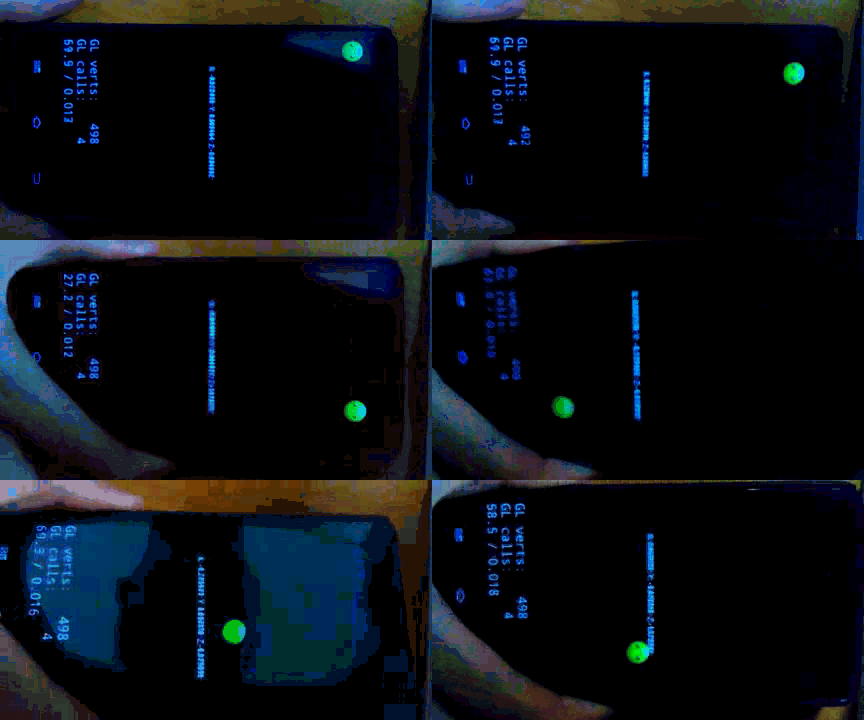
5、实际效果
在电脑上看不出效果,需要移植到手机上,才能看到加速计的效果。
【自定义事件】
以上是系统自带的事件类型,事件由系统内部自动触发,如 触摸屏幕,键盘响应等。
EventListenerCustom 自定义事件,它不是由系统自动触发,而是人为的干涉。
它的出现,使得2.x中的 观察者模式 NotificationCenter(订阅发布消息) 被无情的遗弃了。
在 3.x 中,使用EventListenerCustom来实现消息的订阅与发布。
学习它之前,最好了解一下 NotificationCenter 这个类的用法。
NotificationCenter 的用法参见:http://shahdza.blog.51cto.com/2410787/1611575
1、创建自定义监听器
该监听器,就相当于是订阅消息。即与NotificationCenter的 addObserver 类似。
//

	//eventName : 监听器名字,即消息的名称

	//callback  : 监听器函数,即消息的回调函数

	static EventListenerCustom* create(const std::string& eventName, const std::function<void(EventCustom*)>& callback);

//
2、分发自定义事件
自定义的事件监听器,需要通过手动的方式,将事件分发出去。
> 通过 EventCustom(string eventName); 来设置需要发布消息的数据信息,eventName为消息名称。
其中EventCustom可以通过setUserData来绑定想要传递的消息数据。
> 通过 dispatcher->dispatchEvent(&event); 来手动将事件分发出去。即发布消息。
这与NotificationCenter的 postNotification 类似。
//

	EventCustom event("custom_event");

	event->setUserData((void*)123); // 绑定消息传递的数据,可以为任意类型void。

	dispatcher->dispatchEvent(&event); // 发布名称为"custom_event"的消息。

//
3、使用举例
//

	//获取事件分发器

	auto dispatcher = Director::getInstance()->getEventDispatcher();

	//创建自定义事件监听器

	//监听器名字  : "custom_event"

	//事件响应函数: HelloWorld::onCustomEvent

	auto customListener = EventListenerCustom::create("custom_event", CC_CALLBACK_1(HelloWorld::onCustomEvent, this));

	//添加自定义事件监听器,优先权为1

	dispatcher->addEventListenerWithFixedPriority(customListener, 1);

	//手动分发监听器的事件,通过dispatchEvent发布名称为custom_event的消息。

	EventCustom event = EventCustom("custom_event");

	event->setUserData((void*)123); // 绑定消息传递的数据,可以为任意类型void。

	dispatcher->dispatchEvent(&event);

	//消息事件回调函数

	void HelloWorld::onCustomEvent(EventCustom* event)

	{

		// 获取消息传递的数据

		int* data = (int*)event->getUserData()

		CCLOG("onCustomEvent data = %d", data);

	}

//
4、说明
> 每个自定义的事件监听器,都有一个监听器名字eventName。即为订阅的消息名称。
> 需要通过 dispatcher->dispatchEvent(&event); 来手动将事件分发出去。即为发布消息。
> 可以通过 dispatcher->dispatchCustomEvent(,); 来给自定义事件监听器绑定一个用户数据。
【物理碰撞事件】
有待研究。。。
//

	EventListenerPhysicsContact;

	EventListenerPhysicsContactWithBodies;

	EventListenerPhysicsContactWithGroup;

	EventListenerPhysicsContactWithShapes;

//
【游戏手柄】
有待研究。。。
//

	EventListenerController;

//
cocos2dx[3.2](11) 新事件分发机制的更多相关文章
- Cocos2d-X研究之v3.x 事件分发机制具体解释
事件分发机制 " src="http://www.cgzhw.com/wp-content/uploads/2014/07/inherent3.png" style=&q ...
- cocos2d-x游戏引擎核心(3.x)----事件分发机制之事件从(android,ios,desktop)系统传到cocos2dx的过程浅析
(一) Android平台下: cocos2dx 版本3.2,先导入一个android工程,然后看下AndroidManifest.xml <application android:label= ...
- cocos基础教程(11)事件分发机制
cocos3.0的事件分发机制: 创建一个事件监听器-用来实现各种触发后的逻辑. 事件监听器添加到事件分发器_eventDispatcher,所有事件监听器有这个分发器统一管理. 事件监听器有以下几种 ...
- Cocos2d-x 3.2 学习笔记(九)EventDispatcher事件分发机制
EventDispatcher事件分发机制先创建事件,注册到事件管理中心_eventDispatcher,通过发布事件得到响应进行回调,完成事件流. 有五种不同的事件机制:EventListenerT ...
- Android查缺补漏(View篇)--事件分发机制
事件分发机制是Android中非常重要的一个知识点,同时也是难点,相信到目前为止很多Android开发者对事件分发机制并没有一个非常系统的认识,当然也包括博主个人在内.可能在平时的开发工作中我们并没有 ...
- 【朝花夕拾】Android自定义View篇之(六)Android事件分发机制(中)从源码分析事件分发逻辑及经常遇到的一些“诡异”现象
前言 转载请注明,转自[https://www.cnblogs.com/andy-songwei/p/11039252.html]谢谢! 在上一篇文章[[朝花夕拾]Android自定义View篇之(五 ...
- Android查缺补漏(View篇)--事件分发机制源码分析
在上一篇博文中分析了事件分发的流程及规则,本篇会从源码的角度更进一步理解事件分发机制的原理,如果对事件分发规则还不太清楚的童鞋,建议先看一下上一篇博文 <Android查缺补漏(View篇)-- ...
- ViewGroup事件分发机制解析
最近在看View的事件分发机制,感觉比复杂的地方就是ViewGrop的dispatchTouchEvent函数,便对照着源码研究了一下.故名思意这个函数起到的作用就是分发事件,在具体分析之前还要说明几 ...
- 浅谈Android View事件分发机制
引言 前面的文章介绍了View的基础知识和View的滑动,今天我们来介绍View的另一个核心知识,View的事件分发机制. 点击事件的传递规则 所谓的点击事件的分发机制,其实就是对MotionEven ...
随机推荐
- 【BZOJ4031】【Luogu P4111】[HEOI2015]小Z的房间
裸的矩阵树定理.求行列式的时候答案要在中间统计,因为交换两个行会使答案取反. #include <bits/stdc++.h> using namespace std; const int ...
- Phaserjs3 对象池随机产生炸弹并销毁 -- Html网页游戏开发
scene.js /// <reference path="../../libs/phaser/phaser.min.js"/> 'use strict'; var B ...
- PHP数字处理
援引自博文 https://blog.csdn.net/hongxiaoshuang/article/details/54598757 ceil -- 进一法取整 float ceil ( float ...
- hiho #1144 : 01串(模拟)
#1144 : 01串 时间限制:7000ms 单点时限:1000ms 内存限制:256MB 描述 给定两个整数n和m,求是否存在恰好包含n个0和m个1的01串S,使得S中不存在子串"001 ...
- d3 词云使用
D3-Cloud是一个开源的词云实现,基于D3.js,使用HTML5 Canvas绘制输出,因为采用异步的方式处理,所以表现性能良好. 项目主页:https://www.jasondavies.com ...
- redis string类型设置过期时间后 再进行set操作,会清除过期时间
版权声明:本文为博主原创文章,遵循 CC 4.0 BY-SA 版权协议,转载请附上原文出处链接和本声明.本文链接:https://blog.csdn.net/qq_41756437/article/d ...
- DOM 修改与DOM元素
㈠HTML DOM - 修改 修改 HTML = 改变元素.属性.样式和事件. ①创建 HTML 内容 改变元素内容的最简单的方法是使用 innerHTML 属性. 下面的例子改变一个 <p ...
- FJOI2017前做题记录
FJOI2017前做题记录 2017-04-15 [ZJOI2017] 树状数组 问题转化后,变成区间随机将一个数异或一,询问两个位置的值相等的概率.(注意特判询问有一个区间的左端点为1的情况,因为题 ...
- LU分解法求逆矩阵 C语言实现
最近在网上找了下,没有找到我想要的C语言版本,找到的也是错误的.故自己写了一个,并进行了相关测试,贴出来分享. 具体的LU分解算法就不细说了,随便找本书就知道了,关键是分解的处理流程,细节特别容易出错 ...
- 用过消息队列?Kafka?能否手写一个消息队列?懵
是否有同样的经历?面试官问你做过啥项目,我一顿胡侃,项目利用到了消息队列,kafka,rocketMQ等等. 好的,那请开始你的表演,面试官递过一支笔:给我手写一个消息队列!!WHAT? 为了大家遇到 ...