实验四 《Android程序设计》
实验四 《Android程序设计实验报告》-20175131王泽龙
实验四 Android程序设计-1
①实验要求:
Android Stuidio的安装测试:参考《Java和Android开发学习指南(第二版)(EPUBIT,Java for Android 2nd)》第二十四章:
- 参考http://www.cnblogs.com/rocedu/p/6371315.html#SECANDROID,安装 Android Stuidio
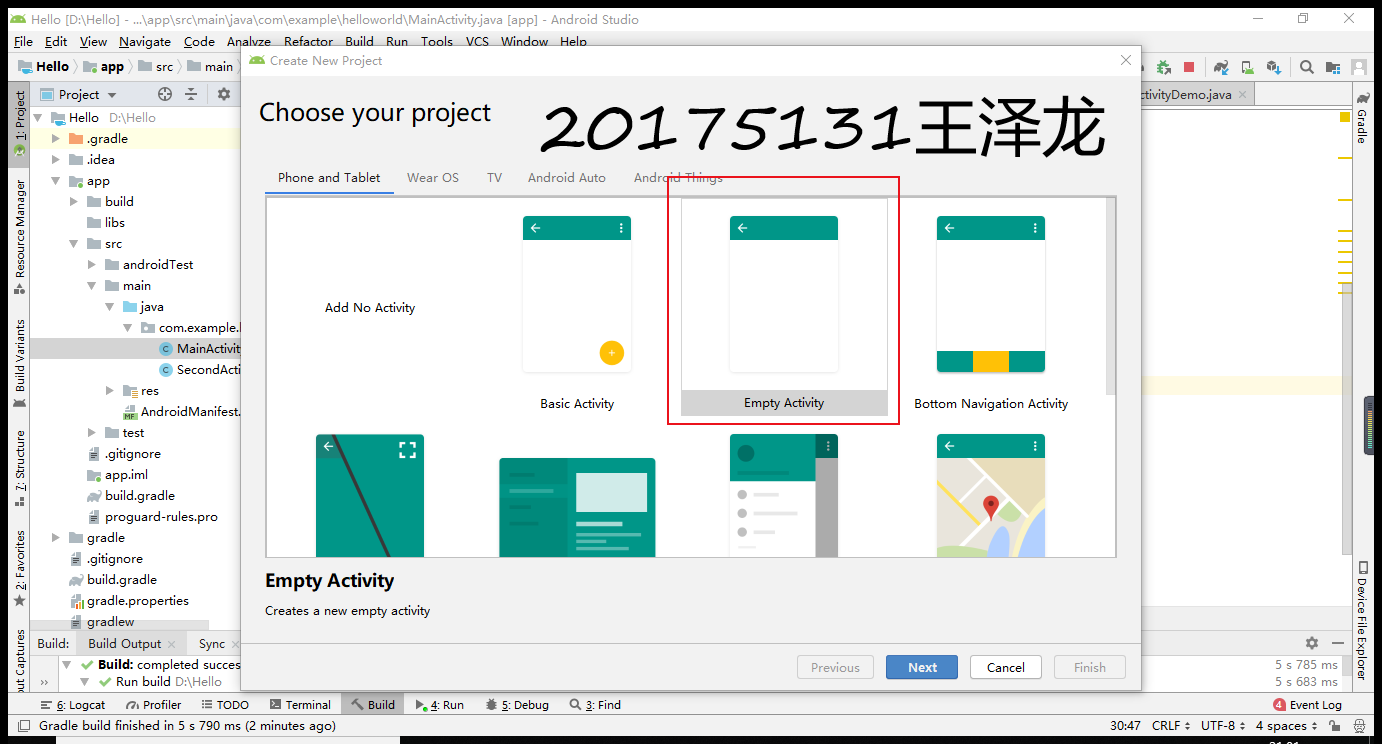
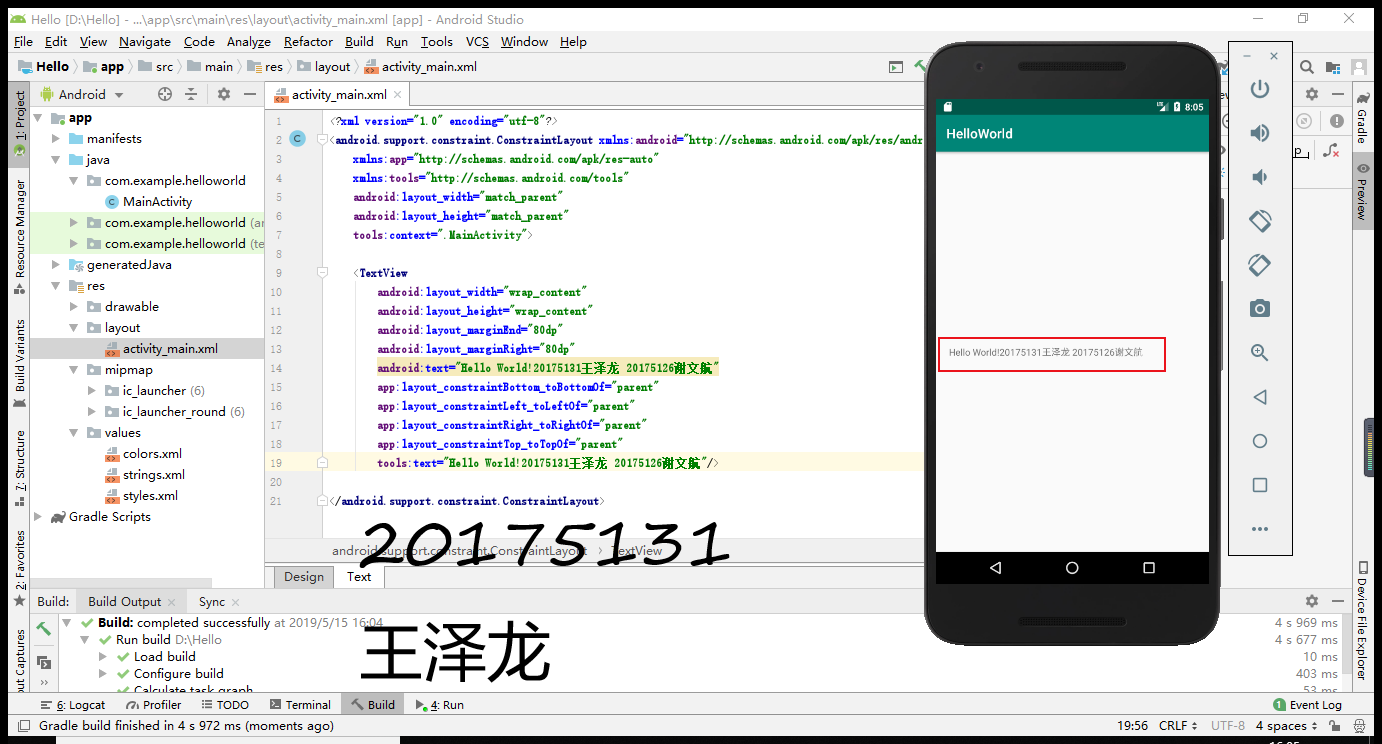
- 完成Hello World, 要求修改res目录中的内容,Hello World后要显示自己的学号,自己学号前后一名同学的学号,提交代码运行截图和码云Git链接,截图没有学号要扣分
- 学习Android Stuidio调试应用程序
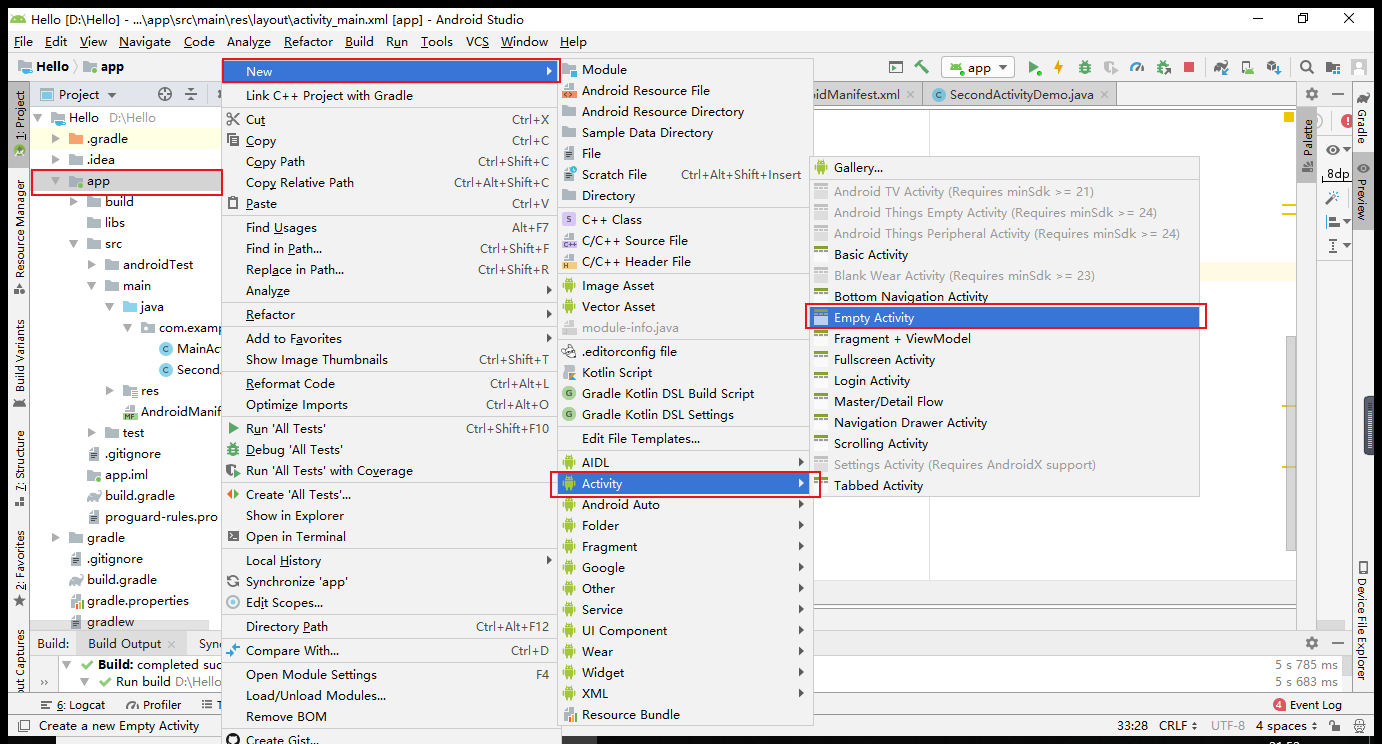
②实验过程:
-首先是安装Android Studio(这个下载安装倒不是很难,按照老师给的步骤一步一步安装就好,就是配置设备的过程对我来说有点困难,配了两天才把最基础的做好,让我对Android实验有了意思恐惧)
-多余的赘述我就不一一说了,主要说一下我在第一个实验中遇到的困难:
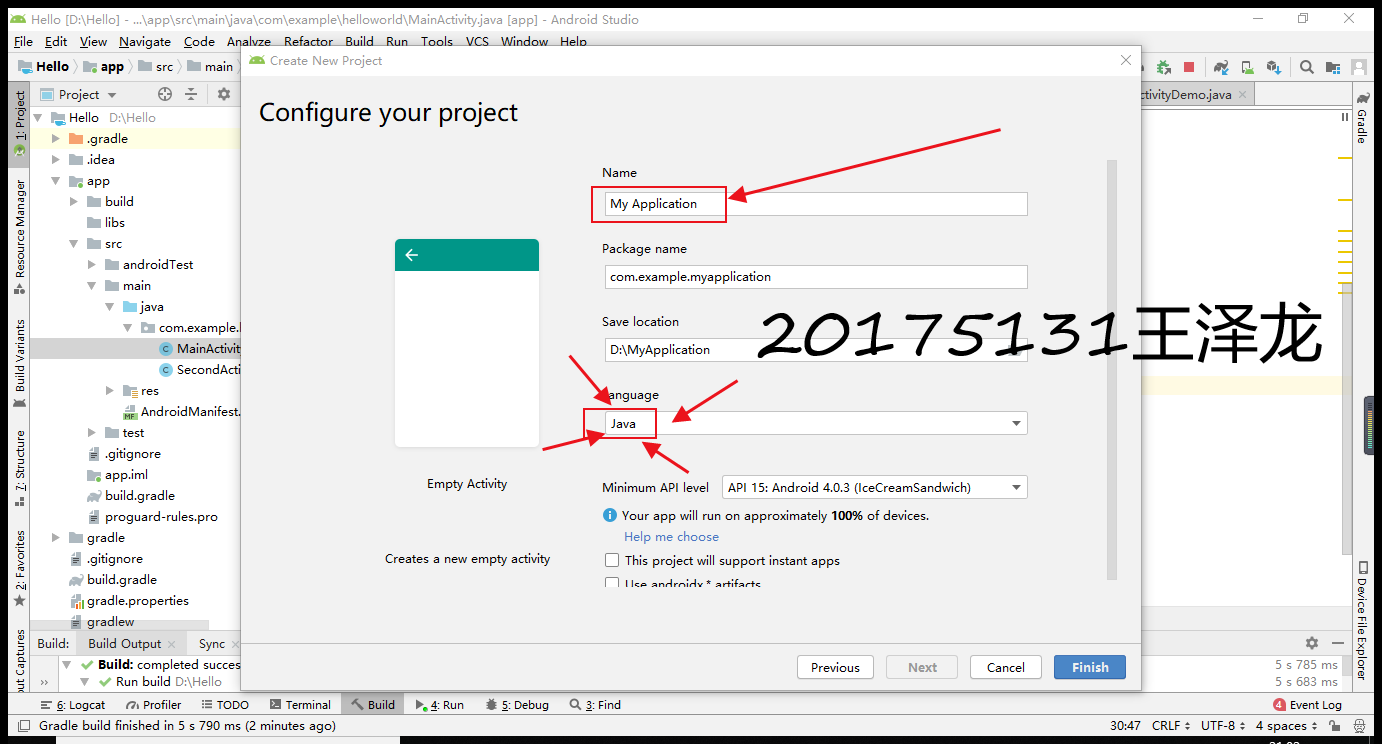
先是在新建项目的时候没有设置好语言(应该是java,我粗心大意设置成了Kotlin),导致后面怎么修改都解决不了问题,后来我把项目重新创建了一次就可以正常运行了
下面这个是重点(和我一样粗心大意的同学可以好好看看)
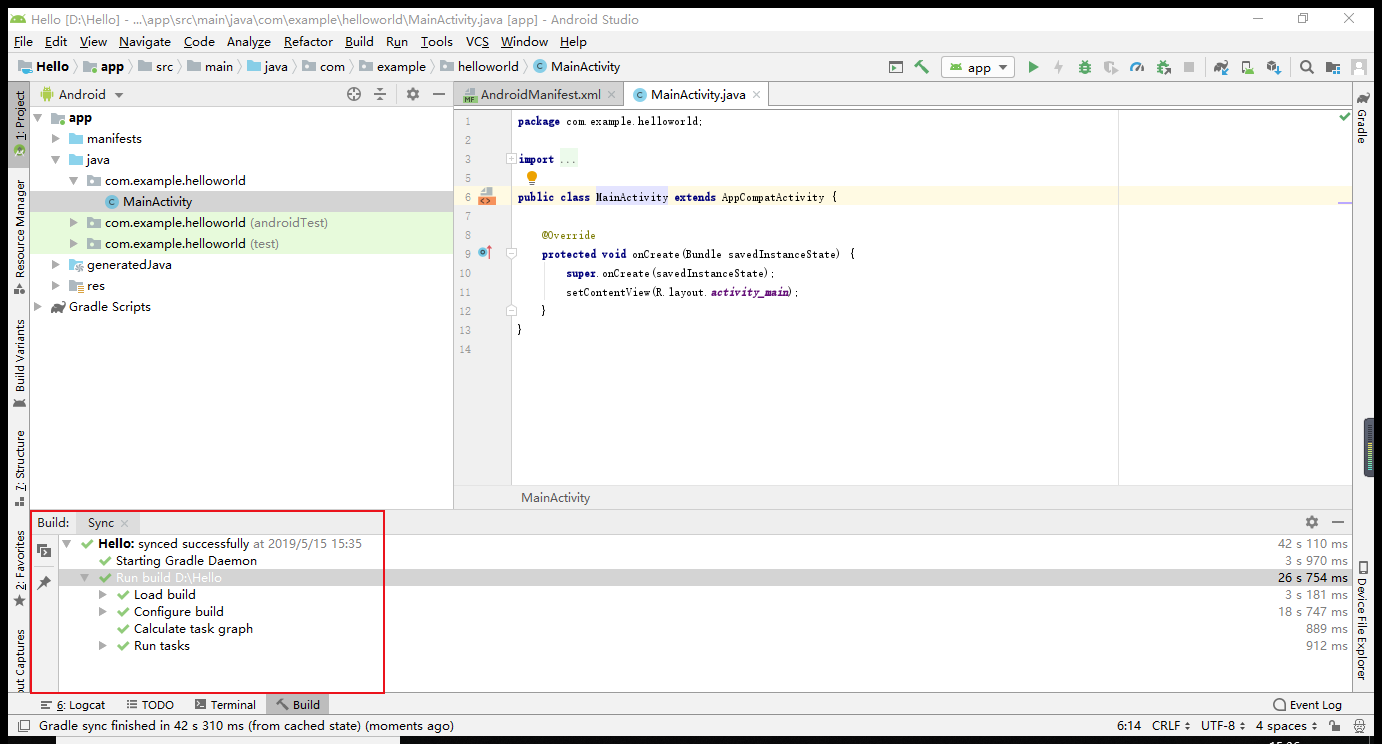
设置好了这两个步骤就可以运行了,HelloWorld在里面是自带的,可以直接运行,我们只需要修改代码即可。下面给出配置好的截图:
修改代码为:
<android.support.constraint.ConstraintLayout xmlns:android="http://schemas.android.com/apk/res/android"
xmlns:app="http://schemas.android.com/apk/res-auto"
xmlns:tools="http://schemas.android.com/tools"
android:layout_width="match_parent"
android:layout_height="match_parent"
tools:context=".MainActivity">
</android.support.constraint.ConstraintLayout>
运行截图:
实验四 Android程序设计-2
①实验要求:
Activity测试: 参考《Java和Android开发学习指南(第二版)(EPUBIT,Java for Android 2nd)》第二十五章:
- 构建项目,运行教材相关代码
- 创建 ThirdActivity, 在ThirdActivity中显示自己的学号,修改代码让MainActivity启动ThirdActivity
- 提交代码运行截图和码云Git链接,截图要有学号水印,否则会扣分
②实验过程:
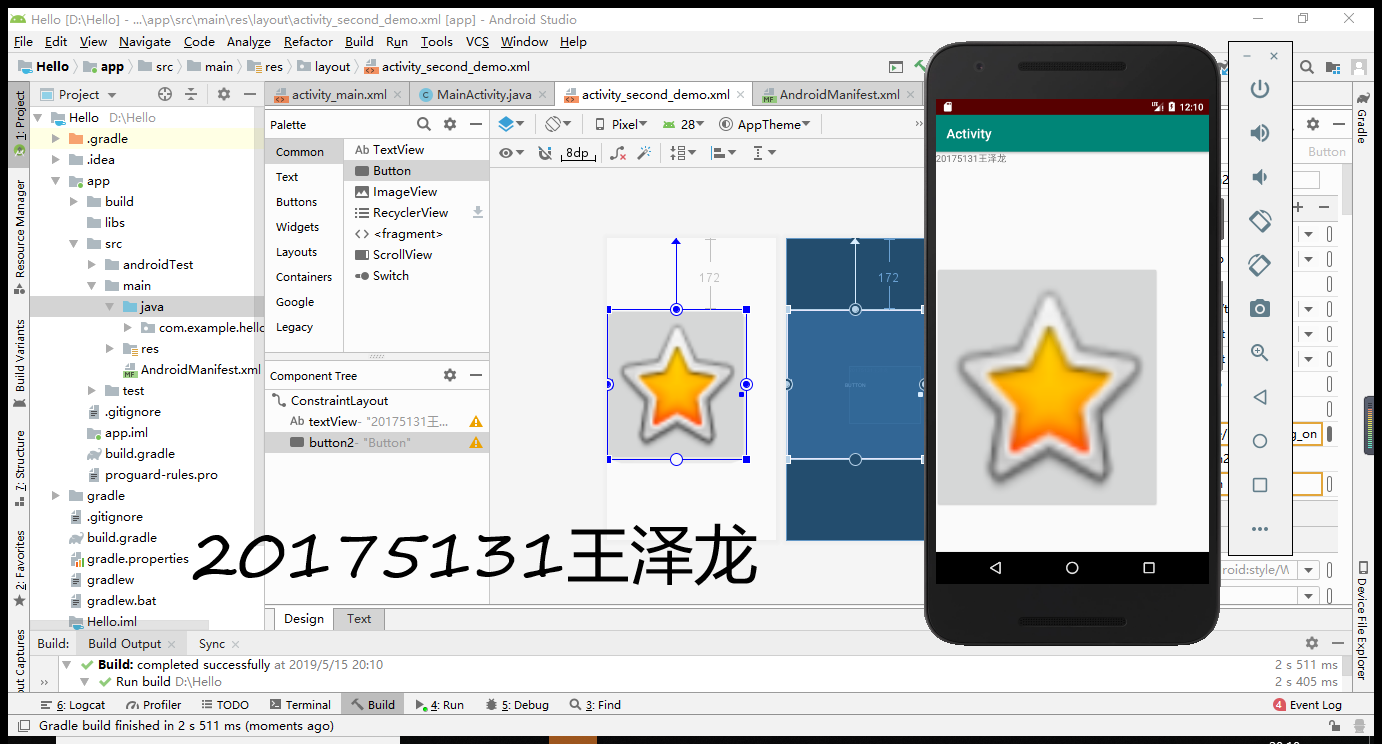
-首先要在HelloWorld里面再创建一个Activity
命名为SecondActivityDemo
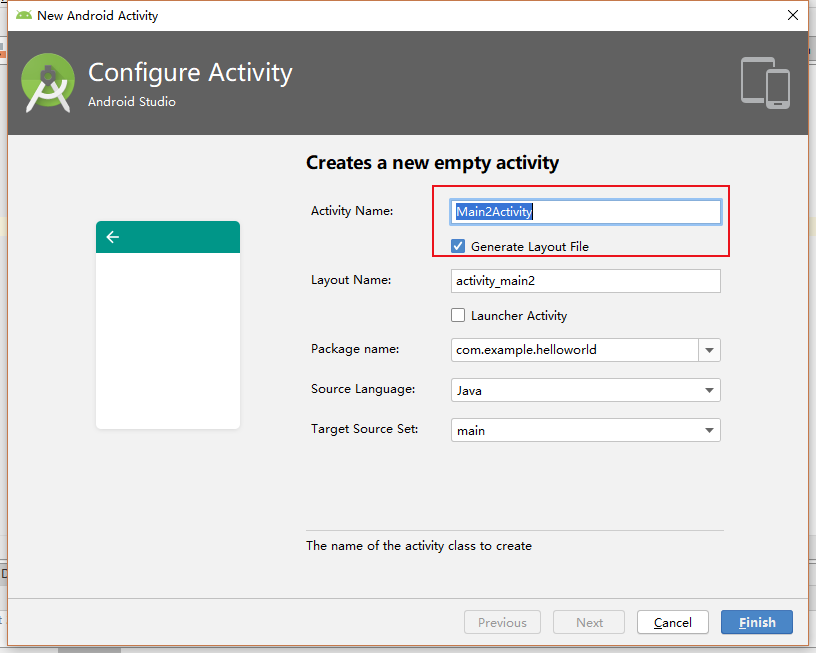
创建好了之后会自动生成两个文件,一个java文件,一个xml文件
代码分别为:
java:
package com.example.helloworld;
import android.support.v7.app.AppCompatActivity;
import android.os.Bundle;
public class SecondActivityDemo extends AppCompatActivity {
@Override

protected void onCreate(Bundle savedInstanceState) {

    super.onCreate(savedInstanceState);

    setContentView(R.layout.activity_second_demo);

}
}
xml:
<android.support.constraint.ConstraintLayout xmlns:android="http://schemas.android.com/apk/res/android"
xmlns:app="http://schemas.android.com/apk/res-auto"
xmlns:tools="http://schemas.android.com/tools"
android:layout_width="match_parent"
android:layout_height="match_parent"
android:orientation="vertical">
<TextView

    android:id="@+id/textView"

    android:layout_width="172dp"

    android:layout_height="139dp"

    android:text="20175131王泽龙"

    tools:layout_editor_absoluteX="153dp"

    tools:layout_editor_absoluteY="311dp"

    tools:ignore="MissingConstraints" />
</android.support.constraint.ConstraintLayout>
-然后在activity_main.xml里建一个新的按钮
添加后的activity_main.xml为:
<android.support.constraint.ConstraintLayout xmlns:android="http://schemas.android.com/apk/res/android"
xmlns:app="http://schemas.android.com/apk/res-auto"
xmlns:tools="http://schemas.android.com/tools"
android:layout_width="match_parent"
android:layout_height="match_parent"
tools:context=".MainActivity">
</android.support.constraint.ConstraintLayout>
-接着再在AndroidMainfest.xml注册:

运行截图:

实验四 Android程序设计-3
①实验要求:
UI测试: 参考《Java和Android开发学习指南(第二版)(EPUBIT,Java for Android 2nd)》第二十六章:
- 构建项目,运行教材相关代码
- 修改代码让Toast消息中显示自己的学号信息
- 提交代码运行截图和码云Git链接,截图要有学号水印,否则会扣分
②实验过程:
-关于Toast的弹窗设计我们只要在MainActivity.java编辑添加方法就行,引用方法并调用。
代码如下:
package com.example.helloworld;
import android.support.v7.app.AppCompatActivity;
import android.os.Bundle;
import android.app.Activity;
import android.graphics.Color;
import android.os.Bundle;
import android.view.Menu;
import android.view.View;
import android.widget.AnalogClock;
import android.app.Activity;
import android.graphics.Color;
import android.os.Bundle;
import android.view.Menu;
import android.view.View;
import android.widget.AnalogClock;
public class MainActivity extends Activity {
int counter = 0;
int[] colors = { Color.BLACK, Color.BLUE, Color.CYAN,
Color.DKGRAY, Color.GRAY, Color.GREEN, Color.LTGRAY,
Color.MAGENTA, Color.RED, Color.WHITE, Color.YELLOW };
@Override
protected void onCreate(Bundle savedInstanceState) {
super.onCreate(savedInstanceState);
setContentView(R.layout.activity_main);
}
@Override
public boolean onCreateOptionsMenu(Menu menu) {
// Inflate the menu; this adds items to the action bar if it
// is present.
getMenuInflater().inflate(R.menu.menu_main, menu);
return true;
}
public void changeColor(View view) {
if (counter == colors.length) {
counter = 0;
}
view.setBackgroundColor(colors[counter++]);
}
}
运行截图:

实验四 Android程序设计-4
①实验要求:
布局测试: 参考《Java和Android开发学习指南(第二版)(EPUBIT,Java for Android 2nd)》第二十七章:
- 构建项目,运行教材相关代码
- 修改布局让P290页的界面与教材不同
- 提交代码运行截图和码云Git链接,截图要有学号水印,否则会扣分
②实验过程:
-只要仔细研究过了Android Studio,你就会发现关于界面设计不需要代码操作,直接在design里设置就行

然后添加一个button项
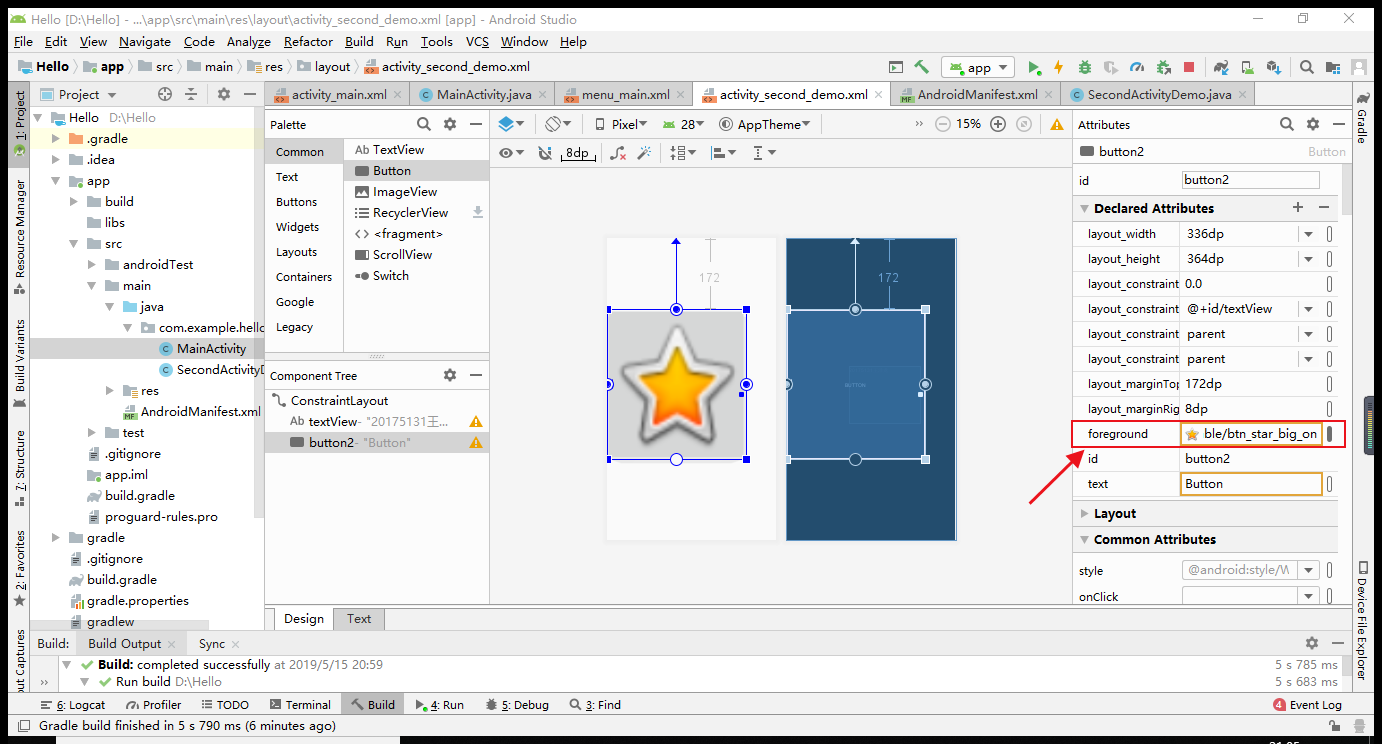
找到foreground点旁边的图片
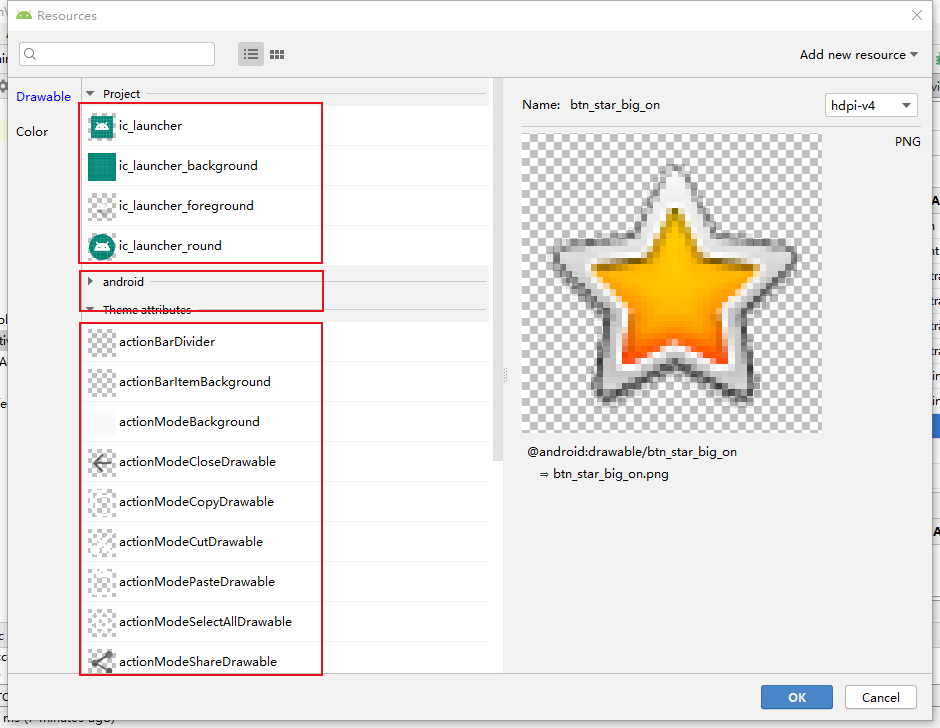
选择,拖拉到合适大小即可。
-运行截图:
实验四 Android程序设计-5
①实验要求:
事件处理测试: 参考《Java和Android开发学习指南(第二版)(EPUBIT,Java for Android 2nd)》第二十八章:
- 构建项目,运行教材相关代码
- 提交代码运行截图和码云Git链接,截图要有学号水印,否则会扣分
②实验过程:
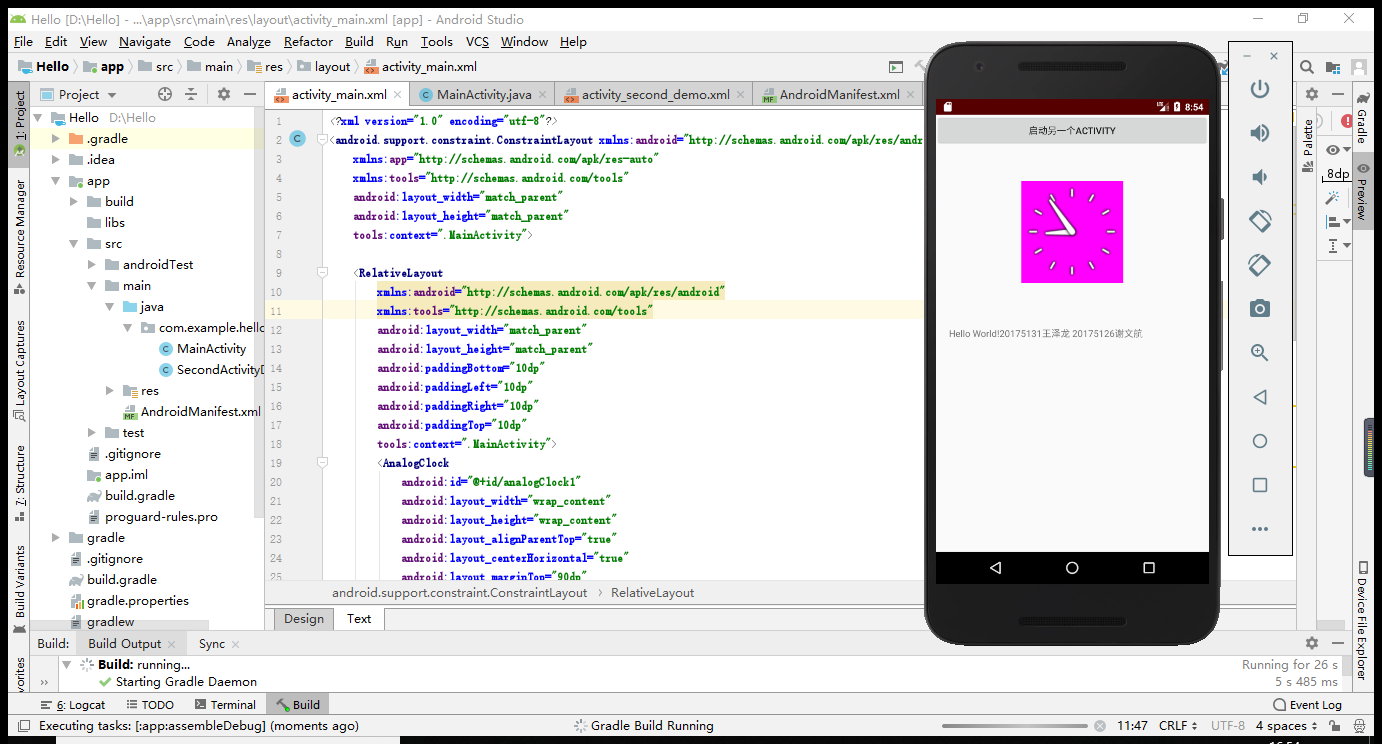
-在点击屏幕后,时钟背景颜色发生改变
-在MainActivity.java编辑添加方法就行,引用方法并调用。
代码如下:
MainActivity.java:
package com.example.helloworld;
import android.support.v7.app.AppCompatActivity;
import android.os.Bundle;
import android.app.Activity;
import android.graphics.Color;
import android.os.Bundle;
import android.view.Menu;
import android.view.View;
import android.widget.AnalogClock;
import android.app.Activity;
import android.graphics.Color;
import android.os.Bundle;
import android.view.Menu;
import android.view.View;
import android.widget.AnalogClock;
public class MainActivity extends Activity {
int counter = 0;
int[] colors = { Color.BLACK, Color.BLUE, Color.CYAN,
Color.DKGRAY, Color.GRAY, Color.GREEN, Color.LTGRAY,
Color.MAGENTA, Color.RED, Color.WHITE, Color.YELLOW };
@Override
protected void onCreate(Bundle savedInstanceState) {
super.onCreate(savedInstanceState);
setContentView(R.layout.activity_main);
}
@Override
public boolean onCreateOptionsMenu(Menu menu) {
// Inflate the menu; this adds items to the action bar if it
// is present.
getMenuInflater().inflate(R.menu.menu_main, menu);
return true;
}
public void changeColor(View view) {
if (counter == colors.length) {
counter = 0;
}
view.setBackgroundColor(colors[counter++]);
}
}
activity_main.xml:
<android.support.constraint.ConstraintLayout xmlns:android="http://schemas.android.com/apk/res/android"
xmlns:app="http://schemas.android.com/apk/res-auto"
xmlns:tools="http://schemas.android.com/tools"
android:layout_width="match_parent"
android:layout_height="match_parent"
tools:context=".MainActivity">
<RelativeLayout

    xmlns:android="http://schemas.android.com/apk/res/android"

    xmlns:tools="http://schemas.android.com/tools"

    android:layout_width="match_parent"

    android:layout_height="match_parent"

    android:paddingBottom="10dp"

    android:paddingLeft="10dp"

    android:paddingRight="10dp"

    android:paddingTop="10dp"

    tools:context=".MainActivity">

    <AnalogClock

        android:id="@+id/analogClock1"

        android:layout_width="wrap_content"

        android:layout_height="wrap_content"

        android:layout_alignParentTop="true"

        android:layout_centerHorizontal="true"

        android:layout_marginTop="90dp"

        android:onClick="changeColor"

        />

</RelativeLayout>

<Button

    android:id="@+id/button1"

    android:layout_width="fill_parent"

    android:layout_height="wrap_content"

    android:text="启动另一个activity"

    tools:ignore="MissingConstraints" />

<TextView

    android:layout_width="wrap_content"

    android:layout_height="wrap_content"

    android:layout_marginEnd="80dp"

    android:layout_marginRight="80dp"

    android:text="Hello World!20175131王泽龙 20175126谢文航"

    app:layout_constraintBottom_toBottomOf="parent"

    app:layout_constraintLeft_toLeftOf="parent"

    app:layout_constraintRight_toRightOf="parent"

    app:layout_constraintTop_toTopOf="parent"

    tools:text="Hello World!20175131王泽龙 20175126谢文航"/>
</android.support.constraint.ConstraintLayout>
-运行截图:
二.遇到的问题和解决方式都在1,2里面体现,对于这次实验,考察的是我们的自学能力,以及对新的软件的掌握。这次的实验和我们的现实世界又近了一步,因为我用的手机就是android系统,让我很感兴趣。我也在这次实验中收获了很多,学到了很多新的知识,在这里我也要感谢我舍友的鼓励和帮助。
三.码云链接
https://gitee.com/WZL-DM/BESTI.java.is.20175131
四.参考资料
1.《Java和Android开发学习指南(第二版)》
2.Android开发简易教程
3.https://www.cnblogs.com/wxhblogs/p/10848431.html#4255843
实验四 《Android程序设计》的更多相关文章
- 实验四 Android程序设计 实验报告
实验四 Android程序设计 实验报告 目录 代码托管地址 Android程序设计-1 Android程序设计-2 Android程序设计-3 Android程序设计-4 Android程序设计-5 ...
- 第十四周实验报告:实验四 Android程序设计
20162317袁逸灏 第十四周实验报告:实验四 Android程序设计 实验内容 Android Studio 实验要求 学会使用Android Studio 学习 活动 以及相关知识内容 学习 U ...
- 20165235实验四 Android程序设计
20165235实验四 Android程序设计 实验课程:JAVA编程设计 实验名称:Android开发 姓名:祁瑛 学号:20165235 实验时间:2018.05.16 指导老师:娄家鹏 Andr ...
- 20165220Java实验四 Android程序设计
一.实验报告封面 课程:Java程序设计 班级:1652班 姓名:葛宇豪 学号:20165220 指导教师:娄嘉鹏 实验日期:2018年5月14日 实验时间:13:45 - 15:25 实验序号:实验 ...
- 20172328《程序设计与数据结构》实验四 Android程序设计报告
20172328<程序设计与数据结构>实验四 Android程序设计报告 课程:<程序设计与数据结构> 班级: 1723 姓名: 李馨雨 学号:20172328 实验教师:王志 ...
- 20172302《程序设计与数据结构》实验四Android程序设计实验报告
课程:<程序设计与数据结构> 班级: 1723 姓名: 侯泽洋 学号:20172302 实验教师:王志强老师 实验日期:2018年5月30日 必修/选修: 必修 1.实验内容 (1)And ...
- 实验四 Android程序设计
20155224 实验四 Android程序设计 实验报告 实验报告封面: 课程:Java程序设计 班级:1652班 姓名:王高源 学号:20165225 指导教师:娄嘉鹏 实验日期:2018年5月1 ...
- 20165236 实验四 Android程序设计
20165236 实验四 Android程序设计 一.实验报告 课程:Java程序设计 班级:1652班 姓名:郭金涛 学号:20165236 指导教师:娄嘉鹏 实验 ...
- 20165205 2017-2018-2 《Java程序设计》实验四 Android程序设计
20165205 2017-2018-2 <Java程序设计>实验四 Android程序设计 实验内容 实验四 Android程序设计-1 Android Stuidio的安装测试: 参考 ...
- 20155205 《Java程序设计》实验四 Android程序设计
20155205 <Java程序设计>实验四 Android程序设计 一.实验内容及步骤 (一) Android Stuidio的安装测试 参考<Java和Android开发学习指南 ...
随机推荐
- 鸟哥私房菜学习——centos 7_安装
下面是我安装时遇到问题后搜索找到的可行办法: 准备工具: 8G左右U盘; 最新版UltraISO; CentOS7光盘镜像; CentOS7的镜像文件,可以在网易的开源镜像站或者阿里云的开源镜像站下载 ...
- Sublime Text3安装配置
Sublime Text3的所有package都可在如下网站检索 https://packagecontrol.io/browse 以下是我的插件列表 CoolFormat 一款C\C++\C#\CS ...
- Java IO(2)
关于流的概念 Java 由流来完成具体的IO操作,虽然面对的是不同的外设(网络.鼠标.键盘)IO流使用与全部的外设,在底层Java已经将具体与物理设备交互的细节都处理好了. 流的分类: 从功能上 输入 ...
- onblur和onkeyup事件
onblur:事件会在对象失去焦点时发生 提示:onblur 相反事件为onfocus事件 . onkeyup: 事件会在键盘按键被松开时发生. 提示:与onkeyup 事件相关的事件发生次序: on ...
- [SDOI2019]快速查询
[SDOI2019]快速查询 [题目链接] 链接 [思路要点] 据说是 \(\text{SDOI2019}\) 最水的题 操作次数为 \(1e7\) 范围,显然要求每次操作 \(\mathcal{O} ...
- BZOJ 1109 (LIS)
题面 传送门 分析 设dp[i]是第i个积木在自己的位置上时,前i个积木中最多能回到自己位置的数目. \(dp[i]=max(dp[j])+1 (i>j,a[i]>a[j],a[i]-a[ ...
- java 日期工具
package com.neuxa.is.workflow.utils; import java.sql.Timestamp;import java.text.DateFormat;import ja ...
- installing-sql-server-2012-error-prior-visual-studio-2010-instances-requiring 转摘
there are two way: First : Inside your CD of SQL Server 2012 you can go to this path \redist\VisualS ...
- 解决MySQL在导入大文件时候,出现MySQL Server has gone away的问题
编辑/etc/my.cnf文件,在[myslqd]节点,添加 max_allowed_packet = 64M 随后重启MySQL即可.
- art-template补充
<!DOCTYPE html> <html lang="zh-CN"> <head> <meta charset="UTF-8& ...