CentOS下搭建VNC/TEAMVIEW/SSH无密码登录
VNC
配置桌面
# 安装gnome桌面环境
yum groupinstall Desktop -y
# 安装中文语言支持包(可选)
yum groupinstall 'Chinese Support' -y
# 设置系统默认语言为中文(可选)
sed -i '/LANG/c\LANG="zh_CN.UTF-8"' /etc/sysconfig/i18n
source /etc/sysconfig/i18n
配置VNC Server
#安装vncserver包
yum install tigervnc tigervnc-server –y
#开启自启动
chkconfig vncserver on
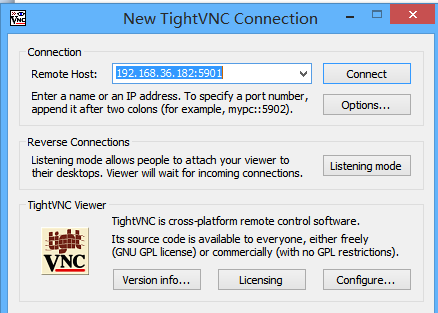
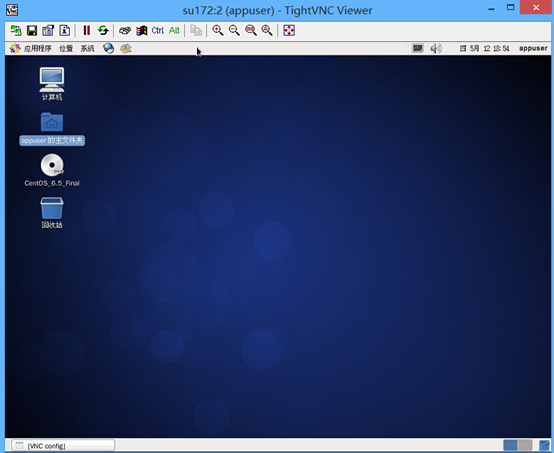
你可以通过UltraVNC Viewer、TigerVNC Viewer或者RealVNC Viewer访问远程桌面了。
#确认vncserver包已经安装
[root@su172 ~]# rpm -qa | egrep -i vnc
tigervnc-server-1.1.0-16.el6.centos.x86_64
[root@su172 ~]#
#确认rpm包配置文件路径
[root@su172 ~]# rpm -ql tigervnc-server-1.1.0-16.el6.centos.x86_64
/etc/rc.d/init.d/vncserver
/etc/sysconfig/vncservers
/usr/bin/Xvnc
/usr/bin/vncconfig
/usr/bin/vncpasswd
/usr/bin/vncserver
/usr/bin/x0vncserver
/usr/share/man/man1/Xvnc.1.gz
/usr/share/man/man1/vncconfig.1.gz
/usr/share/man/man1/vncpasswd.1.gz
/usr/share/man/man1/vncserver.1.gz
/usr/share/man/man1/x0vncserver.1.gz
#root用户启动vncserver
#输入以root用户登录vncserver时的密码
[root@su172 ~]# vncserver
You will require a password to access your desktops.
Password:
Verify:
xauth: (stdin):1: bad display name "su172:1" in "add" command
New 'su172:1 (root)' desktop is su172:1
Creating default startup script /root/.vnc/xstartup
Starting applications specified in /root/.vnc/xstartup
Log file is /root/.vnc/su172:1.log
[root@su172 ~]# cd .vnc/
[root@su172 .vnc]# ls
passwd su172:1.log su172:1.pid xstartup
#普通用户启动vncserver
[appuser@su172 ~]$vncserver
#普通用户需要手工改密码
[appuser@su172 ~]$ vncpasswd
Password:
Verify:
#root验证


#普通user验证


#在Server端进行端口验证
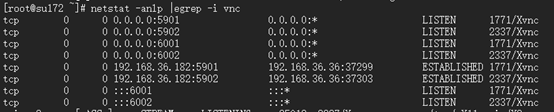
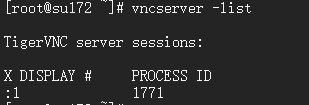
#确认vcn进程

#kill vnc进程验证


#参考
http://www.centoscn.com/image-text/config/2014/1120/4151.html
Teamview
下载
wget https://download.teamviewer.com/download/teamviewer.i686.rpm
安装依赖包
yum install teamviewer_11.0.57095.i686.rpm -y
cd /opt/teamviewer/tv_bin
teamviewer --setup console #设置启动方式为控制台启动
teamviewer --daemon restart #重启teamview服务
teamviewer --info #查看teamview信息
teamviewer --passwd [PASSWD] #设置密码
teamviewer --help #查看帮助
ssh无密码登录
CentOS系统之间有可能需要无密码验证登录,方便拷贝东东,例如oracle rac安装时就有这个东西。所以提前了解很有必要。
node1执行以下步骤:
ssh-keygen -t rsa -P ''
scp /root/.ssh/id_rsa.pub root@192.168.36.182:/root/.ssh/id_rsa.pub181
node2执行以下步骤:
ssh-keygen -t rsa -P ''
scp id_rsa.pub root@192.168.36.181:/root/.ssh/id_rsa.pub182
node1执行:
cat id_rsa.pub182 >>authorized_keys
node2执行
cat id_rsa.pub181 >>authorized_keys
验证
node1验证
ssh 192.168.36.182
node2验证
ssh 192.168.36.181
扩展
-v跟踪
[root@su171 .ssh]# ssh -v 192.168.36.182
OpenSSH_5.3p1, OpenSSL 1.0.1e-fips 11 Feb 2013
debug1: Reading configuration data /etc/ssh/ssh_config
debug1: Applying options for *
debug1: Connecting to 192.168.36.182 [192.168.36.182] port 22.
debug1: Connection established.
debug1: permanently_set_uid: 0/0
debug1: identity file /root/.ssh/identity type -1
debug1: identity file /root/.ssh/identity-cert type -1
debug1: identity file /root/.ssh/id_rsa type 1
debug1: identity file /root/.ssh/id_rsa-cert type -1
debug1: identity file /root/.ssh/id_dsa type -1
debug1: identity file /root/.ssh/id_dsa-cert type -1
debug1: identity file /root/.ssh/id_ecdsa type -1
debug1: identity file /root/.ssh/id_ecdsa-cert type -1
debug1: Remote protocol version 2.0, remote software version OpenSSH_5.3
debug1: match: OpenSSH_5.3 pat OpenSSH*
debug1: Enabling compatibility mode for protocol 2.0
debug1: Local version string SSH-2.0-OpenSSH_5.3
debug1: SSH2_MSG_KEXINIT sent
debug1: SSH2_MSG_KEXINIT received
debug1: kex: server->client aes128-ctr hmac-md5 none
debug1: kex: client->server aes128-ctr hmac-md5 none
debug1: SSH2_MSG_KEX_DH_GEX_REQUEST(1024<1024<8192) sent
debug1: expecting SSH2_MSG_KEX_DH_GEX_GROUP
debug1: SSH2_MSG_KEX_DH_GEX_INIT sent
debug1: expecting SSH2_MSG_KEX_DH_GEX_REPLY
debug1: Host '192.168.36.182' is known and matches the RSA host key.
debug1: Found key in /root/.ssh/known_hosts:1
debug1: ssh_rsa_verify: signature correct
debug1: SSH2_MSG_NEWKEYS sent
debug1: expecting SSH2_MSG_NEWKEYS
debug1: SSH2_MSG_NEWKEYS received
debug1: SSH2_MSG_SERVICE_REQUEST sent
debug1: SSH2_MSG_SERVICE_ACCEPT received
debug1: Authentications that can continue: publickey,gssapi-keyex,gssapi-with-mic,password
debug1: Next authentication method: gssapi-keyex
debug1: No valid Key exchange context
debug1: Next authentication method: gssapi-with-mic
debug1: Unspecified GSS failure. Minor code may provide more information
Cannot determine realm for numeric host address
debug1: Unspecified GSS failure. Minor code may provide more information
Cannot determine realm for numeric host address
debug1: Unspecified GSS failure. Minor code may provide more information
debug1: Unspecified GSS failure. Minor code may provide more information
Cannot determine realm for numeric host address
debug1: Next authentication method: publickey
debug1: Trying private key: /root/.ssh/identity
debug1: Offering public key: /root/.ssh/id_rsa
debug1: Server accepts key: pkalg ssh-rsa blen 277
debug1: read PEM private key done: type RSA
debug1: Authentication succeeded (publickey).
debug1: channel 0: new [client-session]
debug1: Requesting no-more-sessions@openssh.com
debug1: Entering interactive session.
debug1: Sending environment.
debug1: Sending env LANG = en_US.UTF-8
Last login: Thu May 12 23:51:22 2016 from 192.168.36.181
[root@su172 ~]#
CentOS下搭建VNC/TEAMVIEW/SSH无密码登录的更多相关文章
- CentOS 下SSH无密码登录的配置
CentOS 下SSH无密码登录的配置 最近学习Hadoop.它要求各节点之间通过SSH无密码登录,配置SSH的时候费了一番功夫,记录下来,以备忘. 配置SSH无密码登录需要3步: 1.生成公钥和私钥 ...
- CentOS下SSH无密码登录的配置
1.确认本机sshd的配置文件(需要root权限) $ gedit /etc/ssh/sshd_config 找到以下内容,并去掉注释符"#" RSAAuthentication ...
- CentOS配置ssh无密码登录
CentOS配置ssh无密码登录的注意点 前提配置:使用root登录修改配置文件:/etc/ssh/sshd_config,将其中三行的注释去掉,如下: 然后重启ssh服务:service s ...
- ssh-keygen+ssh-copy-id 在linux下实现ssh无密码登录访问(转)
转自:http://blog.csdn.net/pennyliang/article/details/8556662 ssh-keygen+ssh-copy-id 在linux下实现ssh无密码登录访 ...
- CentOS系统实现SSH无密码登录的方法
一.环境配置 1.服务端:CentOS release 5.3 IP:222.73.115.198 2.客服端:CentOS release 5.8 IP:192.168.4.244 二.配置SSH无 ...
- ssh 无密码登录
ssh 无密码登录要使用公钥与私钥.linux下可以用用ssh-keygen生成公钥/私钥对,下面我以CentOS为例. 有机器A(192.168.1.155),B(192.168.1.181).现想 ...
- Linux SSH无密码登录
Linux服务器常见的登录方式有两种:密码登录.秘钥登录.工作中我们最常使用的是用秘钥登录的方法,因为使用秘钥登录更高效.更安全. 如何实现SSH无密码登录: 原理:无密码ssh登录的主要操作为将本机 ...
- ssh 无密码登录要使用公钥与私钥
ssh 无密码登录要使用公钥与私钥.linux下可以用用ssh-keygen生成公钥/私钥对,下面我以CentOS为例. 有机器A(192.168.1.155),B(192.168.1.181).现想 ...
- CentOS下搭建LNMP+WordPress+http2.0教程
此文是本人CentOS下搭建WordPress的一些笔记,环境搭建时间::将看过的几篇文章总结下来,形成一条龙长文.不用大家再找来找去. 本文大概分为此几部分: 一.基础命令更新: 二.服务器加速(非 ...
随机推荐
- HP UNIX 查看 修改IP地址
# 查看所有IP地址h01_root[/]# lanscan Hardware Station Crd Hdw Net-Interface NM MAC HP-DLPI DLPI Path Addre ...
- 红帽6.9搭建yum源的2种方式(HTTP和本地)
方式一:HTTP搭建 1.首先删除本身所带的yum `rpm -qa | grep yum | xargs rpm -e --nodeps ` #忽略依赖关系,强行删除 若出现 错误出现 将后面的 ...
- 851. Loud and Rich —— weekly contest 87
851. Loud and Rich 题目链接:https://leetcode.com/problems/loud-and-rich/description/ 思路:有向图DFS,记录最小的quie ...
- 寻找性能更优秀的动态 Getter 和 Setter 方案
反射获取 PropertyInfo 可以对对象的属性值进行读取或者写入,但是这样性能不好.所以,我们需要更快的方案. 方案说明 就是用表达式编译一个 Action<TObj,TValue> ...
- 3.6 栈 ADT - 3.7 队列 ADT
3.6 栈 ADT 栈是限制插入和删除只能在一个位置上进行的表,叫做栈的顶部.对栈的基本操作有进栈和出栈,进栈在顶部插入元素,出栈删除最后插入的元素. 栈是一个表,因此任何实现表的方法都能实现栈.显然 ...
- 剑指offer之打印超过数组一半的数字
问题描述 数组中有一个数字出现的次数超过数组长度的一半,请找出这个数字.例如输入一个长度为9的数组{1,2,3,2,2,2,5,4,2}.由于数字2在数组中出现了5次,超过数组长度的一半,因此输出2. ...
- 一个名为不安全的类Unsafe
最近为了更加深入了解NIO的实现原理,学习NIO的源码时,遇到了一个问题.即在WindowsSelectorImpl中的 pollWrapper属性,当我点进去查看它的PollArrayWrapper ...
- leetcode113:sudoku-solver
题目描述 请编写一个程序,给数独中的剩余的空格填写上数字 空格用字符'.'表示 假设给定的数独只有唯一的解法 这盘数独的解法是: 红色表示填上的解 Write a program to solve a ...
- LeetCode 热题 HOT 100(05,正则表达式匹配)
LeetCode 热题 HOT 100(05,正则表达式匹配) 不够优秀,发量尚多,千锤百炼,方可成佛. 算法的重要性不言而喻,无论你是研究者,还是最近比较火热的IT 打工人,都理应需要一定的算法能力 ...
- java字符串大小写转换的两种方法
转载自:飞扬青春sina blogjava字符串大小写转换的两种方法 import java.io..* public class convertToPrintString { pu ...