
Nginx作为HTTP服务器--Nginx配置图片服务器
首先安装nginx安装环境
nginx是C语言开发,建议在linux上运行,本教程使用Centos6.5作为安装环境。
--> gcc
安装nginx需要先将官网下载的源码进行编译,编译依赖gcc环境,如果没有gcc环境,需要安装gcc:
yum install gcc-c++
--> PCRE
PCRE(Perl Compatible Regular Expressions)是一个Perl库,包括 perl 兼容的正则表达式库。nginx的http模块使用pcre来解析正则表达式,所以需要在linux上安装pcre库。
yum install -y pcre pcre-devel
注:pcre-devel是使用pcre开发的一个二次开发库。nginx也需要此库。
--> zlib
zlib库提供了很多种压缩和解压缩的方式,nginx使用zlib对http包的内容进行gzip,所以需要在linux上安装zlib库。
yum install -y zlib zlib-devel
--> openssl
OpenSSL 是一个强大的安全套接字层密码库,囊括主要的密码算法、常用的密钥和证书封装管理功能及SSL协议,并提供丰富的应用程序供测试或其它目的使用。
nginx不仅支持http协议,还支持https(即在ssl协议上传输http),所以需要在linux安装openssl库。
yum install -y openssl openssl-devel
然后安装nginx
到Nginx官网下载tar.gz格式的安装包,这里下载的是nginx-1.10.3版本,环境使用centos的虚拟机
1、将安装包上传,解压,命令tar -zxvf nginx-1.10.3.tar.gz
2、自定义创建一个文件夹作为Nginx安装目录,这里在home下创建nginx文件夹;
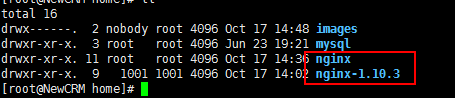
3、在解压的文件夹(nginx-1.10.3)下执行./configure --prefix=/home/nginx 命令。
意思即配置安装环境,将会把Nginx安装到/home/nginx下;
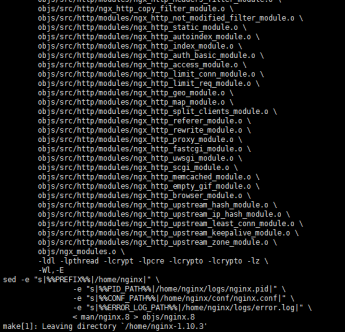
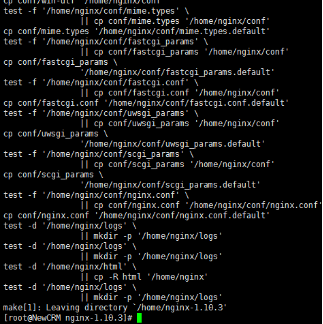
4、编译:在解压的文件夹下先后执行make 和 make install 命令
执行make
然后执行make install
5、Nginx默认使用端口是80,这里直接先把Nginx端口改为8088,
vi /home/nginx/conf/nginx.conf,修改server的端口,并配置一个图片服务器
#user  nobody;

worker_processes  1;

#error_log  logs/error.log;

#error_log  logs/error.log  notice;

#error_log  logs/error.log  info;

#pid        logs/nginx.pid;

events {

    worker_connections  1024;

}

http {

    include       mime.types;

    default_type  application/octet-stream;

    #log_format  main  '$remote_addr - $remote_user [$time_local] "$request" '

    #                  '$status $body_bytes_sent "$http_referer" '

    #                  '"$http_user_agent" "$http_x_forwarded_for"';

    #access_log  logs/access.log  main;

    sendfile        on;

    #tcp_nopush     on;

    #keepalive_timeout  0;

    keepalive_timeout  65;

    #gzip  on;

    server {

        listen       8080;#写内网端口,访问时用外网端口进行映射访问

        server_name  localhost;

        #charset koi8-r;

        #access_log  logs/host.access.log  main;

        location ~ .*\.(gif|jpg|jpeg|png)$ {

            expires 24h;

            root /home/images/;#指定图片存放路径

            access_log /home/nginx/logs/images.log;#图片 日志路径

            proxy_store on;

            proxy_store_access user:rw group:rw all:rw;

            proxy_temp_path         /home/images/;#代理临时路径

            proxy_redirect          off;

            proxy_set_header        Host 127.0.0.1;

            proxy_set_header        X-Real-IP $remote_addr;

            proxy_set_header        X-Forwarded-For $proxy_add_x_forwarded_for;

            client_max_body_size    10m;

            client_body_buffer_size 1280k;

            proxy_connect_timeout   900;

            proxy_send_timeout      900;

            proxy_read_timeout      900;

            proxy_buffer_size       40k;

            proxy_buffers           40 320k;

            proxy_busy_buffers_size 640k;

            proxy_temp_file_write_size 640k;

            if ( !-e $request_filename)

            {

                 proxy_pass  http://127.0.0.1:8080;#代理访问地址,和上面的端口一致

            }

        }

        location / {

            root   html;

            index  index.html index.htm;

        }

        #error_page  404              /404.html;

        # redirect server error pages to the static page /50x.html

        #

        error_page   500 502 503 504  /50x.html;

        location = /50x.html {

            root   html;

        }

        # proxy the PHP scripts to Apache listening on 127.0.0.1:80

        #

        #location ~ \.php$ {

        #    proxy_pass   http://127.0.0.1;

        #}

        # pass the PHP scripts to FastCGI server listening on 127.0.0.1:9000

        #

        #location ~ \.php$ {

        #    root           html;

        #    fastcgi_pass   127.0.0.1:9000;

        #    fastcgi_index  index.php;

        #    fastcgi_param  SCRIPT_FILENAME  /scripts$fastcgi_script_name;

        #    include        fastcgi_params;

        #}

        # deny access to .htaccess files, if Apache's document root

        # concurs with nginx's one

        #

        #location ~ /\.ht {

        #    deny  all;

        #}

    }

    # another virtual host using mix of IP-, name-, and port-based configuration

    #

    #server {

    #    listen       8000;

    #    listen       somename:8080;

    #    server_name  somename  alias  another.alias;

    #    location / {

    #        root   html;

    #        index  index.html index.htm;

    #    }

    #}

    # HTTPS server

    #

    #server {

    #    listen       443 ssl;

    #    server_name  localhost;

    #    ssl_certificate      cert.pem;

    #    ssl_certificate_key  cert.key;

    #    ssl_session_cache    shared:SSL:1m;

    #    ssl_session_timeout  5m;

    #    ssl_ciphers  HIGH:!aNULL:!MD5;

    #    ssl_prefer_server_ciphers  on;

    #    location / {

    #        root   html;

    #        index  index.html index.htm;

    #    }

    #}

}
server下listen的端口改为8088,并增加一个location配置,用于访问图片文件,这一串配置有#号在前面的注释掉的都可以删掉,免得看起来又长又乱。
6、启动命令: /home/nginx/sbin/nginx -c /home/nginx/conf/nginx.conf
打开防火墙对应端口供访问,8088,当然也可以直接关了防火墙。
若修改了nginx.conf配置,则需要重启才生效,命令:/home/nginx/sbin/nginx -s reload
7、访问。
输入ifconfig命令查看虚拟机ip,测试:
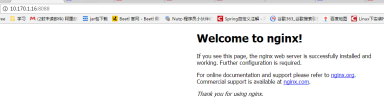
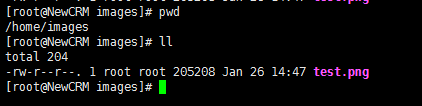
在/home/images下放张图片,测试访问:

Nginx作为HTTP服务器--Nginx配置图片服务器的更多相关文章
- nginx配置图片服务器
这几天研究了一下nginx配置图片服务器的相关内容,个人的一些收获与大家分享一下: Nginx是目前非常流行的web服务器,它起源于俄罗斯.它具有处理速度快,并发量大,占用资源极低等优点,尤其对于静态 ...
- 在windwo server2008服务器上配置ftp服务器、及配置phpstrom工具、实现项目同步。
在windwo server2008服务器上配置ftp服务器.及配置phpstrom工具.实现项目同步. 在windwo server2008服务器上配置ftp服务器 参考该篇文章:http://bl ...
- 用Nginx搭建CDN服务器方法-开启Nginx缓存与镜像,自建图片服务器
利用Nginx的proxy_cache搭建缓存服务器一:编译ngx_cache_purge1.Nginx的Proxy_cache是根据Key值md5哈希存储缓存,支持任意的Key,例如你可以根据”域名 ...
- 使用Postgres,Nginx和Gunicorn将Django配置到服务器上
先决条件 首先你得先在Digital Ocean上有一台自己的服务器,如果还没有,可参考教程如何在Digital Ocean上申请服务器. 为了方便起见,我将本教程分为两部分.第一部分(步骤1 - 6 ...
- tomcat 配置图片服务器
在后台和前端交互时,遇到了后台存储的图片,前端根据地址无法访问,使用Tomcat搭建图片服务器 1.找到tomcat下的server.xml文件 2.配置文件下加入service节点(在原有的serv ...
- nginx 配置图片服务器 (window版本)
配置nginx二级域名 ①找到配置文件 例如:%nginx_home%/conf/nginx.conf ②配置 #user nobody; worker_processes 1; #error_log ...
- (转)Nginx图片服务器
本文转至博客http://wenxin2009.iteye.com/blog/2117079 Nginx搭建图片服务器 Nginx下载地址:http://nginx.org/en/download.h ...
- centos7 nginx图片 服务器可以访问ftp用户上传的图片资源的配置
注:本文参考了csdn:JAVA_DIRECTION的<nginx和ftp搭建图片服务器>一文.在实践中其文在centos7中还是存在缺陷性的 一:前提条件:是成功的安装好了ftp服务器和 ...
- 使用宝塔面板 配置nginx 访问ftp服务器下面的图片
如果 你在服务器上 运行war项目 可以在tomcat 配置访问的: tomcat 也贴出来吧! 一.tomca配置访问,需要更改配置文件server.xml ,如果找不到,自己好好找一下 一般在 ...
随机推荐
- Linux iptables用法与NAT
1.相关概念 2.iptables相关用法 3.NAT(DNAT与SNAT) 相关概念 防火墙除了软件及硬件的分类,也可对数据封包的取得方式来分类,可分为代理服务器(Proxy)及封包过滤机制(IP ...
- 一道编程题: 在1~n之间选择若干个数,使其和为m
这是一道很明显的动态规划的题目. 递推公式为 用sum(n, m)表示所有可能的1~n之间存在的和为m的组合 那么 sum(n,m) = sum(n-1, m) | sum(n-1, m-n) 直接上 ...
- MVC详解:mvc是什么?为什么要用MVC?MVC工作原理以及MVC优缺点
一.什么是MVC Model:模型层 View:视图层 Controller:控制层 MVC (Modal View Controler)本来是存在于Desktop程序中的,M是指数据模型,V是指用户 ...
- 吴恩达机器学习笔记60-大规模机器学习(Large Scale Machine Learning)
一.随机梯度下降算法 之前了解的梯度下降是指批量梯度下降:如果我们一定需要一个大规模的训练集,我们可以尝试使用随机梯度下降法(SGD)来代替批量梯度下降法. 在随机梯度下降法中,我们定义代价函数为一个 ...
- linux-Navicat 连接数据库 报错10060 & Navicat连接报错1146
1.mysql数据库设置远程连接权限 GRANT ALL PRIVILEGES ON *.* TO 'root'@'%' IDENTIFIED BY '密码' WITH GRANT OPTION;[回 ...
- C/C++性能测试工具GNU gprof
代码剖析(Code profiling)程序员在优化软件性能时要注意应尽量优化软件中被频繁调用的部分,这样才能对程序进行有效优化.使用真实的数据,精确的分析应用程序在时间上的花费的行为就成为_代码剖析 ...
- SpringBoot进阶教程(二十三)Linux部署Quartz
在之前的一篇文章中<SpringBoot(九)定时任务Schedule>,已经详细介绍了关于schedule框架的配置和使用,有收到一些朋友关于部署的私信,所以抽时间整理一个linux部署 ...
- js简单四则运算
作业来源 本次作业要求来自于:https://edu.cnblogs.com/campus/gzcc/GZCC-16SE1/homework/2166 我的项目GitHub远程仓库地址:https:/ ...
- Angular开发技巧
由于之前有幸去参加了ngChina2018开发者大会,听了will保哥分享了Angular开发技巧,自己接触Angular也有差不多快一年的时间了,所以打算对Angular开发中的一些技巧做一个整理 ...
- (二)surging 微服务框架使用系列之surging 的准备工作consul安装
suging 的注册中心支持consul跟zookeeper.因为consul跟zookeeper的配置都差不多,所以只是consul的配置 consul下载地址:https://www.consul ...