CentOS 6.2+Nginx+Nagios,手机短信和qq邮箱提醒
http://chenhao6.blog.51cto.com/6228054/1323192
CentOS 6.2+Nginx+Nagios,手机短信和qq邮箱提醒
注:192.168.0.21 服务端
192.168.0.22 客户端
环境:两台centos6.0 64位系统,都已经搭建好了源码的lnmp平台
结尾附上所需的软件包
1.nagios安装(中文版)
|
1
2
3
4
5
6
7
8
9
10
11
12
|
tar xvftar.bz2cd nagios-cn-3.2.3useradd -m/bin/bash nagiosusermod -a./configure --prefix=/usr/local/nagios --with-command-group=nagcmdmakemake allmake installmake install-init #make install-config #make install-commandmode #chmod o+rwx /usr/local/nagios/var/rw |
2.nagios-plugins安装
|
1
2
3
4
5
6
7
8
|
wget//prdownloads.sourceforge.net/sourceforge/nagiosplug/nagios-pluginstar zxvftar.gzcd nagios-plugins-1.4.16yum install make apr*opensslkernelcloog-pplkrb5-devel |
|
1
2
3
|
./configure --prefix=/usr/local/nagios --with-mysql=/home/mysql/makemake install |
3.nrpe安装
|
1
2
3
4
5
6
7
8
9
10
11
12
|
tar xzvftar.gzcd nrpe-2.12./configuremake./configuremake allmake install-pluginmake install-daemonmake install-daemon-config\cp src/check_nrpe /usr/local/nagios/libexec//usr/local/nagios/bin/nrpe -c /usr/local/nagios/etc/nrpe.cfgecho '/usr/local/nagios/bin/nrpe >> /etc/rc.local |
|
1
2
3
4
5
|
要重启nrpe进行就先杀掉进行,然后重启kill `ps auxgrep nrpegrep -v grep |awk '{print`/usr/local/nagios/bin/nrpe -c /usr/local/nagios/etc/nrpe.cfg本机测试下:/usr/local/nagios/libexec/check_nrpe -H |
加入系统服务
|
1
2
3
4
5
6
|
加入系统服务并设为开机自动chkconfigchkconfigchown nagios.nagios /usr/local/nagios/var/rw#/usr/local/nagios/bin/nagios -v /usr/local/nagios/etc/nagios.cfg |
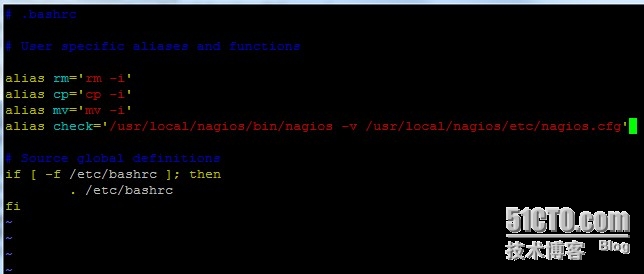
添加别名命令,方便测试配置文件
|
1
2
3
4
5
|
vi ~/.bashrc在里面用alias 来自定义一个命令来代替,这里我用checkalias check='/usr/local/nagios/bin/nagiossource ~/.bashrc此时可以用check命令来检测配置文件了 |
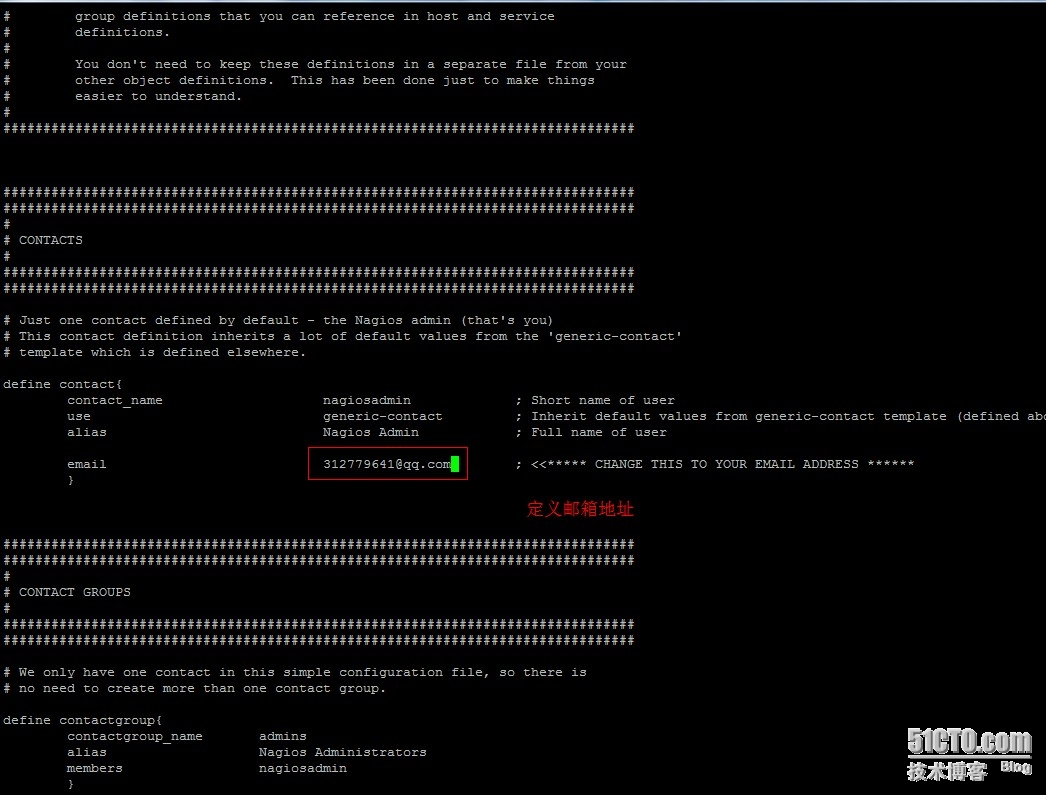
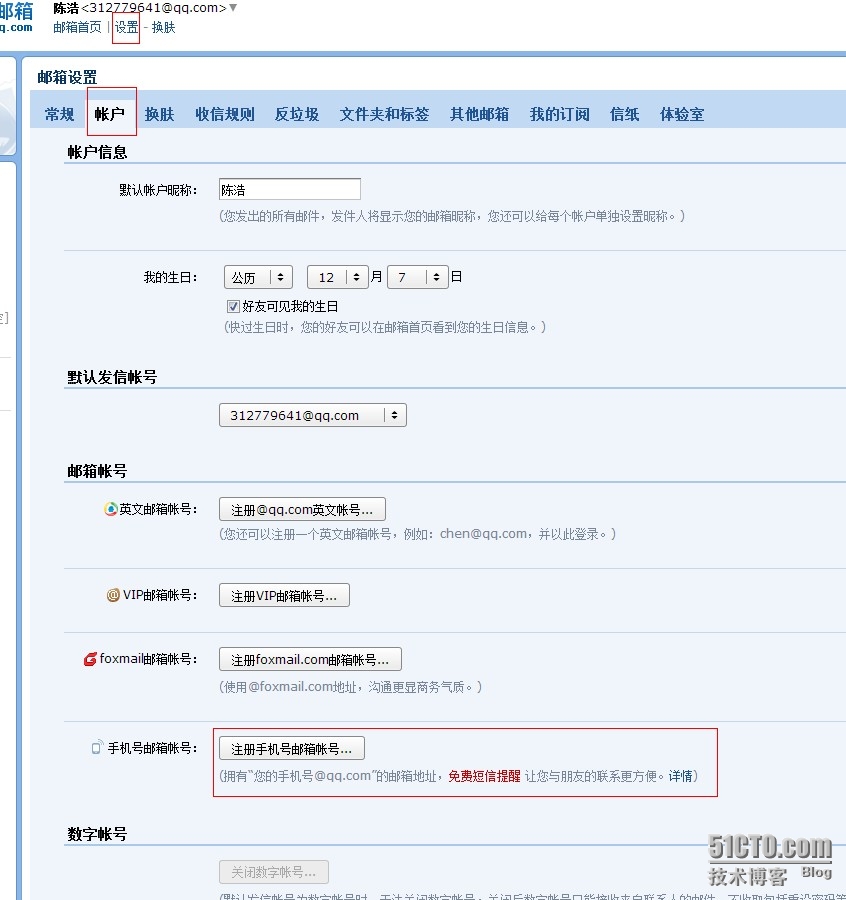
修改联系人邮箱,修改为用于报警接收的邮件地址
|
1
2
3
4
5
6
7
8
9
10
11
12
13
14
15
16
17
18
19
20
21
22
23
24
25
26
27
28
29
30
31
32
33
34
35
36
37
38
39
40
41
42
43
44
45
46
47
48
49
50
51
|
vi /usr/local/nagios/etc/objects/contacts.cfg##################################################################################### # ## # # ##################################################################################################################################################################################################################################################################################################################################################################################################################define contact_name use alias Nagios email }#################################################################################################################################################################################################################################################################################################################################define contactgroup_name alias Nagios members }定义check_nrpe命令vi /usr/local/nagios/etc/objects/commands.cfgdefine command{command_namecommand_line /usr/local/nagios/libexec/check_nrpe -H} |
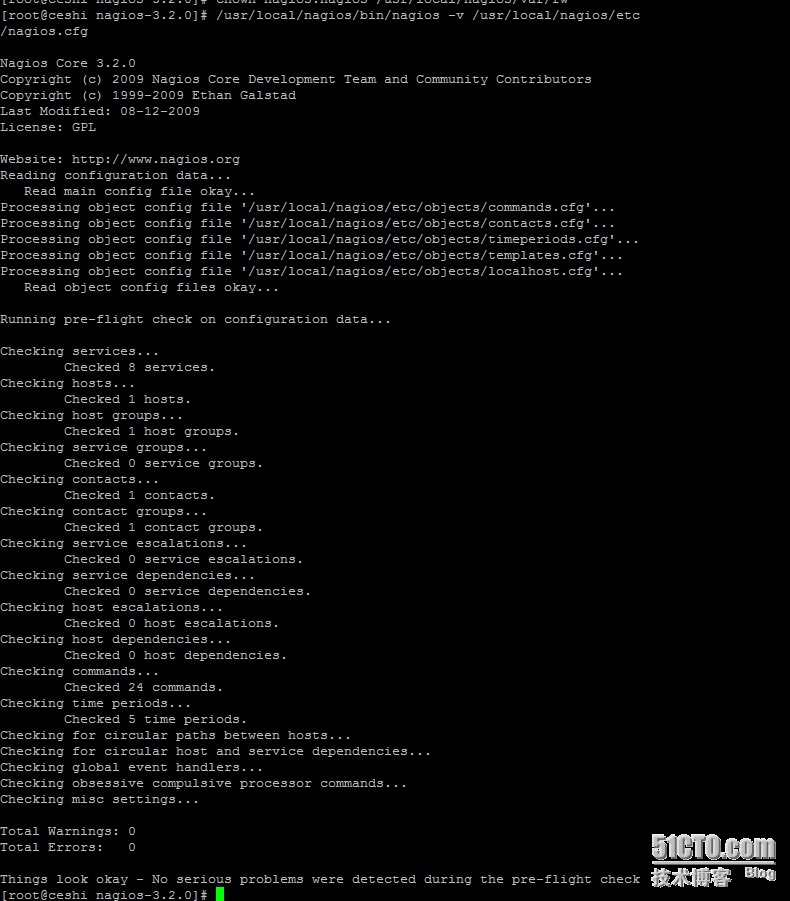
检测配置文件是否有误
check
|
1
2
3
4
5
6
7
8
9
10
11
12
13
14
15
16
17
18
19
20
21
22
23
24
25
|
nginx安装FCGI模块cdtar zxvftar.gzcd FCGI-0.70perlmakemake installcd安装tar zxvftar.gzcd IO-1.25perlmakemake installcdtar zxvftar.gzcd IO-All-0.41perlmakemake installcdunzipcp perl-fcgi.pl /usr/local/nginx/chmod 755 /usr/local/nginx/perl-fcgi.pl |
|
1
2
3
4
5
6
7
8
9
10
11
12
13
14
15
16
17
18
19
20
21
22
23
24
25
26
27
28
29
30
31
32
33
34
|
vi /usr/local/nginx/start_perl_cgi.sh#!/bin/bash#setdir=/usr/local/nginx/stop{#pkill kill $(cat $dir/logs/perl-fcgi.pid)rm $dir/logs/perl-fcgi.pid/dev/nullrm $dir/logs/perl-fcgi.sock/dev/nullecho "stop}start{rm $dir/now_start_perl_fcgi.sh/dev/nullchown nobody.rootdir/logsecho "$dir/perl-fcgi.pl >>$dir/now_start_perl_fcgi.shchown nobody.nobodydir/now_start_perl_fcgi.shchmod u+xdir/now_start_perl_fcgi.shsudo -udir/now_start_perl_fcgi.shecho "start}case $1 instop)stop;;start)start;;restart)stopstart;;esac |
把start_perl_cgi.sh文件中的nobody全部用nagios替换,nginx
目录上的用户
|
1
2
3
|
sed -i 's@nobody@nagios@g' /usr/local/nginx/start_perl_cgi.shchmod 755 /usr/local/nginx/start_perl_cgi.sh/usr/local/nginx/start_perl_cgi.sh |
|
1
2
3
4
5
|
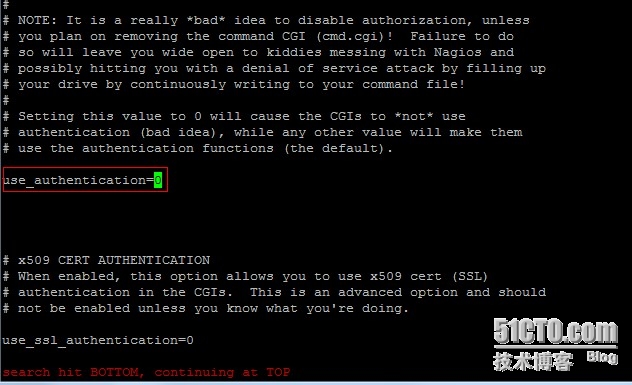
#vi /usr/local/nagios/etc/cgi.cfg找到use_authentication=1并把值改为0修改联系人邮箱,修改为用于报警接收的邮件地址vi /usr/local/nagios/etc/objects/contacts.cfg |

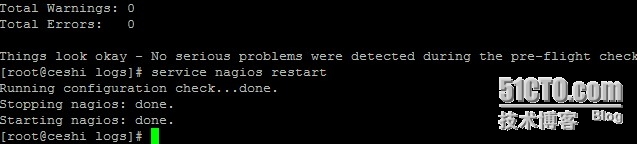
到这一步就是正常的
下面nginx 配置
我把监听改成80的了
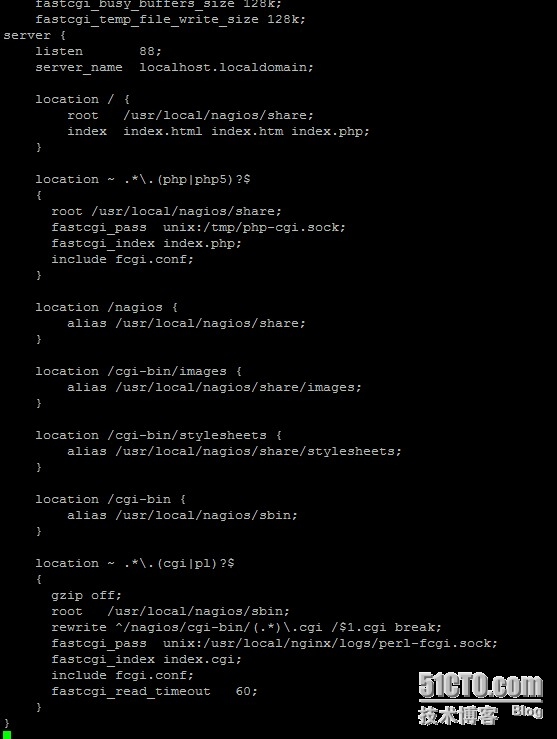
然后开启服务
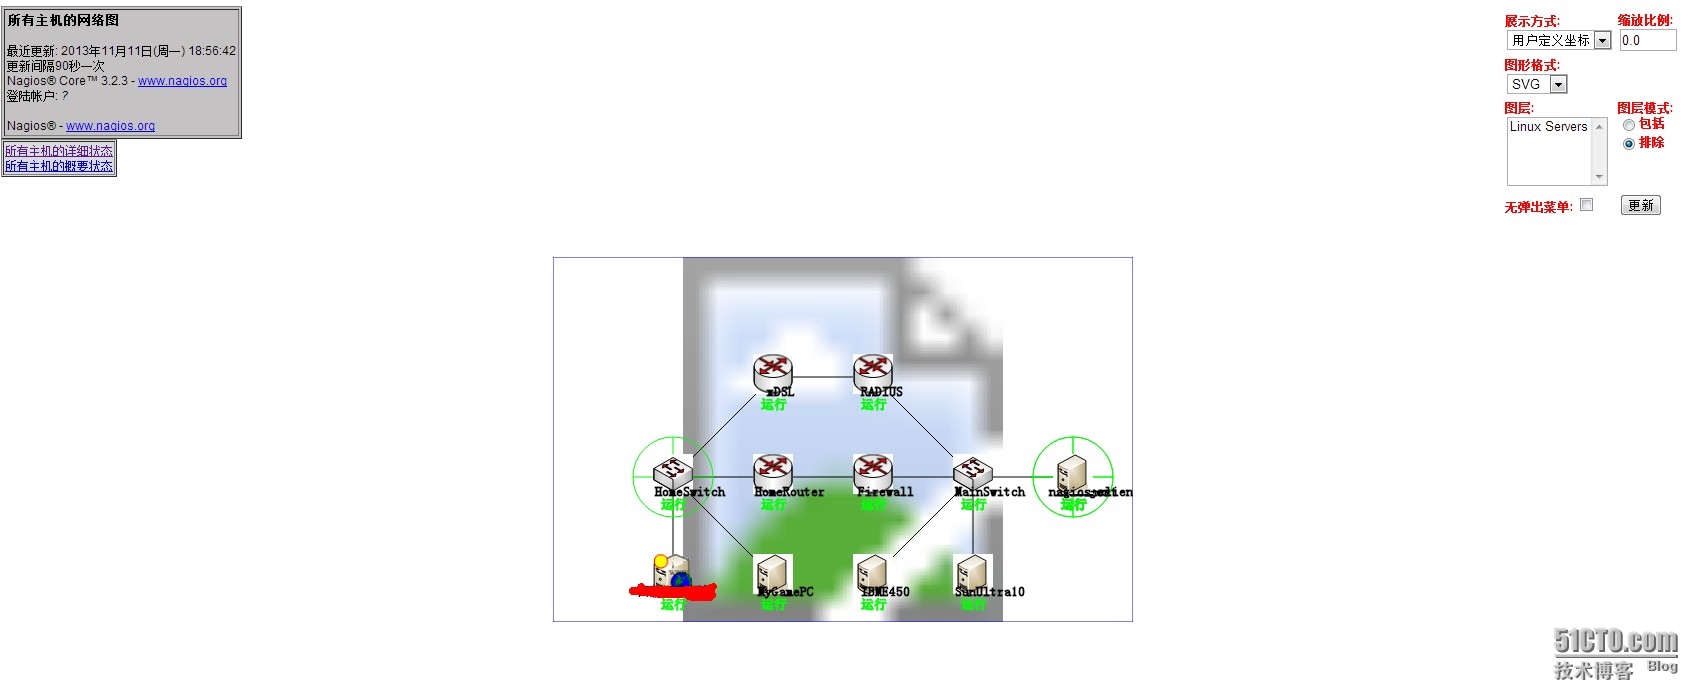
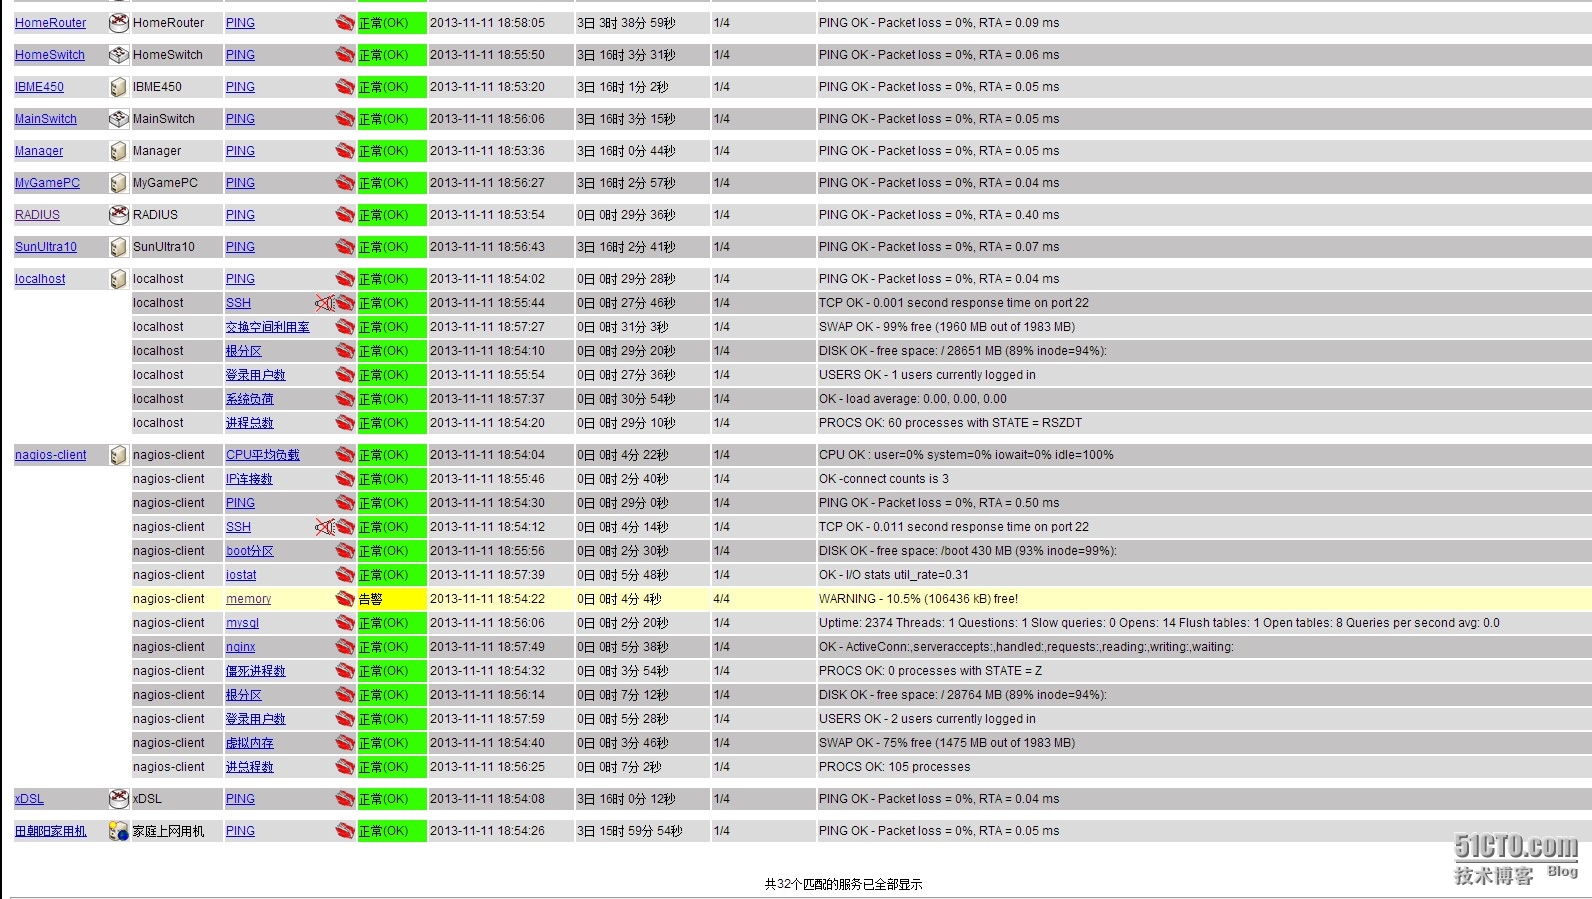
就可以访问了,然后继续安装客户端,最后给大家截图看效果
service nagios start
nagios被控端安装
|
1
2
3
4
5
6
7
8
9
10
11
12
13
14
15
16
|
yum install openssl-devel1.groupadduseradd nagios/sbin/nologin -gtar xvftar.gzcd nagios-plugins-1.4.16./configure --prefix=/usr/local/nagios --with-nagios-user=nagios/usr/local/mysql && make && make installcd2.tar zxvftar.gzcd nrpe-2.13./configuremake allmake install-pluginmake install-daemonmake install-daemon-config |
|
1
2
3
|
启动nrpe/usr/local/nagios/bin/nrpe -c /usr/local/nagios/etc/nrpe.cfgecho '/usr/local/nagios/bin/nrpe >> /etc/rc.local |
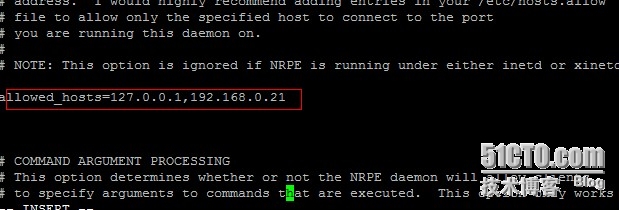
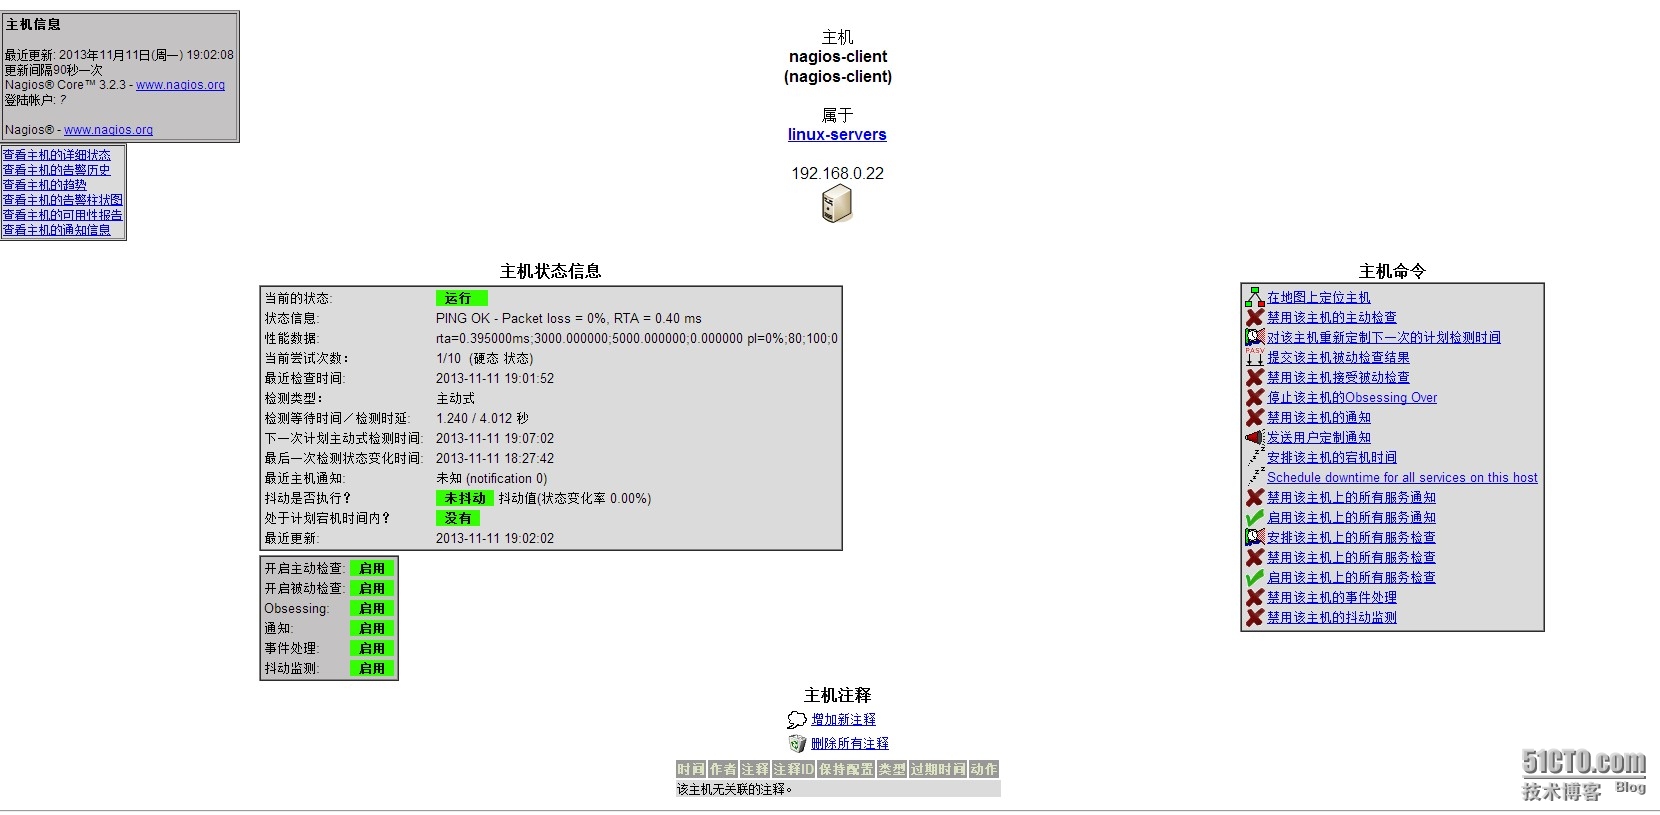
监控服务端本机:自己监控自己不需要配置nrpe,服务端的nrpe只用于获取客户端的nrpe传送过来的数据,在这里因为中文版的nagios已经默认有些配置,等会儿修改下直接用了
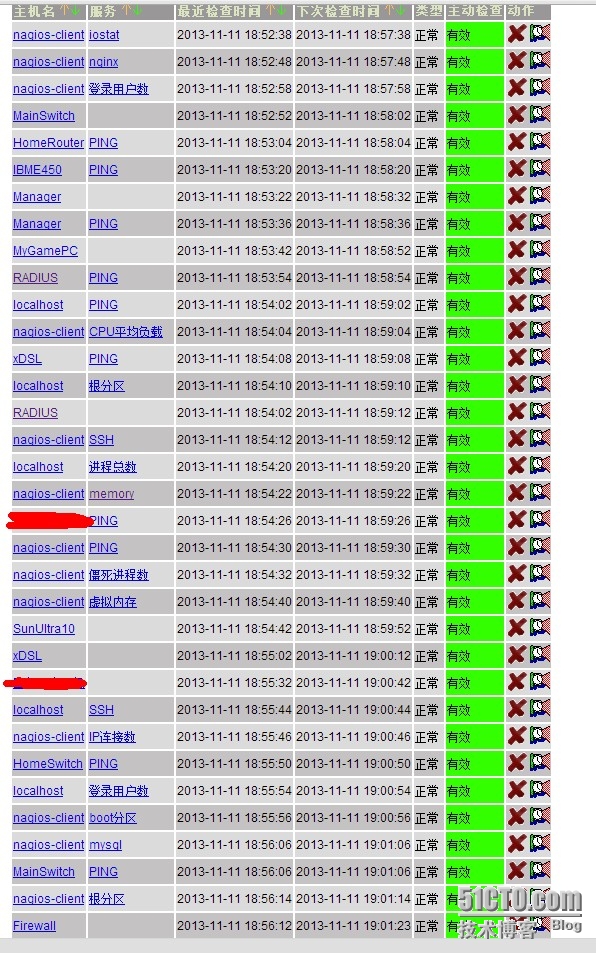
监控客户端:监控的服务有:mysql、nginx、memory、ip连接数、僵死的进程、磁盘空间、磁盘IO、登录用户数、进程总数、cpu负载、PING、SSH
|
1
2
3
|
unzip\cp libexec/* /usr/local/nagios/libexecchmod -R/usr/local/nagios/libexec |
装插件
|
1
2
3
4
5
|
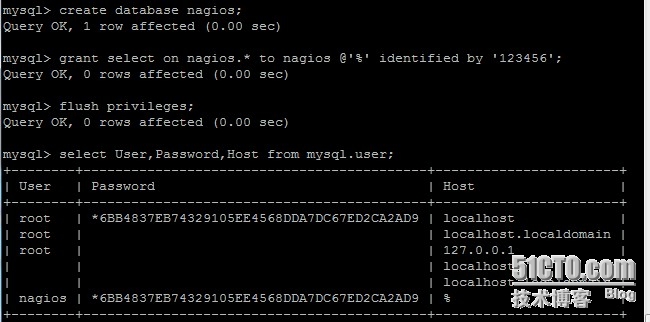
创建一个空的数据库nagios,授权nagios这个用户从任何地方访问nagios这个数据库,刷新授权设置,查询下nagios这个用户是否创建成功creategrant select on'%' identified'123456';flushselect User,Password,Host |
|
1
2
3
4
5
6
7
8
|
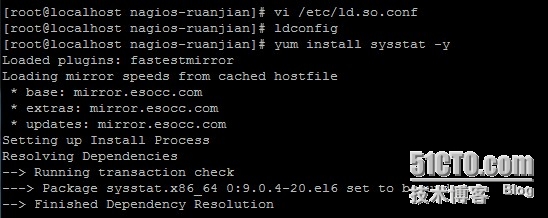
添加mysql库到系统搜索库vim /etc/ld.so.conf/usr/local/mysql/libldconfig要监控磁盘io,还得安装sysstat这个工具包yum install sysstat配置客户端上面的nrpevim /usr/local/nagios/etc/nrpe.cfg |
|
1
2
3
4
5
6
7
8
9
10
11
12
13
14
15
16
17
18
19
20
21
22
23
24
25
26
27
28
29
30
31
32
33
34
35
36
37
38
39
40
41
42
43
44
45
46
47
48
49
50
51
52
53
54
55
56
57
58
59
60
61
62
63
64
65
66
67
68
69
70
71
72
73
74
75
76
77
78
79
80
81
82
83
84
85
86
87
88
89
90
91
92
93
94
95
96
97
98
99
100
101
102
103
104
105
106
107
108
109
110
111
112
113
114
115
116
117
118
119
120
121
122
123
124
125
126
127
128
129
130
131
132
133
134
135
136
137
138
139
140
141
142
143
144
145
146
147
148
149
150
151
152
153
154
155
156
157
158
159
160
161
162
163
164
165
166
167
168
169
170
171
172
173
174
175
176
177
178
179
180
181
182
183
184
|
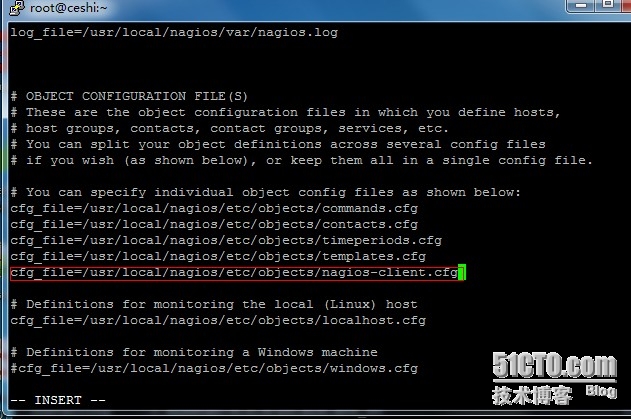
配置客户端上面的nrpevim /usr/local/nagios/etc/nrpe.cfgcommand[check_users]=/usr/local/nagios/libexec/check_users -wcommand[check_load]=/usr/local/nagios/libexec/check_cpu.shcommand[check_sda1]=/usr/local/nagios/libexec/check_disk -w/dev/sda1command[check_sda2]=/usr/local/nagios/libexec/check_disk -w/dev/sda2command[check_zombie_procs]=/usr/local/nagios/libexec/check_procs -wcommand[check_total_procs]=/usr/local/nagios/libexec/check_procs -wcommand[check_swap]=/usr/local/nagios/libexec/check_swap -wcommand[check_iostat]=/usr/local/nagios/libexec/check_iostat.shcommand[check_mysql]=/usr/local/nagios/libexec/check_mysql -Hcommand[check_nginx]=/usr/local/nagios/libexec/check_nginx.sh/status -wcommand[check_mem]=/usr/local/nagios/libexec/check_memory.plcommand[check_ip_conn]=/usr/local/nagios/libexec/ip_conn.shcommand[check_ssh]=/usr/local/nagios/libexec/check_tcp -p配置完成后,重启nrpekill `ps auxgrep nrpegrep -v grep |awk '{print`/usr/local/nagios/bin/nrpe -c /usr/local/nagios/etc/nrpe.cfg服务端配置:监控服务端本机的配置:vim /usr/local/nagios/etc/objects/localhost.cfg修改里面的配置,最后修改完成的配置如下define use host_name alias localhost address icon_image statusmap_image 2d_coords 3d_coords }define hostgroup_name alias Linux members }defineservicegroup_namealias 联通性检查 members }define use local-service host_name service_description check_command }define use local-service host_name service_description check_command }define use local-service host_name service_description check_command }define use local-service host_name service_description check_command }define use local-service host_name service_description check_command }define use local-service host_name service_description check_command }define use local-service host_name service_description check_command notifications_enabled }服务器监控客户端的配置:保存退出后复制这个文件一份,作为nagios-client的监控模版文件cp /usr/local/nagios/etc/objects/localhost.cfg /usr/local/nagios/etc/objects/nagios-client.cfgvim /usr/local/nagios/etc/objects/nagios-client.cfg define use host_name alias nagios-client address icon_image statusmap_image 2d_coords 3d_coords }define use local-service host_name service_description check_command }define use local-service host_name service_description check_command }define use local-service host_name service_description check_command }define use local-service host_name service_description check_command }define use local-service host_name service_description check_command }define use local-service host_name service_description check_command }define use local-service host_name service_description check_command }define use local-service host_name service_description check_command notifications_enabled }define use local-service host_name service_description check_command }define use local-service host_name service_description check_command }define use local-service host_name service_description check_command }define use local-service host_name service_description check_command }define use local-service host_name service_description check_command }define use local-service host_name service_description check_command } |
|
1
2
3
4
5
6
7
8
9
|
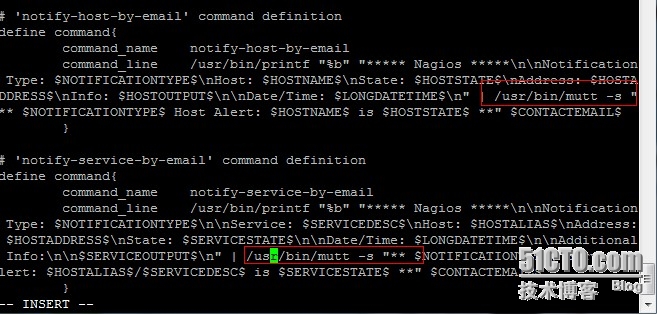
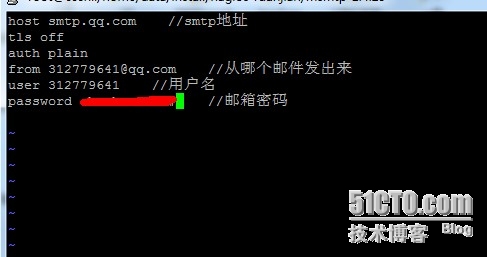
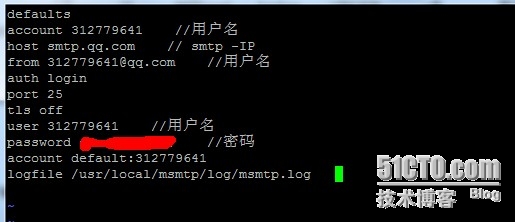
直接把原来的邮件报警的两条命令中的/bin/mail修改为/usr/bin/mutt即可,如下图 加快nagios的报警时间设置:1.修改模版文件:vim /usr/local/nagios/etc/objects/templates.cfg修改所有normal_check_interval项的值为1,既发现故障后1分钟就报警修改所有check_interval项的值为1,即正常情况下每分钟检查一次修改所有notification_interval #在主机出现异常后,故障一直没有解决,nagios再次对使用者发出通知的时间service |
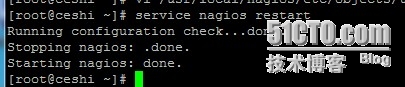
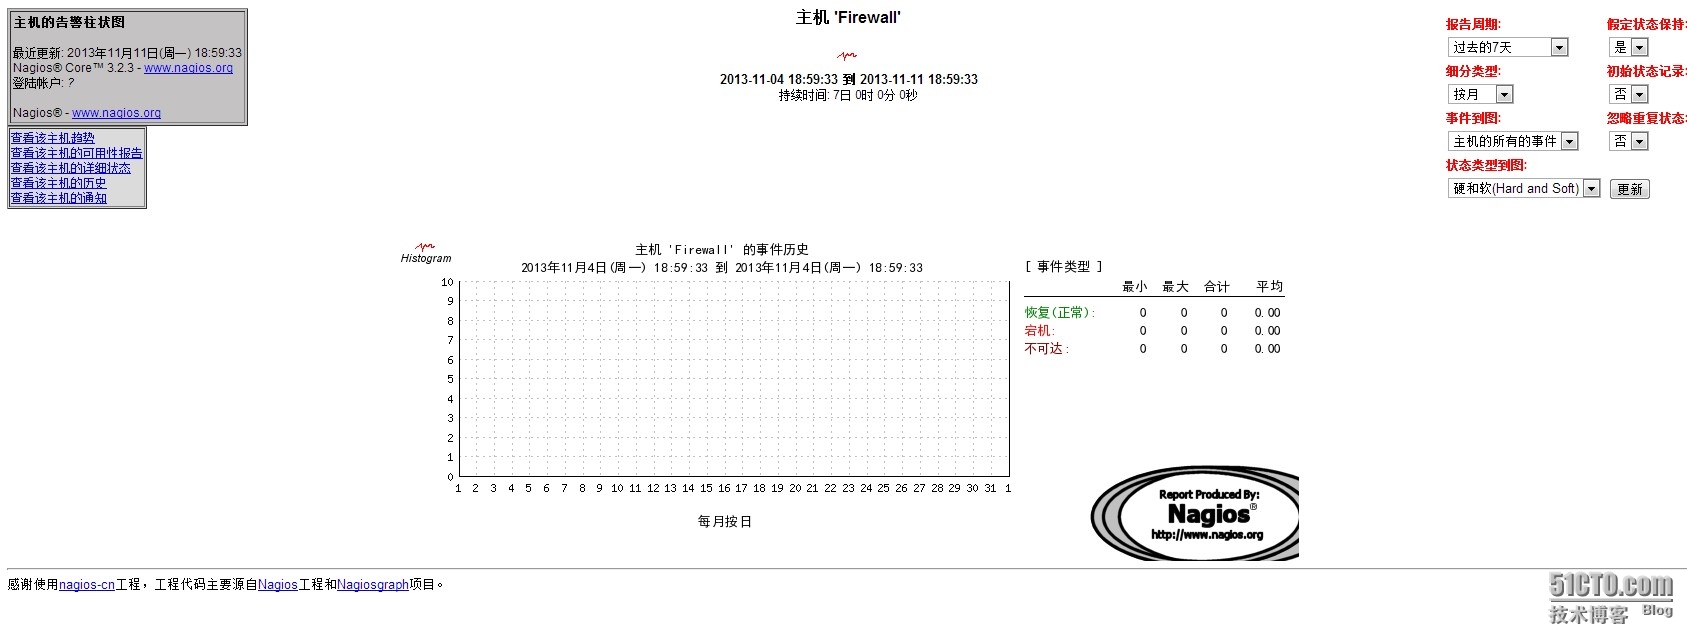


测试告警:
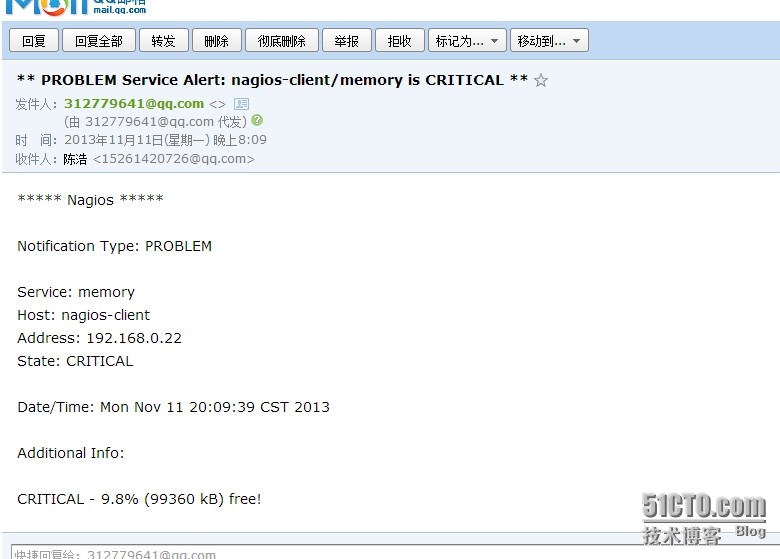
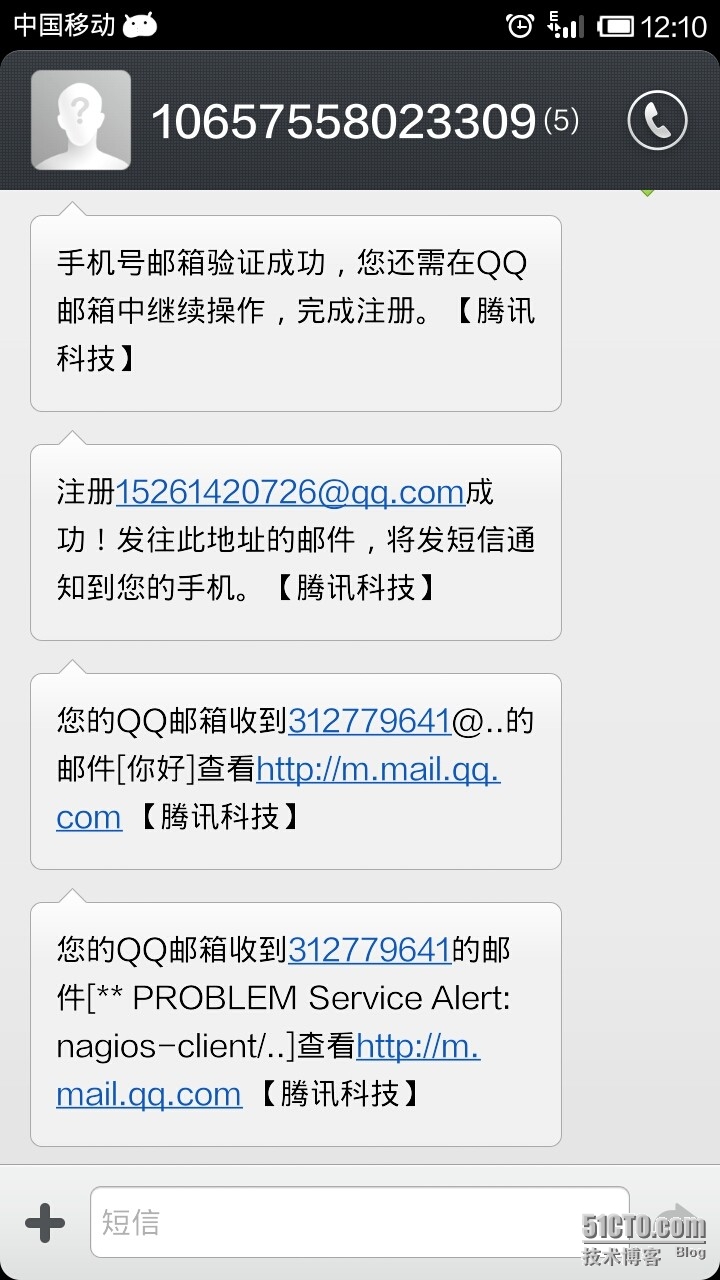
试验完成!
附上软件包所需软件地址
缺的软件可以直接找我要!
http://down.51cto.com/data/1007210
本文出自 “浩子的▁运维笔录ヽ” 博客,请务必保留此出处http://chenhao6.blog.51cto.com/6228054/1323192
CentOS 6.2+Nginx+Nagios,手机短信和qq邮箱提醒的更多相关文章
- Atitit. 破解 拦截 绕过 网站 手机 短信 验证码 方式 v2 attilax 总结
Atitit. 破解 拦截 绕过 网站 手机 短信 验证码 方式 v2 attilax 总结 1. 验证码的前世今生11.1. 第一代验证码 图片验证码11.2. 第二代验证码 用户操作 ,比如 ...
- C#.NET 大型通用信息化系统集成快速开发平台 4.1 版本 - 忘记密码功能改进、手机短信、电子邮件
由于我们的系统接近有100000个用户账户,经常会有忘记密码的时候,用户多了,很小的一个功能,每天都会有很多人在用,每个功能都非常友善,会提高提系统的效率,提高用户体验. 一天最多能返回3次手机短信, ...
- C#.NET 大型信息化系统集成快速开发平台 - 手机短信开发接口 4.0
可以批量发信息给手机,相同的信息发给多个手机号码的效果图 已发送手机短信列表 可以批量发手机的功能,可以把先有的待发信息列表,直接通过批量发送功能发出 这个是设置发送模板公式的功能展示,可以设置发送的 ...
- SNF开发平台WinForm之十二-发送手机短信功能调用-金笛-SNF快速开发平台3.3-Spring.Net.Framework
1.调用前组装参数 2.调用发送信息服务脚本 .调用前组装参数: BaseSendTaskEntity entity = new BaseSendTaskEntity(); entity.Mess ...
- 利用java实现的一个发送手机短信的小例子
今天闲来无事,在微博上看到一个关于用java实现的一个发送手机短信的程序,看了看,写的不太相信,闲的没事,把他整理下来,以后可能用得着 JAVA发送手机短信,流传有几种方法:(1)使用webservi ...
- js手机短信按钮倒计时
/* 120秒手机短信按钮倒计时 */ exports.sendmessage = function (name) { var second = 120; $(name). ...
- C#简单实现发送手机短信
偶然想起,像编写一个从电脑向手机发送短信的程序,从网上查找到有三种方式:(1)使用webservice接口发送手机短信,这个可以使用sina提供的webservice进行发送,但是需要进行注册;(2) ...
- Ios拦截手机短信程序
引用 1.手机要越狱,没有越狱的话,下面的可以不用看了! 2.IOS 要5.0以上,4.xx的同上 首先,声明下!由于公司移动开发的项目中,需要根据手机的内容进行逻辑处理,也就是要实现手机短信拦截 ...
- Android 读取手机短信
获取android手机短信需要在AndroidManifest.xml加权限: <uses-permission android:name="android.permission.RE ...
随机推荐
- MIDle生命周期详解,以及工作原理
当MIDlet被应用程序管理器成功地初始化之后,就开始展开了它的生命周期.MIDlet的生命周期完全由应用程序管理器控制,也就是说,当MIDlet要从一个状态变成另外一个状态时,应用程序管理器会调用对 ...
- 网络最短路径Dijkstra算法
最近在学习算法,看到有人写过的这样一个算法,我决定摘抄过来作为我的学习笔记: <span style="font-size:18px;">/* * File: shor ...
- unix下各种查看“变量”的命令比较
子程序只会继承父程序的环境变量,而不继承其自定义变量. env 查看所有环境变量 set 查看所有变量,包括环境变量和自定义变量 set 还可以给程序位置参数赋值: set 1 2 3 将1赋值给$1 ...
- python MultiProcessing标准库使用Queue通信的注意要点
今天原本想研究下MultiProcessing标准库下的进程间通信,根据 MultiProcessing官网 给的提示,有两种方法能够来实现进程间的通信,分别是pipe和queue.因为看queue顺 ...
- PHP单元测试使用
单元测试(unit testing),是指对软件中的最小可测试单元进行检查和验证.对于单元测试中单元的含义,一般来说,要根据实际情况去判定其具体含义,如C语言中单元指一个函数,Java里单元指一个类, ...
- $cordovaCamera 插件 上传头像 图片功能
首先要注入 $cordovaCamera 使用相机拍照 var useCamera = function() { var options = { //这些参数可能要配合着使用,比如选择了source ...
- miniui几个常用知识点汇总
1.在表格中去除系统自带的序列号,请看代码: function allAndBrief(id) { if(id==1){ grid.set({ columns: [ { type: "ind ...
- 学习MQ(二)基本概念
学习MQ(二)基本概念 这次简单罗列一下MQ的基本概念,还有我对它们的理解 1.queue manager 队列管理器,这是MQ系统中最上层的一个概念.每一个queue manager都有一个侦听器, ...
- struts 开发流程
- [转]用python 10min手写一个简易的实时内存监控系统
简易的内存监控系统 本文需要有一定的python和前端基础,如果没基础的,请关注我后续的基础教程系列博客 文章github源地址,还可以看到具体的代码,喜欢请在原链接右上角加个star 腾讯视频链接 ...