简单实现接口自动化测试(基于python+unittest)
简单实现接口自动化测试(基于python+unittest)
简介
本文通过从Postman获取基本的接口测试Code简单的接口测试入手,一步步调整优化接口调用,以及增加基本的结果判断,讲解Python自带的Unittest框架调用,期望各位可以通过本文对接口自动化测试有一个大致的了解。
引言
为什么要做接口自动化测试?
在当前互联网产品迭代频繁的背景下,回归测试的时间越来越少,很难在每个迭代都对所有功能做完整回归。但接口自动化测试因其实现简单、维护成本低,容易提高覆盖率等特点,越来越受重视。
为什么要自己写框架呢?
使用Postman调试通过过直接可以获取接口测试的基本代码,结合使用requets + unittest很容易实现接口自动化测试的封装,而且requests的api已经非常人性化,非常简单,但通过封装以后(特别是针对公司内特定接口),可以进一步提高脚本编写效率。
一个现有的简单接口例子
下面使用requests + unittest测试一个查询接口
接口信息如下
请求信息:
Method:POST
URL:api/match/image/getjson
Request:
{

"category": "image",

"offset": "0",

"limit": "30",

"sourceId": "0",

"metaTitle": "",

"metaId": "0",

"classify": "unclassify",

"startTime": "",

"endTime": "",

"createStart": "",

"createEnd": "",

"sourceType": "",

"isTracking": "true",

"metaGroup": "",

"companyId": "0",

"lastDays": "1",

"author": ""

}
Response示例:
{

"timestamp" : xxx,

"errorMsg" : "",

"data" : {

"config" : xxx

}
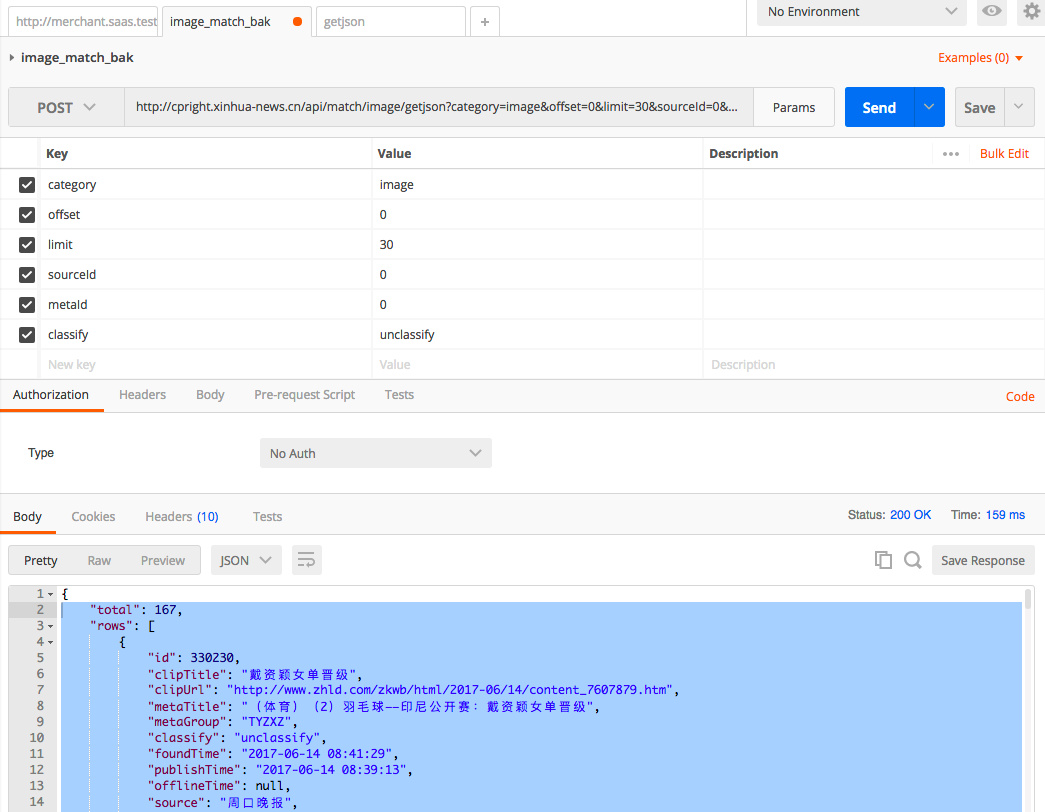
Postman测试方法见截图:
测试思路
1.获取Postman原始脚本
2.使用requests库模拟发送HTTP请求**
3.对原始脚本进行基础改造**
4.使用python标准库里unittest写测试case**
原始脚本实现
未优化
该代码只是简单的一次调用,而且返回的结果太多,很多返回信息暂时没用,示例代码如下
import requests

url = "http://cpright.xinhua-news.cn/api/match/image/getjson"

querystring = {"category":"image","offset":"0","limit":"30","sourceId":"0","metaTitle":"","metaId":"0","classify":"unclassify","startTime":"","endTime":"","createStart":"","createEnd":"","sourceType":"","isTracking":"true","metaGroup":"","companyId":"0","lastDays":"1","author":""}

headers = {

    'cache-control': "no-cache",

    'postman-token': "e97a99b0-424b-b2a5-7602-22cd50223c15"

    }

response = requests.request("POST", url, headers=headers, params=querystring)

print(response.text)
优化 第一版
调整代码结构,输出结果Json出来,获取需要验证的response.status_code,以及获取结果校验需要用到的results['total']
#!/usr/bin/env python

#coding: utf-8

'''

unittest merchant backgroud interface

@author: zhang_jin

@version: 1.0

@see:http://www.python-requests.org/en/master/

'''

import unittest

import json

import traceback

import requests

url = "http://cpright.xinhua-news.cn/api/match/image/getjson"

querystring = {

    "category": "image",

    "offset": "0",

    "limit": "30",

    "sourceId": "0",

    "metaTitle": "",

    "metaId": "0",

    "classify": "unclassify",

    "startTime": "",

    "endTime": "",

    "createStart": "",

    "createEnd": "",

    "sourceType": "",

    "isTracking": "true",

    "metaGroup": "",

    "companyId": "0",

    "lastDays": "1",

    "author": ""

}

headers = {

    'cache-control': "no-cache",

    'postman-token': "e97a99b0-424b-b2a5-7602-22cd50223c15"

    }

#Post接口调用

response = requests.request("POST", url, headers=headers, params=querystring)

#对返回结果进行转义成json串

results = json.loads(response.text)

#获取http请求的status_code

print "Http code:",response.status_code

#获取结果中的total的值

print results['total']

#print(response.text)
优化 第二版
接口调用异常处理,增加try,except处理,对于返回response.status_code,返回200进行结果比对,不是200数据异常信息。
#!/usr/bin/env python

#coding: utf-8

'''

unittest merchant backgroud interface

@author: zhang_jin

@version: 1.0

@see:http://www.python-requests.org/en/master/

'''

import json

import traceback

import requests

url = "http://cpright.xinhua-news.cn/api/match/image/getjson"

querystring = {

    "category": "image",

    "offset": "0",

    "limit": "30",

    "sourceId": "0",

    "metaTitle": "",

    "metaId": "0",

    "classify": "unclassify",

    "startTime": "",

    "endTime": "",

    "createStart": "",

    "createEnd": "",

    "sourceType": "",

    "isTracking": "true",

    "metaGroup": "",

    "companyId": "0",

    "lastDays": "1",

    "author": ""

}

headers = {

    'cache-control': "no-cache",

    'postman-token': "e97a99b0-424b-b2a5-7602-22cd50223c15"

    }

try:

    #Post接口调用

    response = requests.request("POST", url, headers=headers, params=querystring)

    #对http返回值进行判断,对于200做基本校验

    if response.status_code == 200:

        results = json.loads(response.text)

        if results['total'] == 191:

            print "Success"

        else:

            print "Fail"

            print results['total']

    else:

        #对于http返回非200的code,输出相应的code

        raise Exception("http error info:%s" %response.status_code)

except:

    traceback.print_exc()
优化 第三版
1.该版本改动较大,引入config文件,单独封装结果校验模块,引入unittest模块,实现接口自动调用,并增加log处理模块;
2.对不同Post请求结果进行封装,不同接口分开调用;
3.测试用例的结果进行统计并最终输出
#!/usr/bin/env python

#coding: utf-8

'''

unittest interface

@author: zhang_jin

@version: 1.0

@see:http://www.python-requests.org/en/master/

'''

import unittest

import json

import traceback

import requests

import time

import result_statistics

import config as cf

from com_logger import  match_Logger

class MyTestSuite(unittest.TestCase):

    """docstring for MyTestSuite"""

    #@classmethod

    def sedUp(self):

        print "start..."

    #图片匹配统计

    def test_image_match_001(self):

        url = cf.URL1

        querystring = {

            "category": "image",

            "offset": "0",

            "limit": "30",

          "sourceId": "0",

          "metaTitle": "",

          "metaId": "0",

          "classify": "unclassify",

          "startTime": "",

          "endTime": "",

          "createStart": "",

          "createEnd": "",

          "sourceType": "",

          "isTracking": "true",

          "metaGroup": "",

          "companyId": "0",

          "lastDays": "1",

          "author": ""

        }

        headers = {

            'cache-control': "no-cache",

            'postman-token': "545a2e40-b120-2096-960c-54875be347be"

            }

        response = requests.request("POST", url, headers=headers, params=querystring)

        if response.status_code == 200:

            response.encoding = response.apparent_encoding

            results = json.loads(response.text)

            #预期结果与实际结果校验,调用result_statistics模块

            result_statistics.test_result(results,196)

        else:

            print "http error info:%s" %response.status_code

        #match_Logger.info("start image_query22222")

        #self.assertEqual(results['total'], 888)

        '''

        try:

            self.assertEqual(results['total'], 888)

        except:

            match_Logger.error(traceback.format_exc())

        #print results['total']

        '''

    #文字匹配数据统计

    def test_text_match_001(self):

        text_url = cf.URL2

        querystring = {

            "category": "text",

            "offset": "0",

            "limit": "30",

            "sourceId": "0",

            "metaTitle": "",

            "metaId": "0",

            "startTime": "2017-04-14",

            "endTime": "2017-04-15",

            "createStart": "",

            "createEnd": "",

            "sourceType": "",

            "isTracking": "true",

            "metaGroup": "",

            "companyId": "0",

            "lastDays": "0",

            "author": "",

            "content": ""

        }

        headers = {

            'cache-control': "no-cache",

            'postman-token': "ef3c29d8-1c88-062a-76d9-f2fbebf2536c"

            }

        response = requests.request("POST", text_url, headers=headers, params=querystring)

        if response.status_code == 200:

            response.encoding = response.apparent_encoding

            results = json.loads(response.text)

            #预期结果与实际结果校验,调用result_statistics模块

            result_statistics.test_result(results,190)

        else:

            print "http error info:%s" %response.status_code

        #print(response.text)

    def tearDown(self):

        pass

if __name__ == '__main__':

    #image_match_Logger = ALogger('image_match', log_level='INFO')

    #构造测试集合

    suite=unittest.TestSuite()

    suite.addTest(MyTestSuite("test_image_match_001"))

    suite.addTest(MyTestSuite("test_text_match_001"))

    #执行测试

    runner = unittest.TextTestRunner()

    runner.run(suite)

    print "success case:",result_statistics.num_success

    print "fail case:",result_statistics.num_fail

    #unittest.main()
最终输出日志信息
Zj-Mac:unittest lazybone$ python image_test_3.py

测试结果:通过

.测试结果:不通过

错误信息: 期望返回值:190 实际返回值:4522

.

----------------------------------------------------------------------

Ran 2 tests in 0.889s

OK

success case: 1

fail case: 1
后续改进建议
1.unittest输出报告也可以推荐使用HTMLTestRunner(我目前是对结果统计进行了封装)
2.接口的继续封装,参数化,模块化
3.unittest单元测试框架实现参数化调用第三方模块引用(nose-parameterized)
4.持续集成运行环境、定时任务、触发运行、邮件发送等一系列功能均可以在Jenkins上实现。
简单实现接口自动化测试(基于python+unittest)的更多相关文章
- 如何简单实现接口自动化测试(基于 python) 原博主地址https://blog.csdn.net/gitchat/article/details/77849725
如何简单实现接口自动化测试(基于 python) 2017年09月05日 11:52:25 阅读数:9904 GitChat 作者:饿了么技术社区 原文:如何简单实现接口自动化测试(基于 python ...
- 《Web接口开发与自动化测试 -- 基于Python语言》 ---前言
前 言 本书的原型是我整理一份Django学习文档,从事软件测试工作的这六.七年来,一直有整理学习资料的习惯,这种学习理解再输出的方式对我非常受用,博客和文档是我主要的输出形式,这些输出同时也帮 ...
- Appium基于Python unittest自动化测试 & 自动化测试框架 -- PO并生成html测试报告
基于python单元测试框架unittest完成appium自动化测试,生成基于html可视化测试报告 代码示例: #利用unittest并生成测试报告 class Appium_test(unitt ...
- 接口自动化 基于python+Testlink+Jenkins实现的接口自动化测试框架[V2.0改进版]
基于python+Testlink+Jenkins实现的接口自动化测试框架[V2.0改进版] by:授客 QQ:1033553122 由于篇幅问题,,暂且采用网盘分享的形式: 下载地址: [授客] ...
- 接口自动化 基于python实现的http+json协议接口自动化测试框架源码(实用改进版)
基于python实现的http+json协议接口自动化测试框架(实用改进版) by:授客 QQ:1033553122 欢迎加入软件性能测试交流QQ群:7156436 目录 1. ...
- Appium基于python unittest自动化测试并生成html测试报告
本文基于python单元测试框架unittest完成appium自动化测试,生成基于html可视化测试报告 代码示例: #利用unittest并生成测试报告 class Appium_test(uni ...
- 关于《Web接口开发与自动化测试--基于Python语言》
关于封面logo 首先,你会被书封上面logo吸引,这么炫酷?双蛇杖?嗯,这是Requests的新logo. 旧的logo是一只乌龟. 新logo是双蛇杖: 看到新logo我首先想到的是 火爆全网页游 ...
- 《Web接口开发与自动化测试 -- 基于Python语言》---现已出版。
终于可以购买了!! 有需要的同学通过下面链接购买. 购买来链接: https://item.jd.com/11806319423.html 为什么要出这样一本书? 首先,今年我有不少工作是跟接口自动化 ...
- 接口自动化 基于python+Testlink+Jenkins实现的接口自动化测试框架
链接:http://blog.sina.com.cn/s/blog_13cc013b50102w94u.html
随机推荐
- WebService常用公共接口
Web Service 一些对外公开的网络服务接口 商业和贸易: 1.股票行情数据 WEB 服务(支持香港.深圳.上海基金.债券和股票:支持多股票同时查询) Endpoint: http://we ...
- Nginx & Reverse Proxy
Nginx & Reverse Proxy https://docs.nginx.com/nginx/admin-guide/web-server/reverse-proxy/ https:/ ...
- iOS自定义控件创建原理(持续更新)
前言 因为如果要创建各种自定义控件根据需求的不同会有很多的差别,所以我就在这里,分析一些自定义控件的创建实现方法 弹出视图 1.把要弹出的视图装在一个控制器里面,自定义转场动画 2.创建一个弹出视图, ...
- 【Luogu】P2403所驼门王的宝藏(强连通分量)
题目链接 想到缩点后DP这题就迷之好做 横天门就点向该行连一条边 纵门就点向该列连一条边 ziyou门直接枚举……map搞搞……话说ziyou门为啥是违规内容不让我发布? 然后缩点,DP,1A 不过写 ...
- String 类详解
StringBuilder与StringBuffer的功能基本相同,不同之处在于StringBuilder是非线程安全的,而StringBuffer是线程安全的,因此效率上StringBuilder类 ...
- c#使用Split分割字符串的几种方法
原文发布时间为:2009-03-07 -- 来源于本人的百度文章 [由搬家工具导入] 最近发现很多人在问在c#中使用Split等分割字符串的方法,今天有时间所以把使用Split等分割字符串的方法做了一 ...
- Lawnmower(洛谷 CF115B)
题目看这里 题目大意 简单来讲就是从(1,1)向左或右或下走,经过所有草坪的最短路程 思路: 由于在第一行只能向右走,那么我们就知道,在单数行和双数行分别是向右走和向左走,那么我们在单数行就只需要统计 ...
- 乌班图中的ssh服务
SSH服务(TCP端口号22):安全的命令解释器 为客户机提供安全的Shell 环境,用于远程管理 ...
- 【git】把本地项目和远程git仓库相连通
1. 打开在你的项目文件夹,输入下面的命令 git init 输完上面的命令,文件夹中会出现一个.git文件夹,如下图所示,其他的的文件也会出现蓝色小问号的标志 2. 添加所有文件 git add . ...
- iptables之centos6版本常用设置
默认策略 # iptables -LChain INPUT (policy ACCEPT) target prot opt source destination ACCEPT all -- anywh ...