一,准备工作:首先安装jdk1.7及其以上版本,此环境安装的是jdk-1.8
二.搭建activemq
环境: 192.168.9.25 centos6.5
jdk-1.8
apache-activemq-5.14.5-bin.tar.gz
三.搭建activemq
1》解压activemq
[root@localhost soft]# tar xf apache-activemq-5.14.5-bin.tar.gz
[root@localhost soft]# cp -rf apache-activemq-5.14.5 /usr/local/
2》启动activemq
activeMQ具有三种启动方式
1、普通启动 ./activemq start
2、启动并指定日志文件 ./activemq start >tmp/smlog
3、后台启动方式
[root@localhost bin]# nohup ./activemq start >/tmp/smlog
[root@localhost soft]# cd /usr/local/apache-activemq-5.14.5/
[root@localhost apache-activemq-5.14.5]# ls
activemq-all-5.14.5.jar conf docs lib NOTICE tmp webapps-demo
bin data examples LICENSE README.txt webapps
[root@localhost apache-activemq-5.14.5]# cd bin
[root@localhost bin]# ls
activemq activemq.jar linux-x86-32 macosx wrapper.jar
activemq-diag env linux-x86-64 nohup.out
[root@localhost bin]# nohup ./activemq start //采用后台启动方式
3》检查启动
[root@localhost bin]# ps -ef | grep activemq
root 8740 1 1 23:20 pts/0 00:00:11 /usr/bin/java -Xms64M -Xmx1G -Djava.util.logging.config.file=logging.properties -Djava.security.auth.login.config=/usr/local/apache-activemq-5.14.5//conf/login.config -Dcom.sun.management.jmxremote -Djava.awt.headless=true -Djava.io.tmpdir=/usr/local/apache-activemq-5.14.5//tmp -Dactivemq.classpath=/usr/local/apache-activemq-5.14.5//conf:/usr/local/apache-activemq-5.14.5//../lib/: -Dactivemq.home=/usr/local/apache-activemq-5.14.5/ -Dactivemq.base=/usr/local/apache-activemq-5.14.5/ -Dactivemq.conf=/usr/local/apache-activemq-5.14.5//conf -Dactivemq.data=/usr/local/apache-activemq-5.14.5//data -jar /usr/local/apache-activemq-5.14.5//bin/activemq.jar start
root 8860 8839 0 23:39 pts/2 00:00:00 grep activemq
[root@localhost conf]# netstat -lnpt | grep 8161
tcp 0 0 :::8161 :::* LISTEN 8740/java
四.登陆activemq控制台
[root@localhost bin]# cd ../
[root@localhost apache-activemq-5.14.5]# ls
activemq-all-5.14.5.jar conf docs lib NOTICE tmp webapps-demo
bin data examples LICENSE README.txt webapps
[root@localhost apache-activemq-5.14.5]# cd conf/
[root@localhost conf]# ll
总用量 80
-rw-r--r--. 1 root root 5911 3月 20 23:09 activemq.xml
-rw-r--r--. 1 root root 1370 3月 20 23:09 broker.ks
-rw-r--r--. 1 root root 592 3月 20 23:09 broker-localhost.cert
-rw-r--r--. 1 root root 665 3月 20 23:09 broker.ts
-rw-r--r--. 1 root root 1357 3月 20 23:09 client.ks
-rw-r--r--. 1 root root 665 3月 20 23:09 client.ts
-rw-r--r--. 1 root root 1172 3月 20 23:09 credentials-enc.properties
-rw-r--r--. 1 root root 1121 3月 20 23:09 credentials.properties
-rw-r--r--. 1 root root 962 3月 20 23:09 groups.properties
-rw-r--r--. 1 root root 1011 3月 20 23:09 java.security
-rw-r--r--. 1 root root 1087 3月 20 23:09 jetty-realm.properties
-rw-r--r--. 1 root root 7795 3月 20 23:09 jetty.xml
-rw-r--r--. 1 root root 965 3月 20 23:09 jmx.access
-rw-r--r--. 1 root root 964 3月 20 23:09 jmx.password
-rw-r--r--. 1 root root 3084 3月 20 23:09 log4j.properties
-rw-r--r--. 1 root root 1207 3月 20 23:09 logging.properties
-rw-r--r--. 1 root root 1016 3月 20 23:09 login.config
-rw-r--r--. 1 root root 961 3月 20 23:09 users.properties
查看broker连接端口
[root@localhost conf]# vim activemq.xml
<transportConnectors>
<!-- DOS protection, limit concurrent connections to 1000 and frame size to 100MB -->
<transportConnector name="openwire" uri="tcp://0.0.0.0:61616?maximumConnections=1000&wireFormat.maxFrameSize=104857600"/>
<transportConnector name="amqp" uri="amqp://0.0.0.0:5672?maximumConnections=1000&wireFormat.maxFrameSize=104857600"/>
<transportConnector name="stomp" uri="stomp://0.0.0.0:61613?maximumConnections=1000&wireFormat.maxFrameSize=104857600"/>
<transportConnector name="mqtt" uri="mqtt://0.0.0.0:1883?maximumConnections=1000&wireFormat.maxFrameSize=104857600"/>
<transportConnector name="ws" uri="ws://0.0.0.0:61614?maximumConnections=1000&wireFormat.maxFrameSize=104857600"/>
</transportConnectors>
61616就是我们的broker连接端口
查看amq控制台的端口
[root@localhost conf]# vim jetty.xml
<property name="host" value="0.0.0.0"/>
<property name="port" value="8161"/>
五。浏览器进入控制台
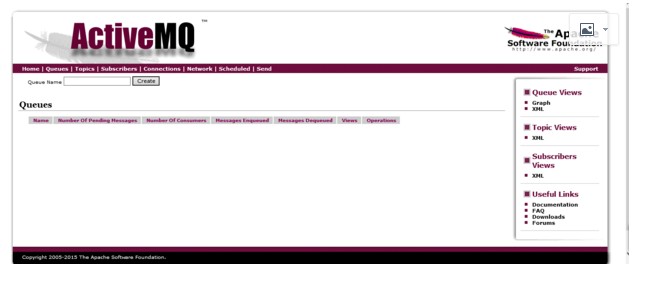
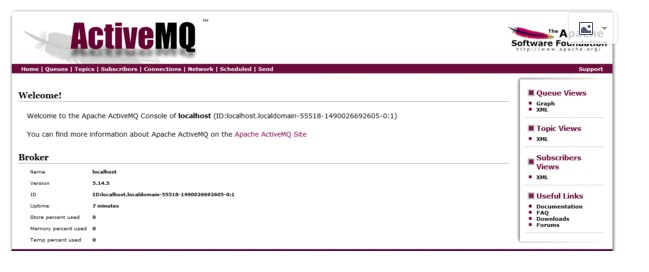
username:admin
passwd:admin
六,修改activemq控制台登陆端口
[root@localhost conf]# vim jetty.xml
。。。。。。。。。。。。。。
109 <property name="host" value="0.0.0.0"/>
110 <property name="port" value="9766"/> //控制台端口修改成9766
。。。。。。。。。。。。。。。。。
[root@localhost bin]# nohup ./activemq restart //重启activemq服务
[root@localhost bin]# ps -ef | grep activemq
root 8992 1 54 00:05 pts/0 00:00:06 /usr/bin/java -Xms64M -Xmx1G -Djava.util.logging.config.file=logging.properties -Djava.security.auth.login.config=/usr/local/apache-activemq-5.14.5//conf/login.config -Dcom.sun.management.jmxremote -Djava.awt.headless=true -Djava.io.tmpdir=/usr/local/apache-activemq-5.14.5//tmp -Dactivemq.classpath=/usr/local/apache-activemq-5.14.5//conf:/usr/local/apache-activemq-5.14.5//../lib/: -Dactivemq.home=/usr/local/apache-activemq-5.14.5/ -Dactivemq.base=/usr/local/apache-activemq-5.14.5/ -Dactivemq.conf=/usr/local/apache-activemq-5.14.5//conf -Dactivemq.data=/usr/local/apache-activemq-5.14.5//data -jar /usr/local/apache-activemq-5.14.5//bin/activemq.jar start
root 9036 8289 0 00:05 pts/0 00:00:00 grep activemq
[root@localhost bin]# netstat -lnpt | grep 9766 //查看9766端口
tcp 0 0 :::9766 :::* LISTEN 8992/java
浏览器登录测试:
username:admin
passwd:admin
七,修改activemq控制台登陆用户名和密码
[root@localhost conf]# vim jetty.xml
30 <property name="roles" value="user,admin" />
31 <!-- set authenticate=false to disable login -->
32 <property name="authenticate" value="true" /> //确认次数为“true”,说明在web登陆时会开启认证。若此处更改为“flash”,在web登陆时不需要认证
activemq用户名密码存放的位置
[root@localhost conf]# vim jetty-realm.properties
## ---------------------------------------------------------------------------
## Licensed to the Apache Software Foundation (ASF) under one or more
## contributor license agreements. See the NOTICE file distributed with
## this work for additional information regarding copyright ownership.
## The ASF licenses this file to You under the Apache License, Version 2.0
## (the "License"); you may not use this file except in compliance with
## the License. You may obtain a copy of the License at
##
## http://www.apache.org/licenses/LICENSE-2.0
##
## Unless required by applicable law or agreed to in writing, software
## distributed under the License is distributed on an "AS IS" BASIS,
## WITHOUT WARRANTIES OR CONDITIONS OF ANY KIND, either express or implied.
## See the License for the specific language governing permissions and
## limitations under the License.
## ---------------------------------------------------------------------------
# Defines users that can access the web (console, demo, etc.)
# username: password [,rolename ...]
#admin: admin, admin
#user: user, user
zxjr: zxjr123, admin //此处用户名修改成“zxjr” 密码修改成“zxjr123”。值得注意的是用户名和密码的格式是:用户名 : 密码 ,角色名。
user: user, user
重启activemq 服务
[root@localhost conf]# ps -ef | grep activemq
root 9188 1 1 00:07 pts/0 00:00:10 /usr/bin/java -Xms64M -Xmx1G -Djava.util.logging.config.file=logging.properties -Djava.security.auth.login.config=/usr/local/apache-activemq-5.14.5//conf/login.config -Dcom.sun.management.jmxremote -Djava.awt.headless=true -Djava.io.tmpdir=/usr/local/apache-activemq-5.14.5//tmp -Dactivemq.classpath=/usr/local/apache-activemq-5.14.5//conf:/usr/local/apache-activemq-5.14.5//../lib/: -Dactivemq.home=/usr/local/apache-activemq-5.14.5/ -Dactivemq.base=/usr/local/apache-activemq-5.14.5/ -Dactivemq.conf=/usr/local/apache-activemq-5.14.5//conf -Dactivemq.data=/usr/local/apache-activemq-5.14.5//data -jar /usr/local/apache-activemq-5.14.5//bin/activemq.jar start
root 9303 8289 0 00:17 pts/0 00:00:00 grep activemq
[root@localhost conf]# kill 9188
[root@localhost bin]# nohup ./activemq start //后台启动activemq服务
[root@localhost bin]# netstat -lnpt | grep 9766
tcp 0 0 :::9766 :::* LISTEN 9347/java
web网页登陆测试:
username:zxjr
passwd:zxjr123
八,在搭建过程中可能会出现的问题
问题1:当在同一台机器上安装activemq和rabbitmq时,如果是先安装rabbitmq,后安装activmq,在启动activemq时会报错,查看activemq日志,报错内容为: Error creating bean with name 'org.apache.activemq.xbean.XBeanBrokerService#0' defined in class path resource [activemq.xml]: Invocation of init method failed; nested exception is java.io.IOException: Transport Connector could not be registered in JMX: java.io.IOException: Failed to bind to server socket: amqp://0.0.0.0:5672?maximumConnections=1000&wireFormat.maxFrameSize=104857600 due to: java.net.BindException: 地址已在使用 (Bind failed) | org.apache.activemq.xbean.XBeanBrokerFactory$1 | main
次报错信息为activmq 5672的端口被占用,更改5672的端口即可
[root@bongo conf]#vim /usr/local/apache-activemq-5.14.4/conf/activemq.xml
111 <transportConnectors>
112 <!-- DOS protection, limit concurrent connections to 1000 and frame size to 100MB -->
113 <transportConnector name="openwire" uri="tcp://127.0.0.1:61616?maximumConnections=1000&wireFormat.maxFrameSize=104 857600"/>
114 <transportConnector name="amqp" uri="amqp://127.0.0.1:9766?
maximumConnections=1000&wireFormat.maxFrameSize=1048576 00"/> //5672的端口更改为9766
115 <transportConnector name="stomp" uri="stomp://127.0.0.1:61613?maximumConnections=1000&wireFormat.maxFrameSize=1048 57600"/>
116 <transportConnector name="mqtt" uri="mqtt://127.0.0.1:1883?maximumConnections=1000&wireFormat.maxFrameSize=1048576 00"/>
117 <transportConnector name="ws" uri="ws://127.0.0.1:61614?maximumConnections=1000&wireFormat.maxFrameSize=104857600" />
118 </transportConnectors>
重启启动activemq:
[root@bongo conf]# cd ../bin/
[root@bongo bin]# nohup ./activemq restart
[root@bongo bin]# ps -ef | grep activemq
root 14617 14196 0 14:46 pts/2 00:00:00 tail -f activemq.log
root 15196 1 61 15:01 pts/0 00:00:06 /usr/bin/java -Xms64M -Xmx1G -Djava.util.logging.config.file=logging.properties -Djava.security.auth.login.config=/usr/local/apache-activemq-5.14.4//conf/login.config -Dcom.sun.management.jmxremote -Djava.awt.headless=true -Djava.io.tmpdir=/usr/local/apache-activemq-5.14.4//tmp -Dactivemq.classpath=/usr/local/apache-activemq-5.14.4//conf:/usr/local/apache-activemq-5.14.4//../lib/: -Dactivemq.home=/usr/local/apache-activemq-5.14.4/ -Dactivemq.base=/usr/local/apache-activemq-5.14.4/ -Dactivemq.conf=/usr/local/apache-activemq-5.14.4//conf -Dactivemq.data=/usr/local/apache-activemq-5.14.4//data -jar /usr/local/apache-activemq-5.14.4//bin/activemq.jar start
问题2:Error creating bean with name 'org.apache.activemq.xbean.XBeanBrokerService#0' defined in class path resource [activemq.xml]: Invocation of init method failed; nested exception is java.lang.IllegalArgumentException: port out of range:-1 | org.apache.activemq.xbean.XBeanBrokerFactory$1 | main
报次错误时,可以把[root@bongo conf]#vim /usr/local/apache-activemq-5.14.4/conf/activemq.xml,的ip地址修改为127.0.0.1,如上错误已被修改。
- Java JMS 程序基础 与 ActiveMQ 安装(一)
一 ActiveMQ安装 从Apache官网上下载 ActivieMQ的安装包 apache-activemq-5.9.1-bin.tar.gz, 并拷贝到linux的安装目录解压 # tar -zx ...
- ActiveMQ安装配置及使用 转发 https://www.cnblogs.com/hushaojun/p/6016709.html
ActiveMQ安装配置及使用 ActiveMQ介绍 ActiveMQ 是Apache出品,最流行的,能力强劲的开源消息总线.ActiveMQ 是一个完全支持JMS1.1和J2EE 1.4规范的 JM ...
- ActiveMQ安装配置及使用
ActiveMQ介绍 ActiveMQ 是Apache出品,最流行的,能力强劲的开源消息总线.ActiveMQ 是一个完全支持JMS1.1和J2EE 1.4规范的 JMS Provider实现,尽管J ...
- ActiveMQ安装与入门程序 & JMS的消息结构
1.Activemq安装 直接到官网下载:记住apache的官网是域名反过来,比如我们找activemq就是activemq.apache.org. 最新版本要求最低的JDK是8,所以最好在电脑装多个 ...
- activeMQ 安装及启动异常处理
一.环境: [root@centos_6 ~]# cat /etc/system-release CentOS release 6.5 (Final) [root@centos_6 ~]# uname ...
- Windows下ActiveMq安装与使用
一.activeMq安装与启动 Apache Active MQ的官网 :http://activemq.apache.org/ 下载地址: http://activemq.apache.org/ac ...
- linux下activemq安装与配置activemq-5.15.2
linux下activemq安装与配置 前提 配置好jdk环境 一.下载:apache-activemq-5.15.2-bin.tar.gz https://archive.apache.org/ ...
- springboot之activemq安装与实践
环境:腾讯云centos7 注意:activemq安装插件,可能会报错.本人是主机名的问题,所以修改了主机名. vim /etc/hosts vim /etc/hostname 修改这两个文件,并重启 ...
- 开源消息服务中间件ActiveMQ安装部署
1.下载ActiveMQ 去官方网站下载:http://activemq.apache.org/ 2.运行ActiveMQ 解压缩apache-activemq-5.5.1-bin.zip 启动Act ...
随机推荐
- hdu 1395(欧拉函数)
2^x mod n = 1 Time Limit: 2000/1000 MS (Java/Others) Memory Limit: 65536/32768 K (Java/Others)Tot ...
- 聊聊、Zookeeper 数据结构和操作命令
Zookeeper 的视图结构跟标准的 Unix 文件系统很像,都有一个根节点 / .在根节点下面就是一个个的子节点,我们称为 ZNode.ZNode 是 Zookeeper 中最小数据单位,在 ZN ...
- xamarin.ios 本地通知推送
由于ios10版本以后UILocalNotification被标为弃用了,所以要添加新的本地通知推送功能,下面提供一些代码参考. 一.先在AppDelegate.cs上注册本地通知推送功能. publ ...
- 多源最短路径Floyd算法
多源最短路径是求图中任意两点间的最短路,采用动态规划算法,也称为Floyd算法.将顶点编号为0,1,2...n-1首先定义dis[i][j][k]为顶点 i 到 j 的最短路径,且这条路径只经过最大编 ...
- hdu1862
//开始把student stu[100000]放置在main()中导致栈溢出,所以必须放在全局位置, //可以调用数组的排序函数sort,包含头文件#include<algorithm> ...
- django博客开发
找一文件夹作为项目文件夹1 django-admin.py startproject mysite建立工程2 cd mysite python manage.py startapp blog 建立第一 ...
- nginx rewrite arg 带问号的地址转发参数处理?Nginx重定向的参数问题
Nginx重定向的参数问题 在给某网站写rewrite重定向规则时,碰到了这个关于重定向的参数处理问题.默认的情况下,Nginx在进行rewrite后都会自动添加上旧地址中的参数部分,而这对于重定向到 ...
- maven仓库中有jar包pom还报错
maven仓库中有jar包pom还报错 就报错,咋啦? 这个包来源不明,自己拷贝进来的吧?你当我mvn是傻子?我要去网上验证一下: 我自己有个_remote.respositories文件,如果自己用 ...
- C 作用域规则
C 作用域规则 任何一种编程中,作用域是程序中定义的变量所存在的区域,超过该区域变量就不能被访问.C 语言中有三个地方可以声明变量: 在函数或块内部的局部变量 在所有函数外部的全局变量 在形式参数的函 ...
- Winform GridView打印类
using System;using System.Collections.Generic;using System.Text;using System.Drawing.Printing;usin ...