spirngmvc整合mybatis
一、建立一张简单的User表
CREATE TABLE `users` (
`id` int(20) NOT NULL AUTO_INCREMENT,
`name` varchar(20) NOT NULL,
`age` int(20) DEFAULT NULL,
PRIMARY KEY (`id`)
) ENGINE=InnoDB AUTO_INCREMENT=19 DEFAULT CHARSET=utf8;
-- ----------------------------
-- Records of users
-- ----------------------------
INSERT INTO `users` VALUES ('1', '杜崇', '10');
INSERT INTO `users` VALUES ('2', '黄春宇', '12');
INSERT INTO `users` VALUES ('11', '文杰', '2');
INSERT INTO `users` VALUES ('12', '何亮', '20');
INSERT INTO `users` VALUES ('13', '超哥', '25');
INSERT INTO `users` VALUES ('14', '阿宝', '10');
二、用myeclipse建立一个web工程ssi
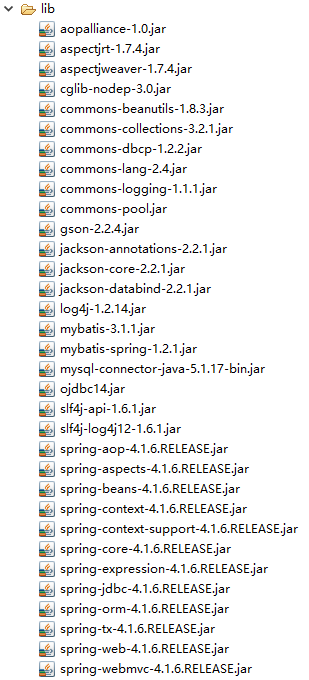
2.1、jar包
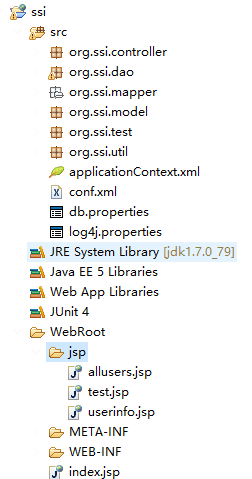
2.2目录结构
2.3、springmvc的核心servlet ssi-servlet.xml
<?xml version="1.0" encoding="UTF-8"?>
<beans xmlns="http://www.springframework.org/schema/beans"
xmlns:xsi="http://www.w3.org/2001/XMLSchema-instance"
xmlns:context="http://www.springframework.org/schema/context"
xmlns:mvc="http://www.springframework.org/schema/mvc"
xmlns:aop="http://www.springframework.org/schema/aop"
xsi:schemaLocation="http://www.springframework.org/schema/beans http://www.springframework.org/schema/beans/spring-beans-4.1.xsd
http://www.springframework.org/schema/context http://www.springframework.org/schema/context/spring-context-4.1.xsd
http://www.springframework.org/schema/aop http://www.springframework.org/schema/aop/spring-aop-4.1.xsd
http://www.springframework.org/schema/mvc http://www.springframework.org/schema/mvc/spring-mvc-4.1.xsd">
<context:component-scan base-package="org.ssi.controller"/>
<!--自动注册解析器和适配器-->
<mvc:annotation-driven/>
<mvc:default-servlet-handler />
<aop:aspectj-autoproxy proxy-target-class="true" />
<!-- 视图解析器的分配器 -->
<bean class="org.springframework.web.servlet.view.ContentNegotiatingViewResolver">
<!--先检查请求的后缀名,如果没有匹配的,则spring检查请求头里面设置的 ContentType 来找适合的 mediaType来返回一种 mediaType
mediaTypes这个属性存储了 你请求后缀名 或者 参数 所对应 的mediaType
-->
<property name="mediaTypes">
<map>
<entry key="atom" value="application/atom+xml"/>
<entry key="html" value="text/html"/>
<entry key="json" value="application/json"/>
</map>
</property>
<!--具体的解析器 -->
<property name="viewResolvers">
<list>
<bean class="org.springframework.web.servlet.view.BeanNameViewResolver"/>
<bean class="org.springframework.web.servlet.view.InternalResourceViewResolver">
<property name="prefix" value="/jsp/"/>
<property name="suffix" value=".jsp"/>
</bean>
</list>
</property>
</bean>
</beans>
2.4、 web.xml
<?xml version="1.0" encoding="UTF-8"?>
<web-app xmlns:xsi="http://www.w3.org/2001/XMLSchema-instance" xmlns="http://java.sun.com/xml/ns/javaee" xmlns:web="http://java.sun.com/xml/ns/javaee/web-app_2_5.xsd" xsi:schemaLocation="http://java.sun.com/xml/ns/javaee http://java.sun.com/xml/ns/javaee/web-app_2_5.xsd" version="2.5">
<display-name></display-name>
<welcome-file-list>
<welcome-file>index.jsp</welcome-file>
</welcome-file-list>
<servlet>
<servlet-name>ssi</servlet-name>
<servlet-class>org.springframework.web.servlet.DispatcherServlet</servlet-class>
<load-on-startup>1</load-on-startup>
</servlet>
<servlet-mapping>
<servlet-name>ssi</servlet-name>
<url-pattern>/</url-pattern>
</servlet-mapping>
<filter>
<filter-name>CharacterEncodingFilter</filter-name>
<filter-class>org.springframework.web.filter.CharacterEncodingFilter</filter-class>
<init-param>
<param-name>encoding</param-name>
<param-value>utf-8</param-value>
</init-param>
</filter>
<filter-mapping>
<filter-name>CharacterEncodingFilter</filter-name>
<url-pattern>/*</url-pattern>
</filter-mapping>
<listener>
<listener-class>org.springframework.web.context.ContextLoaderListener</listener-class>
</listener>
<context-param>
<param-name>contextConfigLocation</param-name>
<param-value>
classpath:applicationContext.xml
</param-value>
</context-param>
<session-config>
<session-timeout>0</session-timeout>
</session-config>
</web-app>
2.5、conf.xml 实际上这个文件可以不要
<?xml version="1.0" encoding="UTF-8"?>
<!DOCTYPE configuration PUBLIC "-//mybatis.org//DTD Config 3.0//EN" "http://mybatis.org/dtd/mybatis-3-config.dtd">
<configuration>
<typeAliases>
<typeAlias type="org.ssi.model.User" alias="User"/>
</typeAliases>
</configuration>
2.6、配置spring容器 applicationContext.xml
<?xml version="1.0" encoding="UTF-8"?>
<beans xmlns="http://www.springframework.org/schema/beans"
xmlns:xsi="http://www.w3.org/2001/XMLSchema-instance" xmlns:p="http://www.springframework.org/schema/p"
xmlns:context="http://www.springframework.org/schema/context"
xmlns:aop="http://www.springframework.org/schema/aop" xmlns:tx="http://www.springframework.org/schema/tx"
xsi:schemaLocation="http://www.springframework.org/schema/beans http://www.springframework.org/schema/beans/spring-beans-4.1.xsd
http://www.springframework.org/schema/context http://www.springframework.org/schema/context/spring-context-4.1.xsd
http://www.springframework.org/schema/aop http://www.springframework.org/schema/aop/spring-aop-4.1.xsd
http://www.springframework.org/schema/tx http://www.springframework.org/schema/tx/spring-tx-4.1.xsd
">
<!-- 加载数据库属性配置文件
<context:property-placeholder location="classpath:db.properties" ignore-unresolvable="true"/>
-->
<bean id="dataSource" class="org.apache.commons.dbcp.BasicDataSource">
<!--
<property name="driverClassName" value="${jdbc.driver}"></property>
<property name="url" value="${jdbc.url}"></property>
<property name="password" value="${jdbc.password}"></property>
<property name="username" value="${jdbc.username}"></property>
-->
<property name="driverClassName" value="com.mysql.jdbc.Driver"></property>
<property name="url" value="jdbc:mysql://localhost:3306/mybatis"></property>
<property name="username" value="root"></property>
<property name="password" value="root"></property>
<!--maxActive: 最大连接数量-->
<property name="maxActive" value="150"/>
<!--minIdle: 最小空闲连接-->
<property name="minIdle" value="5"/>
<!--maxIdle: 最大空闲连接-->
<property name="maxIdle" value="20"/>
<!--initialSize: 初始化连接-->
<property name="initialSize" value="30"/>
<!-- 连接被泄露时是否打印 -->
<property name="logAbandoned" value="true"/>
<!--removeAbandoned: 是否自动回收超时连接-->
<property name="removeAbandoned" value="true"/>
<!--removeAbandonedTimeout: 超时时间(以秒数为单位)-->
<property name="removeAbandonedTimeout" value="10"/>
<!--maxWait: 超时等待时间以毫秒为单位 1000等于60秒-->
<property name="maxWait" value="1000"/>
<!-- 在空闲连接回收器线程运行期间休眠的时间值,以毫秒为单位. -->
<property name="timeBetweenEvictionRunsMillis" value="10000"/>
<!-- 在每次空闲连接回收器线程(如果有)运行时检查的连接数量 -->
<property name="numTestsPerEvictionRun" value="10"/>
<!-- 1000 * 60 * 30 连接在池中保持空闲而不被空闲连接回收器线程-->
<property name="minEvictableIdleTimeMillis" value="10000"/>
</bean>
<bean id="sqlSessionFactory" class="org.mybatis.spring.SqlSessionFactoryBean">
<property name="configLocation" value="classpath:conf.xml" />
<property name="dataSource" ref="dataSource" />
<property name="mapperLocations" value="classpath:org/ssi/mapper/*.xml" />
</bean>
<!-- 配置扫描器 -->
<bean class="org.mybatis.spring.mapper.MapperScannerConfigurer">
<!-- 扫描org.ssi.dao这个包以及它的子包下的所有映射接口类 -->
<property name="basePackage" value="org.ssi.dao" />
<property name="sqlSessionFactoryBeanName" value="sqlSessionFactory" />
</bean>
<!--配置事物 -->
<bean id="txManager"
class="org.springframework.jdbc.datasource.DataSourceTransactionManager ">
<property name="dataSource" ref="dataSource"/>
</bean>
<!-- 注解事务-->
<tx:annotation-driven transaction-manager="txManager" />
<context:annotation-config />
<!--
-->
<context:component-scan base-package="org.ssi.service,org.ssi.dao," />
</beans>
2.7、dao接口,不用提供实现类,实现类有mybatis实现
package org.ssi.dao;
import java.util.List;
import org.ssi.model.User;
public interface UserMapperI {
/**
* 增
* @param user
*/
public void addUser(User user);
/**
* 改
* @param user
*/
public void updateUser(User user);
/**
* 删
* @param id
*/
public void deleteUser(int id);
/**
* 查
* @param id
* @return
*/
public User getUser(int id);
/**
* 查所有
* @return
*/
public List<User> getAllUsers();
}
与配置文件中的类文件以及路径相对应,
2.8、pojo类 user.java
package org.ssi.model;
public class User {
private int id;
private String name;
private int age;
public User(int id, String name, int age) {
super();
this.id = id;
this.name = name;
this.age = age;
}
public User() {
super();
}
public int getId() {
return id;
}
public void setId(int id) {
this.id = id;
}
public String getName() {
return name;
}
public void setName(String name) {
this.name = name;
}
public int getAge() {
return age;
}
public void setAge(int age) {
this.age = age;
}
@Override
public String toString() {
return "User [id=" + id + ", name=" + name + ", age=" + age + "]";
}
}
2.9、UserMapperI.xml
<?xml version="1.0" encoding="UTF-8" ?>
<!DOCTYPE mapper PUBLIC "-//mybatis.org//DTD Mapper 3.0//EN" "http://mybatis.org/dtd/mybatis-3-mapper.dtd">
<!--
为这个mapper指定一个唯一的namespace,namespace的值习惯上设置成包名+sql映射文件名,这样就能够保证namespace的值是唯一的
例如namespace="org.ssi.dao.UserMapperI"就是org.ssi.dao(包名)+UserMapperI(userMapperI.xml文件去除后缀)
-->
<mapper namespace="org.ssi.dao.UserMapperI">
<!-- <resultMap>标签用来处理pojo对象的属性与表字段之间的不匹配问题
<resultMap id="userResultMap" type="User">
<id property="id" column="userid" />
<result property="name" column="username" />
<result property="age" column="age" />
</resultMap>
-->
<!--
在select标签中编写查询的SQL语句, 设置select标签的id属性为getUser,id属性值必须是唯一的,
不能够重复 使用parameterType属性指明查询时使用的参数类型,resultType属性指明查询返回的结果集类型
resultType="org.mybatis.model.User"就表示将查询结果封装成一个User类的对象返回
User类就是users表所对应的实体类
-->
<!--
根据id查询得到一个user对象
-->
<select id="getUser" parameterType="int"
resultType="User">
select * from users where id=#{id}
</select>
<insert id="addUser" parameterType="User" >
insert into users(name ,age) values(#{name},#{age})
</insert>
<delete id="deleteUser" parameterType="int">
delete from users where id=#{id}
</delete>
<update id="updateUser" parameterType="User">
update users set name=#{name},age=#{age} where id=#{id}
</update>
<select id="getAllUsers" resultType="User">
select * from users
</select>
</mapper>
该xml文件中的各种操作的id必须要跟dao接口中的方法名字一一对应,否侧会报错。
按照以上配置,springmvc整合mybatis的整体架构已经完成,
三、编写代码进行测试
Controller控制器 SsiController.java
package org.ssi.controller;
import java.util.List;
import javax.servlet.http.HttpServletRequest;
import org.springframework.beans.factory.annotation.Autowired;
import org.springframework.stereotype.Controller;
import org.springframework.web.bind.annotation.PathVariable;
import org.springframework.web.bind.annotation.RequestMapping;
import org.springframework.web.bind.annotation.RequestMethod;
import org.ssi.dao.UserMapperI;
import org.ssi.model.User;
@Controller
@RequestMapping(value="/controller")
public class SsiController {
@Autowired
private UserMapperI umi;
private List<User> ulist;
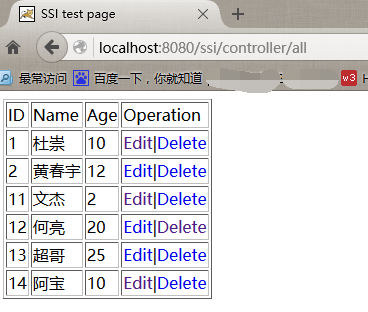
@RequestMapping(value="/all",method = RequestMethod.GET)
public String uList(HttpServletRequest request){
ulist=this.umi.getAllUsers();
for (int i = 0; i < ulist.size(); i++) {
System.out.println(ulist.get(i));
}
request.setAttribute("ulist",ulist);
return "allusers";
}
@RequestMapping(value = "/addu", method = RequestMethod.POST)
public String addU(User u) {
this.umi.addUser(u);
return "redirect:all";
}
@RequestMapping(value = "/delete/{id}", method = RequestMethod.GET)
public String deleteU(HttpServletRequest request,@PathVariable Integer id) {
this.umi.deleteUser(id);
return "redirect:/controller/all";
}
@RequestMapping(value = "/get/{id}", method = RequestMethod.GET)
public String getUserById(HttpServletRequest request,@PathVariable Integer id) {
User u=this.umi.getUser(id);
request.setAttribute("user", u);
return "userinfo";
}
@RequestMapping(value = "/update/{id}", method = RequestMethod.POST)
public String updateU(HttpServletRequest request,@PathVariable Integer id,User u) {
User uu=this.umi.getUser(id);
uu.setName(u.getName());
uu.setAge(u.getAge());
this.umi.updateUser(uu);
return "redirect:/controller/all";
}
}
3.1、测试新增
index.jsp
<%@ page language="java" import="java.util.*" pageEncoding="UTF-8"%>
<%
String path = request.getContextPath();
String basePath = request.getScheme()+"://"+request.getServerName()+":"+request.getServerPort()+path+"/";
%>
<!DOCTYPE HTML PUBLIC "-//W3C//DTD HTML 4.01 Transitional//EN">
<html>
<head>
<base href="<%=basePath%>">
<title>Add User</title>
<meta http-equiv="pragma" content="no-cache">
<meta http-equiv="cache-control" content="no-cache">
<meta http-equiv="expires" content="0">
<meta http-equiv="keywords" content="keyword1,keyword2,keyword3">
<meta http-equiv="description" content="This is my page">
<!--
<link rel="stylesheet" type="text/css" href="styles.css">
-->
</head>
<body>
<form action="controller/addu" method="post">
name : <input name="name" type="text"><br>
age : <input name="age" type="text"><br>
<input type="submit" value="submit">
</form>
<br>
</body>
</html>
添加前:
添加:
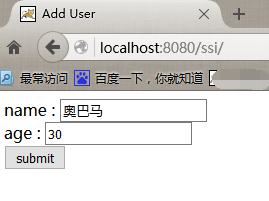
添加后:

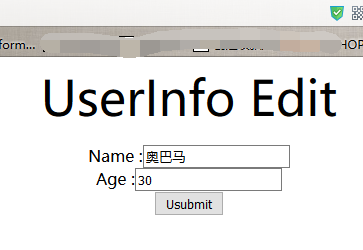
点击edit 19 奥巴马
userinfo.jsp
<%@ page language="java" import="java.util.*" pageEncoding="UTF-8"%>
<%
String path = request.getContextPath();
String basePath = request.getScheme()+"://"+request.getServerName()+":"+request.getServerPort()+path+"/";
%>
<!DOCTYPE HTML PUBLIC "-//W3C//DTD HTML 4.01 Transitional//EN">
<html>
<head>
<base href="<%=basePath%>">
<title>UserInfo</title>
<meta http-equiv="pragma" content="no-cache">
<meta http-equiv="cache-control" content="no-cache">
<meta http-equiv="expires" content="0">
<meta http-equiv="keywords" content="keyword1,keyword2,keyword3">
<meta http-equiv="description" content="This is my page">
<!--
<link rel="stylesheet" type="text/css" href="styles.css">
-->
</head>
<body>
<p align="center"><font size="20">UserInfo Edit</font></p>
<div align="center">
<form action="controller/update/${user.id}" method="post">
Name :<input type="text" name="name" value="${user.name}"><br>
Age :<input type="text" name="age" value="${user.age }"><br>
<input type="submit" value="Usubmit">
</form>
</div>
</body>
</html>

spirngmvc整合mybatis的更多相关文章
- spirngmvc整合mybatis实现CRUD
一.建立一张简单的User表 CREATE TABLE `users` ( `id` ) NOT NULL AUTO_INCREMENT, `name` ) NOT NULL, `age` ) DEF ...
- springboot使用之二:整合mybatis(xml方式)并添加PageHelper插件
整合mybatis实在前面项目的基础上进行的,前面项目具体整合请参照springboot使用之一. 一.整合mybatis 整合mybatis的时候可以从mybatis官网下载mybatis官网整合的 ...
- Spring学习总结(六)——Spring整合MyBatis完整示例
为了梳理前面学习的内容<Spring整合MyBatis(Maven+MySQL)一>与<Spring整合MyBatis(Maven+MySQL)二>,做一个完整的示例完成一个简 ...
- Spring学习总结(五)——Spring整合MyBatis(Maven+MySQL)二
接着上一篇博客<Spring整合MyBatis(Maven+MySQL)一>继续. Spring的开放性和扩张性在J2EE应用领域得到了充分的证明,与其他优秀框架无缝的集成是Spring最 ...
- SpringMVC入门二: 1规范结构, 2简单整合MyBatis
昨天拿springMVC写的helloworld结构不好, 这次先调整一下体系结构 , 然后简单整合一下MyBatis spring的配置还是以注解为主, 不过MyBatis的映射文件什么的还是拿xm ...
- 分析下为什么spring 整合mybatis后为啥用不上session缓存
因为一直用spring整合了mybatis,所以很少用到mybatis的session缓存. 习惯是本地缓存自己用map写或者引入第三方的本地缓存框架ehcache,Guava 所以提出来纠结下 实验 ...
- 2017年2月16日 分析下为什么spring 整合mybatis后为啥用不上session缓存
因为一直用spring整合了mybatis,所以很少用到mybatis的session缓存. 习惯是本地缓存自己用map写或者引入第三方的本地缓存框架ehcache,Guava 所以提出来纠结下 实验 ...
- Spring Boot 整合 MyBatis
前言 现在业界比较流行的数据操作层框架 MyBatis,下面就讲解下 Springboot 如何整合 MyBatis,这里使用的是xml配置SQL而不是用注解.主要是 SQL 和业务代码应该隔离,方便 ...
- SpringBoot整合Mybatis之项目结构、数据源
已经有好些日子没有总结了,不是变懒了,而是我一直在奋力学习springboot的路上,现在也算是完成了第一阶段的学习,今天给各位总结总结. 之前在网上找过不少关于springboot的教程,都是一些比 ...
随机推荐
- multitail
multitail 在分隔的窗口查看你的日志
- bzoj1177&p3625 [APIO2009]采油区域p[大力讨论]
我好菜菜啊. 给定矩形,从中选出三个边长K的正方形互不重叠,使得覆盖到的数总和最大. 想的时候往dp上钻去了..结果一开始想了一个错的dp,像这样 /************************* ...
- 3170: [Tjoi 2013]松鼠聚会
题目大意 给定n个点,找到一个点使这个点到其他所有点的切比雪夫距离之和最小. 题解 我们知道切比雪夫距离和曼哈顿距离的转化公式 \(1\)表示切比雪夫距离,\(2\)表示曼哈顿距离 我们有: \(x_ ...
- jdk、tomcat如何配置环境变量
一.安装JDK和Tomcat 1,安装JDK:直接运行jdk-7-windows-i586.exe可执行程序,默认安装即可. 备注:路径可以其他盘符,不建议路径包含中文名及特殊符号. 2.安装Tomc ...
- HDU4391(线段树+剪枝)
Paint The Wall Time Limit: 20000/10000 MS (Java/Others) Memory Limit: 32768/32768 K (Java/Others) ...
- Scala学习——类,继承,接口(中)
基本类的使用:(初) package com.dtspark.scala.basics /** * trait是一个接口 * 接口的第一次继承用extends,多继承时用with * 多继承时,如果这 ...
- Lagom学习(一)
Lagom是JAVA系下响应式 微服务框架,其特性包括: 目前,大多数已有的微服务框架关注于简化单个微服务的构建,Lagom将其扩展到了微服务所构成的系统,分布式系统的复杂性. 同步通信使用HTTP, ...
- Unity3d笔记
当变量重命名后,已序列化保存的值会丢失,如果希望继续保留其数值,可使用FormerlySerializedAs,如下代码所示: [UnityEngine.Serialization.FormerlyS ...
- skb_store_bits() 和 skb_copy_bits()
int skb_copy_bits(const struct sk_buff *skb, int offset, void *to, int len); int skb_store_bits(c ...
- centos 安装webbench 用于web压力测试
1.WebBench安装: yum install ctags(先安装依赖库) mkdir /usr/local/man (创建一个目录不然会报错) wget http://home.tiscali. ...