Ubuntu WSL 下编译并使用OpenJDK12
一,安装Ubuntu WSL
1.Windows中设置WSL并安装Ubuntu wsl
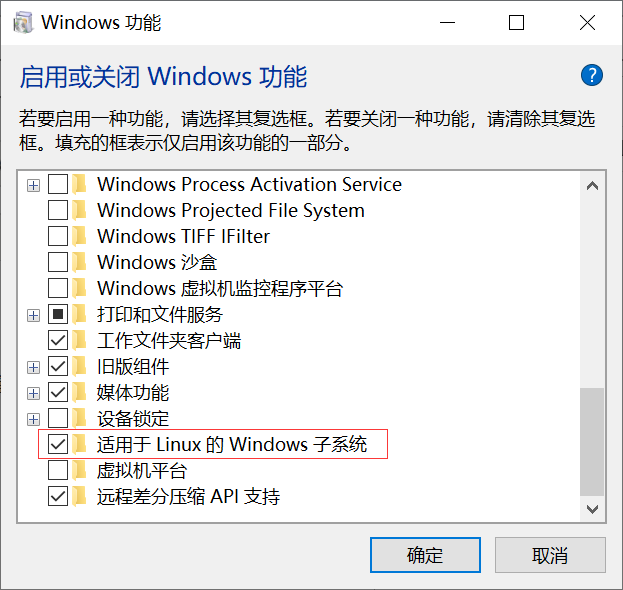
“控制面板”——>"程序”——>"启用或关闭Windows功能"中勾选如下,否则安装后无法开启
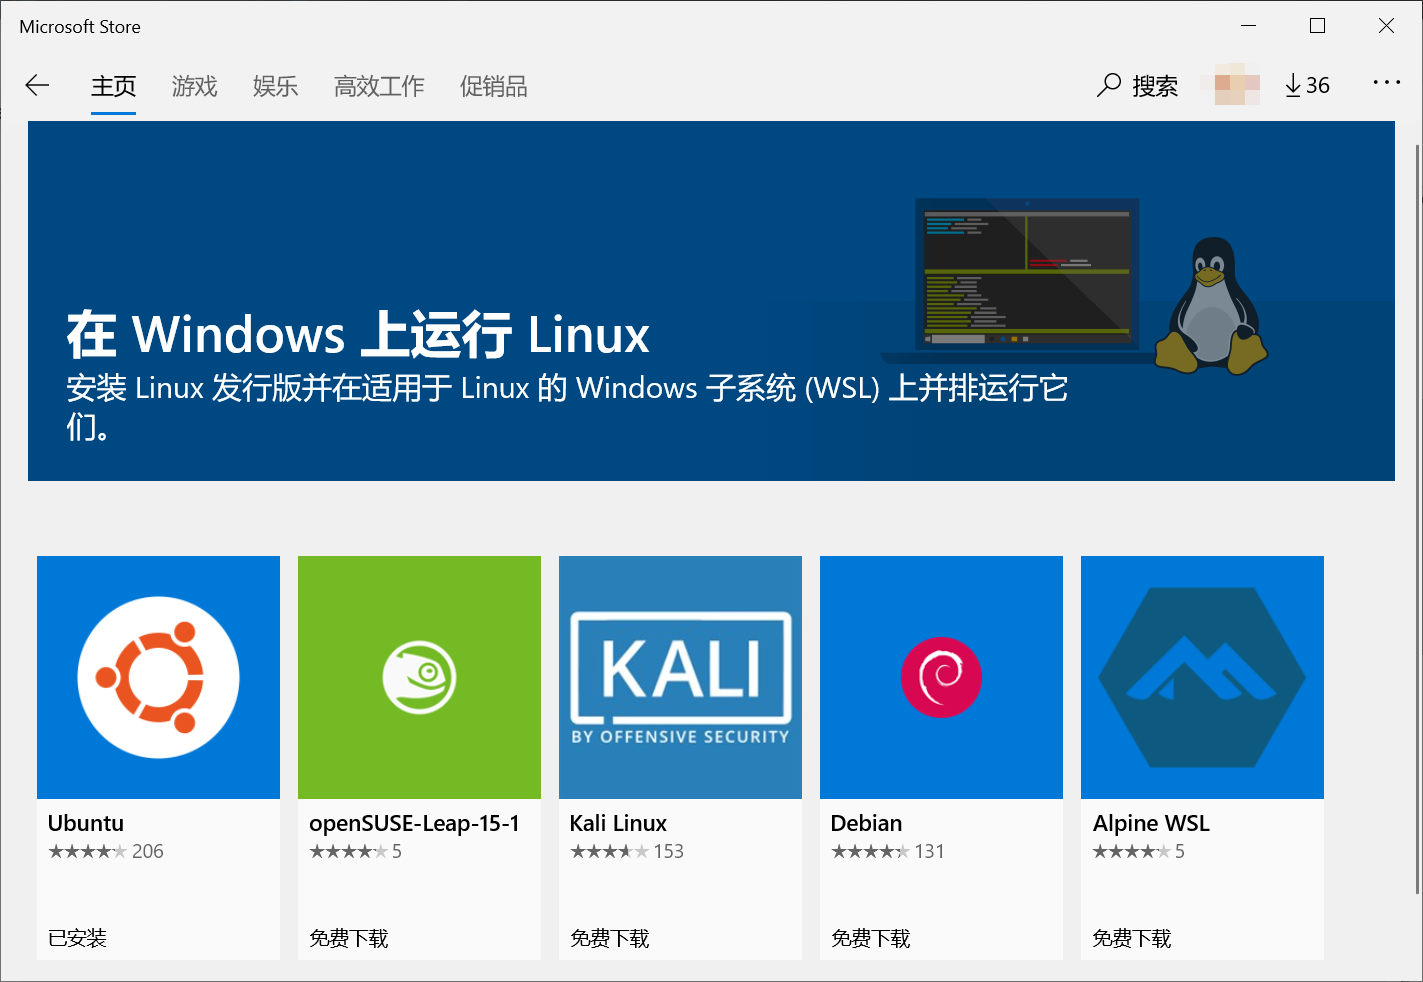
在Windows商店中搜索Ubuntu并下载安装
1.1 若要切换到root
刚进入是,root密码不知道的,可使用
sudo passwd
设置密码,设置后,使用 su root 便能切换到root用户。
1.2 若要使用windows资源管理器操作ubuntu中文件
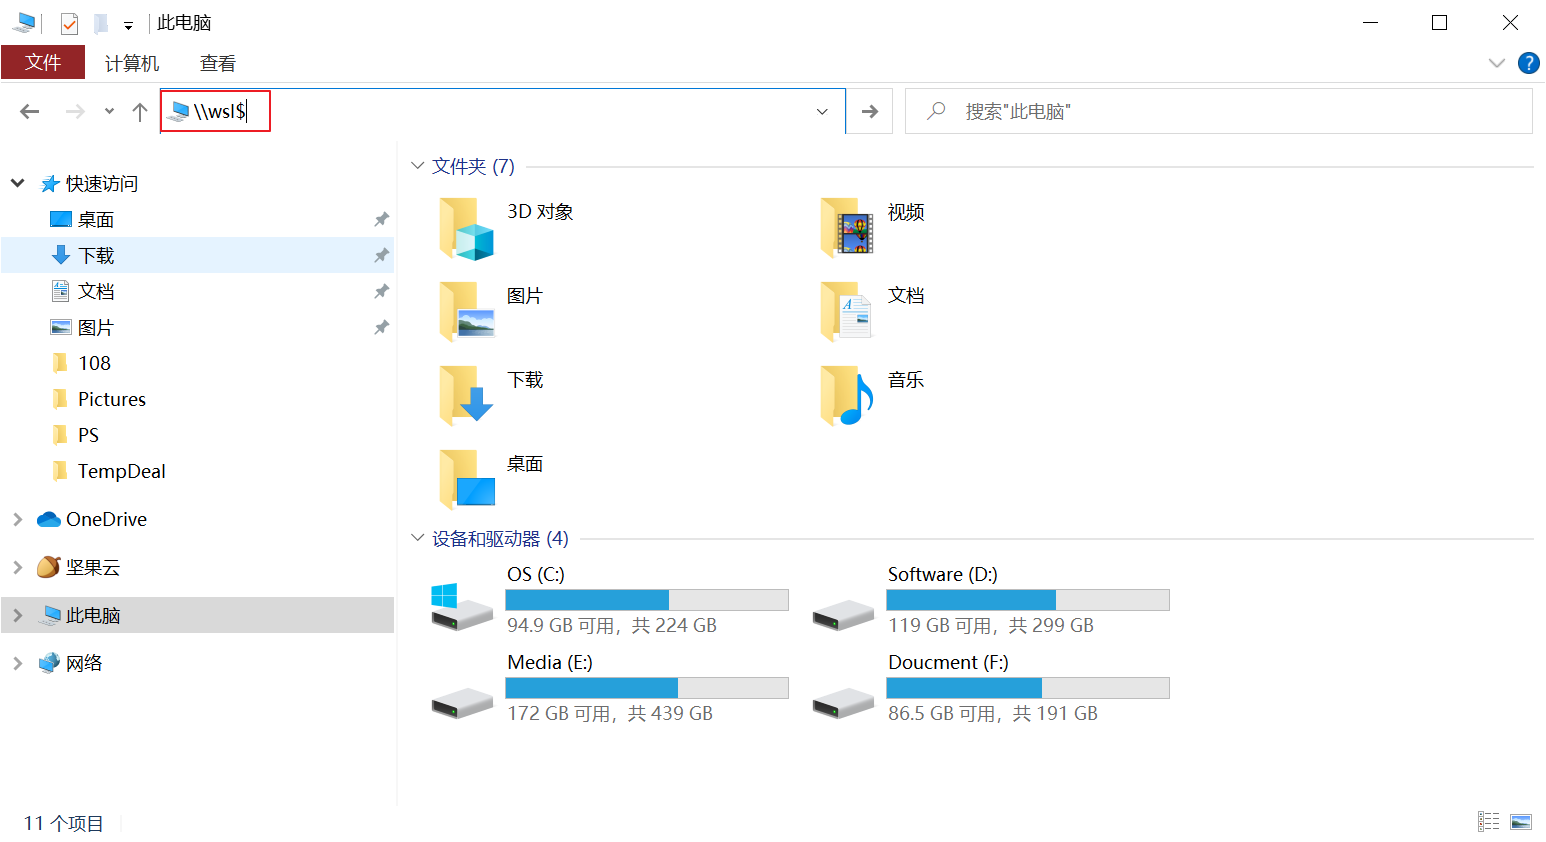
对与Linux命令不是很熟悉的同学,可以使用windows资源管理器操作wsl中的文件,更加的方便:
文件资源管理器输入\\wsl$
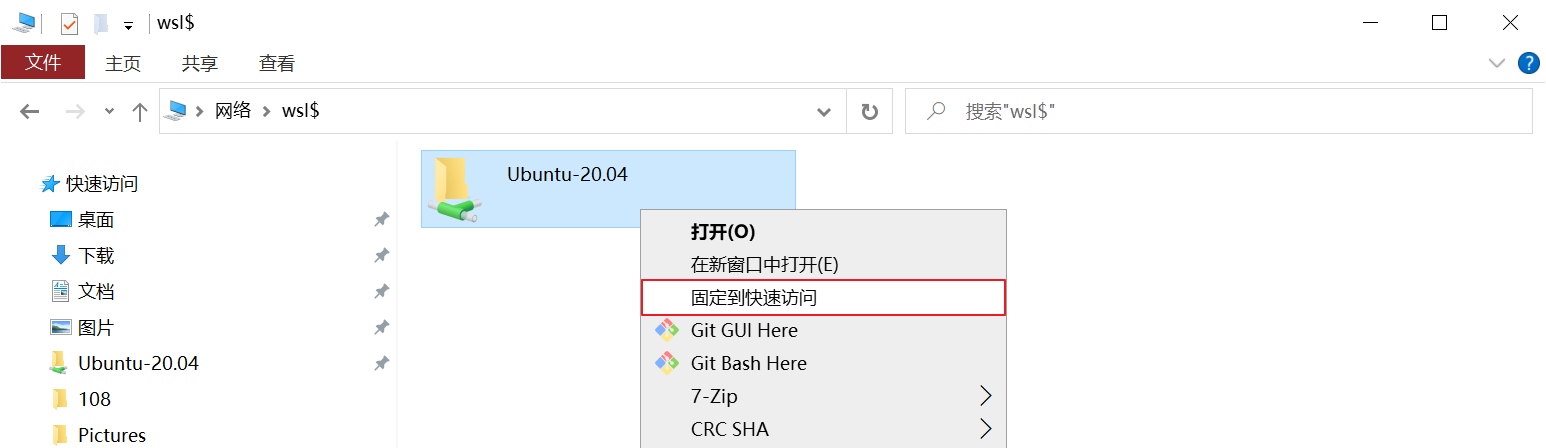
可将其固定到快速访问,方便以后的使用,
2.更换为国内源
将Ubuntu的更新源换到国内已获得更好的体验,本人换的为阿里云的源,当然你也可以换别的源:
更新源的目录是在 etc/apt/sources.list,先备份源
sudo cp sources.list sources.list.backup
然后在其前添加或将其内容替换为:
deb http://mirrors.aliyun.com/ubuntu/ bionic main restricted universe multiverse

deb-src http://mirrors.aliyun.com/ubuntu/ bionic main restricted universe multiverse

deb http://mirrors.aliyun.com/ubuntu/ bionic-security main restricted universe multiverse

deb-src http://mirrors.aliyun.com/ubuntu/ bionic-security main restricted universe multiverse

deb http://mirrors.aliyun.com/ubuntu/ bionic-updates main restricted universe multiverse

deb-src http://mirrors.aliyun.com/ubuntu/ bionic-updates main restricted universe multiverse

deb http://mirrors.aliyun.com/ubuntu/ bionic-proposed main restricted universe multiverse

deb-src http://mirrors.aliyun.com/ubuntu/ bionic-proposed main restricted universe multiverse

deb http://mirrors.aliyun.com/ubuntu/ bionic-backports main restricted universe multiverse

deb-src http://mirrors.aliyun.com/ubuntu/ bionic-backports main restricted universe multiverse
然后运行更新源
sudo apt-get update
二,OpenJDK12源码获取
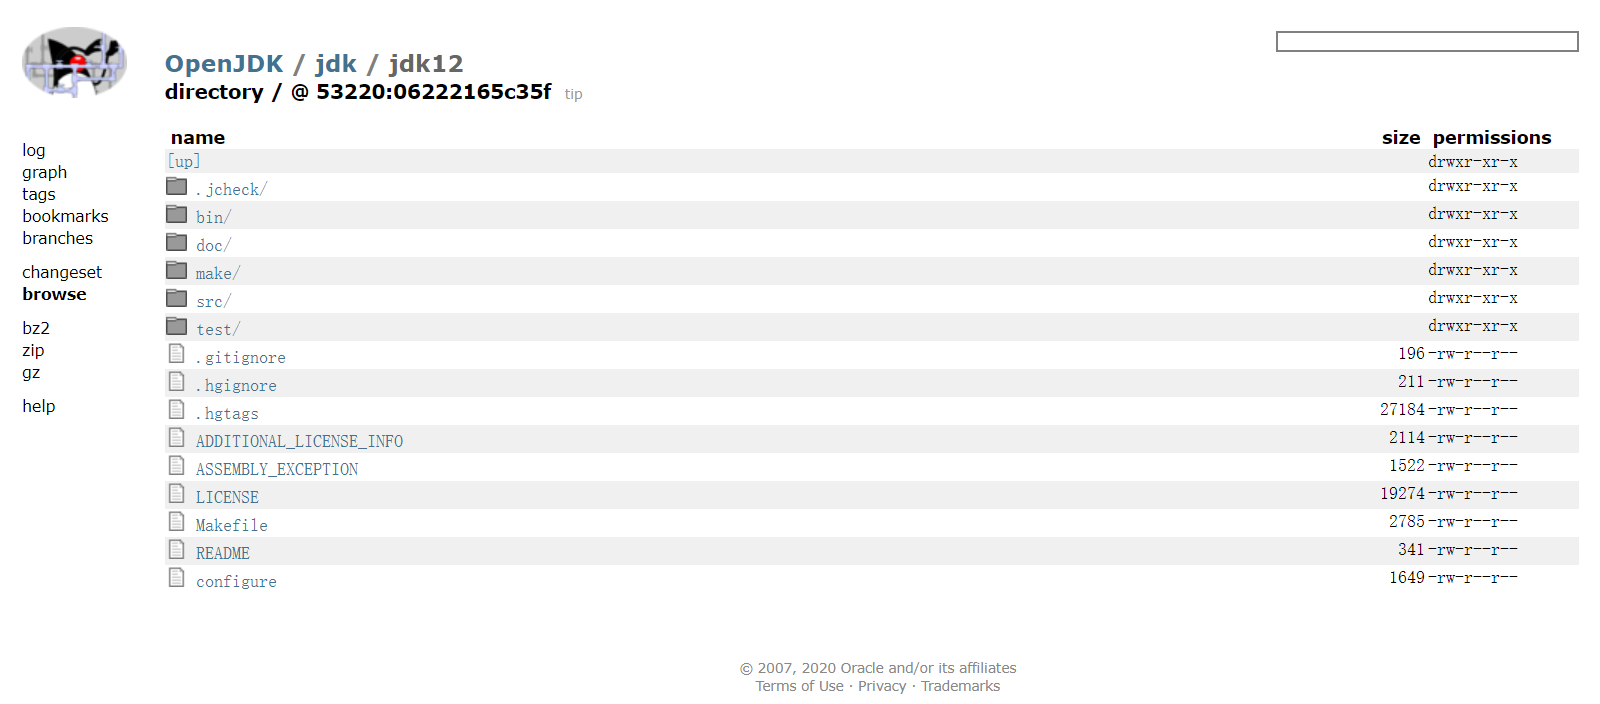
OpenJDK12源码地址:http://hg.openjdk.java.net/jdk/jdk12/file/06222165c35f
百度网盘 提取码:0h2s
三,构建编译环境
下载源码解压后,在其doc目录下有相关的说明文件,
安装GCC命令
sudo apt-get install build-essential
第三方依赖库
| 工具 | 库名称 | 安装命令 |
| FreeType | The Free Type Project | sudo apt-get install libfreetype6-dev |
| CUPS | Common UNIX Printing System | sudo apt-get install libcups2-dev |
| X11 | X Window System | sudo apt-get install libx11-dev libxext-dev libxrender-dev libxrandr-dev libxtst-dev libxt-dev |
| ALSA | Advanced Linux Sound Architecture | sudo apt-get install libasound2-dev |
| libffi | Portable Foreign Function Interface Library | sudo apt-get install libffi-dev |
| Autoconf | Extensible Package of M4 Macros | sudo apt-get install autoconf |
安装OpenJDK11
sudo apt-get install openjdk-11-jdk
安装zip
sudo apt-get install zip
如没安装zip在检查编译时可能会报如下错误
configure: error: Could not find required tool for ZIPEXE

configure exiting with result code 1
四,进行编译
编译时有很多参数可以供使用,如设置编译一个FastDebug版的,只有Server模式的HotSpot的虚拟机
bash configure --enable-debug --with-jvm-variants=server
如果环境已经构建好会出现如下类似内容:
====================================================

A new configuration has been successfully created in

/home/flytree/jdk12/build/linux-x86_64-server-fastdebug

using configure arguments '--enable-debug --with-jvm-variants=server'.

Configuration summary:

* Debug level:    fastdebug

* HS debug level: fastdebug

* JVM variants:   server

* JVM features:   server: 'aot cds cmsgc compiler1 compiler2 epsilongc g1gc graal jfr jni-check jvmci jvmti management nmt parallelgc serialgc services shenandoahgc vm-structs zgc'

* OpenJDK target: OS: linux, CPU architecture: x86, address length: 64

* Version string: 12-internal+0-adhoc.flytree.jdk12 (12-internal)

Tools summary:

* Boot JDK:       openjdk version "11.0.6" 2020-01-14 OpenJDK Runtime Environment (build 11.0.6+10-post-Ubuntu-1ubuntu118.04.1) OpenJDK 64-Bit Server VM (build 11.0.6+10-post-Ubuntu-1ubuntu118.04.1, mixed mode, sharing)  (at /usr/lib/jvm/java-11-openjdk-amd64)

* Toolchain:      gcc (GNU Compiler Collection)

* C Compiler:     Version 7.5.0 (at /usr/bin/gcc)

* C++ Compiler:   Version 7.5.0 (at /usr/bin/g++)

Build performance summary:

* Cores to use:   4

* Memory limit:   12154 MB
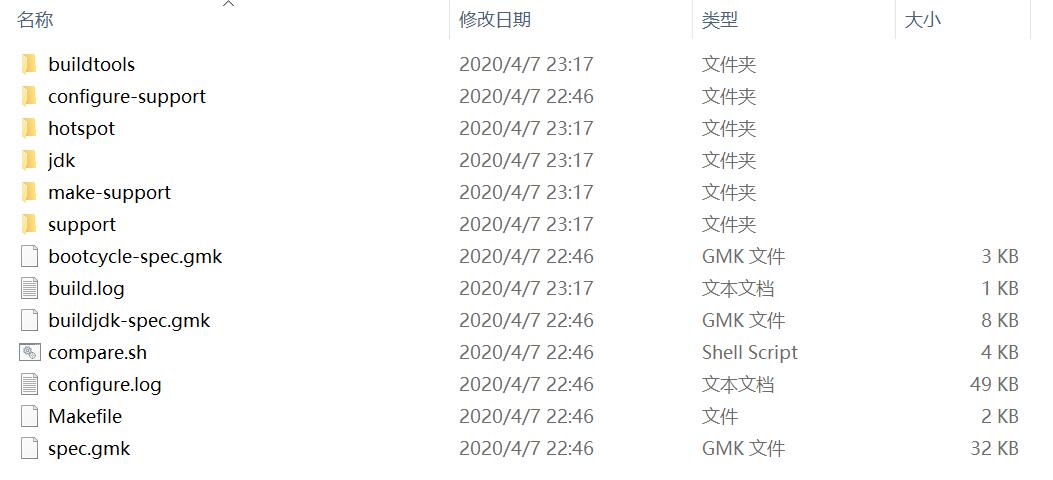
并会产生已下目录
然后执行以下命令,进行编译
make images
编译后得到的JDK

文档中参数说明:
Configure Arguments for Tailoring the Build
--enable-debug- Set the debug level tofastdebug(this is a shorthand for--with-debug-level=fastdebug)--with-debug-level=<level>- Set the debug level, which can berelease,fastdebug,slowdebugoroptimized. Default isrelease.optimizedis variant ofreleasewith additional Hotspot debug code.--with-native-debug-symbols=<method>- Specify if and how native debug symbols should be built. Available methods arenone,internal,external,zipped. Default behavior depends on platform. See Native Debug Symbols for more details.--with-version-string=<string>- Specify the version string this build will be identified with.--with-version-<part>=<value>- A group of options, where<part>can be any ofpre,opt,build,major,minor,securityorpatch. Use these options to modify just the corresponding part of the version string from the default, or the value provided by--with-version-string.--with-jvm-variants=<variant>[,<variant>...]- Build the specified variant (or variants) of Hotspot. Valid variants are:server,client,minimal,core,zero,custom. Note that not all variants are possible to combine in a single build.--with-jvm-features=<feature>[,<feature>...]- Use the specified JVM features when building Hotspot. The list of features will be enabled on top of the default list. For thecustomJVM variant, this default list is empty. A complete list of available JVM features can be found usingbash configure --help.--with-target-bits=<bits>- Create a target binary suitable for running on a<bits>platform. Use this to create 32-bit output on a 64-bit build platform, instead of doing a full cross-compile. (This is known as a reduced build.)On Linux, BSD and AIX, it is possible to override where Java by default searches for runtime/JNI libraries. This can be useful in situations where there is a special shared directory for system JNI libraries. This setting can in turn be overriden at runtime by setting the
java.library.pathproperty.
--with-jni-libpath=<path>- Use the specified path as a default when searching for runtime libraries.Configure Arguments for Native Compilation
--with-devkit=<path>- Use this devkit for compilers, tools and resources--with-sysroot=<path>- Use this directory as sysroot--with-extra-path=<path>[;<path>]- Prepend these directories to the default path when searching for all kinds of binaries--with-toolchain-path=<path>[;<path>]- Prepend these directories when searching for toolchain binaries (compilers etc)--with-extra-cflags=<flags>- Append these flags when compiling JDK C files--with-extra-cxxflags=<flags>- Append these flags when compiling JDK C++ files--with-extra-ldflags=<flags>- Append these flags when linking JDK librariesConfigure Arguments for External Dependencies
--with-boot-jdk=<path>- Set the path to the Boot JDK--with-freetype=<path>- Set the path to FreeType--with-cups=<path>- Set the path to CUPS--with-x=<path>- Set the path to X11--with-alsa=<path>- Set the path to ALSA--with-libffi=<path>- Set the path to libffi--with-jtreg=<path>- Set the path to JTReg. See Running TestsCertain third-party libraries used by the JDK (libjpeg, giflib, libpng, lcms and zlib) are included in the JDK repository. The default behavior of the JDK build is to use this version of these libraries, but they might be replaced by an external version. To do so, specify
systemas the<source>option in these arguments. (The default isbundled).
--with-libjpeg=<source>- Use the specified source for libjpeg--with-giflib=<source>- Use the specified source for giflib--with-libpng=<source>- Use the specified source for libpng--with-lcms=<source>- Use the specified source for lcms--with-zlib=<source>- Use the specified source for zlib参考:《深入理解Java虚拟机:JVM高级特性与最佳实践》(第三版)
五,使用编译后的JDK
将编译后的JDK目录,设置为JAVA_HOME,修改文件
sudo vim ~/.bashrc
在其最后添加
export JAVA_HOME=/home/flytree/jdk12/build/linux-x86_64-server-fastdebug/jdk

export JRE_HOME=${JAVA_HOME}/jre

export CLASSPATH=.:${JAVA_HOME}/lib:${JRE_HOME}/lib

export PATH=${JAVA_HOME}/bin:$PATH
执行‘source ~/.bashrc’使得保存生效,执行'java -version'看时否有效
$ java -version

openjdk version "12-internal" 2019-03-19

OpenJDK Runtime Environment (fastdebug build 12-internal+0-adhoc.flytree.jdk12)

OpenJDK 64-Bit Server VM (fastdebug build 12-internal+0-adhoc.flytree.jdk12, mixed mode)
编写测试类
vim Hello.java
public class Hello {

    public static void main(String[] args) {

        System.out.println("Hello flytree");

    }

}
运行测试类
# javac Hello.java

# java Hello

Hello flytree
Ubuntu WSL 下编译并使用OpenJDK12的更多相关文章
- Ubuntu/CentOS下编译Nginx最基本参数
Ubuntu/CentOS下编译Nginx安装基本参数,做个记录: groupadd www useradd -g www www ./configure --user=www --group=www ...
- premake 在64位Ubuntu系统下编译32位GCC程序
首先,要安装GCC 4.8, 参考前文:Ubuntu 12.04 & 13.04 安装 GCC4.8.1 其中,重点是安装multilib apt-get install gcc-4.8-mu ...
- ubuntu 环境下编译 hadoop 2.6.0的简单方法
由于服务器一般都64位系统, hadoop网站的release版本32位native库不能运行,所以需要自己在编译一下.以下是我采用的一个编译的过程,比较简单,不用下载各种版本及环境配置,通过命令就能 ...
- ubuntu环境下编译linux内核问题解决备忘
在使用比较新的gcc编译内核时,经常遇到这个问题: 问题一: 提示: mkimage" command not found - U-Boot images will not be built ...
- Ubuntu/Debian下编译PC版的ffmpeg
1.安装git: 在命令行下执行 sudo apt-get install git-core 2.下载最新版本的ffmpeg: git clone git://source.ffmpeg.org/ff ...
- 在Ubuntu系统下编译arcsim仿真器
首先,用tar zxvf arcsim-0.2.1.tar.gz 将软件包解压 然后,打开里面的INSTALL文件,按照里面的步骤一步一步安装库.Ubuntu13.04下 1.BLAS sudo ap ...
- Ubuntu系统下arm-linux-gcc交叉编译环境搭建过程
搭建所需环境Linux版本:Ubuntu 14.10 交叉编译器版本:arm-linux-gcc-4.4.3资源链接 何为交叉编译环境搭建交叉编译环境,即安装.配置交叉编译工具链.在Ubuntu环境下 ...
- windows(wsl)下的trino编译和升级注意事项
最近在进行旧版本的prestosql和prestodb升级相关的操作,尝试自己编译了一下,这里记录一下过程和遇到问题的处理. 因为Trino不支持windows下的编译,如果使用windows最方便的 ...
- ubuntu下编译caffe
Ubuntu下编译caffe 纯粹是个人编译的记录.不用CUDA(笔记本是amd卡,万恶的nvidia):不手动编译依赖包(apt-get是用来干啥的?用来直接装二进制包,以及自动解决依赖项的) ca ...
- ubuntu下编译VLC
ubuntu下编译VLC 标签(空格分隔): ubuntu vlc 视频 编译 [TOC] 1.下载VLC源码包并解压 VLC的源码包在VLC的官网有,可以直接下载.也可以使用git来clone一个. ...
随机推荐
- Ubuntu系统部署springcloud+nacos遇到的问题。
1,部署上的jar包运行正常,但是通过浏览器不能访问,telnet +IP+端口连接不通.小皮面板访问后台接口也是不通但是小皮面板可以通过浏览器访问.具体问题暂未解决. 2,改用docker部署,将j ...
- 初学STM32 CAN通信(三)
1. stm32 CAN通信标准库函数 //CAN通信初始化函数 uint8_t CAN_Init(CAN_TypeDef* CANx, CAN_InitTypeDef* CAN_InitStruct ...
- #分块,二分#洛谷 5356 [Ynoi2017] 由乃打扑克
题目 支持区间加和区间查询第 \(k\) 小 分析 分块之后给每个整块排序,这样修改的时候整块打标记,散块直接分开把需要加的部分暴力加之后归并,就是 \(O(\sqrt{n})\) 的 查询的话,如果 ...
- HTTP协议安全头部的笔记
本文于2016年3月完成,发布在个人博客网站上. 考虑个人博客因某种原因无法修复,于是在博客园安家,之前发布的文章逐步搬迁过来. 近日项目组对当前开发.维护的Web系统做了AppScan扫描,扫描的结 ...
- FindBugs问题EQ_COMPARETO_USE_OBJECT_EQUALS的解决方法
本文记录的是2016年4月初发生的事情. 前几天,标准CI的静态检查页面发现一个项目组同事引入的FindBugs问题,EQ_COMPARETO_USE_OBJECT_EQUALS,CI对这个问题给出的 ...
- 基于ArkUI框架开发——图片模糊处理的实现
原文:https://mp.weixin.qq.com/s/vwXVj5vmAxDRG_jTk_8hPA,点击链接查看更多技术内容. 现在市面上有很多APP,都或多或少对图片有模糊上的设计,所以,图 ...
- [AHOI2014/JSOI2014/一本通1722]骑士游戏 题解 (spfa做dp)
题目描述 在游戏中,JYY一共有两种攻击方式,一种是普通攻击,一种是法术攻击.两种攻击方式都会消耗JYY一些体力.采用普通攻击进攻怪兽并不能把怪兽彻底杀死,怪兽的尸体可以变出其他一些新的怪兽,注意一个 ...
- 家庭实验室系列文章-如何迁移树莓派系统到更大的 SD 卡?
前言 其实这个专题很久很久之前就想写了,但是一直因为各种原因拖着没动笔. 因为没有资格,也没有钱在一线城市买房 (); 但是在要结婚之前,婚房又是刚需. 我和太太最终一起在一线城市周边的某二线城市买了 ...
- github仓库开始启用Token认证,用户名密码模式将在2021年8月停止使用
提交代码到github原本使用github的登录账号和密码即可.现在github出于安全的考虑,将在2021年8月停止使用账号和密码的方式访问github仓库,改为token认证的方式. 创建步骤 点 ...
- HarmonyOS Connect FAQ第三期
原文:https://mp.weixin.qq.com/s/YpI9-k4yQvNhaMfg7Li82g,点击链接查看更多技术内容. 在开发HarmonyOS Connect生态产品时,你是否对设 ...