RTX显卡 运行TensorFlow=1.14.0 代码 报错 Could not create cudnn handle: CUDNN_STATUS_INTERNAL_ERROR
硬件环境:
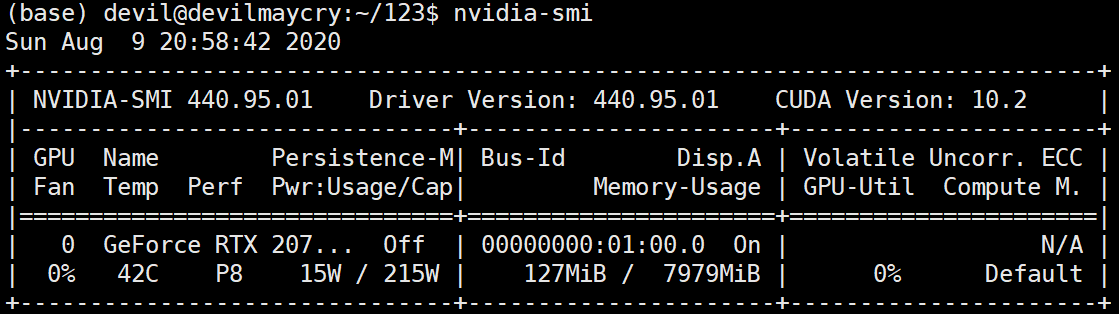
RTX2070super 显卡
软件环境:
Ubuntu18.04.5

Tensorflow = 1.14.0

---------------------------------------------------------------------
运行代码:
import numpy as np

import tensorflow as tf

from tensorflow.examples.tutorials.mnist import input_data

mnist = input_data.read_data_sets("MNIST_data/", one_hot=True)

def dense(x, size, scope):

    return tf.contrib.layers.fully_connected(x, size,

                        activation_fn=None, scope=scope)

def dense_relu(x, size, scope):

    with tf.variable_scope(scope):

        h1 = dense(x, size, 'dense')

        return tf.nn.relu(h1, 'relu')

tf.reset_default_graph()

x = tf.placeholder('float32', (None, 784), name='x')

y = tf.placeholder('float32', (None, 10), name='y')

phase = tf.placeholder(tf.bool, name='phase')

h1 = dense_relu(x, 100, 'layer1')

h1 = tf.contrib.layers.batch_norm(h1,

                            center=True, scale=True,

                            is_training=phase,

                            scope='bn_1')

h2 = dense_relu(h1, 100, 'layer2')

h2 = tf.contrib.layers.batch_norm(h2,

                            center=True, scale=True,

                            is_training=phase,

                            scope='bn_2')

logits = dense(h2, 10, scope='logits')

with tf.name_scope('accuracy'):

    accuracy = tf.reduce_mean(tf.cast(

            tf.equal(tf.argmax(y, 1), tf.argmax(logits, 1)),

            'float32'))

with tf.name_scope('loss'):

    loss = tf.reduce_mean(

        tf.nn.softmax_cross_entropy_with_logits(logits=logits, labels=y))

def train():

    update_ops = tf.get_collection(tf.GraphKeys.UPDATE_OPS)

    with tf.control_dependencies(update_ops):

        train_step = tf.train.GradientDescentOptimizer(0.01).minimize(loss)

    sess = tf.Session()

    sess.run(tf.global_variables_initializer())

    history = []

    iterep = 500

    for i in range(iterep * 30):

        x_train, y_train = mnist.train.next_batch(100)

        sess.run(train_step,

                 feed_dict={'x:0': x_train,

                            'y:0': y_train,

                            'phase:0': 1})

        if (i + 1) %  iterep == 0:

            epoch = (i + 1)/iterep

            tr = sess.run([loss, accuracy],

                          feed_dict={'x:0': mnist.train.images,

                                     'y:0': mnist.train.labels,

                                     'phase:0': 1})

            t = sess.run([loss, accuracy],

                         feed_dict={'x:0': mnist.test.images,

                                    'y:0': mnist.test.labels,

                                    'phase:0': 0})

            history += [[epoch] + tr + t]

            print( history[-1] )

    return history

train()
报错, 具体如下:

2020-08-09 21:03:53.837785: E tensorflow/stream_executor/cuda/cuda_dnn.cc:329] Could not create cudnn handle: CUDNN_STATUS_INTERNAL_ERROR

2020-08-09 21:03:53.837987: W ./tensorflow/stream_executor/stream.h:1995] attempting to perform DNN operation using StreamExecutor without DNN support

Traceback (most recent call last):

  File "/home/devil/anaconda3/lib/python3.7/site-packages/tensorflow/python/client/session.py", line 1356, in _do_call

    return fn(*args)

  File "/home/devil/anaconda3/lib/python3.7/site-packages/tensorflow/python/client/session.py", line 1341, in _run_fn

    options, feed_dict, fetch_list, target_list, run_metadata)

  File "/home/devil/anaconda3/lib/python3.7/site-packages/tensorflow/python/client/session.py", line 1429, in _call_tf_sessionrun

    run_metadata)

tensorflow.python.framework.errors_impl.InternalError: cuDNN launch failure : input shape ([100,100,1,1])

     [[{{node bn_1/cond/FusedBatchNorm}}]]

During handling of the above exception, another exception occurred:
不使用 显卡 进行计算,正常运行:

或:

主要语句:
CUDA_VISIBLE_DEVICES=-1
正常运行:

如果 这种情况要仍然要使用 RTX 显卡, 那么 加入下面语句(对 会话session 的创建不使用默认设置,而是进行配置):
使用非交互的session时候,如下:
gpu_options = tf.GPUOptions(per_process_gpu_memory_fraction=0.5)

sess = tf.Session(config=tf.ConfigProto(gpu_options=gpu_options))
或
gpu_options = tf.GPUOptions( allow_growth = True )

sess = tf.Session(config=tf.ConfigProto(gpu_options=gpu_options))
或
gpu_options = tf.GPUOptions( per_process_gpu_memory_fraction=0.5, allow_growth = True )

sess = tf.Session(config=tf.ConfigProto(gpu_options=gpu_options))
总之,就是不能使用默认配置的session,需要配置一下。
其中,
per_process_gpu_memory_fraction=0.5
是指为该程序分配使用的显卡其内存不超过总内存的 0.5倍。
--------------------------------------------------------
发生该问题的原因:
Could not create cudnn handle: CUDNN_STATUS_INTERNAL_ERROR 这个问题大部分是因为RTX显卡不兼容它出生前的接口有关。
原因解释出自资料:
https://blog.csdn.net/pkuyjxu/article/details/89402298
-------------
对上面代码中对 tensor 进行运算的代码中 feed_dict 的形式不是很熟悉,即:

因为以前经常使用的形式为:

于是很好奇,将代码改为如下:

发现报错:

从报错中可以知道,原来 feed_dict 中的key 是可以用 所构建的图的tensor(用函数tf.placeholder生成的tensor) 在图内的名字来表示的,即 "<op_name>:<output_index>" , 也就是这里的 “x:0” 。
而我们以前常用的形式是 将构建图中tensor (用tf.placeholder生成的tensor)的那个变量 即 x 作为 feed_dict 中的key 的。
比如:

这里,我们相当于构建了一个tensor (用函数tf.placeholder生成的tensor), tensor的名字为 'xxx:0' , 但是所构建的这个tensor 的变量为 x 。
详细的说就是:
x = tf.placeholder('float32', (None, 784), name='x') 中, name="x" 是说这个tf.placeholer函数在图中所定义的操作( operation)的名字(name) 是 “xxx” , 而图中的这个操作产生的第0个tensor在图中的名字为 “xxx:0” , 而这个名字为 “xxx:0” 的tensor又传递给了python变量x , 因此在 feed_dict 中我们可以使用变量x 来表示这个tensor, 也可以使用这个tensor的图内的名字“xxx:0” 来表示。需要注意的是“xxx”是操作(operation)的名字,而不是tensor的名字。
对于 tensor 的这个 "<op_name>:<output_index>" 形式的表示还是很长知识的。
注:
这里传给 feed_dict 的变量都是使用 tf.placeholder生成的 tensor 的变量, 这种变量也是整个图所依赖的起始tensor的变量。
-----------------------------------------------------
以下给出 feed_dict 的两个混合写法的 代码:

import numpy as np

import tensorflow as tf

from tensorflow.examples.tutorials.mnist import input_data

mnist = input_data.read_data_sets("MNIST_data/", one_hot=True)

def dense(x, size, scope):

    return tf.contrib.layers.fully_connected(x, size,

                        activation_fn=None, scope=scope)

def dense_relu(x, size, scope):

    with tf.variable_scope(scope):

        h1 = dense(x, size, 'dense')

        return tf.nn.relu(h1, 'relu')

tf.reset_default_graph()

x = tf.placeholder('float32', (None, 784), name='x')

y = tf.placeholder('float32', (None, 10), name='y')

phase = tf.placeholder(tf.bool, name='phase')

h1 = dense_relu(x, 100, 'layer1')

h1 = tf.contrib.layers.batch_norm(h1,

                            center=True, scale=True,

                            is_training=phase,

                            scope='bn_1')

h2 = dense_relu(h1, 100, 'layer2')

h2 = tf.contrib.layers.batch_norm(h2,

                            center=True, scale=True,

                            is_training=phase,

                            scope='bn_2')

logits = dense(h2, 10, scope='logits')

with tf.name_scope('accuracy'):

    accuracy = tf.reduce_mean(tf.cast(

            tf.equal(tf.argmax(y, 1), tf.argmax(logits, 1)),

            'float32'))

with tf.name_scope('loss'):

    loss = tf.reduce_mean(

        tf.nn.softmax_cross_entropy_with_logits(logits=logits, labels=y))

def train():

    update_ops = tf.get_collection(tf.GraphKeys.UPDATE_OPS)

    with tf.control_dependencies(update_ops):

        train_step = tf.train.GradientDescentOptimizer(0.01).minimize(loss)

    gpu_options = tf.GPUOptions( per_process_gpu_memory_fraction=0.5, allow_growth = True )

    sess = tf.Session(config=tf.ConfigProto(gpu_options=gpu_options))

    #sess = tf.Session()

    sess.run(tf.global_variables_initializer())

    history = []

    iterep = 500

    for i in range(iterep * 30):

        x_train, y_train = mnist.train.next_batch(100)

        sess.run(train_step,

                 feed_dict={x: x_train,

                            'y:0': y_train,

                            phase: 1})

        if (i + 1) %  iterep == 0:

            epoch = (i + 1)/iterep

            tr = sess.run([loss, accuracy],

                          feed_dict={'x:0': mnist.train.images,

                                     y: mnist.train.labels,

                                     phase: 1})

            t = sess.run([loss, accuracy],

                         feed_dict={x: mnist.test.images,

                                    y: mnist.test.labels,

                                    'phase:0': 0})

            history += [[epoch] + tr + t]

            print( history[-1] )

    return history

train()
RTX显卡 运行TensorFlow=1.14.0 代码 报错 Could not create cudnn handle: CUDNN_STATUS_INTERNAL_ERROR的更多相关文章
- Could not create cudnn handle: CUDNN_STATUS_INTERNAL_ERROR tensorflow-1.13.1和1.14windows版本目前不支持CUDA10.0
报错出现 Could not create cudnn handle: CUDNN_STATUS_INTERNAL_ERROR tensorflow-1.13.1和1.14windows版本目前不支持 ...
- CUDA报错: Cannot create Cublas handle. Cublas won't be available. 以及:Check failed: status == CUBLAS_STATUS_SUCCESS (1 vs. 0) CUBLAS_STATUS_NOT_INITIALIZED
Error描述: aita@aita-Alienware-Area-51-R5:~/AITA2/daisida/ssd-github/caffe$ make runtest -j8 .build_re ...
- 首次运行tensorflow-gpu 1.0 报错 failed to create cublas handle: CUBLAS_STATUS_NOT_INITIALIZED
发现博客: https://blog.csdn.net/u010752600/article/details/79534910 于是找到解决方法. sudo rm -rf ~/.nv/
- SQL Developer 4.0 启动报错“unable to create an instance of the java virtual machine located at path”
安装了Oracle之后,第一件事情就是想想怎么去连接,进而操作.SQL Developer是官方提供的强大工具,个人看来也是第一选择. 目前官网提供的最新版是4.0.1.14.48,下载下来之后,就跃 ...
- svn 提交代码报错
svn 提交代码报错 最近新安装了TortoiseSvn 1.92,在上传代码,其中有新增加的文件,出现如下错误: 解决方法: 1.用vs生成patch文件 2.生成的patch文件中讲nonexis ...
- Idea下的springboot mysql8.0等报错解决随笔
cannot load jdbc class path:mysql8.0装载失败,可能原因,驱动名称错误,连接字符串中需要加入时区UTC,否则8.0一定会报错无法连接,关闭SSL 在applicati ...
- 执行Spark运行在yarn上的命令报错 spark-shell --master yarn-client
1.执行Spark运行在yarn上的命令报错 spark-shell --master yarn-client,错误如下所示: // :: ERROR SparkContext: Error init ...
- 如何解决spring boot 项目导入依赖后代码报错问题
如何解决spring boot 项目导入依赖后代码报错问题 2020-08-15 14:17:18 代码截图如图所示(由于本人问题已经解决,没来得及截图,所以在网上找了一张图片)
- Tomcat7.0启动报错:java.lang.illegalargumentexception:taglib definition not consisten with specification version
Tomcat7.0启动报错:java.lang.illegalargumentexception:taglib definition not consisten with specification ...
- wince6.0 编译报错:"error C2220: warning treated as error - no 'object' file generated"的解决办法
内容提要:wince6.0编译报错:"error C2220: warning treated as error - no 'object' file generated" 原因是 ...
随机推荐
- java.lang.NoClassDefFoundError: com/google/gson/GsonBuilder
Exception in thread "main" java.lang.NoClassDefFoundError: com/google/gson/GsonBuilder 解决方 ...
- tempCode
package com.cmbchina.monitor.service.imp; import com.alibaba.fastjson.JSON; import com.cmbchina.moni ...
- Jenkins构建UI自动化项目,指定本地执行,没弹起浏览显示
1. 原因分析 为什么执行web没有弹出浏览器,Jenkins日志显示正在执行中 jenkins是用windows installer 安装成 windows的服务了,那么启动windows后jenk ...
- 一款开源、免费、现代化风格的WPF UI控件库 - ModernWpf
前言 今天大姚给大家分享一款开源(MIT License).免费.现代化风格的WPF UI控件库:ModernWpf. 项目介绍 ModernWpf是一个开源项目,它为 WPF 提供了一组现代化的控件 ...
- python重拾基础第二天
本节内容 列表.元祖操作 字符串操作 字典操作 集合操作 文件操作 字符编码与转码 三元运算&生成式&成员运算&解压法&队列堆栈&数据类型转换 1. 列表操作 ...
- 图片接口JWT鉴权实现
图片接口JWT鉴权实现 前言 之前做了个返回图片链接的接口,然后没做授权,然后今天键盘到了,也是用JWT来做接口的权限控制. 然后JTW网上已经有很多文章来说怎么用了,这里就不做多的解释了,如果不懂的 ...
- 使用iperf3调试网络
介绍 Iperf是一款基于TCP/IP和UDP/IP的网络性能测试工具,它可以用来测量网络带宽和网络质量,还可以提供网络延迟抖动.数据包丢失率.最大传输单元等统计信息.网络管理员可以根据这些信息了解并 ...
- 嵌入式编程的 4 种模型:轮询、中断、DMA、通道
轮询方式 对I/O设备的程序轮询的方式,是早期的计算机系统对I/O设备的一种管理方式.它定时对各种设备轮流询问一遍有无处理要求.轮流询问之后,有要求的,则加以处理.在处理I/O设备的要求之后,处理机返 ...
- NXP i.MX 6ULL工业核心板规格书( ARM Cortex-A7,主频792MHz)
1 核心板简介 创龙科技SOM-TLIMX6U是一款基于NXP i.MX 6ULL的ARM Cortex-A7高性能低功耗处理器设计的低成本工业级核心板,主频792MHz,通过邮票孔连接方式引出Eth ...
- MQ和RabbitMQ
一.微服务间通讯有同步和异步两种方式: 同步通讯:就像打电话,需要实时响应. 异步通讯:就像发邮件,不需要马上回复. Feign调用就属于同步方式,虽然调用可以实时得到结果,但存在下面的问题: 1.耦 ...