[转]Code! MVC 5 App with Facebook, Twitter, LinkedIn and Google OAuth2 Sign-on (C#)
This tutorial shows you how to build an ASP.NET MVC 5 web application that enables users to log in using OAuth 2.0 with credentials from an external authentication provider, such as Facebook, Twitter, LinkedIn, Microsoft, or Google. For simplicity, this tutorial focuses on working with credentials from Facebook and Google.
Enabling these credentials in your web sites provides a significant advantage because millions of users already have accounts with these external providers. These users may be more inclined to sign up for your site if they do not have to create and remember a new set of credentials.
See also ASP.NET MVC 5 app with SMS and email Two-Factor Authentication.
The tutorial also shows how to add profile data for the user, and how to use the Membership API to add roles. This tutorial was written by Rick Anderson ( Please follow me on Twitter: @RickAndMSFT ).
- Getting Started
- Creating Your First Application
- Setting up SSL in the Project
- Creating a Google app for OAuth 2 and connecting the app to the project
- Creating the app in Facebook and connecting the app to the project
- Examine the Membership Data
- Adding Profile Data to the User Class
- Logging off your App and Logging in With Another Account
Getting Started
Start by installing and running Visual Studio Express 2013 for Web or Visual Studio 2013. Install Visual Studio 2013 Update 3 or higher. For help with Dropbox, GitHub, Linkedin, Instagram, buffer, salesforce, STEAM, Stack Exchange, Tripit, twitch, Twitter, Yahoo and more, see this one stop guide.
Click New Project from the Start page, or you can use the menu and select File, and then New Project.

Creating Your First Application
Click New Project, then select Visual C# on the left, then Web and then select ASP.NET Web Application. Name your project "MvcAuth" and then click OK.

In the New ASP.NET Project dialog, click MVC. If the Authentication is not Individual User Accounts, click the Change Authenticationbutton and select Individual User Accounts. By checking Host in the cloud, the app will be very easy to host in Azure.
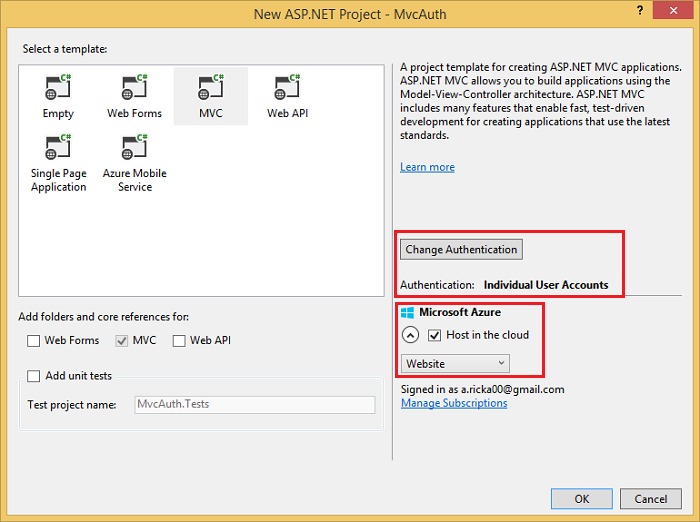
If you selected Host in the cloud, complete the configure dialog.

Use NuGet to update to the latest OWIN middleware
Use the NuGet package manager to update the OWIN middleware. Select Updates in the left menu. You can click on the Update All button or you can search for only OWIN packages (shown in the next image):

In the image below, only OWIN packages are shown:
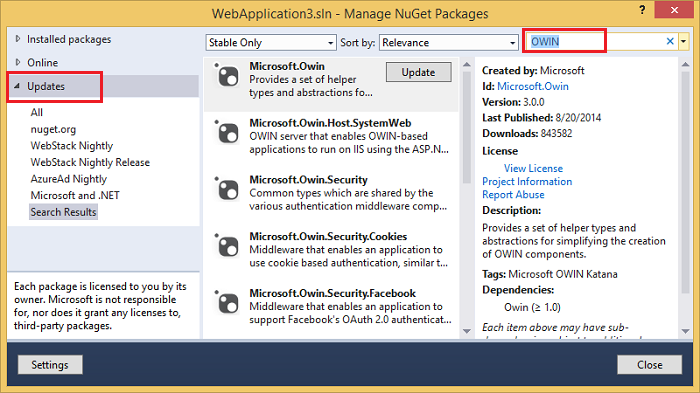
From the Package Manager Console (PMC), you can enter the Update-Package command, which will update all packages.
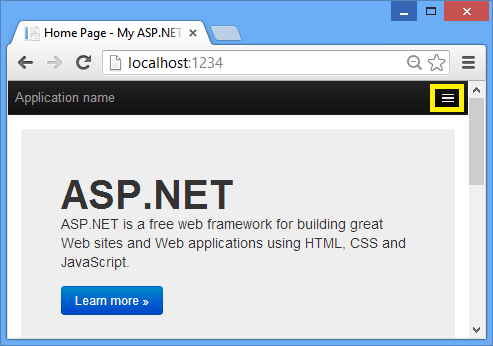
Press F5 or Ctrl+F5 to run the application. In the image below, the port number is 1234. When you run the application, you'll see a different port number.
Depending on the size of your browser window, you might need to click the navigation icon to see the Home, About, Contact, Register andLog in links.

Setting up SSL in the Project
To connect to authentication providers like Google and Facebook, you will need to set up IIS-Express to use SSL. It's important to keep using SSL after login and not drop back to HTTP, your login cookie is just as secret as your username and password, and without using SSL you’re sending it in clear-text across the wire. Besides, you’ve already taken the time to perform the handshake and secure the channel (which is the bulk of what makes HTTPS slower than HTTP) before the MVC pipeline is run, so redirecting back to HTTP after you’re logged in won’t make the current request or future requests much faster.
- In Solution Explorer, click the MvcAuth project.
- Hit the F4 key to show the project properties. Alternatively, from the View menu you can select Properties Window.
- Change SSL Enabled to True.
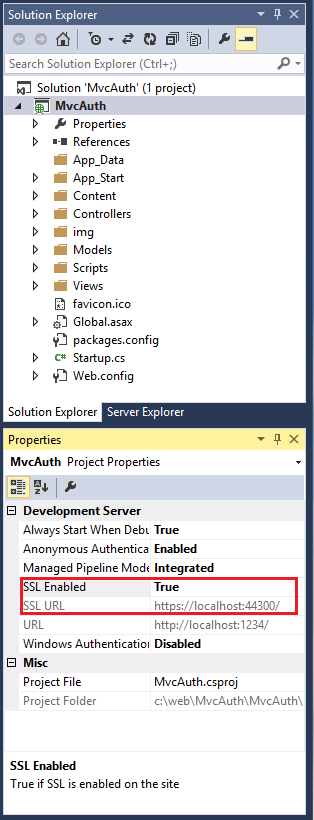
- Copy the SSL URL (which will be https://localhost:44300/ unless you've created other SSL projects).
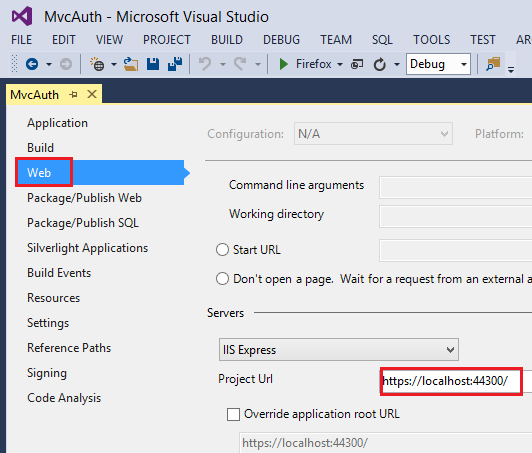
- In Solution Explorer, right click the MvcAuth project and select Properties.
- Select the Web tab, and then paste the SSL URL into the Project Url box. Save the file (Ctl+S). You will need this URL to configure Facebook and Google authentication apps.
- Add the RequireHttps attribute to the
Homecontroller to require all requests must use HTTPS. A more secure approach is to add the RequireHttps filter to the application. See the section "Protect the Application with SSL and the Authorize Attribute" in my tutoral Create an ASP.NET MVC app with auth and SQL DB and deploy to Azure App Service. A portion of the Home controller is shown below.[RequireHttps]
public class HomeController : Controller
{
public ActionResult Index()
{
return View();
} - Press CTRL+F5 to run the application. If you've installed the certificate in the past, you can skip the rest of this section and jump toCreating a Google app for OAuth 2 and connecting the app to the project, otherwise, follow the instructions to trust the self-signed certificate that IIS Express has generated.

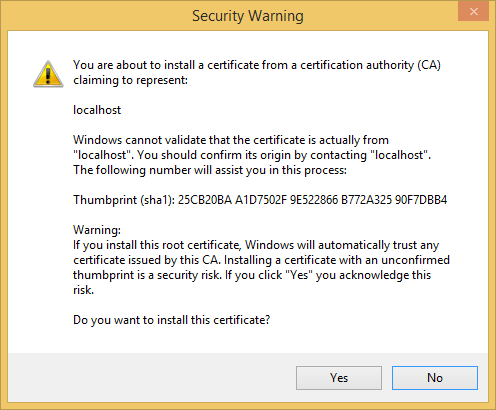
- Read the Security Warning dialog and then click Yes if you want to install the certificate representing localhost.
- IE shows the Home page and there are no SSL warnings.

- Google Chrome also accepts the certificate and will show HTTPS content without a warning. Firefox uses its own certificate store, so it will display a warning. For our application you can safely click I Understand the Risks.

Creating a Google app for OAuth 2 and connecting the app to the project
- Navigate to the Google Developers Console.
- Click the Create Project button and enter a project name and ID (you can use the default values). In a few seconds the new project will be created and your browser will display the new projects page.
- In the left tab, click APIs & auth, and then > Credentials.
- Click the Create New Client ID under OAuth.
- In the Create Client ID dialog, keep the default Web application for the application type.
- Set the Authorized JavaScript origins to the SSL URL you used above (https://localhost:44300/ unless you've created other SSL projects)
- Set the Authorized redirect URI to:
https://localhost:44300/signin-google
- Click the Consent screen menu item, then set your email address and product name. When you have completed the form click Save.
- Click the APIs menu item, scroll down and click the off button on Google+ API.
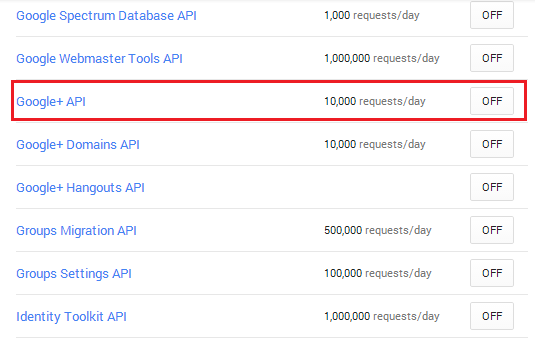
The image below shows the enabled APIs.

Copy and paste the AppId and App Secret into the
UseGoogleAuthenticationmethod. The AppId and App Secret values shown below are samples and will not work.public void ConfigureAuth(IAppBuilder app)
{
// Configure the db context and user manager to use a single instance per request
app.CreatePerOwinContext(ApplicationDbContext.Create);
app.CreatePerOwinContext<ApplicationUserManager>(ApplicationUserManager.Create); // Enable the application to use a cookie to store information for the signed in user
// and to use a cookie to temporarily store information about a user logging in with a third party login provider
// Configure the sign in cookie
app.UseCookieAuthentication(new CookieAuthenticationOptions
{
AuthenticationType = DefaultAuthenticationTypes.ApplicationCookie,
LoginPath = new PathString("/Account/Login"),
Provider = new CookieAuthenticationProvider
{
OnValidateIdentity = SecurityStampValidator.OnValidateIdentity<ApplicationUserManager, ApplicationUser>(
validateInterval: TimeSpan.FromMinutes(30),
regenerateIdentity: (manager, user) => user.GenerateUserIdentityAsync(manager))
}
}); app.UseExternalSignInCookie(DefaultAuthenticationTypes.ExternalCookie); // Uncomment the following lines to enable logging in with third party login providers
//app.UseMicrosoftAccountAuthentication(
// clientId: "",
// clientSecret: ""); //app.UseTwitterAuthentication(
// consumerKey: "",
// consumerSecret: ""); //app.UseFacebookAuthentication(
// appId: "",
// appSecret: ""); app.UseGoogleAuthentication(
clientId: "000-000.apps.googleusercontent.com",
clientSecret: "00000000000");
}
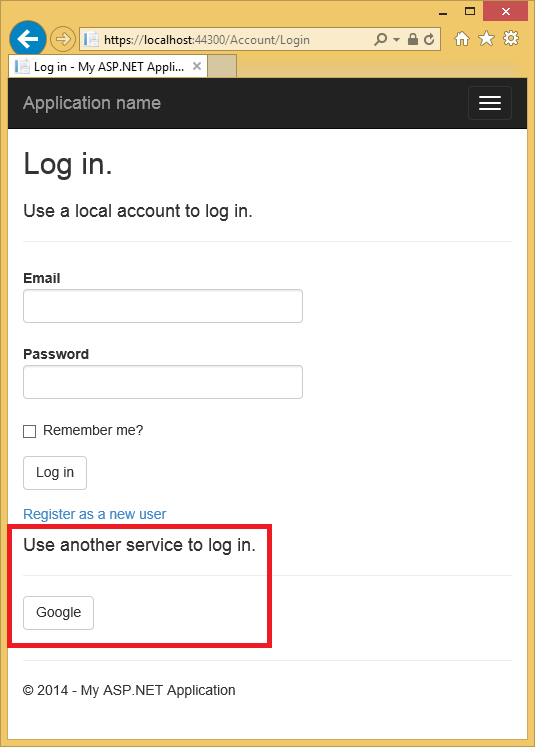
Press CTRL+F5 to build and run the application. Click the Log in link.

Under Use another service to log in, click Google.
 Note: If you miss any of the steps above you will get a HTTP 401 error. Recheck your steps above. If you miss a required setting (for example product name), add the missing item and save, it can take a few minutes for authentication to work.
You will be redirected to the google site where you will enter your credentials.
aaarticlea/gif;base64,R0lGODlhAQABAIAAAP///wAAACwAAAAAAQABAAACAkQBADs=" alt="" width="535" height="747" data-original="https://media-www-asp.azureedge.net/media/4865360/z3.png" />
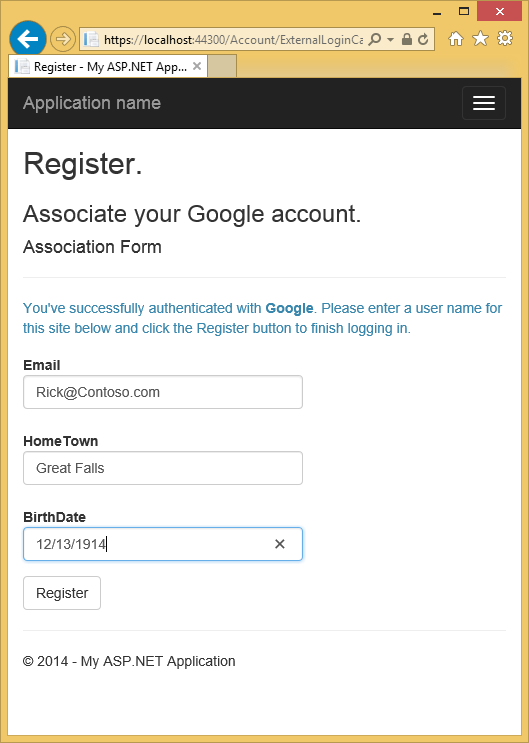
After you enter your credentials, you will be prompted to give permissions to the web application you just created:
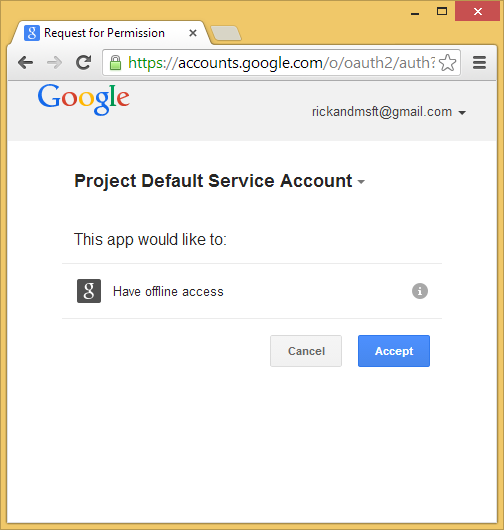
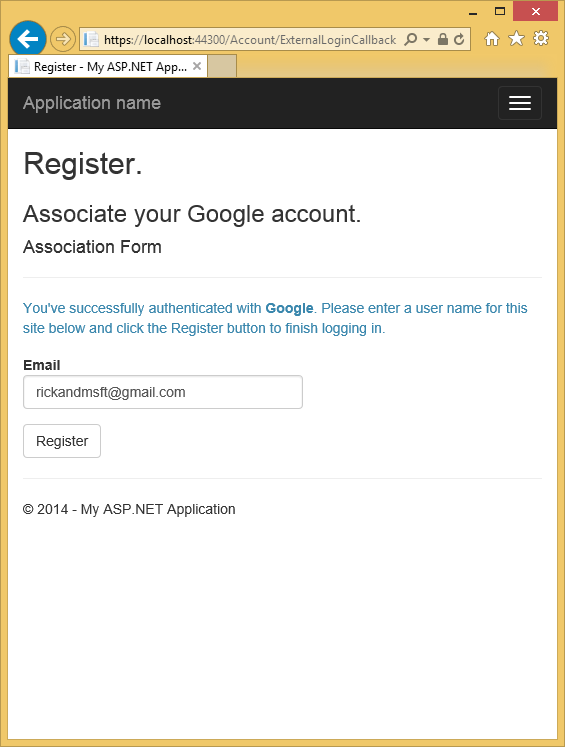
Click Accept. You will now be redirected back to the Register page of the MvcAuth application where you can register your Google account. You have the option of changing the local email registration name used for your Gmail account, but you generally want to keep the default email alias (that is, the one you used for authentication). Click Register.
Creating the app in Facebook and connecting the app to the project
For Facebook OAuth2 authentication, you need to copy to your project some settings from an application that you create in Facebook.
In your browser, navigate to https://developers.facebook.com/apps and log in by entering your Facebook credentials.
If you aren’t already registered as a Facebook developer, click Register as a Developer and follow the directions to register.
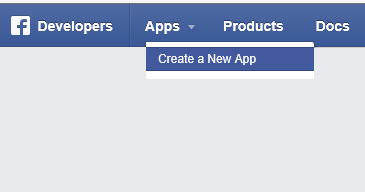
On the Apps tab, click Create New App.
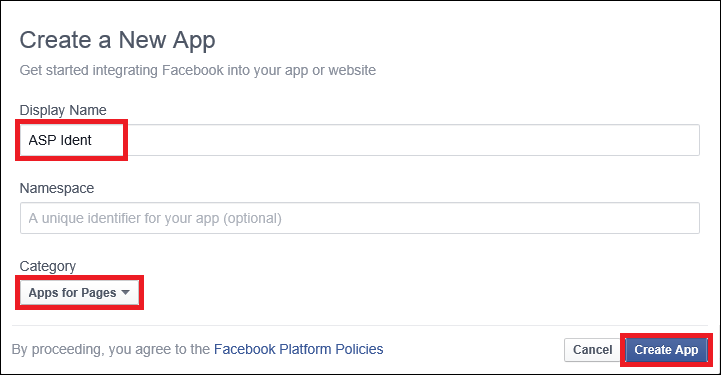
Enter an App Name and Category, then click Create App.
This must be unique across Facebook. The App Namespace is the part of the URL that your App will use to access the Facebook application for authentication (for example, https://apps.facebook.com/{App Namespace}). If you don't specify an App Namespace, theApp ID will be used for the URL. The App ID is a long system-generated number that you will see in the next step.
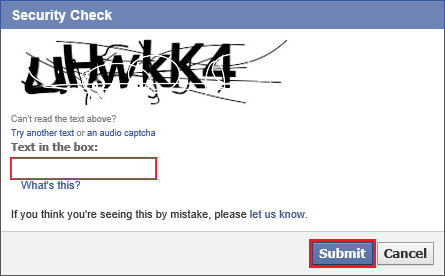
Submit the standard security check.
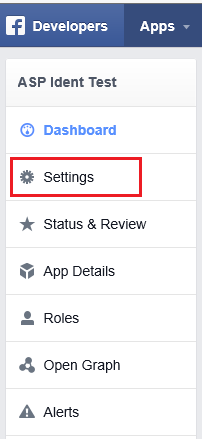
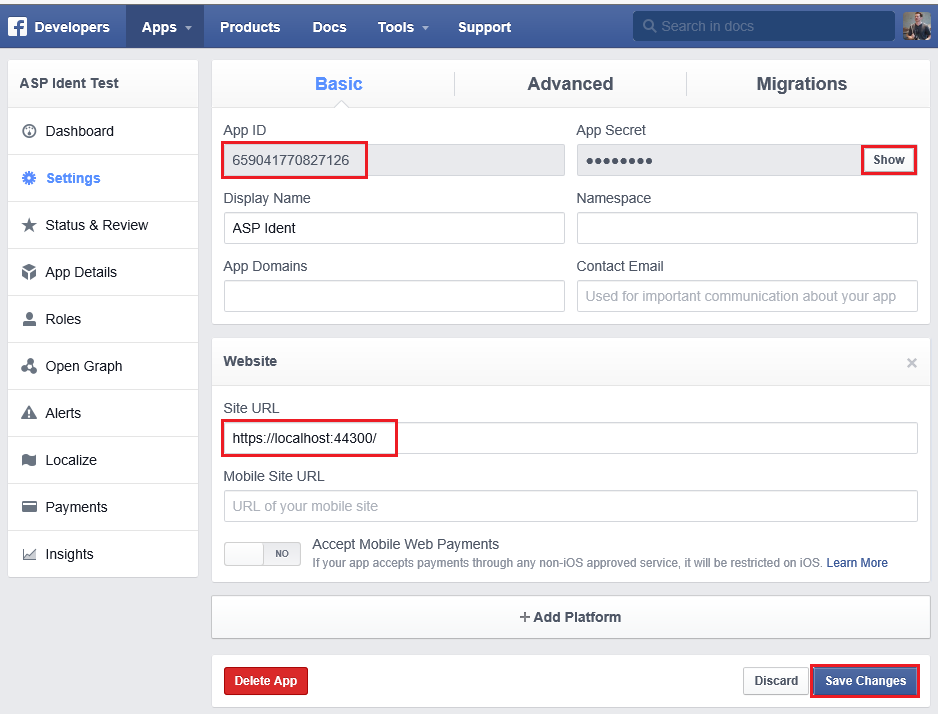
Select Settings for the left menu bar.
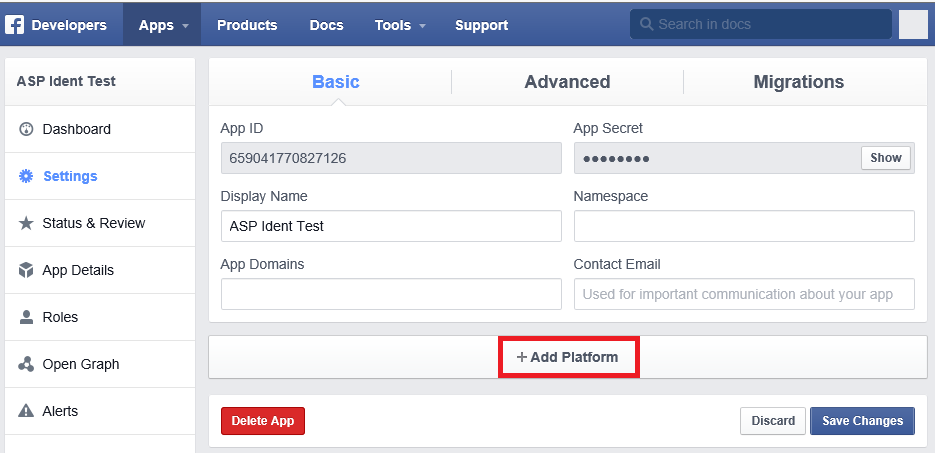
On the Basic settings section of the page select Add Platform to specify that you are adding a website application.
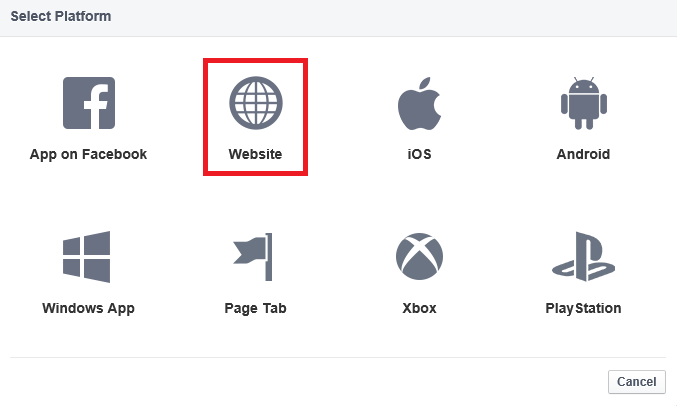
- Select Website from the platform choices.
- Make a note of your App ID and your App Secret so that you can add both into your MVC application later in this tutorial. Also, Add your Site URL (https://localhost:44300/) to test your MVC application. Also, add a Contact Email. Then, select Save Changes.
 Note that you will only be able to authenticate using the email alias you have registered. Other users and test accounts will not be able to register. You can grant other Facebook accounts access to the application on the Facebook Developer Roles tab.
 In Visual Studio, open App_Start\Startup.Auth.cs.
Copy and paste the AppId and App Secret into the
UseFacebookAuthenticationmethod. The AppId and App Secret values shown below are samples and will not work.public void ConfigureAuth(IAppBuilder app)
{
// Configure the db context and user manager to use a single instance per request
app.CreatePerOwinContext(ApplicationDbContext.Create);
app.CreatePerOwinContext<ApplicationUserManager>(ApplicationUserManager.Create); // Enable the application to use a cookie to store information for the signed in user
// and to use a cookie to temporarily store information about a user logging in with a third party login provider
// Configure the sign in cookie
app.UseCookieAuthentication(new CookieAuthenticationOptions
{
AuthenticationType = DefaultAuthenticationTypes.ApplicationCookie,
LoginPath = new PathString("/Account/Login"),
Provider = new CookieAuthenticationProvider
{
OnValidateIdentity = SecurityStampValidator.OnValidateIdentity<ApplicationUserManager, ApplicationUser>(
validateInterval: TimeSpan.FromMinutes(30),
regenerateIdentity: (manager, user) => user.GenerateUserIdentityAsync(manager))
}
}); app.UseExternalSignInCookie(DefaultAuthenticationTypes.ExternalCookie); // Uncomment the following lines to enable logging in with third party login providers
//app.UseMicrosoftAccountAuthentication(
// clientId: "",
// clientSecret: ""); //app.UseTwitterAuthentication(
// consumerKey: "",
// consumerSecret: ""); app.UseFacebookAuthentication(
appId: "000000000000000",
appSecret: "000000000000000"); app.UseGoogleAuthentication(
clientId: "000000000000000.apps.googleusercontent.com",
clientSecret: "000000000000000");
}Click Save Changes.
Press CTRL+F5 to run the application.
Select Log in to display the Login page. Click Facebook under Use another service to log in.
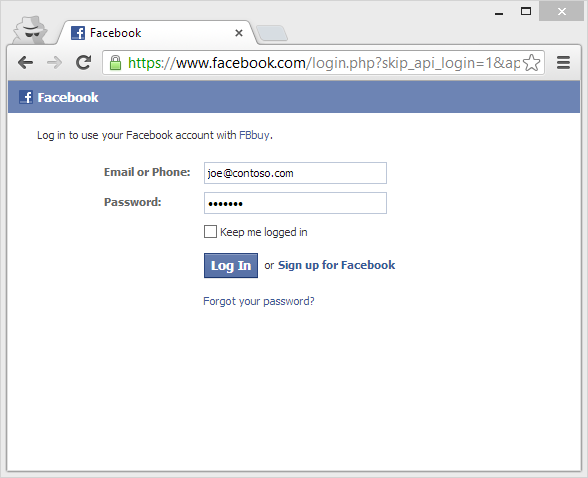
Enter your Facebook credentials.
You will be prompted to grant permission for the application to access your public profile and friend list.
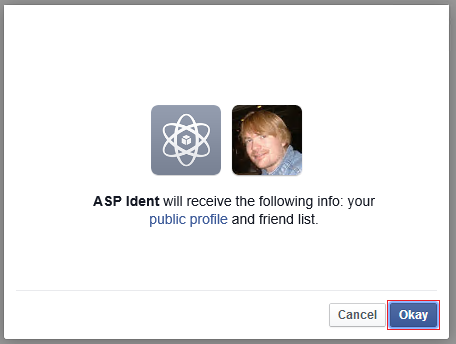
You are now logged in. You can now register this account with the application.

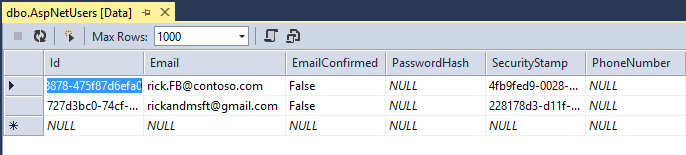
When you register, an entry is added to the Users table of the membership database.
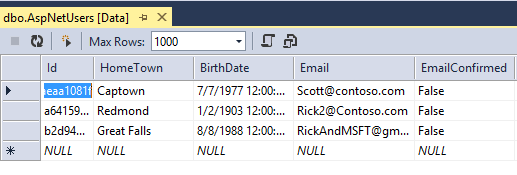
Examine the Membership Data
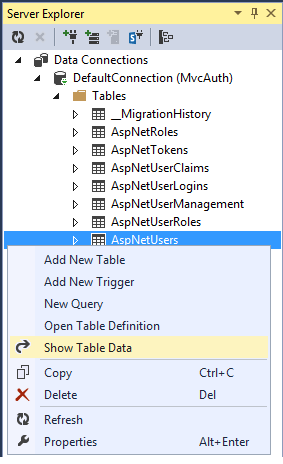
In the View menu, click Server Explorer.
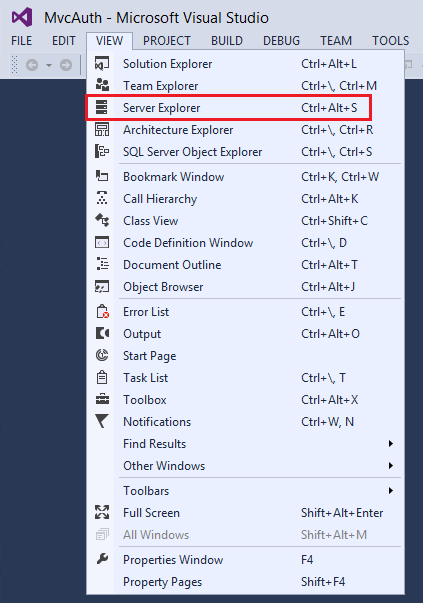
Expand DefaultConnection (MvcAuth), expand Tables, right click AspNetUsers and click Show Table Data.
Adding Profile Data to the User Class
In this section you'll add birth date and home town to the user data during registration, as shown in the following image.
Open the Models\IdentityModels.cs file and add birth date and home town properties:
public class ApplicationUser : IdentityUser

{

    public string HomeTown { get; set; }

    public System.DateTime? BirthDate { get; set; }

    public async Task<ClaimsIdentity> GenerateUserIdentityAsync(UserManager<ApplicationUser> manager)

    {

        // Note the authenticationType must match the one defined in CookieAuthenticationOptions.AuthenticationType

        var userIdentity = await manager.CreateIdentityAsync(this, DefaultAuthenticationTypes.ApplicationCookie);

        // Add custom user claims here

        return userIdentity;

    }

}
Open the Models\AccountViewModels.cs file and the set birth date and home town properties in ExternalLoginConfirmationViewModel.
public class ExternalLoginConfirmationViewModel

{

    [Required]

    [EmailAddress]

    [Display(Name = "Email")]

    public string Email { get; set; }

    public string HomeTown { get; set; }

    public System.DateTime? BirthDate { get; set; }

}
Open the Controllers\AccountController.cs file and add code for birth date and home town in the ExternalLoginConfirmation action method as shown:
[HttpPost]

[AllowAnonymous]

[ValidateAntiForgeryToken]

public async Task<ActionResult> ExternalLoginConfirmation(ExternalLoginConfirmationViewModel model, string returnUrl)

{

    if (User.Identity.IsAuthenticated)

    {

        return RedirectToAction("Manage");

    }

    if (ModelState.IsValid)

    {

        // Get the information about the user from the external login provider

        var info = await AuthenticationManager.GetExternalLoginInfoAsync();

        if (info == null)

        {

            return View("ExternalLoginFailure");

        }

        var user = new ApplicationUser()

        {

            UserName = model.Email, Email = model.Email,

            BirthDate = model.BirthDate,

            HomeTown  = model.HomeTown

        };

        IdentityResult result = await UserManager.CreateAsync(user);

        if (result.Succeeded)

        {

            result = await UserManager.AddLoginAsync(user.Id, info.Login);

            if (result.Succeeded)

            {

                await SignInAsync(user, isPersistent: false);

                // For more information on how to enable account confirmation and password reset please visit http://go.microsoft.com/fwlink/?LinkID=320771

                // Send an email with this link

                // string code = await UserManager.GenerateEmailConfirmationTokenAsync(user.Id);

                // var callbackUrl = Url.Action("ConfirmEmail", "Account", new { userId = user.Id, code = code }, protocol: Request.Url.Scheme);

                // SendEmail(user.Email, callbackUrl, "Confirm your account", "Please confirm your account by clicking this link");

                return RedirectToLocal(returnUrl);

            }

        }

        AddErrors(result);

    }

    ViewBag.ReturnUrl = returnUrl;

    return View(model);

}
Add birth date and home town to the Views\Account\ExternalLoginConfirmation.cshtml file:
@model MvcAuth.Models.ExternalLoginConfirmationViewModel

@{

    ViewBag.Title = "Register";

}

<h2>@ViewBag.Title.</h2>

<h3>Associate your @ViewBag.LoginProvider account.</h3>

@using (Html.BeginForm("ExternalLoginConfirmation", "Account", new { ReturnUrl = ViewBag.ReturnUrl }, FormMethod.Post, new { @class = "form-horizontal", role = "form" }))

{

    @Html.AntiForgeryToken()

    <h4>Association Form</h4>

    <hr />

    @Html.ValidationSummary(true, "", new { @class = "text-danger" })

    <p class="text-info">

        You've successfully authenticated with <strong>@ViewBag.LoginProvider</strong>.

            Please enter a user name for this site below and click the Register button to finish

            logging in.

    </p>

    <div class="form-group">

        @Html.LabelFor(m => m.Email, new { @class = "col-md-2 control-label" })

        <div class="col-md-10">

            @Html.TextBoxFor(m => m.Email, new { @class = "form-control" })

            @Html.ValidationMessageFor(m => m.Email, "", new { @class = "text-danger" })

        </div>

    </div>

    <div class="form-group">

        @Html.LabelFor(m => m.HomeTown, new { @class = "col-md-2 control-label" })

        <div class="col-md-10">

            @Html.TextBoxFor(m => m.HomeTown, new { @class = "form-control" })

            @Html.ValidationMessageFor(m => m.HomeTown)

        </div>

    </div>

    <div class="form-group">

        @Html.LabelFor(m => m.BirthDate, new { @class = "col-md-2 control-label" })

        <div class="col-md-10">

            @Html.TextBoxFor(m => m.BirthDate, new { @class = "form-control" })

            @Html.ValidationMessageFor(m => m.BirthDate)

        </div>

    </div>

    <div class="form-group">

        <div class="col-md-offset-2 col-md-10">

            <input type="submit" class="btn btn-default" value="Register" />

        </div>

    </div>

}

@section Scripts {

    @Scripts.Render("~/bundles/jqueryval")

}
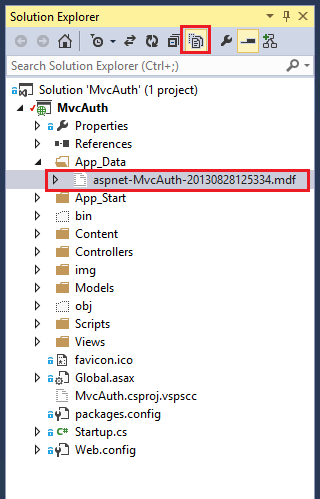
Delete the membership database so you can again register your Facebook account with your application and verify you can add the new birth date and home town profile information.
From Solution Explorer, click the Show All Files icon, then right click Add_Data\aspnet-MvcAuth-<dateStamp>.mdf and click Delete.
From the Tools menu, click NuGet Package Manger, then click Package Manager Console (PMC). Enter the following commands in the PMC.
- Enable-Migrations
- Add-Migration Init
- Update-Database
Run the application and use FaceBook and Google to log in and register some users.
Examine the Membership Data
In the View menu, click Server Explorer.
Right click AspNetUsers and click Show Table Data.
The HomeTown and BirthDate fields are shown below.
Logging off your App and Logging in With Another Account
If you log on to your app with Facebook, , and then log out and try to log in again with a different Facebook account (using the same browser), you will be immediately logged in to the previous Facebook account you used. In order to use another account, you need to navigate to Facebook and log out at Facebook. The same rule applies to any other 3rd party authentication provider. Alternatively, you can log in with another account by using a different browser.
Next Steps
See Introducing the Yahoo and LinkedIn OAuth security providers for OWIN by Jerrie Pelser for Yahoo and LinkedIn instructions. See Jerrie's Pretty social login buttons for ASP.NET MVC 5 to get enable social login buttons.
Follow my tutorial Create an ASP.NET MVC app with auth and SQL DB and deploy to Azure App Service, which continues this tutorial and shows the following:
- How to deploy your app to Azure.
- How to secure you app with roles.
- How to secure your app with the RequireHttps and Authorize filters.
- How to use the membership API to add users and roles.
Please leave feedback on how you liked this tutorial and what we could improve. You can also request new topics at Show Me How With Code. You can even ask for and vote on new features to be added to ASP.NET. For example, you can vote for a tool to create and manage users and roles.
For an good explanation of how ASP.NET External Authentication Services work, see Robert McMurray's External Authentication Services. Robert's article also goes into detail in enabling Microsoft and Twitter authentication. Tom Dykstra's excellent EF/MVC tutorial shows how to work with the Entity Framework.
This article was originally created on April 3, 2014
Author Information

Rick Anderson – Rick Anderson works as a programmer writer for Microsoft, focusing on ASP.NET MVC, Windows Azure and Entity Framework. You can follow him on twitter via @RickAndMSFT.
[转]Code! MVC 5 App with Facebook, Twitter, LinkedIn and Google OAuth2 Sign-on (C#)的更多相关文章
- Code! MVC 5 App with Facebook, Twitter, LinkedIn and Google OAuth2 Sign-on (C#)
http://www.asp.net/mvc/overview/security/create-an-aspnet-mvc-5-app-with-facebook-and-google-oauth2- ...
- MVC 5 App 通过 Facebook OAuth2 登陆(Sign-on)的问题
今天做了下MVC 5 App通过Google, Twitter, Linkedin 和 Facebook进行登录的例子, 算是对Asp.net Identity的一个入门,做的过程中发现了如下的问题, ...
- Sharing count on Facebook, Twitter, and LinkedIn
最近一段时间一直在研究有关Social Network的东西,这里有几个在当前国外主流社交网站上用来显示分享数量的API,记录一下,今后可能会用得着. Facebook Facebook将FQL(Fa ...
- 004.Create a web app with ASP.NET Core MVC using Visual Studio on Windows --【在 windows上用VS创建mvc web app】
Create a web app with ASP.NET Core MVC using Visual Studio on Windows 在 windows上用VS创建mvc web app 201 ...
- share.js一键分享到微博、QQ空间、QQ好友、微信、腾讯微博、豆瓣、Facebook、Twitter、Linkedin、Google+、点点等
官网上面 https://github.com/overtrue/share.js非常详细的介绍了share.js他的使用 使用方式有:第一:使用 npm npm install social-sha ...
- MVC Movie App
ylbtech- ASP.NET MVC:MVC Movie App 功能描述:MVC Movie App 2,TechnologyAndTheEnvironment(技术与环境) 操作系统: win ...
- Asp.Net Web Forms/MVC/Console App中使用Autofac
本来简单介绍了Autofac在Asp.Net Web Forms中的应用,后来又添加了mvc.控制台应用程序中使用Autofac,详情请看源码. ASP.NET Web Forms使用Autofac, ...
- ASP.NET API(MVC) 对APP接口(Json格式)接收数据与返回数据的统一管理
话不多说,直接进入主题. 需求:基于Http请求接收Json格式数据,返回Json格式的数据. 整理:对接收的数据与返回数据进行统一的封装整理,方便处理接收与返回数据,并对数据进行验证,通过C#的特性 ...
- FaceBook Twitter实习生简历求内推
写在博客里面吧. 有一个朋友,男,博士在读,研究方向为图像处理,计算机视觉相关. 想在在读期间有一些海外实习经历.不知道哪位博友,有相关的人脉,求内推啊.内推成功的话请吃大餐,哈哈!
随机推荐
- web前端性能调优
最近2个月一直在做手机端和电视端开发,开发的过程遇到过各种坑.弄到快元旦了,终于把上线了.2个月干下来满满的的辛苦,没有那么忙了自己准备把前端的性能调优总结以下,以方便以后自己再次使用到的时候得于得心 ...
- 菜鸟浅析JAVA,.NET,C/C++的区别
前言 以前经常看一些文章说到JAVA,.NET的区别,有时候C++er也会过来 凑凑热闹,突然发现这几天手停不下来了,也想写一篇文章 来分析一下 JAVA,.NET,C/C++的优缺点以及他们之间谁“ ...
- Windows下Git多账号配置,同一电脑多个ssh-key的管理
这一篇文章是对上一篇文章<Git-TortoiseGit完整配置流程>的拓展,所以需要对上一篇文章有所了解,当然直接往下看也可以,其中也有一些提到一些基础的操作. <Git-Tort ...
- ASP.NET Core 中文文档 第二章 指南 (09) 使用 Swagger 生成 ASP.NET Web API 在线帮助测试文档
原文:ASP.NET Web API Help Pages using Swagger 作者:Shayne Boyer 翻译:谢炀(kiler) 翻译:许登洋(Seay) 对于开发人员来说,构建一个消 ...
- 用python实现最长公共子序列算法(找到所有最长公共子串)
软件安全的一个小实验,正好复习一下LCS的写法. 实现LCS的算法和算法导论上的方式基本一致,都是先建好两个表,一个存储在(i,j)处当前最长公共子序列长度,另一个存储在(i,j)处的回溯方向. 相对 ...
- 基于NodeJS微信公众号
最近重新研究了微信公众号的高级接口,原来也利用C#或JAVA写过微信公众号,主要是消息的基础接口. 由于当时不知道微信公众号可以申请测试公众号,微信测试公众号基本上没有任何限制,对于开发来说是一个不错 ...
- 配置IIS的通配符应用程序映射
使用IIS 6架设网站,如果要使用伪静态的功能,可能需要设置“通配符应用程序映射(执行顺序)”. 在Windows Server 2012 r2 的IIS 8中,对应的是添加设置“通配符脚本映射”,参 ...
- 9.6 MongoDB一
目录:ASP.NET MVC企业级实战目录 9.6.1 MongoDB简介 MongoDB是一个高性能,开源,无模式的文档型数据库,是当前NoSql数据库中比较热门的一种.它在许多场景下可用于替代传统 ...
- PHP函数基础知识.png
- springmvc4 mybatis 整合 框架源码 bootstrap
A集成代码生成器 [正反双向(单表.主表.明细表.树形表,开发利器)+快速构建表单 下载地址 ; freemaker模版技术 ,0个代码不用写,生成完整的一个模块,带页面.建表sql脚本,处理类 ...