
Windows环境下使用uiautomatorviewer进行元素定位
一、摘要
元素定位本篇主要介绍如何使用uiautomatorviewer,通过定位到页面上的元素,然后进行相应的点击等操作,uiautomatorviewer 是 android-sdk 自带的一个元素定位工具,非常简单好用,使用 uiautomatorviewer,你可以检查一个应用的 UI 来查看应用的布局和组件以及相关的属性
在WIndows系统上进行元素定位,建议使用这个工具,在Mac上建议用Appium Inspector
二、启动uiautomatorviewer.bat
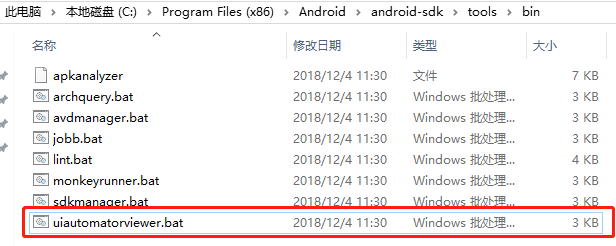
双击启动
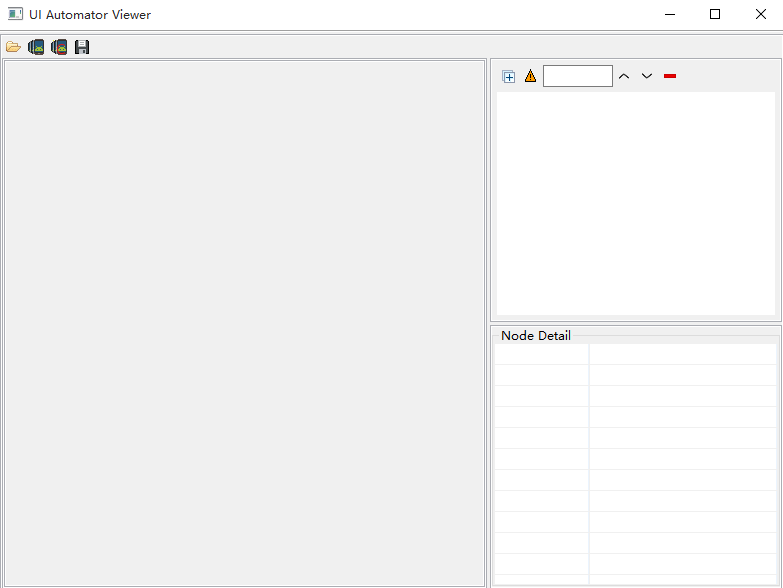
三、链接手机
确认连接手机状态正常-》打开手机qq页面,让屏幕处于点亮状态
点左上角安卓机器人按钮 Devices Screenshot 按钮刷新页面
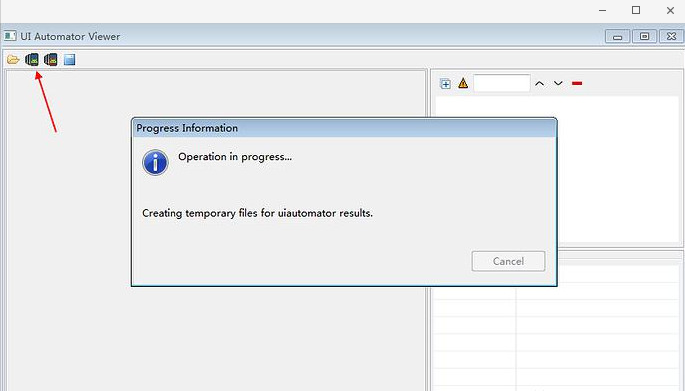
四、定位元素
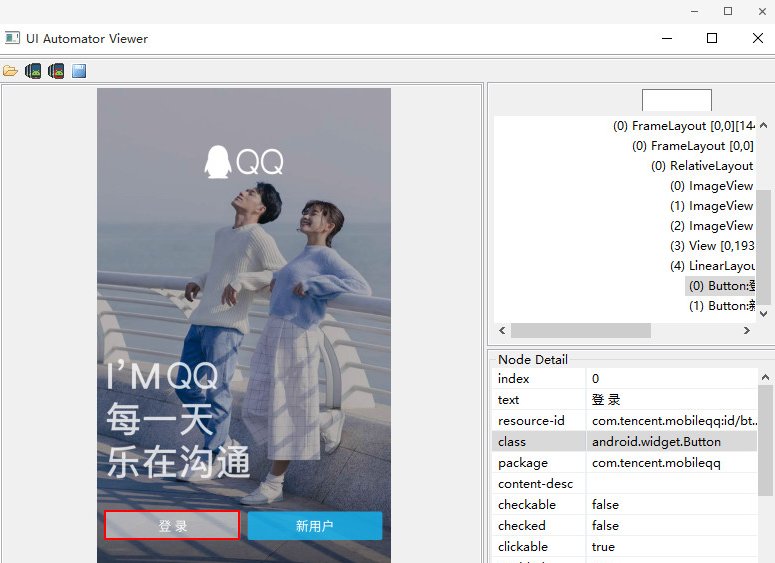
五、点击登录按钮代码实例
如上图所示,定位了登陆按钮,代码实例如下
# python
'''
@Time    : 2018/11/12 13:37
@Author  :
@Email   :
@File    :
@Software: PyCharm
@Description:
'''
# encoding = utf-8
from appium import webdriver
import time
import unittest

class test_ClickButon(unittest.TestCase):
    def setUp(self):
        desired_caps = {
                    'platformName': 'Android',
                    'deviceName': '30d4e606',
                    'platformVersion': '5.0',
                    'appPackage': 'com.tencent.qqpimsecure',
                    'appActivity': 'com.tencent.server.fore.QuickLoadActivity'
                    }
        self.driver = webdriver.Remote('http://127.0.0.1:4723/wd/hub', desired_caps)

    def test_ClickButton(self):
        driver = self.driver
        driver.find_element_by_id("com.tencent.mobileqq:id/btn_login").click()
        time.sleep(5)
 // Java

 package testscript;/*

  * @FileName testscript.Test_Calculator:

  * @author davieyang

  * @create 2018-11-20 11:02

  */

 import org.apache.log4j.xml.DOMConfigurator;

 import java.net.MalformedURLException;

 import java.net.URL;

 import java.util.concurrent.TimeUnit;

 import org.openqa.selenium.By;

 import org.openqa.selenium.remote.DesiredCapabilities;

 import org.testng.Assert;

 import org.testng.annotations.BeforeTest;

 import org.testng.annotations.DataProvider;

 import org.testng.annotations.Test;

 import io.appium.java_client.android.AndroidDriver;

 public class Test_Calculator {

     static {

         //指定log4j配置文件为log4j.xml

         DOMConfigurator.configure("log4j.xml");

     }

     AndroidDriver driver;

     @BeforeTest

     public void setUp() throws MalformedURLException{

         DesiredCapabilities caps = new DesiredCapabilities();

         // des.setCapability("app", "c:\\");

         caps.setCapability("automationname", "Appium");

         caps.setCapability("platformName", "Android");

         caps.setCapability("platformVersion", "23");

         caps.setCapability("udid", "WTKDU17105005171");

         caps.setCapability("deviceName", "Honor");

         caps.setCapability("appPackage", "com.tencent.qqpimsecure");//com.android.contacts

         caps.setCapability("appActivity", "com.tencent.server.fore.QuickLoadActivity");//.activities.PeopleActivity

         caps.setCapability("appWaitActivity", "com.tencent.server.fore.QuickLoadActivity");

         caps.setCapability("unicodeKeyboard", "True");

         caps.setCapability("resetKeyboard", "True");

         caps.setCapability("newCommandTimeout", "15");

         caps.setCapability("nosign", "True");

         driver = new AndroidDriver(new URL("http://127.0.0.1:4723/wd/hub"),caps);

         driver.manage().timeouts().implicitlyWait(10, TimeUnit.SECONDS);

     }

     @Test

     public void add() {

         driver.findElement(By.xpath("com.tencent.mobileqq:id/btn_login")).click();

     }
六、Finding Elements By ID
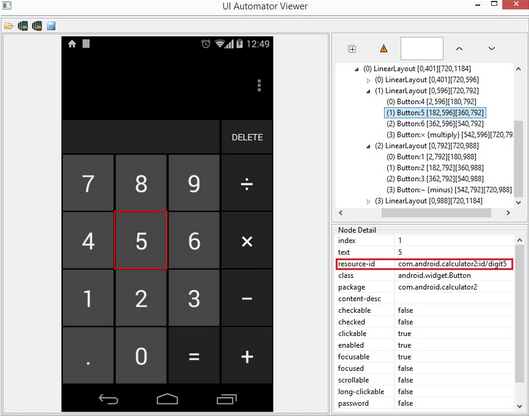
WebElement digit_5 = driver.findElement(By.id("com.android.calculator2:id/digit5"));
七、Finding Elements By Name
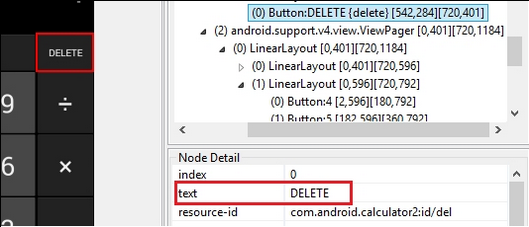
WebElement delete = driver.findElement(By.name("DELETE"));
八、Finding Elements By CLASSNAME
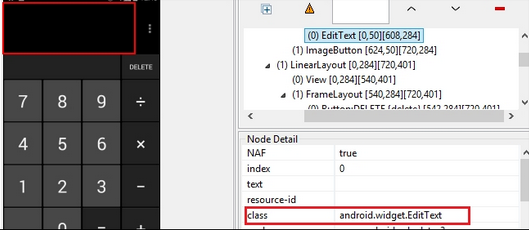
WebElement editBox = driver.findElement(By.className("android.widget.EditText"));
If the same class is used for multiple elements, then we need to select an element on the basic of indexing. For example:
List<WebElement>editBox = driver.findElements(By.className("android.widget.Button"));
editBox.get(1).click();
九、Finding Elements By AccessibilityID
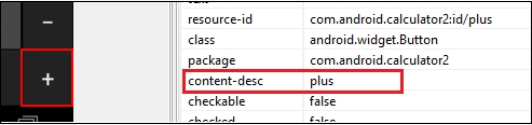
WebElement plusSign=driver.findElementByAccessibilityId("plus");
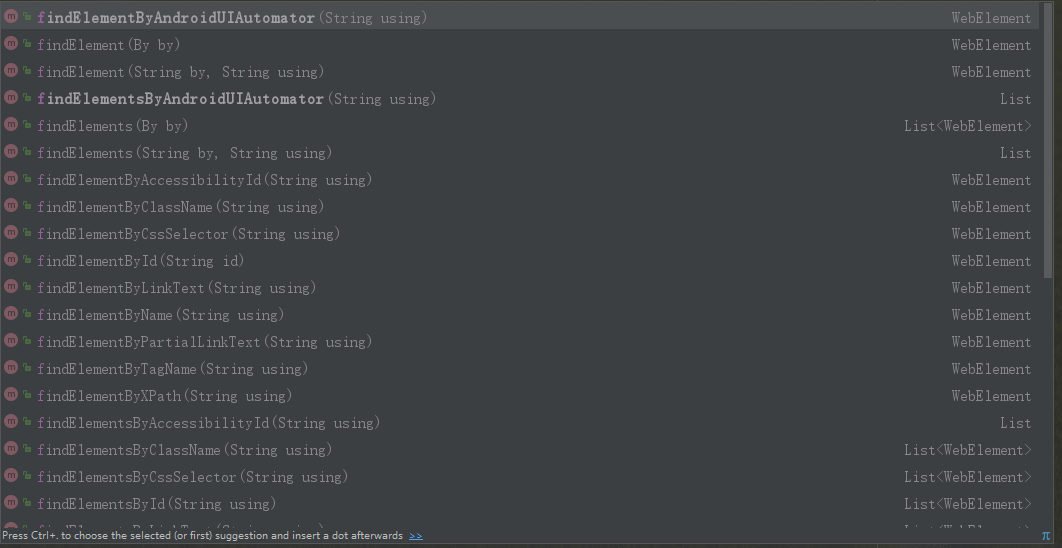
十、Finding Elements By AndroidUIAutomator
findElement(By.AndroidUIAutomator(String UIAuto));
WebElement equal = driver.findElementByAndroidUiAutomator("new UiSelector().resourceId(\"com.android.calculator2:id/equal\")")
WebElement equal = driver.findElementByAndroidUiAutomator("new UiSelector().description(\"equals\")");
十一、其他定位方式
Windows环境下使用uiautomatorviewer进行元素定位的更多相关文章
- Windows环境下的MYSQL5.7配置文件定位
1.MYSQL安装目录 select @@basedir; 2.MYSQL数据文件目录 select @@datadir; 3.相应地,配置文件在数据文件上一级目录中 4.停止MYSQL服务 net ...
- Windows环境下MongoDB的安装与配置
MongoDB是一种高性能的文档型数据库,现介绍一下在Windows环境下MongDB的安装与配置 获取MongoDB 打开官方网站 www.mongodb.org,找到页面右上解的DownLoad链 ...
- 第一部分:使用iReport制作报表的详细过程(Windows环境下)
提示:在有些板块,文中的图片看不到,建议到我的blog浏览文章:http://blog.csdn.net/jemlee2002/文章将会涉及3个方面的内容: 第一部分:使用iReport制作报表的详细 ...
- Windows环境下32位汇编语言程序设计(典藏版)
Windows环境下32位汇编语言程序设计(典藏版)(含CD光盘1张)(年,经典再现!) 罗云彬 著 ISBN 978-7-121-20759-4 2013年7月出版 定价:99.00元 756页 1 ...
- windows环境下搭建ffmpeg开发环境
ffmpeg是一个开源.跨平台的程序库,能够使用在windows.linux等平台下,本文将简单解说windows环境下ffmpeg开发环境搭建过程,本人使用的操作系统为windows ...
- 浅谈Windows环境下DOS及MS-DOS以及常见一些命令的介绍
浅谈Windows环境下DOS及MS-DOS以及常见一些命令的介绍 前记 自己是搞编程的,首先我是一个菜鸟,接触计算机这么久了,感觉很多计算机方面的技术和知识朦朦胧胧.模模糊糊,貌似有些贻笑大方了:所 ...
- windows环境下永久修改pip镜像源的方法(转)
一.在windows环境下修改pip镜像源的方法(以python3.7为例) (1):在windows文件管理器中,输入 %APPDATA%,cmd里面输入即可. (2):会定位到一个新的目录下,在该 ...
- 一、在windows环境下修改pip镜像源的方法(以python3为例)
在windows环境下修改pip镜像源的方法(以python3为例) 1.在windows文件管理器中,输入 %APPDATA% 2.会定位到一个新的目录下,在该目录下新建pip文件夹,然后到pip文 ...
- windows环境下apache-apollo服务器搭建及发布订阅测试
查证了一些资料之后,发现 apache-apollo服务器使用的人还是挺多的,资料也比较齐全,所以直接选择 apache-apollo了,具体性能如何,先用起来再说吧: 1.下载 apache-apo ...
随机推荐
- django 之(五) --- RESTApi总结
RESTful django-rest-framework serializers 序列化工具.序列化与反序列化 级联模型 添加级联字段 nested 级联字段的key原来必须就是存在的 隐性属性.自 ...
- X-Forwarded-For注入漏洞实战
准备工具 Burp suite Sqlmap 实训目标 1.掌握SQL注入的基本原理:2.了解服务器获取客户端IP的方式:3.了解SQL注入的工具使用: 解题方向 对登录表单的各参数进行测试,找到SQ ...
- poj2318(叉积判断点在直线左右+二分)
题目链接:https://vjudge.net/problem/POJ-2318 题意:有n条线将矩形分成n+1块,m个点落在矩形内,求每一块点的个数. 思路: 最近开始肝计算几何,之前的几何题基本处 ...
- Java—System类入门学习
第三阶段 JAVA常见对象的学习 System类 System类包含一些有用的字段和方法,他不能被实例化 //用于垃圾回收 public static void gc() //终止正在运行的java虚 ...
- 关于keepalived执行后日志狂刷IPVS: Can't initialize ipvs: Protocol not available的问题
安装了keepalived+lvs,达到了高可用的负载均衡,但是今天再启用的时候发现keepalived不正常,通过 /var/log/messages 查看系统日志发现狂刷 IPVS: Can't ...
- mysql-事务总结
目录 事务基本概念 事务的定义 使用事务 自动提交 特殊操作 ACID特性及其原理 原子性(A) 持久性 (D) 隔离性 脏读.不可重复读和幻读 事务隔离级别 mysql事务日志 redo log 定 ...
- mysql 查询最佳实践
(1)负向条件查询不能使用索引 select * from order where status!=0 and stauts!=1 not in/not exists都不是好习惯 (2)前导模糊查询不 ...
- 【Python基础】05_Python中的while循环
1.程序的三大流程介绍 顺序 —— 从上到下,顺序执行 分支 —— 根据条件判断,决定代码的分支 循环 —— 让特定代码执行 2.while 基本语法 while 条件(判断 计数器 是否达到 目标次 ...
- 【AC自动机】Censoring
[题目链接] https://loj.ac/problem/10059 [题意] 有一个长度不超过 1e5 的字符串 .Farmer John 希望在 T 中删掉 n 个屏蔽词(一个屏蔽词可能出现多 ...
- 关于vue项目的文件组织
最近参与了好几个项目,都是以vue-cli脚手架生成的项目,参与完成之后,有点关于项目文件组织的看法,很想聊聊. 关于目录 由vue-cli脚手架生成的项目,都会生成一个基本的目录格式. 类似于这种, ...