springboot情操陶冶-web配置(二)
承接前文springboot情操陶冶-web配置(一),在分析mvc的配置之前先了解下其默认的错误界面是如何显示的
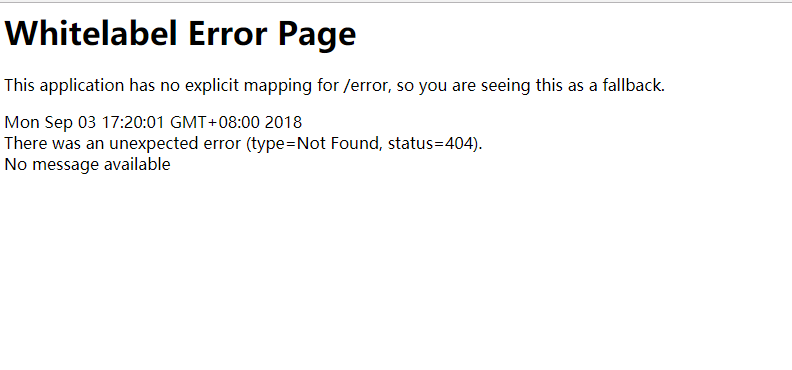
404界面
springboot有个比较有趣的配置server.error.whitelabel.enabled,可用来管理404界面的显示方式,是简单的显示还是详细的显示。
指定为false的时候,则会简简单单的显示视图找不到的错误信息,如下

指定为true的时候(默认配置),则会显示前文样例中的错误信息,如下
源码层分析
springboot安排了ErrorMvcAutoConfiguration自动配置类来处理错误页面的相关信息,笔者分几个步骤来进行分析
No.1 脑壳上的注解看一发
@Configuration

@ConditionalOnWebApplication(type = Type.SERVLET)

@ConditionalOnClass({ Servlet.class, DispatcherServlet.class })

// Load before the main WebMvcAutoConfiguration so that the error View is available

@AutoConfigureBefore(WebMvcAutoConfiguration.class)

@EnableConfigurationProperties({ ServerProperties.class, ResourceProperties.class })

public class ErrorMvcAutoConfiguration {

}
可以看出其是排在WebMvcAutoConfiguration配置类之前的,那么为什么需要排在前面呢?看注释是说这样才可以使error视图有效,那怎么实现的呢?笔者带着问题继续往下探索
No.2 DefaultErrorViewResolverConfiguration内部类-错误视图解析器注册
	@Configuration

	static class DefaultErrorViewResolverConfiguration {

		private final ApplicationContext applicationContext;

		private final ResourceProperties resourceProperties;

		DefaultErrorViewResolverConfiguration(ApplicationContext applicationContext,

				ResourceProperties resourceProperties) {

			this.applicationContext = applicationContext;

			this.resourceProperties = resourceProperties;

		}

		// 注册了DefaultErrorViewResolver解析器

		@Bean

		@ConditionalOnBean(DispatcherServlet.class)

		@ConditionalOnMissingBean

		public DefaultErrorViewResolver conventionErrorViewResolver() {

			return new DefaultErrorViewResolver(this.applicationContext,

					this.resourceProperties);

		}

	}
DefaultErrorViewResolver这个默认的错误视图解析器很有意思,里面包含了一些默认的处理,也分几个小步骤来吧,这样会显得清晰
- 静态方法了解
	static {

		Map<Series, String> views = new EnumMap<>(Series.class);

		views.put(Series.CLIENT_ERROR, "4xx");

		views.put(Series.SERVER_ERROR, "5xx");

		SERIES_VIEWS = Collections.unmodifiableMap(views);

	}
应该是对HTTP状态码的映射处理,以4开头的是客户端错误,5开头的为服务端错误
- 构造函数了解
	public DefaultErrorViewResolver(ApplicationContext applicationContext,

			ResourceProperties resourceProperties) {

		Assert.notNull(applicationContext, "ApplicationContext must not be null");

		Assert.notNull(resourceProperties, "ResourceProperties must not be null");

		this.applicationContext = applicationContext;

		this.resourceProperties = resourceProperties;

		// 模板加载器

		this.templateAvailabilityProviders = new TemplateAvailabilityProviders(

				applicationContext);

	}
上述的模板加载器主要是读取所有spring.factories中的org.springframework.boot.autoconfigure.template.TemplateAvailabilityProvider对应的属性值,本质也就是模板的渲染器,比如我们常用的freemarker、velocity、jsp等等
- 视图对象获取了解
	@Override

	public ModelAndView resolveErrorView(HttpServletRequest request, HttpStatus status,

			Map<String, Object> model) {

		// 优先根据状态码来查找view静态资源,比如404则会查找error/404视图

		ModelAndView modelAndView = resolve(String.valueOf(status), model);

		if (modelAndView == null && SERIES_VIEWS.containsKey(status.series())) {

			// 上述不存在则再查找error/4xx或者error/5xx视图

			modelAndView = resolve(SERIES_VIEWS.get(status.series()), model);

		}

		return modelAndView;

	}

	private ModelAndView resolve(String viewName, Map<String, Object> model) {

		String errorViewName = "error/" + viewName;

		// 通过模板加载器查找是否含有符合要求的视图资源

		TemplateAvailabilityProvider provider = this.templateAvailabilityProviders

				.getProvider(errorViewName, this.applicationContext);

		if (provider != null) {

			return new ModelAndView(errorViewName, model);

		}

		return resolveResource(errorViewName, model);

	}

	// 默认查找staticLocation指定路径的资源,比如classpath:/static/error/404.html

	private ModelAndView resolveResource(String viewName, Map<String, Object> model) {

		for (String location : this.resourceProperties.getStaticLocations()) {

			try {

				Resource resource = this.applicationContext.getResource(location);

				resource = resource.createRelative(viewName + ".html");

				if (resource.exists()) {

					// view类型为HtmlResourceView,直接将html资源输出到response对象中

					return new ModelAndView(new HtmlResourceView(resource), model);

				}

			}

			catch (Exception ex) {

			}

		}

		return null;

	}
通过上述的代码注释,基本可以得知错误视图的查找规则,所以用户可以简单的在static目录下配置对应状态码的页面比如error/404.html或者error/500.html;当然也可以配置统一的页面error/4xx.html或者error/5xx.html
那如果我们啥也不指定,那上述的错误提示信息是如何展示的呢?
No.3 WhitelabelErrorViewConfiguration-白板错误视图配置
	// server.error.whitelabel.enabled开关,默认是打开的

	@Configuration

	@ConditionalOnProperty(prefix = "server.error.whitelabel", name = "enabled", matchIfMissing = true)

	@Conditional(ErrorTemplateMissingCondition.class)

	protected static class WhitelabelErrorViewConfiguration {

		// 熟悉的打印信息

		private final SpelView defaultErrorView = new SpelView(

				"<html><body><h1>Whitelabel Error Page</h1>"

						+ "<p>This application has no explicit mapping for /error, so you are seeing this as a fallback.</p>"

						+ "<div id='created'>${timestamp}</div>"

						+ "<div>There was an unexpected error (type=${error}, status=${status}).</div>"

						+ "<div>${message}</div></body></html>");

		// 创建了名为error的视图对象

		@Bean(name = "error")

		@ConditionalOnMissingBean(name = "error")

		public View defaultErrorView() {

			return this.defaultErrorView;

		}

		// 与上面的View对象搭配使用

		@Bean

		@ConditionalOnMissingBean

		public BeanNameViewResolver beanNameViewResolver() {

			BeanNameViewResolver resolver = new BeanNameViewResolver();

			resolver.setOrder(Ordered.LOWEST_PRECEDENCE - 10);

			return resolver;

		}

	}
上述就是我们开头可见的错误信息的处理处,详细的用户可自行查阅代码
No.4 构造函数了解
	public ErrorMvcAutoConfiguration(ServerProperties serverProperties,

			ObjectProvider<List<ErrorViewResolver>> errorViewResolversProvider) {

		this.serverProperties = serverProperties;

		this.errorViewResolvers = errorViewResolversProvider.getIfAvailable();

	}
上述的errorViewResolverProvider便会加载第二步骤的DefaultViewResolver,当然用户也可以自定义去实现ErrorViewResolver接口。这些错误的视图解析器将会在下一步骤的controller层被调用
No.5 error控制器注册
	@Bean

	@ConditionalOnMissingBean(value = ErrorAttributes.class, search = SearchStrategy.CURRENT)

	public DefaultErrorAttributes errorAttributes() {

		return new DefaultErrorAttributes(

				this.serverProperties.getError().isIncludeException());

	}

	// 创建BasicErrorController控制器用于响应server.error.path指定的路径,默认为/error

	@Bean

	@ConditionalOnMissingBean(value = ErrorController.class, search = SearchStrategy.CURRENT)

	public BasicErrorController basicErrorController(ErrorAttributes errorAttributes) {

		return new BasicErrorController(errorAttributes, this.serverProperties.getError(),

				this.errorViewResolvers);

	}
此处的BasicErrorController对象则会默认响应/error的请求,其内部写了一个返回html页面的响应方法
	@RequestMapping(produces = "text/html")

	public ModelAndView errorHtml(HttpServletRequest request,

			HttpServletResponse response) {

		HttpStatus status = getStatus(request);

		Map<String, Object> model = Collections.unmodifiableMap(getErrorAttributes(

				request, isIncludeStackTrace(request, MediaType.TEXT_HTML)));

		// 状态码设置

		response.setStatus(status.value());

		// 调用errorViewResolvers集合去获取对应的错误视图

		ModelAndView modelAndView = resolveErrorView(request, response, status, model);

		// 如果没指定相应的视图,则会采用默认的名为error的视图

		return (modelAndView != null ? modelAndView : new ModelAndView("error", model));

	}
对上述代码的注释作下简单的解释,帮助读者们理顺下思路
- 首先其会调用所有实现了ErrorViewResolver接口的视图解析器去找寻相应的错误视图,并支持通过Order接口进行排序。所以此处默认情况下会调用DefaultErrorViewResolver来获取view,具体的如果获取可见上文的讲解
- 如果上述找到了,那么也就么事了,但是如果还没找到,则会默认指定名为error的视图。
- 那么如何去解析默认名为error的视图呢?答案在DispatcherServlet在最终确定渲染视图的时候,会统一调用所有实现了ViewResolver接口的视图解析器去获取视图对象,那么第三步骤中的BeanNameViewResolver对象便会找寻到对应的SpelView视图,由其来进行相应的渲染
在此处笔者回答下开头的问题,为什么ErrorMvcAutoConfiguration需要放在DispatcherServletAutoConfiguration之前,其实最主要的是后者并没有去注册BeanViewResolver,此处上了一份保险,好让能正确的找到SpelView对象
error请求问题
经过上文的分析,我们知道了BasicErrorController用来处理访问方式为GET [/error]的请求并处理得到相应的错误视图,那么最重要的问题来了,到底怎么在出现资源找不到的时候去路由至此路径上呢?笔者继续带着这个问题去探索
No.1 ErrorPageCustomizer-错误页面配置
	@Bean

	public ErrorPageCustomizer errorPageCustomizer() {

		return new ErrorPageCustomizer(this.serverProperties);

	}

	private static class ErrorPageCustomizer implements ErrorPageRegistrar, Ordered {

		private final ServerProperties properties;

		protected ErrorPageCustomizer(ServerProperties properties) {

			this.properties = properties;

		}

		@Override

		public void registerErrorPages(ErrorPageRegistry errorPageRegistry) {

			// 默认路径为/error

			ErrorPage errorPage = new ErrorPage(

					this.properties.getServlet().getServletPrefix()

							+ this.properties.getError().getPath());

			// 注册

			errorPageRegistry.addErrorPages(errorPage);

		}

		@Override

		public int getOrder() {

			return 0;

		}

	}
上述的errorPage貌似展示了一点信息,可能是会去访问/error的源头,那么ErrorPageCustomizer#registerErrorPages()是如何被调用的呢?继续往下
No.2 ServletWebAutoConfiguration引入的时候还注册了一个BeanPostProcessor
		@Override

		public void registerBeanDefinitions(AnnotationMetadata importingClassMetadata,

				BeanDefinitionRegistry registry) {

			if (this.beanFactory == null) {

				return;

			}

			registerSyntheticBeanIfMissing(registry,

					"webServerFactoryCustomizerBeanPostProcessor",

					WebServerFactoryCustomizerBeanPostProcessor.class);

			// 就是这个

			registerSyntheticBeanIfMissing(registry,

					"errorPageRegistrarBeanPostProcessor",

					ErrorPageRegistrarBeanPostProcessor.class);

		}
我们直接去关注其主要的方法
	// 注册了相应的错误界面

	private void postProcessBeforeInitialization(ErrorPageRegistry registry) {

		for (ErrorPageRegistrar registrar : getRegistrars()) {

			registrar.registerErrorPages(registry);

		}

	}

	private Collection<ErrorPageRegistrar> getRegistrars() {

		if (this.registrars == null) {

			// Look up does not include the parent context

			this.registrars = new ArrayList<>(this.beanFactory

					.getBeansOfType(ErrorPageRegistrar.class, false, false).values());

			this.registrars.sort(AnnotationAwareOrderComparator.INSTANCE);

			this.registrars = Collections.unmodifiableList(this.registrars);

		}

		return this.registrars;

	}
至于为什么在该类中去注册这个processor去执行注册错误页面,看来这个路径的转发应该与web容器有关。其实追踪源头其实将错误界面注册到了相应的web容器中(Tomcat),具体的读者可自行去分析。
No.4 web容器加载(插曲,顺带提一下)
我们都知道springboot对环境为Servlet所采用的ApplicationContext为AnnotationConfigServletWebServerApplicationContext,其父类在刷新上下文过程中的onRefresh()方法便去启动了web容器
	@Override

	protected void onRefresh() {

		super.onRefresh();

		try {

			// 创建web服务器

			createWebServer();

		}

		catch (Throwable ex) {

			throw new ApplicationContextException("Unable to start web server", ex);

		}

	}

	private void createWebServer() {

		WebServer webServer = this.webServer;

		ServletContext servletContext = getServletContext();

		if (webServer == null && servletContext == null) {

			// 默认为TomcatServletWebServerFactory

			ServletWebServerFactory factory = getWebServerFactory();

			// 初始化servlet/filter等

			this.webServer = factory.getWebServer(getSelfInitializer());

		}

		else if (servletContext != null) {

			try {

				getSelfInitializer().onStartup(servletContext);

			}

			catch (ServletException ex) {

				throw new ApplicationContextException("Cannot initialize servlet context",

						ex);

			}

		}

		initPropertySources();

	}
上述的代码主要会在ServletContext上注册Filters和Servlets集合并且注册ErrorPages,限于代码过长,读者可自行分析。而具体的去启动web容器则是在finishRefresh()方法中
	@Override

	protected void finishRefresh() {

		super.finishRefresh();

		// 启动

		WebServer webServer = startWebServer();

		if (webServer != null) {

			publishEvent(new ServletWebServerInitializedEvent(webServer, this));

		}

	}
No.5 StandardHostValve-错误界面应用
    private void status(Request request, Response response) {

        int statusCode = response.getStatus();

        ....

		// 优先查找404对应的ErrorPage

        ErrorPage errorPage = context.findErrorPage(statusCode);

        if (errorPage == null) {

            // 0-默认的ErrorPage,此处便是上文注册的

            errorPage = context.findErrorPage(0);

        }

        if (errorPage != null && response.isErrorReportRequired()) {

            ....

            // 在custom方法中会调用RequestDispatcher对象进行后端路由重置到/error请求

            if (custom(request, response, errorPage)) {

                response.setErrorReported();

                try {

                    response.finishResponse();

                } catch (ClientAbortException e) {

                    // Ignore

                } catch (IOException e) {

                    container.getLogger().warn("Exception Processing " + errorPage, e);

                }

            }

        }

    }
此源码来源于tomcat,这让笔者想起了针对状态码的page配置
    <!--404 error page specified based on Tomcat-->

    <error-page>

        <error-code>404</error-code>

        <location>/404.html</location>

    </error-page>
小结
本文的内容较多,需要耐心阅读,读者只需要了解View视图的解析加载便可通读全文,如果想要自定义状态码视图则直接在classpath:/static/error目录下新建相应的状态码HTML文件即可,具体可参照本文的讲述。
springboot情操陶冶-web配置(二)的更多相关文章
- springboot情操陶冶-web配置(三)
承接前文springboot情操陶冶-web配置(二),本文将在前文的基础上分析下mvc的相关应用 MVC简单例子 直接编写一个Controller层的代码,返回格式为json package com ...
- springboot情操陶冶-web配置(九)
承接前文springboot情操陶冶-web配置(八),本文在前文的基础上深入了解下WebSecurity类的运作逻辑 WebSecurityConfigurerAdapter 在剖析WebSecur ...
- springboot情操陶冶-web配置(七)
参数校验通常是OpenApi必做的操作,其会对不合法的输入做统一的校验以防止恶意的请求.本文则对参数校验这方面作下简单的分析 spring.factories 读者应该对此文件加以深刻的印象,很多sp ...
- springboot情操陶冶-web配置(四)
承接前文springboot情操陶冶-web配置(三),本文将在DispatcherServlet应用的基础上谈下websocket的使用 websocket websocket的简单了解可见维基百科 ...
- springboot情操陶冶-web配置(一)
承接前文springboot情操陶冶-@SpringBootApplication注解解析,在前文讲解的基础上依次看下web方面的相关配置 环境包依赖 在pom.xml文件中引入web依赖,炒鸡简单, ...
- springboot情操陶冶-web配置(八)
本文关注应用的安全方面,涉及校验以及授权方面,以springboot自带的security板块作为讲解的内容 实例 建议用户可直接路由至博主的先前博客spring security整合cas方案.本文 ...
- springboot情操陶冶-web配置(六)
本文则针对数据库的连接配置作下简单的分析,方便笔者理解以及后续的查阅 栗子当先 以我们经常用的mybatis数据库持久框架来操作mysql服务为例 环境依赖 1.JDK v1.8+ 2.springb ...
- springboot情操陶冶-web配置(五)
本文讲讲mvc的异常处理机制,方便查阅以及编写合理的异常响应方式 入口例子 很简单,根据之前的文章,我们只需要复写WebMvcConfigurer接口的异常添加方法即可,如下 1.创建简单的异常处理类 ...
- springboot情操陶冶-SpringApplication(二)
承接前文springboot情操陶冶-SpringApplication(一),本文将对run()方法作下详细的解析 SpringApplication#run() main函数经常调用的run()方 ...
随机推荐
- Go smtp发送邮件,带附件
package main import ( "net/smtp" "bytes" "time" "io/ioutil" ...
- vs2010 sp1 安装Silverlight5 语言版本不匹配的问题
好久之前用silverlight写了个程序,今天心血来潮想给朋友看一下,朋友更新了sl5,但是运行不起来. 所以有点郁闷,于是打算更新项目到silverlight5. 装sp1后,下载silverli ...
- 详谈kafka的深入浅出
第一:kafka的介绍,kafka官网:http://kafka.apache.org/ http://www.jasongj.com/2015/03/10/KafkaColumn1/ kafka的简 ...
- mysql数据库备份_可执行文件
这段时间接手运维的工作,刚开始就尝到了数据丢失的痛!老板抱怨,同事抱怨!都说先删库再跑路,我还不想跑! 下面是我的备份记录:(分4步) 1.编写备份执行文件sqlAutoBak.sh #!/bin/s ...
- lucene 结合数据库做搜索
package jdbc; import java.sql.Connection; import java.sql.DriverManager; import java.sql.PreparedSta ...
- linux常见命令实践.
ls -la : 给出当前目录下所有文件的一个长列表,包括以句点开头的“隐藏”文件 ls -a . .. 1 online_tools online_tools_0803 ll: 竖列显示所有文件 l ...
- java小练习
打印99乘法表 因为有9行9列,所有要用两个for循环 int m; for (int i = 1; i < 10; i++) { for (int j = 1; j <= i; j++) ...
- 大数据BI框架知识点备注
将这段时间的一些基于大数据方案的BI知识点暂时做些规整,可能还存在较多问题,后续逐步完善修改. 数据模型: 1.星型模型和雪花模型,同样是将业务表拆分成事实表和纬度表:例如一个员工数据表,可以拆分为员 ...
- TCP协议学习总结(下)
在前两边TCP学习总结中,也大概地学习了TCP的整个流程,但许多细节中的细节并没有详细学习,例如超时重传问题,每次瓶颈回归慢启动效率问题以及最大窗口限制问题等.本学习篇章最要针对这些细节中的细节进行学 ...
- Roslyn还出现这么低级的错误,不应该呀!
前几天对Dora.Interception作了简单的重构,想提供C#脚本来定义Interception Policy,毫无疑问微软提供的编译平台Roslyn使C#脚本化提供了支持.但是没有想到随便尝试 ...