
Spring+SpringMVC整合----配置文件
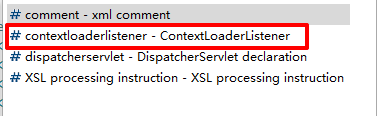
<!-- Spring -->

<context-param>

      <param-name>contextConfigLocation</param-name>

      <!-- 指定spring的配置文件的路径和名称 -->

      <param-value>classpath:applicationContext.xml</param-value>

</context-param>

<!-- Bootstraps the root web application context before servlet initialization -->

<listener>

      <listener-class>org.springframework.web.context.ContextLoaderListener</listener-class>

</listener>

<!-- SpringMVC -->

<servlet>

      <servlet-name>springDispatcherServlet</servlet-name>

      <servlet-class>org.springframework.web.servlet.DispatcherServlet</servlet-class>

      <init-param>

            <param-name>contextConfigLocation</param-name>

            <param-value>classpath:springmvc.xml</param-value>

      </init-param>

      <load-on-startup>1</load-on-startup>

</servlet>

<!-- Map all requests to the DispatcherServlet for handling -->

<servlet-mapping>

      <servlet-name>springDispatcherServlet</servlet-name>

      <url-pattern>/</url-pattern>

</servlet-mapping>
3.在 web.xml 文件中设置处理POST请求乱码
<!-- 处理POST请求乱码 -->

<filter>

      <filter-name>CharacterEncodingFilter</filter-name>

      <filter-class>org.springframework.web.filter.CharacterEncodingFilter</filter-class>

      <init-param>

            <param-name>encoding</param-name>

            <param-value>UTF-8</param-value>

      </init-param>

</filter>

<filter-mapping>

      <filter-name>CharacterEncodingFilter</filter-name>

      <url-pattern>/*</url-pattern>

</filter-mapping>
4.在 web.xml 文件中配置将POST请求转化为PUT、DELETE请求
<!-- 将POST请求转化为PUT、DELETE请求 -->

<filter>

      <filter-name>HiddenHttpMethodFilter</filter-name>

      <filter-class>org.springframework.web.filter.HiddenHttpMethodFilter</filter-class>

</filter>

<filter-mapping>

      <filter-name>HiddenHttpMethodFilter</filter-name>

      <url-pattern>/*</url-pattern>

</filter-mapping>
<context:component-scan base-package="com.neuedu" use-default-filters="false">

      <context:include-filter type="annotation" expression="org.springframework.stereotype.Controller"/>

      <context:include-filter type="annotation" expression="org.springframework.web.bind.annotation.ControllerAdvice"/>

</context:component-scan>
6.在 springmvc .xml 文件中配置视图解析器
<!-- 配置视图解析器 -->

<bean class="org.springframework.web.servlet.view.InternalResourceViewResolver">

      <property name="prefix" value="WEB-INF/views/"></property>

      <property name="suffix" value=".jsp"></property>

</bean>
<!-- 处理静态资源 -->

<mvc:default-servlet-handler/>

<mvc:annotation-driven/>
<context:component-scan base-package="com.neuedu">

    <context:exclude-filter type="annotation" expression="org.springframework.stereotype.Controller"/>

    <context:exclude-filter type="annotation" expression="org.springframework.web.bind.annotation.ControllerAdvice"/>

</context:component-scan>
9.在 bean.xml 文件中配置 jdbc.properties 及 C3P0 数据源
<!-- 加载外部属性文件 -->

<context:property-placeholder location="classpath:jdbc.properties"/>

<!-- 配置C3P0 数据源 -->

<bean id="comboPooledDataSource" class="com.mchange.v2.c3p0.ComboPooledDataSource">

      <property name="user" value="${jdbc.username}"></property>

      <property name="password" value="${jdbc.password}"></property>

      <property name="driverClass" value="${jdbc.driver}"></property>

      <property name="jdbcUrl" value="${jdbc.url}"></property>

</bean>
10.在 bean.xml 文件中配置 jdbcTemplate
<!-- 配置jdbcTemplate -->

<bean id="jdbcTemplate" class="org.springframework.jdbc.core.JdbcTemplate">

      <property name="dataSource" ref="comboPooledDataSource"></property>

</bean>
11.在 bean.xml 文件中配置事务管理器及基于注解的事务
<!-- 配置事务管理器 -->

<bean id="dataSourceTransactionManager" class="org.springframework.jdbc.datasource.DataSourceTransactionManager">

      <property name="dataSource" ref="comboPooledDataSource"></property>

</bean>

<!-- 开启基于注解的事务 -->

<tx:annotation-driven transaction-manager="dataSourceTransactionManager"/>
Spring+SpringMVC整合----配置文件的更多相关文章
- SpringMVC Spring MyBatis整合配置文件
1.spring管理SqlSessionFactory.mapper 1)在classpath下创建mybatis/sqlMapConfig.xml <?xml version="1. ...
- spring+springMVC 整合 MongoDB 实现注册登录
发现一入手 MongoDB,便无法脱离,简要说一下,MongoDB 是一个介于关系数据库和非关系数据库之间的产品,是非关系数据库当中功能最丰富,最像关系数据库的. 也是在 Nosql 中我最喜欢的一种 ...
- Spring+SpringMVC重复加载配置文件问题
sping+springmvc的框架中,IOC容器的加载过程 http://my.oschina.net/xianggao/blog/596476 基本上是先加载ContextLoaderListen ...
- 06_MyBatis,Spring,SpringMVC整合
项目结构 Spring的配置: beans.xml <?xml version="1.0" encoding="UTF-8"?> <be ...
- ssm整合(Spring+SpringMVC+Mybatis)
一.Spring Spring致力于提供一种方法管理你的业务对象.IOC容器,它可以装载bean(也就是我们java中的类,当然也包括service dao里面的),有了这个机制,我们就不用在每次使用 ...
- Spring Boot2 系列教程(二十四)Spring Boot 整合 Jpa
Spring Boot 中的数据持久化方案前面给大伙介绍了两种了,一个是 JdbcTemplate,还有一个 MyBatis,JdbcTemplate 配置简单,使用也简单,但是功能也非常有限,MyB ...
- spring+springMVC+mybatis框架整合——配置文件说明
如下图 web.xml配置说明: spring配置文件说明-1: spring配置文件说明-2: spring配置助记: 扫注(base) 读配(loc) 数据源(和comb(使用c3p0数据源)) ...
- Spring+SpringMVC+Mybaties整合之配置文件如何配置及内容解释--可直接拷贝使用--不定时更改之2017/4/27
以下配置可直接使用,只需更改包名. 关于内部标签的解释及用法,都以注解形式在代码内部说明.个人原创,转载需注明出处. 1,web.xml.添加jar包后首先需要配置WEB-INF下的web.xml文件 ...
- Eclipse Meaven Spring SpringMVC Mybaits整合
本示例是在:Ubuntu15上实现的:Windows上安装Maven将不太相同. Maven Install Run command sudo apt-get install maven, to in ...
随机推荐
- Java求和的整体思路
一. 设计思想: 设计这个程序我们需要考虑到参数的输入,并且可以输入多个参数,以及为用户考虑到各种的边界问题.首先第一步我们应该给出输入参数的语句,让用户可以输入.第二步我们应对其进行参数个数的 ...
- linux 基本操作积累
1 sed 命令,替换含有指定字符的一整行数据 sed -i 's/原字符串/替换后的字符串/g' ./文件名 (此命令会全局替换[整个文件内替换]原字符串) sed -i.bak 's/原字符串/替 ...
- 第10项:重写equals时请遵守通用约定
重写equals方法看起来似乎很简单,但是有许多重写方式会导致错误,而且后果非常严重.最容易避免这类问题的办法就是不覆盖equals方法,在这种情况下,类的每个实例都只能与它自身相等.如果满足了以 ...
- Python历史+优缺点+应用领域+网站职位简介
一.Python的历史 1. 1989年圣诞节:Guido von Rossum开始写Python语言的编译器.2. 1991年2月:第一个Python编译器(同时也是解释器)诞生,它是用C语言实现的 ...
- unittest介绍
unittest框架是python中一个标准的库中的一个模块,该模块包括许多的类如 test case类.test suit类.texttest runner类.texttest resuite类.t ...
- cmd 环境下载文件的几种方法
今天渗透测试面试提到cmd下载文件 ,自己只写了js和certutil,还有几种常见的方法自己没想起来 这里记录和总结下 . (自己还是太菜太垃圾.) 0x01 certutil certutil ...
- 机器学习:LibSVM与weka在eclipse中的使用
LibSVM是weka3.5以后的版本新加的功能,使用这个算法必须自己下载jar包,配置进项目: LibSVM在weka可视化界面的使用,很多人写过,但在clipse下的调用资料却不多,试了很多都不能 ...
- Rancher 2.1平台搭建及使用
一.概述 1.1.什么是Rancher Rancher是一套容器管理平台,它可以帮助组织在生产环境中轻松快捷的部署和管理容器. Rancher可以轻松地管理各种环境的Kubernetes,满足IT需求 ...
- 06 Node.js学习笔记之自动路由
在以往客户端请求的文件,我们都得判断匹配才能返回相应的数据,其实我们可以设置一个自动路由,就可以不用每次去判断用户访问的是那个文件了 //1.载入http和fs模块 var http=require( ...
- Linux及Windows安装Redis(详细)
Linux及Windows安装Redis 1.Windows安装教程 1.1下载 https://github.com/MSOpenTech/redis/releases 进入github里下载red ...